Mastering Thick Fudge Brownies: The Ultimate Recipe for Shiny, Chewy Perfection
There’s a universally acknowledged truth in the world of baking: a truly exceptional brownie can brighten any day. While many recipes promise deliciousness, the quest for the perfect *thick* fudge brownie—one that boasts a glistening, crackly top, an intensely rich chocolate flavor, and an impossibly gooey center—is a journey many bakers embark upon. This particular recipe refines an already fantastic foundation, Melissa Clark’s Impossibly Fudgy Brownies, by making some crucial adjustments to achieve a brownie that’s not just fudgy, but wonderfully substantial and satisfyingly thick.
The original recipe, celebrated for its exquisite fudginess, was a brilliant starting point. However, my personal preference leaned towards a more robust, deeply satisfying brownie experience that demanded extra height. To achieve this, the primary modification involved a simple yet impactful change: using a 9-inch square pan instead of the larger 9×13 inch pan. While this might seem like a minor alteration, changing pan dimensions in baking often necessitates recalibrating baking times and temperatures. It’s a delicate balance, as under-baking leads to raw batter, and over-baking results in dry, cake-like brownies – a culinary disappointment when seeking fudgy perfection.
This adjustment meant a more attentive baking process, carefully monitoring the brownies to ensure they reached optimal doneness without compromising their signature fudgy texture. This is where a reliable kitchen tool, specifically a meat thermometer, becomes invaluable. Forget the old toothpick test; for truly fudgy brownies, knowing the internal temperature is the most accurate way to guarantee success.
Understanding the Internal Temperature for Perfect Brownies
Baking brownies, especially those aiming for maximum fudge factor, is more art than science, but incorporating a bit of science can significantly improve your results. The internal temperature is a critical indicator of doneness, far more reliable than merely judging by appearance or the traditional toothpick test, which can be misleading for very moist baked goods. Different types of brownies require different internal temperatures to achieve their ideal texture.
For brownies that are dense, rich, and intensely fudgy – characterized by minimal leavening agents and a high concentration of fat, chocolate, and sugar – the ideal internal temperature hovers around 212°F (100°C). Reaching this temperature ensures that enough moisture has evaporated and the structure has set, while still preserving that coveted gooey, moist core. If you pull them out much sooner, they might be too raw; much later, and you risk losing that glorious fudge-like consistency. These thick fudge brownies, with their rich composition, absolutely fall into the 212°F (100°C) category, guaranteeing a truly decadent experience.
Conversely, for brownies designed to be more cake-like or lighter in texture, often incorporating baking powder or soda, a lower internal temperature is generally recommended, typically around 175°F (79°C). This allows the leavening to create a softer, more aerated crumb without drying out. However, as experienced bakers know, rules can sometimes be bent. I’ve found that keeping a log of the perfect internal temperature for each specific brownie recipe I try is incredibly helpful. This personal record serves as a reliable guide for future baking endeavors, ensuring consistent results every time.
Essential Tips for Baking Your Best Thick Fudge Brownies
Crafting the perfect batch of thick fudge brownies involves more than just mixing ingredients; it’s about understanding the nuances of each component and how they interact. Here are some detailed tips to help you achieve brownie nirvana:
- Choose the Right Pan Size and Material: The specific 9-inch square pan is non-negotiable for achieving the desired thickness and fudginess in this recipe. Using a larger pan, such as a 9×13 inch, would result in thinner brownies, altering the bake time and potentially the texture. Metal pans are highly recommended due to their excellent heat conductivity, which ensures even baking and proper setting of the edges while keeping the center moist. While I’ve recently acquired a Pampered Chef stoneware pan and intend to experiment with it (as it’s the perfect size), for now, metal is the tried-and-true choice to guarantee consistent results. Stoneware can retain heat differently, which might require further adjustments to baking time.
- The Secret Weapon: Coffee: A small amount of instant coffee crystals or instant espresso powder works wonders in intensifying the chocolate flavor without imparting any discernible coffee taste to the brownies. It acts as a flavor enhancer, deepening the richness and complexity of the chocolate. If you’re not a coffee fan, rest assured that the brownies will still be fantastic without it, but a touch of coffee truly elevates the chocolate notes to another level. Feel free to adjust the amount to your preference; some bakers even double it for a more pronounced effect.
- Cocoa Powder Matters: Both Dutch-process and natural cocoa powder are acceptable for this recipe. Dutch-process cocoa, which has been treated with an alkali to neutralize its acidity, results in a darker color and a milder, smoother chocolate flavor. Natural cocoa powder is more acidic, lending a fruitier, sharper chocolate taste and reacting with baking soda (though not used in this recipe) to provide lift. Since this recipe relies on a high fat content for its fudginess rather than leavening from cocoa interaction, either type will deliver excellent flavor. Choose based on your preferred depth of chocolate taste and color.
- Fat Content is Key: This recipe calls for a generous amount of butter—2 sticks plus 2 tablespoons (9 ounces). This high fat content is crucial for the brownies’ incredibly fudgy and moist texture. Butter not only provides richness but also contributes significantly to the overall flavor. While I haven’t personally tested it, I believe substituting 1 tablespoon of oil for 1 tablespoon of butter (reducing butter to 2 sticks plus 1 tablespoon) might work as a slight adjustment if you wish to reduce the butter content marginally without compromising the texture too much. However, for the ultimate experience, stick with the full butter amount.
- Plan Ahead for Perfection: Brownies, like many baked goods, almost always taste better on the second day. The flavors have time to meld and deepen, and the texture often becomes even more fudgy and uniform. Making these ahead of time, wrapping them tightly, and chilling them overnight allows for optimal setting and flavor development. Chilling also makes them much easier to cut into clean, neat squares. Furthermore, these brownies freeze exceptionally well. Wrap individual pieces or the entire slab tightly in plastic wrap and then foil, and they’ll keep for months, ready for a delicious treat anytime.
- Banana Bread with Sour Cream and Oil
- Chocolate Syrup Swirl Cake with Ganache Glaze
- Vinegar Pecan Pie Recipe
- Thick Cream Cheese Brownies
- Walnut Fudge Brownies
Armed with these insights, you’re ready to embark on your brownie-making adventure. The following recipe is designed for ease and maximum flavor, all coming together in a single saucepan for minimal cleanup. Prepare to be amazed by the rich, chewy, and utterly satisfying results!
Recipe

Shiny, Chewy, Thick Fudge Brownies
Anna
Pin Recipe
Ingredients
- 3 ounces unsweetened chocolate chopped into small pieces for even melting
- 18 tablespoons unsalted butter, room temperature (9 oz total, or 2 sticks plus 2 tablespoons), cut into chunks
- ¼ teaspoon instant coffee crystals or instant espresso powder; optional, but highly recommended to enhance chocolate flavor; feel free to use more for a stronger boost
- ½ cup plus 1 tablespoon cocoa powder (natural or Dutch-process)
- 2 ½ cups granulated sugar (approximately 490 grams)
- 3 large eggs at room temperature
- 2 teaspoons pure vanilla extract
- ½ teaspoon kosher salt (Morton’s, which measures like table salt)
- 1 ½ cups all-purpose flour (approximately 200 grams)
- ⅓ cup chocolate chips plus a small amount of shortening; optional, for garnish
Instructions
-
Preheat your oven to 350°F (175°C). Prepare a 9-inch square metal baking pan by lining it with nonstick foil, or use regular foil and generously grease it. The type of pan is crucial here for proper thickness and baking. Update: While I haven’t thoroughly tested this recipe in a stoneware pan yet, a 9-inch square stoneware pan of similar dimensions should theoretically work well, though baking times might need slight adjustment due to stoneware’s different heat retention properties.
-
In a 3 ½ to 4-quart saucepan, combine the chunks of unsalted butter and chopped unsweetened chocolate. Melt them together over very gentle, low heat, stirring continuously with a wooden spoon or a heat-proof silicone scraper. This gentle melting prevents scorching the chocolate and ensures a smooth base. Once the mixture is almost entirely melted and smooth, stir in the instant coffee crystals (or espresso powder) and cocoa powder. Continue stirring until the mixture is completely smooth and homogeneous. Remove the saucepan from the heat.
-
Add the granulated sugar to the hot cocoa and butter mixture, stirring well to combine. Allow the mixture to cool slightly; it shouldn’t be excessively hot if you melted the butter and chocolate gently. Once slightly cooled, beat in the large eggs one at a time, ensuring each egg is fully incorporated before adding the next. Finally, stir in the vanilla extract and kosher salt until the batter is smooth and well-combined.
-
Gradually add the all-purpose flour to the chocolate mixture, stirring just until it’s blended and no dry streaks remain. Be careful not to overmix, as this can develop the gluten in the flour and lead to tougher brownies. The resulting batter will be quite thick and rich.
-
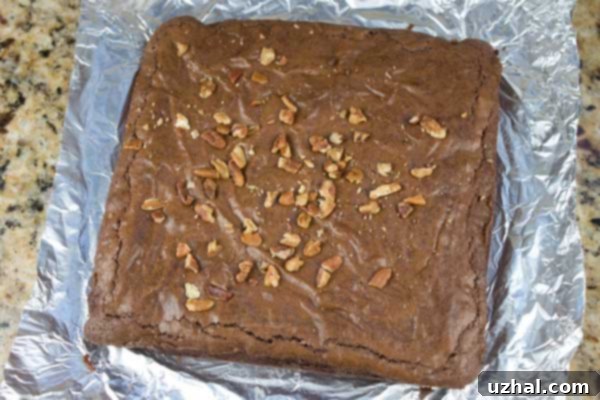
Scrape all the thick brownie batter into your prepared 9-inch square pan. Use a spatula to spread the batter evenly, making sure it reaches all the way to the edges and forms a smooth, level top.
-
Bake the brownies in the preheated oven at 350°F (175°C) for an initial 10 minutes. After this initial bake, reduce the oven temperature to 325°F (160°C) and continue baking for another 28 to 30 minutes. The most accurate way to determine doneness for these fudgy brownies is to check their internal temperature with a meat thermometer; it should read 212°F (100°C) when inserted into the center. Do not overbake!
-
Once baked, remove the pan from the oven and let the brownies cool completely at room temperature. This cooling process is crucial for the brownies to set properly and become truly fudgy. After cooling, it is highly recommended to chill the brownies for at least a few hours (or preferably overnight) before attempting to lift them from the pan and cut them. Chilling makes for much cleaner cuts and a firmer, more satisfying fudgy texture.
-
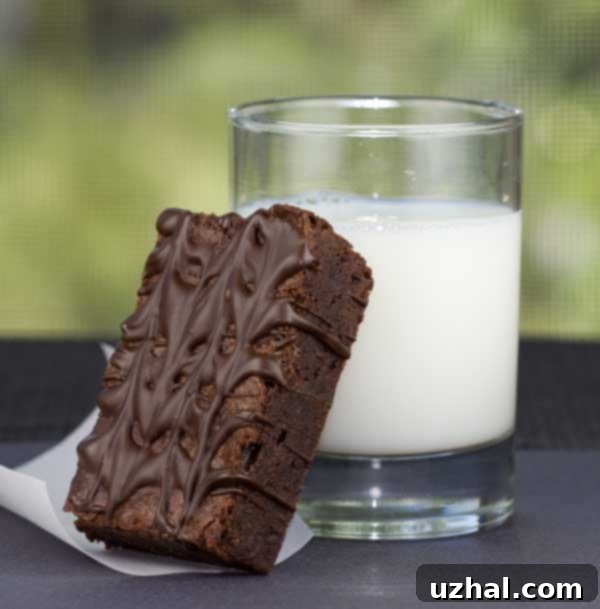
For an extra touch of decadence, you can garnish your cooled brownies with melted chocolate. Melt chocolate chips with a small bit of shortening (this helps with a smooth, drizzleable consistency) at 50% power in the microwave, stirring every 30 seconds until smooth. Drizzle the melted chocolate over the chilled brownies. Allow the chocolate to set completely before serving for a beautiful finish.
Notes
There’s an undeniable allure to a homemade brownie, especially one crafted to be as thick, shiny, and chewy as these. They represent a perfect balance of comforting nostalgia and gourmet indulgence. The journey from a classic recipe to this elevated version of thick fudge brownies has been a delightful one, resulting in a dessert that is consistently requested and always devoured. Whether you’re making them for a special occasion or simply to satisfy a chocolate craving, these brownies are sure to impress with their profound depth of flavor and irresistible texture. So, grab your saucepan, preheat your oven, and prepare to create some truly unforgettable brownies!
