Indulge in the Ultimate Hot Cocoa Cake Roll: Your Perfect Holiday Dessert Guide
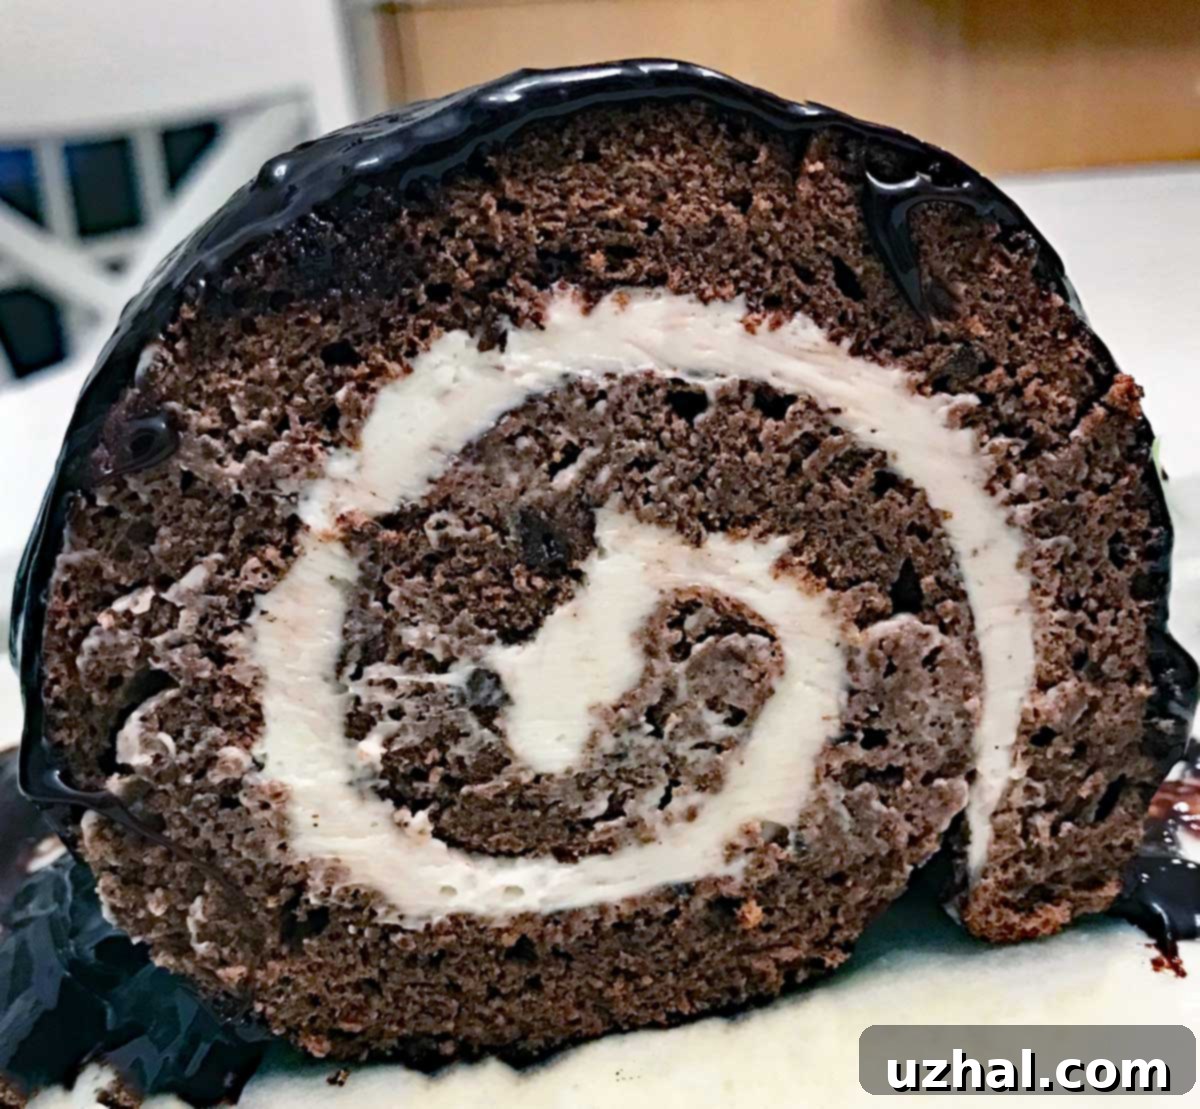
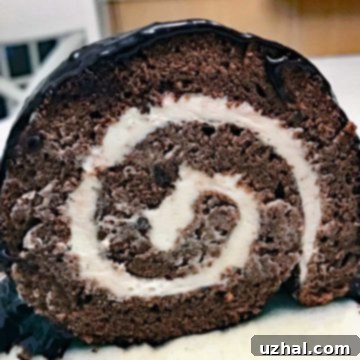
As the days grow shorter and the air turns crisp, there’s a certain magic that signals the start of “cake roll season.” For many, this delightful time begins in November, ushering in an era of cozy kitchens and heartwarming treats. However, I couldn’t resist getting a head start this year with an exceptionally comforting creation: the Hot Cocoa Cake Roll. This charming recipe, originally featured in Food Network magazine, immediately captured my attention. I made it right away, but life had other plans, and the hustle of a cross-country move meant it never saw the light of day on the blog. Fast forward to today, and I’m thrilled to finally share this culinary gem. It’s more than just a cake; it’s an elevated take on a classic snack cake Swiss Roll, promising a taste that is simply superior and unforgettable. Prepare to fall in love with its rich chocolate flavor, light-as-air texture, and dreamy marshmallow cream filling, all enveloped in a glistening chocolate glaze. This Hot Cocoa Cake Roll is not just a dessert; it’s an experience, a perfect symphony of winter flavors in every slice.
Essential Equipment for Cake Roll Success: Rimmed Pans and Tea Towels
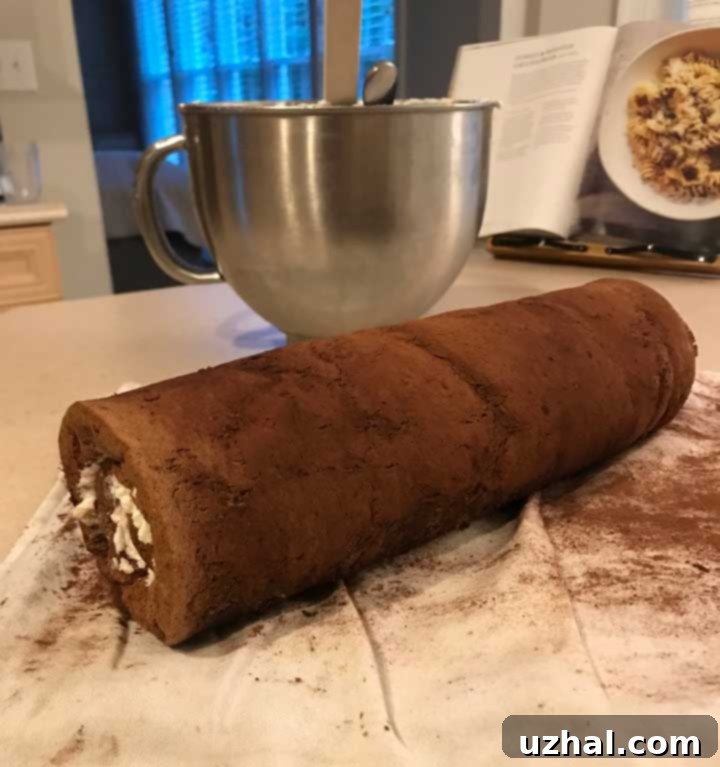
Creating a perfect cake roll, while seemingly intricate, is surprisingly straightforward once you have the right tools. This particular Hot Cocoa Cake Roll recipe is no exception, designed for ease and enjoyment. However, there are three non-negotiable items you’ll need to ensure your success: an 11×17-inch rimmed baking pan, a clean cotton tea towel (and a crucial note here: absolutely *not* terry cloth!), and a reliable electric mixer. For many home bakers, myself included, the biggest hurdle to baking cake rolls in the past was simply having all three of these specific items on hand simultaneously.
I recall countless times being ready to bake, only to realize my pan was either too small or too large, or my tea towel collection consisted solely of fluffy terry cloth, which is entirely unsuitable for the delicate art of cake rolling. The precise dimensions of the 11×17-inch pan are critical; it allows the cake to bake into a thin, flexible sheet that’s ideal for rolling without cracking. Similarly, the choice of tea towel fabric is paramount. A thin, lint-free cotton tea towel provides the necessary grip and flexibility to help roll the warm cake without sticking or tearing, and it prevents the cake from drying out as it cools. Terry cloth, with its thick loops, can leave imprints and hinder the smooth rolling process. Nowadays, I keep an 11×17-inch pan dedicated almost exclusively to my cake roll endeavors, alongside a dedicated stack of smooth cotton tea towels. If you’re just starting your cake roll journey, take a moment to ensure you have these essential pieces of equipment. They are truly the foundation for a flawless and beautiful Hot Cocoa Cake Roll.
Mastering the Hot Cocoa Cake Roll: Key Recipe Insights
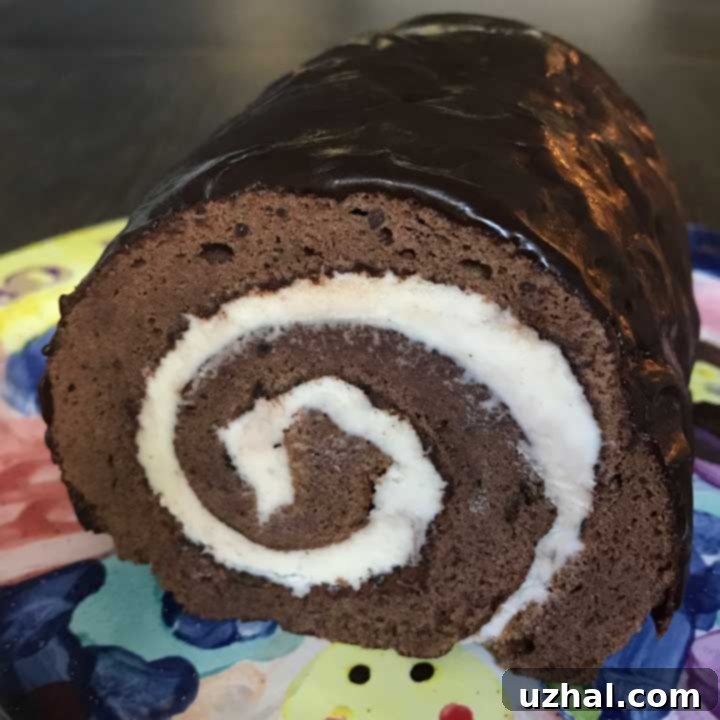
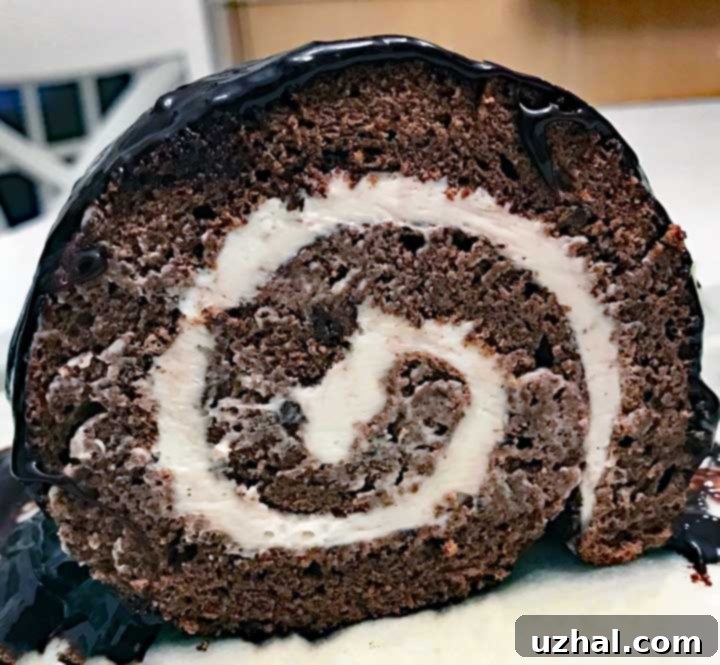
Once you’ve gathered all your essential equipment and laid out your ingredients, you’ll be delighted by how quickly this Hot Cocoa Cake Roll comes together. The cake batter is remarkably easy to prepare and bakes in a mere 10 to 12 minutes, making it an efficient choice for a show-stopping dessert. One of the most striking features of this particular recipe is the cake’s incredibly soft and pliable texture. This characteristic is a dream for bakers, as it makes the rolling process remarkably easy, significantly reducing the chances of cracks or breakage – a common apprehension for those new to cake rolls. Its delicate crumb holds up beautifully, ensuring a smooth, elegant spiral every time.
The filling for this Hot Cocoa Cake Roll deviates from the usual whipped cream, offering a more robust and intriguing alternative: a unique buttercream style that incorporates marshmallow cream. After the initial mixing, you might notice the filling has a slightly “curdled” appearance, which is perfectly normal and no cause for alarm. Rest assured, this texture transforms as you spread it over the cake, gliding on smoothly to create a slick, inviting layer. This marshmallow buttercream sets up wonderfully in the refrigerator, firming to a delightful consistency that complements the soft cake. For the best sensory experience, I highly recommend allowing the cake to come to room temperature for about 15-20 minutes before serving. This brief warming period allows the filling to soften slightly, achieving its optimal creamy and melt-in-your-mouth texture, enhancing the overall hot cocoa experience. The combination of the tender chocolate cake and the sweet, subtly firm marshmallow filling truly elevates this dessert into something extraordinary.
Freezing for Future Enjoyment
While the Hot Cocoa Cake Roll might appear to be a grand, single-serving dessert, its generous length is actually a hidden blessing, as it freezes exceptionally well. This makes it an ideal make-ahead option for holidays, gatherings, or simply to ensure you always have a decadent treat on hand. After baking and filling your cake roll, you can easily cut it into two more manageable logs. I often freeze both halves, applying the rich chocolate glaze only to the portion I plan to serve immediately. This method keeps the other half pristine and ready for future indulgence.
The fact that cake rolls freeze so beautifully opens up a world of possibilities for the enthusiastic baker. Imagine the convenience of preparing several different flavored cake rolls in advance – a classic chocolate, a festive red velvet, or perhaps a zesty lemon. Cut each into halves, wrap them tightly in plastic wrap and then aluminum foil to protect them from freezer burn, and simply store them in your freezer. When a spontaneous dessert craving strikes or unexpected guests arrive, you can pull out an assortment of logs, thaw them slightly, glaze, and serve a delightful variety of cake rolls. This not only saves precious time during busy periods but also allows you to offer a charming and impressive dessert spread with minimal last-minute effort. The Hot Cocoa Cake Roll, with its robust flavors, holds up particularly well to freezing, ensuring that every thawed slice retains its incredible texture and taste.
More Delicious Recipes to Explore
If you’ve enjoyed baking this Hot Cocoa Cake Roll and are eager to explore more delightful treats, here are some other fantastic recipes from our kitchen that you might love. Whether you’re in the mood for cookies, muffins, or classic tea-time pastries, we’ve got something to tempt your taste buds:
- Half Batch Hazelnut Chocolate Chip Cookies
- Reduced Fat Chocolate Muffins
- Old Fashioned Tea Cakes (Sugar Cookie Cut-Outs)
- Alice’s Tea Cup Banana Butterscotch Scones
- Alice’s Tea Cup Pumpkin Scones
Hot Cocoa Cake Roll Recipe
Hot Cocoa Cake Roll
Anna
Pin Recipe
Ingredients
- 6 large eggs
- ¾ cup all-purpose flour (105 grams)
- ¼ cup unsweetened Dutch-process cocoa powder, plus 2 T. more for dusting (20 grams)
- ½ teaspoon baking powder
- ¼ teaspoon salt
- ¼ teaspoon cream of tartar
- ¾ cup granulated sugar, divided use (150 grams)
- ¼ cup vegetable oil
- ¼ cup whole milk
- 1 teaspoon pure vanilla extract
- ½ teaspoon instant espresso powder (optional, enhances chocolate flavor)
Filling and Glaze
- 12 tablespoons unsalted butter (room temperature or slightly softened)
- Pinch salt
- 7 oz marshmallow cream (one whole 7 oz jar works perfectly)
- ¾ teaspoon vanilla extract
- ½ cup confectioners’ sugar
- 2 tablespoons whole milk
- 6 ounces semisweet chocolate or dark chocolate (finely chopped for easier melting)
- ½ cup heavy cream
Instructions
-
Approximately one hour before you plan to begin baking, separate your cold eggs. Place the egg whites into the bowl of a stand mixer and the egg yolks into a separate large mixing bowl. Allow both to come to room temperature, which helps with better mixing and volume.
-
Preheat your oven to 375 degrees F (190 C). Lightly spray an 11-by-17-inch rimmed baking sheet with cooking spray. Line the bottom of the pan with a sheet of parchment paper, ensuring it covers the entire bottom, then spray the parchment paper as well. This double layering helps prevent sticking and makes releasing the cake much easier.
-
In a medium-sized bowl, combine the all-purpose flour, cocoa powder, baking powder, and salt. Whisk these dry ingredients together thoroughly for about 2 minutes to ensure they are well combined and aerated. Set this mixture aside.
-
Using the whisk attachment on your electric mixer, beat the room temperature egg whites and cream of tartar on medium speed until soft peaks begin to form. Gradually add in ¼ cup of the granulated sugar while continuing to beat. Increase the mixer speed to medium-high and continue beating until stiff, glossy peaks form. Be careful not to overbeat.
-
In the separate bowl with the egg yolks, whisk vigorously with the remaining ½ cup of granulated sugar, the vegetable oil, whole milk, pure vanilla extract, and optional instant espresso powder until the mixture is light and creamy. Gently fold the prepared flour mixture into this egg yolk mixture until it is just combined and no dry streaks remain.
-
Using a heavy-duty rubber spatula, carefully stir one-third of the beaten egg whites into the chocolate batter to lighten it. Then, gently fold in the remaining egg whites in two batches, taking care not to deflate the mixture. Spread the batter evenly into the prepared baking pan. Bake for 10 to 12 minutes, or until the cake springs back lightly when gently pressed with a fingertip. Let the baked cake cool in the pan for 5 minutes.
-
While the cake is still warm, sift the reserved 2 tablespoons of cocoa powder evenly over the top. Carefully loosen the edges of the cake from the pan with a thin knife or offset spatula. Lay a clean, lint-free cotton kitchen towel (ensure it’s not terry cloth, as discussed earlier) over the cake. Place another baking sheet or a large cutting board over the towel and, holding both sheets/boards firmly, swiftly flip the cake to invert it onto the towel. Carefully remove the top baking sheet and peel off the parchment paper. If desired, dust this side of the cake with a little more cocoa powder. Starting from a short end, carefully roll up the warm cake and the towel together into a spiral. Transfer the rolled cake, seam-side down, to a wire rack and allow it to cool completely to room temperature. This cooling process helps the cake retain its rolled shape.
-
While the cake cools, prepare the delightful filling: In a large bowl, using an electric mixer on medium speed, beat the room temperature unsalted butter and a pinch of salt until light and creamy, which should take about 2 minutes. Add the marshmallow cream and the ¾ teaspoon of vanilla extract. Increase the mixer speed to medium-high and beat for another 2 minutes until the mixture is light and fluffy. Reduce the speed to low. Gradually beat in the confectioners’ sugar until incorporated, then slowly add the 2 tablespoons of whole milk. Once combined, increase the speed to medium and beat until the filling is thick, smooth, and easily spreadable. Don’t be concerned if it initially looks slightly “curdled”; it will smooth out with continued beating.
-
Once the cake is completely cool, gently unroll it from the towel. Carefully spread the prepared marshmallow buttercream filling evenly over the entire surface of the cake, leaving a small ¼-inch border free around the edges. Carefully re-roll the cake (this time without the towel), maintaining a tight spiral. Using a serrated knife, neatly trim about ½ inch off each end of the cake roll to create clean, attractive edges. Transfer the finished cake roll to a wire rack positioned over a baking sheet to catch any drips from the glaze.
-
Finally, prepare the rich chocolate glaze: In a microwave-safe bowl, combine the chopped semisweet or dark chocolate with the ½ cup of heavy cream. Microwave on high, stirring every 30 seconds, until the chocolate is completely melted and the mixture is smooth and glossy. Pour this decadent glaze over the cake roll, using an offset spatula to spread it evenly and coat the entire surface. Transfer the glazed cake to a serving platter and refrigerate for at least 15 minutes to allow the glaze to set and the filling to firm up. For the best flavor and texture, let the cake sit at room temperature for 15-20 minutes before slicing and serving. Enjoy your magnificent Hot Cocoa Cake Roll!
We hope this comprehensive guide inspires you to create your own Hot Cocoa Cake Roll. It’s truly a labor of love that yields an incredibly rewarding and utterly delicious dessert. From its tender chocolate sponge to the dreamy marshmallow filling and glossy chocolate glaze, every bite is a celebration of flavor and texture. Don’t be intimidated by the rolling process; with the right tools and a little patience, you’ll master it in no time. Whether you’re baking for a special occasion, a cozy family evening, or simply to treat yourself, this cake roll is sure to bring warmth and joy. Happy baking, and we can’t wait to hear how your Hot Cocoa Cake Roll turns out!
