Easy Cherry Dream Bars: Your Go-To Recipe for a Quick & Delicious Cake Mix Dessert
Imagine a day filled with the sweet aroma of baking, a delightful frenzy of flour and sugar, leading to a kitchen overflowing with treats. That’s precisely how these irresistible Cherry Dream Bars came to life! What started as an ambitious morning baking spree continued well into the evening, even after our traditional flour supply ran out. But a true baker knows no surrender! A quick rummage through the pantry revealed a hidden treasure: a box of cake mix. And just like that, the baking party reignited, giving birth to these incredibly simple yet profoundly satisfying bars.
This recipe for Cherry Dream Bars is a cherished, albeit sometimes forgotten, classic. It’s a testament to the magic of convenience foods, proving that quick and easy doesn’t mean sacrificing flavor or satisfaction. Crafted with readily available ingredients, these bars consistently deliver a delightful dessert experience that’s far greater than the sum of its humble parts. And here’s an extra bonus for all you meal preppers and party planners: these delightful cherry bars freeze exceptionally well, making them perfect for enjoying later or for unexpected guests!

Cherry Dream Bar Ingredients: Simple Steps to Sweet Perfection
The beauty of these cake mix cherry bars lies in their straightforward ingredient list, which combines pantry staples to create a harmonious blend of textures and flavors. You’ll need a handful of accessible items that transform into a truly memorable dessert. Each component plays a crucial role in building the delectable layers of these dream bars, from the tender crust to the vibrant cherry filling and the irresistible crumb topping.
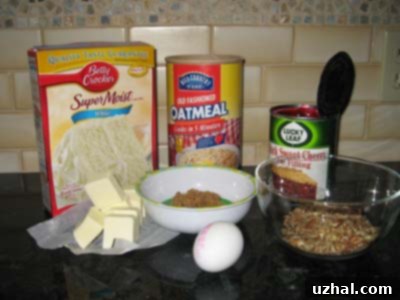
At the heart of our Cherry Dream Bars, you’ll find a humble box of cake mix (either white or yellow works wonderfully), which serves as the ingenious base for both the crust and a portion of the crumbly topping. This clever shortcut simplifies the process immensely, ensuring consistent results every time. We also incorporate hearty oats, which lend a delightful chewiness and texture to the crust and topping, elevating the bars beyond a typical cake mix dessert.
The star of the show, of course, is a can of luscious pie filling. While these are famously known as “Cherry Dream Bars,” the beauty of this recipe is its adaptability. Feel free to experiment with your favorite fruit fillings – apple, blueberry, peach, or even a mixed berry could create equally fantastic variations. For this particular batch, I opted for Lucky Leaf’s rich dark cherry pie filling. I hadn’t realized there was such a distinct difference between “dark” and regular cherry filling before, but the deep, intense color and flavor of the dark variety truly made these bars sing!
Completing our ingredient lineup are essentials like brown sugar, which adds a warm, caramel note and helps create that perfect crumbly texture, softened butter for richness and binding, and a large egg to bring everything together in the crust. For those who appreciate an extra layer of texture and nutty flavor, chopped nuts are an optional but highly recommended addition to the topping. Walnuts or pecans work wonderfully, providing a satisfying crunch that complements the soft filling and crumbly layers.


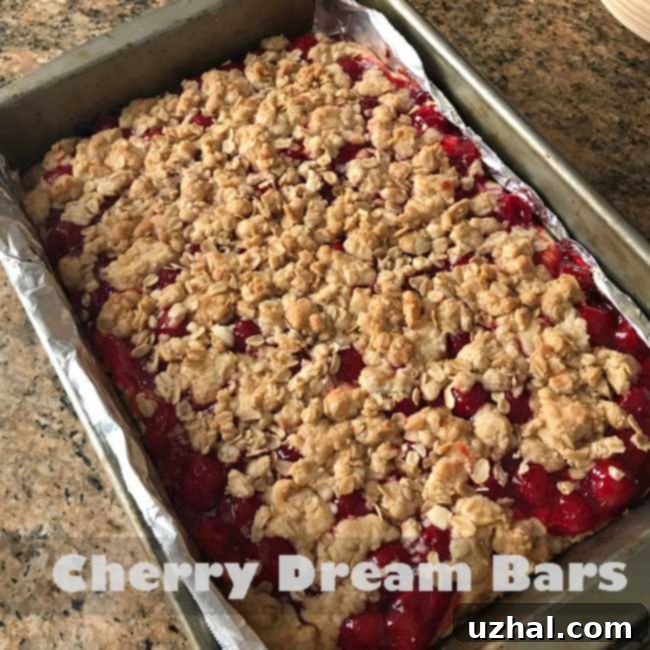
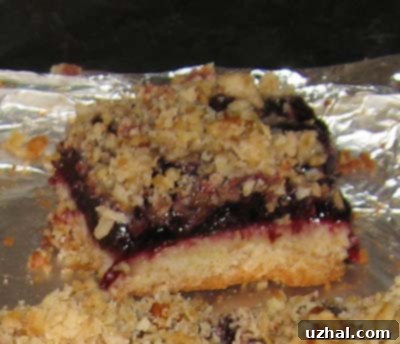
Once baked to golden perfection and cooled, these bars present a beautiful mosaic of textures and flavors. The vibrant red of the cherry filling peeks through the golden, oat-filled crumb topping, promising a treat for both the eyes and the palate. They are truly a sight to behold and an absolute joy to share.

Effortless Preparation: Making Your Cherry Dream Bars
One of the many reasons these Cherry Dream Bars have remained a cherished recipe is their incredible ease of preparation. Whether you prefer the speed of modern kitchen gadgets or the simplicity of mixing by hand, you can whip up a batch of these delightful bars with minimal fuss. I’ve personally made these in various ways over the years, adapting my technique to whatever I had on hand, and they always turn out fantastic.
Crafting the Perfect Cake Mix Base
In the past, I often used a food processor to combine the cake mix with cold, cubed butter, aiming for a finely crumbly mixture. This method works beautifully, creating a very tender and shortbread-like crust. However, I’ve since discovered an even simpler approach that yields equally delicious results: using softened butter. When your butter is softened, you can easily mix it directly with the cake mix and a portion of the oats using just a sturdy spoon or a hand mixer. This method requires less cleanup and is just as effective in achieving that desired crumbly texture for your base. Remember to set aside about a cup of this crumb mixture to create your irresistible topping later.
Assembling the Layers of Goodness
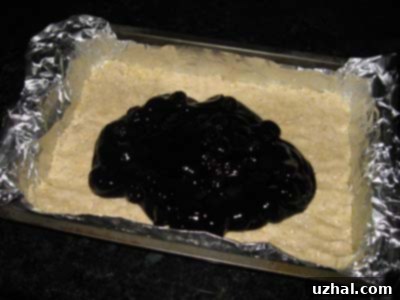
Once your base mixture is ready, combine the remaining crumbs with an egg and mix until well blended. This egg acts as a binder, helping the crust hold together beautifully when pressed into your baking pan. Press this mixture evenly into your prepared 13×9 inch pan, forming a solid, uniform crust. This layer will become the sturdy foundation for your bars. Next, generously pour your chosen pie filling over the crust, spreading it gently to ensure an even layer from edge to edge. The vibrant fruit filling will be the juicy heart of your dream bars.
The Irresistible Crumb Topping
Now for the grand finale: the crumb topping! Take the cup of crumb mixture you reserved earlier. To this, add a bit more oats, the remaining softened butter, your optional chopped nuts, and a touch of brown sugar. Mix these ingredients thoroughly until well combined and crumbly. This concoction is then sprinkled evenly over the cherry pie filling. As it bakes, this topping will become golden brown and delightfully crisp, adding a fantastic textural contrast to the soft fruit filling and tender crust.
Cherry Dream Bar Notes & Tips for Success
Having made these Cherry Dream Bars countless times over the years, I’ve gathered a few notes and tips to ensure your baking experience is as smooth and successful as possible. These bars are as easy to make today as they were when I first stumbled upon this timeless recipe.
Pan Preparation: To Line or Not To Line?
I almost always advocate for lining baking pans with parchment paper or foil, especially when making bars or brownies. This simple step is a game-changer because it allows you to effortlessly lift the entire slab of baked bars out of the pan. Once lifted, you can place them on a cutting board to achieve perfectly clean, precise slices. This is particularly useful for presentation or when you need uniformly sized portions.
However, with these versatile Cherry Dream Bars, you have the flexibility to bake them directly in the pan and serve them right out of it, if the situation calls for a more casual approach. If you’re planning to make them ahead of time, or if you intend to freeze them, lining the pan with greased foil or parchment paper is definitely the way to go. This way, after cooling, you can easily lift the entire slab, wrap it tightly, and freeze it without the need for immediate cutting. You can then cut them a few hours before serving, even while they are still slightly frozen, for beautifully neat bars.
Baking and Cooling for Optimal Texture
Bake your Cherry Dream Bars at 350 degrees F (175 degrees C) for 30 to 40 minutes, or until the topping is golden brown and the filling is bubbly. Keep an eye on them, as oven temperatures can vary. The most crucial step after baking is to allow the bars to cool completely before slicing. While the aroma might tempt you to dig in immediately, resisting the urge will ensure the filling sets properly and your slices are clean and well-formed. Warm bars tend to crumble and make for messy serving, so patience is key for these delightful treats.
Storage and Freezing Instructions
These bars are excellent keepers! Once cooled and sliced, store them in an airtight container at room temperature for up to 3 days, or in the refrigerator for up to a week. For longer storage, their freezer-friendly nature truly shines. Wrap individual bars or the entire slab (if you lined your pan) tightly in plastic wrap, then again in aluminum foil. They can be frozen for up to 2-3 months. To enjoy, simply thaw them at room temperature or warm them slightly in the microwave for a fresh-baked taste. This makes them a fantastic make-ahead option for holidays, potlucks, or simply having a sweet treat on hand.
Explore Flavor Variations and Customizations
While the classic cherry is undeniably delicious, don’t hesitate to get creative with your Dream Bars! As mentioned, any fruit pie filling can be used. Imagine a tangy apple or a sweet blueberry version! You could also add a touch of almond extract to the crust for an even more pronounced cherry flavor, or a sprinkle of cinnamon with apple filling. For chocolate lovers, a yellow cake mix base with chocolate pie filling and a few chocolate chips in the topping would be a decadent twist. The possibilities are truly endless, allowing you to tailor this versatile recipe to your personal preferences or what you have available in your pantry.
Why Cherry Dream Bars Are a Must-Try
These bars are more than just a dessert; they’re a celebration of simplicity, nostalgia, and pure, unadulterated comfort. They are the perfect solution for when you crave something homemade but are short on time, or when you need a reliable crowd-pleaser that everyone will love. Their balance of sweet and tart, combined with varied textures from the crumbly crust, gooey filling, and crunchy topping, makes every bite a delightful experience. Whether for a busy weeknight treat, a potluck contribution, or a special occasion, these Cherry Dream Bars are guaranteed to bring smiles and satisfy any sweet tooth. They truly live up to their “dream” name!
- Dream Bars
- Cream of Coconut Dream Bars
- Chocolate Dream Pie –No Dream Whip
- Dream Whip Cake
- Ultimate Corn Flake Cookies
Recipe
Cherry Dream Bars
Anna
Pin Recipe
Ingredients
- 1 box white or yellow cake mix
- ½ cup salted butter cut into 8 T. and softened
- 1 ¼ cups oats — divided
- 1 large egg
- 21 oz can of cherry pie filling
- ½ cup chopped nuts optional, such as walnuts or pecans
- ¼ cup brown sugar
Instructions
-
Preheat your oven to 350 degrees F (175 degrees C). Prepare a 13×9 inch baking pan by greasing it thoroughly. For easier removal and cleaner slicing, consider lining the pan with parchment paper or greased aluminum foil, leaving an overhang on the sides.
-
In a large mixing bowl, combine the entire box of cake mix, 6 tablespoons of the softened butter, and 1 cup of the oats. Mix these ingredients thoroughly until the mixture is crumbly and well combined. This can be done by hand, with a pastry blender, or a stand mixer. Once mixed, set aside 1 cup of these crumbs to use for the topping later.
-
To the remaining crumb mixture in the bowl, add the large egg. Mix until the egg is fully incorporated and the mixture is well blended. This will create a slightly more cohesive dough. Press this mixture firmly and evenly into the bottom of your prepared 13×9-inch baking pan to form the crust. Then, carefully pour the entire can of cherry pie filling over the crust, spreading it gently with a spatula to ensure an even layer that covers the entire base.
-
Retrieve the 1 cup of crumbs you set aside earlier for the topping. To these reserved crumbs, add the remaining ¼ cup of oats, the remaining 2 tablespoons of softened butter, the optional ½ cup of chopped nuts (if using), and the ¼ cup of brown sugar. Mix all these ingredients thoroughly until you have a coarse, crumbly topping mixture. Evenly sprinkle this topping over the cherry pie filling in the pan.
-
Bake the bars in the preheated oven at 350 degrees F (175 degrees C) for 30 to 40 minutes, or until the topping is golden brown and the cherry filling is bubbly around the edges. Once baked, remove the pan from the oven and place it on a wire rack to cool completely. Allowing the bars to cool fully is essential for the filling to set and for clean, easy slicing. Once cool, slice into 24 bars and serve. Enjoy your delicious homemade Cherry Dream Bars!