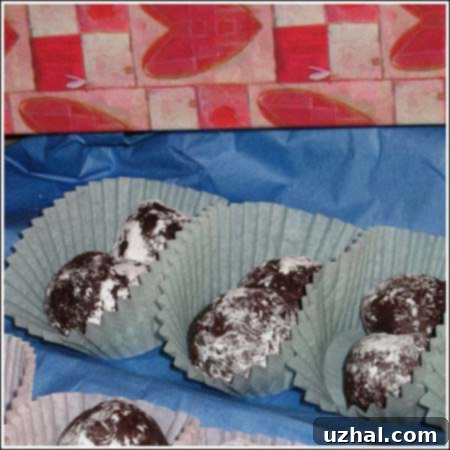
Irresistible Vegan Chocolate Truffles: The Ultimate Cashew Cream Recipe for Dairy-Free Decadence
Indulge your sweet tooth without compromise with these heavenly Vegan Chocolate Truffles, often affectionately dubbed Cashew Truffles. Imagine a rich, creamy, and intensely chocolatey bite that melts in your mouth, yet is entirely dairy-free and plant-based. If you have a blender or a food processor, these luxurious treats are astonishingly simple to create, making them perfect for a special occasion, a thoughtful homemade gift, or simply a well-deserved moment of self-indulgence. Forget complicated steps and long ingredient lists; our recipe harnesses the natural creaminess of cashews to deliver an unparalleled texture that rivals traditional truffles, ensuring a decadent experience every time.
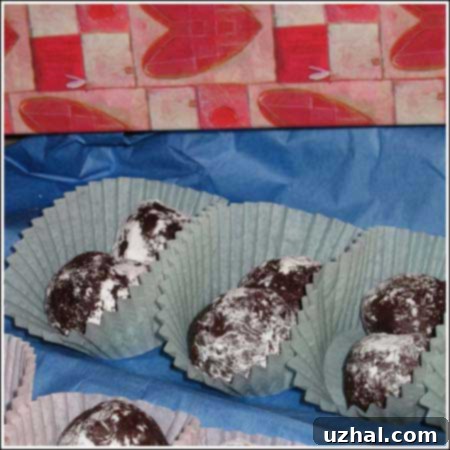
This recipe transforms humble raw cashews and high-quality vegan chocolate into a sophisticated dessert that’s both impressive and incredibly satisfying. Whether you’re a seasoned vegan chef or simply looking to explore delicious dairy-free alternatives, these cashew cream truffles will quickly become a cherished favorite. They offer a delightful blend of simplicity in preparation and gourmet results, proving that plant-based desserts can be every bit as rich and satisfying as their traditional counterparts.
Ingredients for Unforgettable Vegan Chocolate Truffles
Crafting the perfect vegan chocolate truffle starts with a few high-quality ingredients. Each component plays a crucial role in achieving the desired creamy texture and rich flavor. Here’s what you’ll need:
- ¾ cup raw cashews: These are the stars of our cashew cream, providing the essential richness and smooth body. Ensure they are raw, not roasted or salted, for the purest flavor and best blending consistency. Cashews are not only delicious but also offer a range of health benefits, being low in sugar and rich in fiber, heart-healthy fats, and plant protein. They are also packed with copper, magnesium, and manganese, vital for energy production, immunity, and bone health.
- ¾ cup cold water: Used to blend with the cashews to create that luscious, dairy-free cream. The cold water helps maintain a smooth consistency during blending.
- 1 pound bittersweet chocolate: This is where the magic happens! For truly vegan truffles, it’s paramount to select a high-quality bittersweet chocolate that explicitly states it’s dairy-free. Many dark chocolates are naturally vegan, but always double-check the ingredient list for milk solids, whey, or casein. A higher cocoa percentage (around 70-80%) will yield a more intense, less sweet truffle, which is ideal for balancing the richness.
- 1 teaspoon pure vanilla extract: A staple in most dessert recipes, vanilla extract enhances the chocolate flavor, adding a warm, aromatic depth that elevates the truffles from good to truly exceptional.
- Cocoa powder (for coating): Unsweetened cocoa powder provides a classic, slightly bitter exterior that beautifully contrasts with the sweet, creamy interior. This traditional coating also prevents the truffles from sticking together.
Optional Flavor Boosters and Coatings:
While the classic cocoa-dusted truffle is perfect, don’t hesitate to get creative with your coatings and flavorings!
- Powdered sugar: For a sweeter, softer exterior.
- Shredded coconut: Toasted or untoasted, adds a tropical twist.
- Chopped nuts: Finely chopped pistachios, almonds, or hazelnuts add texture and flavor.
- Sprinkles: A fun option, especially for celebratory occasions.
- Espresso powder: Add ½ teaspoon to the chocolate mixture for a coffee-infused truffle.
- Orange zest: A teaspoon of fresh orange zest stirred into the ganache brings a bright, citrusy note.
- Liqueur: A tablespoon of your favorite vegan-friendly liqueur (like Grand Marnier, rum, or Kahlua) can add an adult twist.
Step-by-Step Guide: Crafting Your Vegan Chocolate Truffles
1. Prepare the Cashew Cream
The foundation of these vegan truffles is the incredibly smooth cashew cream. This step is crucial for achieving the perfect consistency.
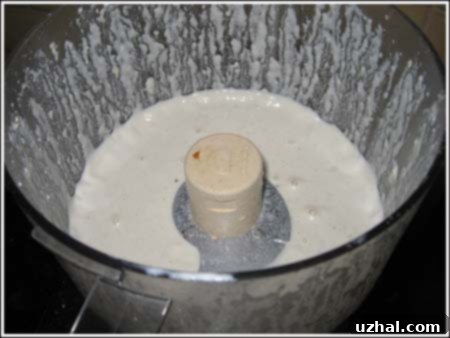
Place the raw cashews and cold water in a high-speed food processor or a powerful blender. Begin to process or blend for an initial 2 minutes. The goal is to break down the cashews until the mixture is completely smooth and free of any gritty texture. After the initial blending, stop and use a spatula to scrape down the sides of the bowl or blender jar. This ensures all cashew pieces are incorporated and processed evenly. Continue to process for another minute or two, or until the mixture reaches the consistency of heavy cream – thick, velvety, and pourable. It should look something like this, resembling a rich, dairy-free liquid cream.
Pro Tip: For an even silkier cashew cream, consider soaking your raw cashews in hot water for at least 30 minutes (or cold water overnight) before draining and blending. This softens them further, leading to an exceptionally smooth result, especially if your blender isn isn’t super high-powered.
2. Melt the Vegan Chocolate
Melting chocolate requires a gentle hand to prevent it from seizing or burning. Precision here ensures a smooth, glossy ganache.
Place your finely chopped bittersweet vegan chocolate (chopping helps it melt more evenly and quickly) in a 2-quart microwave-safe bowl. Melt the chocolate on high power in the microwave, stirring thoroughly every 30 seconds. Continue this process until the chocolate is mostly melted and smooth. Be careful not to overheat it, as burnt chocolate will taste bitter and can’t be salvaged. Alternatively, if you’re “old-school” or prefer a more controlled method, you can melt the chocolate using a double boiler. Place a heatproof bowl over a saucepan of simmering water, ensuring the bottom of the bowl does not touch the water. Stir continuously until the chocolate is smooth and melted. Once melted, remove the chocolate from the heat (or microwave) and let it cool for 3-5 minutes. This slight cooling period is important as it prevents the cashew cream from separating or becoming grainy when added.
3. Combine and Create the Ganache
This is where the magic happens, as the two main components come together to form the truffle base.
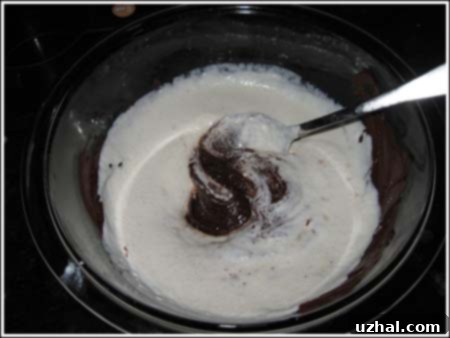
After the melted chocolate has cooled slightly, stir in the prepared cashew cream and the pure vanilla extract. Mix vigorously with a spatula or whisk until the mixture is completely homogeneous, smooth, and glossy. It should transform into a thick, luxurious ganache. Ensure there are no streaks of unmixed cashew cream or chocolate. The consistency should be thick but still pliable. This is your truffle base, brimming with rich, dairy-free chocolate flavor.
4. Chill to Perfection
Chilling is an essential step that allows the ganache to firm up, making it scoopable and rollable.
Cover the bowl with plastic wrap and place the mixture in the refrigerator for a minimum of 2 hours. For best results, or if your kitchen is warm, you can chill it for up to 4 hours, or even overnight. The ganache needs to be firm enough to hold its shape when scooped but still soft enough to roll easily. It should feel solid to the touch but not rock hard. If it’s too hard, let it sit at room temperature for 10-15 minutes before scooping.
5. Scoop and Roll
This is the fun part – transforming your chilled ganache into individual truffles!
Using a melon baller, a small cookie scoop, or even two spoons, scoop out small portions of the chilled truffle mixture. The size is entirely up to your preference, but aim for bite-sized pieces, typically about 1 inch in diameter. Once you have a scooped portion, gently roll it between your palms to form a smooth, round ball. Work quickly, as the warmth of your hands can soften the ganache. Immediately after shaping, roll the little ball in your chosen coating – classic unsweetened cocoa powder, powdered sugar, finely chopped nuts, or shredded coconut. Place the coated truffles on a parchment-lined tray or plate.
6. Serve and Store
Your delicious vegan chocolate truffles are almost ready to be enjoyed!
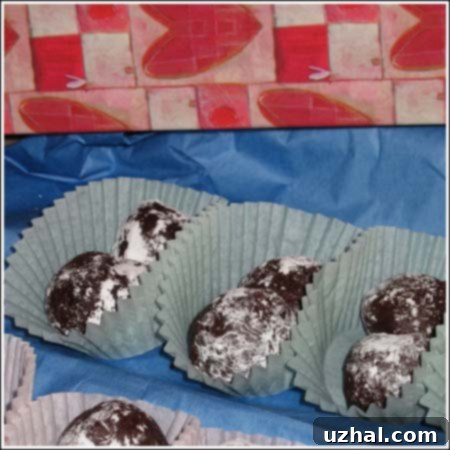
Serve your exquisite Vegan Chocolate Truffles in festive cupcake holders or other elegant truffle receptacles to prevent them from sticking together and for a beautiful presentation. They make a fantastic addition to any dessert platter, a thoughtful gift, or a special treat. Return them to the refrigerator to chill a bit more before serving, as they are best enjoyed cold. This final chill helps them set completely and enhances their firm, yet melt-in-your-mouth texture.
Why Choose Vegan Chocolate Truffles?
Beyond their incredible taste, these dairy-free delights offer numerous advantages:
- Dietary Inclusivity: Perfect for those with dairy allergies, lactose intolerance, or following a vegan lifestyle. Everyone can enjoy a decadent treat!
- Healthier Indulgence: While still a treat, using cashews instead of heavy cream means they’re cholesterol-free and often lower in saturated fat compared to traditional truffles. Cashews also provide healthy fats, protein, and essential minerals.
- Rich & Creamy Texture: The magic of cashews creates an unbelievably smooth and rich ganache that mimics dairy-based versions perfectly.
- Simple Ingredients: You won’t find any obscure ingredients here. Just wholesome nuts, quality chocolate, and water.
- Customizable: Easily adapt flavors and coatings to suit any preference or occasion.
Tips for Truffle Perfection
- Quality Chocolate Matters: Since chocolate is the primary flavor, invest in a good quality vegan bittersweet chocolate. It makes a significant difference.
- Don’t Overheat Chocolate: Melt chocolate slowly and gently to prevent it from seizing or becoming grainy.
- Chill Adequately: Don’t rush the chilling process. A well-chilled ganache is much easier to scoop and roll.
- Work Quickly When Rolling: Truffles soften with the warmth of your hands. If they become too sticky, pop the mixture back into the fridge for 10-15 minutes.
- Experiment with Coatings: Cocoa powder is classic, but try powdered sugar, shredded coconut, finely chopped nuts, or even a drizzle of melted white vegan chocolate for variety.
Storage and Shelf Life
Once formed, store your vegan chocolate truffles in an airtight container in the refrigerator for up to 1-2 weeks. They can also be frozen for up to 2-3 months. If freezing, arrange them in a single layer on a parchment-lined tray until solid, then transfer to a freezer-safe bag or container. Thaw in the refrigerator before serving for the best texture.
Frequently Asked Questions (FAQs)
Do I need to soak the cashews?
While not strictly mandatory if you have a high-speed blender, soaking cashews (in hot water for 30 minutes or cold water overnight) is highly recommended. It softens them, ensuring an incredibly smooth and creamy cashew cream, free of any grittiness. If you forget to soak, boiling them for 10-15 minutes can also work in a pinch.
Can I use a different type of nut?
Cashews are ideal for their neutral flavor and creamy texture. Other nuts like almonds might work, but they tend to have a stronger flavor that could alter the truffle’s taste, and their texture might not be as smooth. For the best results, stick with raw cashews.
What kind of chocolate is best for vegan truffles?
Opt for a high-quality bittersweet or dark chocolate (70% cocoa or higher) that is clearly labeled dairy-free or vegan. Check the ingredients list carefully for any hidden dairy components like milk fat, milk solids, or whey. The better the chocolate, the richer and more delicious your truffles will be.
Are these truffles gluten-free?
Yes, this recipe is naturally gluten-free, provided your chocolate and any optional flavorings (like vanilla extract) are certified gluten-free. Most pure chocolates and cashews are naturally gluten-free.
Can I make these ahead of time?
Absolutely! Vegan chocolate truffles are an excellent make-ahead dessert. You can prepare them completely and store them in the refrigerator for up to two weeks, or freeze them for longer. This makes them perfect for holiday gifts or party preparations.
My ganache is too sticky to roll. What should I do?
If your ganache is too sticky, it likely needs more chilling time. Place it back in the refrigerator for another 30 minutes to an hour. If your hands are warm, you can also chill your hands or rinse them with cold water before rolling to prevent the truffles from melting.
These Irresistible Vegan Chocolate Truffles, made with the luscious creaminess of cashews, prove that dairy-free desserts can be every bit as decadent and satisfying as their traditional counterparts. With their simple preparation and customizable options, they’re perfect for any occasion, offering a guilt-free indulgence that everyone can enjoy. So, gather your ingredients, follow our detailed steps, and prepare to delight your taste buds with these extraordinary plant-based treats. Happy truffle making!
