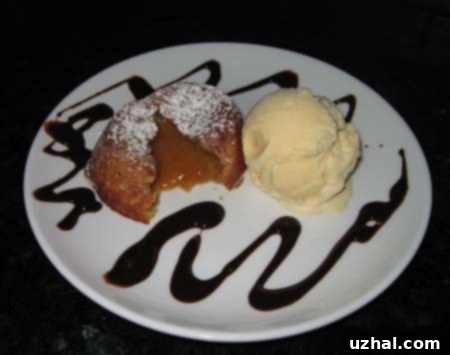
Decadent Peanut Butter Molten Lava Cakes: The Ultimate Recipe for a Gooey, Irresistible Dessert
Prepare for an explosion of flavor and a truly unforgettable dessert experience with our perfected recipe for Peanut Butter Molten Lava Cakes. Imagine cutting into a warm, rich peanut butter cake, only for a luscious, gooey peanut butter “lava” to flow out, mingling perfectly with a scoop of cold vanilla ice cream. This isn’t just a cake; it’s an event, a celebration of all things sweet and nutty, guaranteed to impress anyone lucky enough to take a bite.
While these molten lava cakes appear incredibly sophisticated, you’ll be delighted to discover how surprisingly easy they are to prepare at home. However, don’t let their simplicity fool you; these delicate treats require a gentle touch, especially when inverting them from the muffin tins. The magic lies in achieving that perfect balance between a baked exterior and a molten interior, a feat we’ll guide you through with precise instructions and helpful tips.
Why These Peanut Butter Lava Cakes Will Be Your New Favorite Dessert
There’s a reason molten lava cakes have captured the hearts of dessert lovers worldwide, and when you infuse them with the irresistible flavor of peanut butter, they reach a whole new level of deliciousness. Here’s why this recipe stands out and why you’ll want to make them again and again:
- Unforgettable Flavor Combination: The rich, nutty profile of creamy peanut butter combined with a sweet, tender cake base is simply divine. It offers a delightful and refreshing twist on the more traditional chocolate lava cake, appealing to all peanut butter enthusiasts.
- Spectacular Presentation: The moment that warm, liquid center spills onto the plate is pure culinary theatre, making it an ideal dessert for dinner parties, special occasions, or just a memorable weekend treat. The visual appeal is just as satisfying as the taste.
- Surprisingly Easy to Make: Despite their elegant and gourmet appearance, these cakes come together quickly with readily available ingredients and straightforward steps. This recipe is perfect for both novice bakers looking to impress and experienced chefs seeking a quick yet sophisticated dessert.
- Customizable and Versatile: While incredible on their own, especially paired with vanilla ice cream, these peanut butter lava cakes are also beautifully adaptable. They pair wonderfully with a variety of toppings and can be easily adapted to suit different tastes.
- Perfect Portion Control: Baked in individual muffin cups, these cakes offer perfectly sized servings, ensuring everyone gets their own personal molten masterpiece without the hassle of slicing a larger cake.
Essential Tips for Baking Perfect Peanut Butter Molten Lava Cakes
Achieving that glorious molten center is the true hallmark of a successful lava cake. Here are some crucial notes and insights gleaned from years of baking experience to ensure your baking triumph and that perfect flow of “lava”:
- Don’t Over-Bake! This is Paramount: This cannot be stressed enough – over-baking is the most common pitfall. The goal is to bake the cake just enough for the exterior to set while the interior remains gloriously liquid. Over-baking will result in a fully cooked, moist cake, but sadly, no lava. Keep a very close eye on them. Begin checking around the 7-minute mark. The tops should appear just set, and the edges firm, but the center will still be soft and jiggly.
- Delicate Handling is Key: Once baked, these cakes are quite fragile, especially when warm. Exercise extreme caution and gentleness when inverting them from the muffin tins. We highly recommend using sturdy oven mitts and a flat cookie sheet held firmly over the muffin pan for a smooth inversion process.
- Flour Choice: Cake Flour vs. All-Purpose: You have flexibility here, and both types of flour yield excellent results. Cake flour will produce a slightly more tender and delicate crumb, giving the cake a melt-in-your-mouth quality. All-purpose flour will give you a slightly firmer, yet still wonderfully delicious, cake. Don’t stress too much about this; use whichever you have on hand.
- Butter Matters: Salted or Unsalted? Both salted and unsalted butter work effectively in this recipe. However, if you opt for unsalted butter, remember to add a small pinch of salt (approximately ⅛ teaspoon works well) to your batter. This tiny addition of salt is crucial as it balances the sweetness of the cake and significantly enhances the rich, nutty flavor of the peanut butter.
- Egg Safety Considerations: Since the batter for molten lava cakes is not cooked through for an extended period, considering egg safety is a prudent step. Pasteurized eggs, which have been heat-treated to kill bacteria while remaining raw, are an excellent choice if you’re concerned about raw eggs. Alternatively, egg substitutes like Egg Beaters are a safe, convenient, and readily available option. If you are comfortable with consuming regular raw eggs, simply crack them, lightly beat them with a fork until just combined, and then measure out the required ⅔ cup.
Extreme Double Peanut Butter Molten Lava Cakes with Vanilla Ice Cream
Yields: 6 Servings
Prep time: 15 minutes | Bake time: 7-9 minutes
Ingredients:
- For the Cakes:
- 8 tablespoons (1 stick) unsalted butter, cut into tablespoon-size chunks (room temperature, if possible, for easier and more even melting)
- 7 tablespoons creamy peanut butter (use your favorite brand for the best flavor)
- ½ cup peanut butter flavored chips (these are crucial for that extra layer of gooey peanut butter richness!)
- 8 tablespoons (½ cup) granulated sugar, divided (used for both the coating and the batter)
- ⅔ cup lightly beaten egg or egg substitute (refer to the “Essential Tips” above for options)
- ⅓ cup lightly spooned cake flour (or all-purpose flour, as per your preference)
- ¼ teaspoon ground cinnamon (a subtle hint of warmth that beautifully complements the peanut butter)
- ⅛ teaspoon salt (only if using unsalted butter, for flavor balance)
- For Garnish and Serving:
- 1 tablespoon confectioners’ sugar (also known as powdered sugar, for dusting)
- 6 small scoops vanilla ice cream, a good quality brand for the best creamy and cold contrast
- 6 fresh mint sprigs (optional, for a touch of vibrant color and refreshing aroma)
- Chocolate syrup (optional, for an extra decadent drizzle over the top)
Equipment You’ll Need:
- 6-cup standard muffin pan (non-stick is highly recommended)
- Small microwave-safe mixing bowl
- Separate medium mixing bowl
- Whisk or fork (for beating eggs and stirring batter)
- ⅓ cup measuring cup (for scooping batter)
- Oven mitts (essential for safe handling of hot pans)
- Flat cookie sheet (for inverting the cakes)
- Fine-mesh sieve or small sifter (for dusting confectioners’ sugar evenly)
- Flat spatula or offset spatula (for carefully transferring cakes)
- Paper towel (for greasing the muffin cups)
Step-by-Step Instructions:
- Prepare Your Muffin Pan with Care: Begin by preheating your oven to a blazing 450 degrees F (232 degrees C). Take one tablespoon of your butter and, using a paper towel, thoroughly grease the insides of all 6 muffin cups. Be generous and ensure complete coverage, as this crucial step prevents sticking and significantly aids in the smooth inversion of the delicate cakes. Reserve the remaining 7 tablespoons of butter for the batter.
- Create the Cinnamon-Sugar Coating: In a small, separate cup or bowl, stir together the ¼ teaspoon of ground cinnamon and 2 tablespoons of the granulated sugar. Sprinkle this aromatic cinnamon-sugar mixture evenly into the buttered muffin tins. Gently shake the pan back and forth, tilting it slightly, to ensure the sugar coats the entire bottom and sides of each muffin cup. Invert the pan and give it a gentle tap to shake off any excess cinnamon-sugar. This coating will create a wonderfully sweet and slightly caramelized crust on your lava cakes.
- Melt the Rich Peanut Butter Mixture: In your microwave-safe mixing bowl, combine the 7 tablespoons of creamy peanut butter, the ½ cup of peanut butter flavored chips, and the reserved 7 tablespoons of butter. Place the bowl in the microwave and heat on high power for approximately 1 minute, or until the butter and peanut butter chips are mostly melted. Remove from the microwave and stir vigorously with a spoon or whisk until the mixture is completely smooth, homogenous, and beautifully creamy. Set this luscious mixture aside to cool slightly to prevent cooking the eggs prematurely.
- Combine Wet Ingredients: In your separate medium mixing bowl, stir together the remaining 6 tablespoons of granulated sugar and the lightly beaten egg (or egg substitute). It is important to stir gently and not beat this mixture vigorously, as we want to avoid incorporating too much air, which can alter the cake’s texture.
- Integrate All Ingredients for the Batter: Gently fold the egg and sugar mixture into the slightly cooled peanut butter mixture. Stir until just combined, ensuring there are no visible streaks. Next, gradually add the ⅓ cup of cake flour (or all-purpose flour) to the mixture, stirring only until the batter is smooth and no dry flour remains. Be careful not to overmix at this stage, as overmixing can lead to a tougher cake. If you are using unsalted butter, this is the moment to stir in your ⅛ teaspoon of salt.
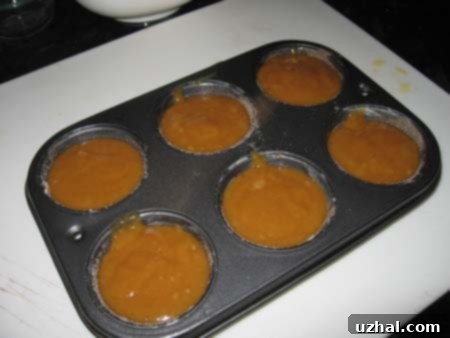
- Fill the Muffin Cups Evenly: Using a ⅓ cup measuring cup, carefully scoop the prepared batter into the sugared muffin cups, dividing it as evenly as possible among the six wells. The cups should be fairly full, but not overflowing, to ensure a good cake structure and plenty of molten center.
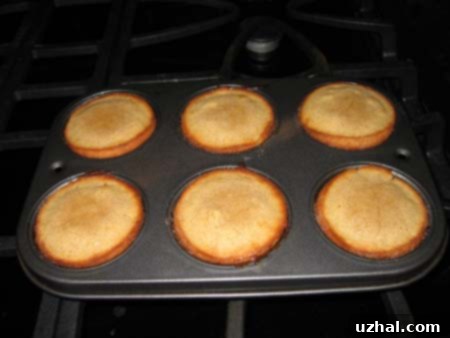
- Bake to Molten Perfection: Place the muffin pan into your preheated oven and bake for precisely 7-9 minutes. The exact baking time is crucial and can vary slightly depending on the calibration of your oven, so watch them very closely. The cakes are done when the tops appear just set and the edges are firm to the touch, but the centers still look visibly soft and slightly jiggly when the pan is gently nudged. A little “lava” might even peek through the top – this is a perfect sign! Do not, under any circumstances, overcook the cakes if you desire that coveted molten center.
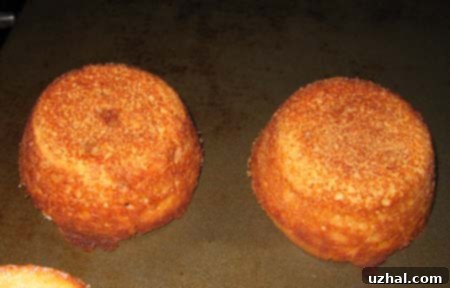
- Cool Briefly and Invert Carefully: Immediately remove the muffin pan from the oven. While the cakes are still warm (but not scalding hot), place a flat cookie sheet firmly over the top of the muffin pan. Grasping both the cookie sheet and the muffin pan securely with oven mitts, carefully but confidently invert the pan so that the cakes release directly onto the tray. Allow them to rest for just a minute or two on the tray before proceeding.
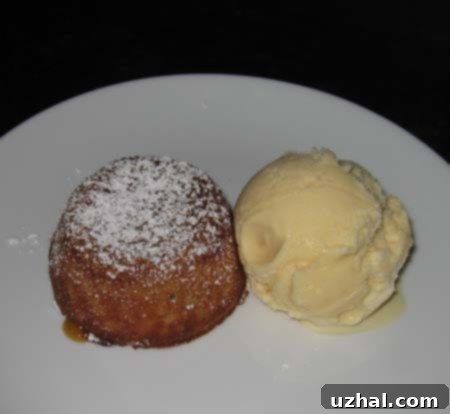
- Dust and Prepare for Serving: Lightly sift confectioners’ sugar over the warm lava cakes using a fine-mesh sieve or a small sifter. This creates a beautiful, elegant “dusty” finish. Gently shake off any excess sugar. Using a flat spatula, carefully transfer each sugar-dusted lava cake to an individual dessert plate. Their delicate nature requires gentle handling.
- Garnish and Enjoy Your Masterpiece: Place a small, generous scoop of good quality vanilla ice cream next to each lava cake. The cold creaminess provides a delightful contrast to the warm, molten cake. For an added touch of elegance and freshness, include a fresh mint sprig. If desired, drizzle with chocolate syrup for an extra decadent finish. Serve these incredible Peanut Butter Molten Lava Cakes immediately and prepare for rave reviews as your guests cut into these incredible, gooey treats!
Pro Tips for Lava Cake Success
Even with a perfect recipe, a few extra insider tips can make all the difference between a good lava cake and an extraordinary one that becomes a staple in your dessert repertoire:
- Preheating is Absolutely Crucial: Ensure your oven is fully preheated to the specified 450°F (232°C) temperature before you put the cakes in. High heat is paramount for the cake’s exterior to set quickly, forming a stable crust, while the interior remains wonderfully molten. If the oven isn’t hot enough, the cakes will bake slower and likely overcook the center.
- Resist the Urge to Peek Too Early: We know it’s tempting, but frequently opening the oven door can cause the internal temperature to drop significantly, which can negatively affect the baking process and the final texture of your cakes. Trust the process and your timer!
- How to Test for Doneness (The Jiggle Test): If you’re unsure whether your lava cakes are ready, gently tap the side of a muffin cup or the pan itself. The edges of the cakes should feel firm and set, but the center should still show a noticeable, delicate jiggle. If it doesn’t jiggle at all, it’s a strong indicator that the cake is likely overcooked, and your molten center might be gone.
- Greasing and Sugaring are Paramount: The thorough greasing of the muffin cups, followed by the cinnamon-sugar coating, is your absolute first line of defense against sticking. These layers not only add flavor and texture but also create a non-stick barrier that helps the delicate cakes release cleanly. Don’t skimp on this step!
- Serve Immediately for Best Results: Molten lava cakes are truly at their peak when enjoyed straight out of the oven. This allows the molten center to be at its most liquid, warm, and flowing, creating that signature “lava” effect that makes them so special. As they cool, the center will naturally begin to set.
Creative Variations and Serving Suggestions
While the classic presentation with vanilla ice cream and a dusting of confectioners’ sugar is undeniably delightful, feel free to unleash your creativity and experiment with these scrumptious variations and serving ideas:
- Chocolate Peanut Butter Swirl: For the ultimate indulgence, swirl a tablespoon of melted dark or milk chocolate chips into the peanut butter batter just before baking. This will create a beautiful marble effect and an even richer flavor profile.
- Nutty Crunch Addition: Enhance the texture by adding a sprinkle of finely chopped roasted peanuts or candied pecans directly into the batter or sprinkling them generously on top of the cakes before serving.
- Salted Caramel Drizzle: A luscious drizzle of homemade or high-quality store-bought salted caramel sauce would be an absolutely incredible and complementary addition to the rich peanut butter flavor.
- Explore Different Ice Cream Flavors: Don’t limit yourself to vanilla! Experiment with other ice cream flavors like chocolate, coffee, strawberry, or even banana for unique and exciting pairings that can elevate the dessert experience.
- Fresh Fruit for Brightness: A few fresh raspberries, sliced strawberries, or thinly sliced bananas can add a welcome touch of freshness, a pop of color, and a slight tanginess that beautifully cuts through the richness of the lava cake.
- Dollop of Whipped Cream: A generous dollop of freshly whipped cream, perhaps lightly sweetened with a hint of vanilla, is always a simple yet elegant and welcome topping.
- Peanut Butter Drizzle: For the true peanut butter aficionado, warm up a little extra creamy peanut butter and drizzle it over the top for an intensified flavor.
Storage and Reheating
Ideally, these magnificent molten lava cakes are made and served fresh for the most spectacular and delicious experience. The molten center is truly best right out of the oven. However, if you find yourself with the rare occurrence of leftovers (it happens!), here’s how to handle them to maximize their enjoyment:
- Storage: Allow any leftover cakes to cool completely to room temperature. Once cooled, transfer them to an airtight container. They can be stored at room temperature for up to 1 day, or in the refrigerator for up to 3 days. Please be aware that the characteristic molten center will almost certainly solidify upon cooling and chilling.
- Reheating: To attempt to revive the glorious “lava” effect, you can gently reheat the cakes. While they may not be as liquid as freshly baked, they will still be wonderfully warm and delicious.
- Microwave Method: Place an individual cake on a microwave-safe plate. Microwave on medium power for short bursts, typically 15-30 seconds, or until the cake is warmed through and the center begins to soften. Be cautious not to overheat, as this will fully cook the interior.
- Oven Method: Preheat your oven to a moderate 350°F (175°C). Place the cakes on a baking sheet and heat for approximately 5-7 minutes, or until they are warmed through. This method provides a more even reheat but is generally less effective at fully restoring a liquid molten center compared to the fresh bake.
Frequently Asked Questions (FAQs) About Peanut Butter Lava Cakes
- Can I prepare the batter ahead of time?
- Yes, absolutely! This is a great time-saving trick. You can prepare the batter completely, cover it tightly with plastic wrap, and refrigerate it for up to 24 hours. When you’re ready to bake, let the batter sit at room temperature for about 15-20 minutes while your oven preheats. Then, proceed with filling the cups and baking as directed. You might find you need to add an extra minute or two to the baking time if the batter is very cold.
- What if my lava cakes stick to the muffin pan?
- This common issue is almost always due to insufficient greasing or not enough cinnamon-sugar coating. Ensure you thoroughly butter the muffin cups, getting into every crevice, and coat them extremely well with the cinnamon-sugar mixture. You can also use a non-stick cooking spray in addition to butter for extra assurance. Additionally, inverting them while they are still warm (but not scorching hot) is crucial for a clean release.
- My lava cakes didn’t have a molten center. What went wrong?
- The most common and almost exclusive culprit for a lack of molten center is over-baking. The delicate balance for lava cakes is achieving baked edges with a wonderfully jiggly, intentionally undercooked center. Since every oven can vary, start checking your cakes at the lower end of the baking time (around 7 minutes) and carefully observe for just-set tops and firm edges, while the center still moves.
- Can I make these in ramekins instead of a muffin pan?
- Absolutely! Using individual ramekins is a classic way to prepare lava cakes. If you’re using standard 4-ounce ramekins, you may need to adjust the baking time slightly. Because ramekins are typically thicker and retain heat differently, you might need to increase the baking time by 2-4 minutes compared to muffin cups. Just like with the muffin pan, ensure you grease and sugar them thoroughly.
- Is it okay if some “lava” leaks out during baking?
- Yes, it’s perfectly normal and actually a good sign! Sometimes a little bit of the molten center will bubble up or seep out a bit from the top or sides of the cake during baking, especially if the cups are very full. This indicates that the center is indeed liquid and developing beautifully, promising a fantastic molten flow upon cutting.
And now, for a little inspiration! Believe it or not, I found myself baking another batch of these incredible peanut butter lava cakes shortly after returning from a trip to Chicago. The allure of that warm, gooey center is simply too strong to resist! Here are some visual glimpses of the baking process, capturing the journey from raw ingredients and batter to beautifully baked, molten perfection. These images illustrate key stages, helping you visualize the steps to your own dessert triumph.
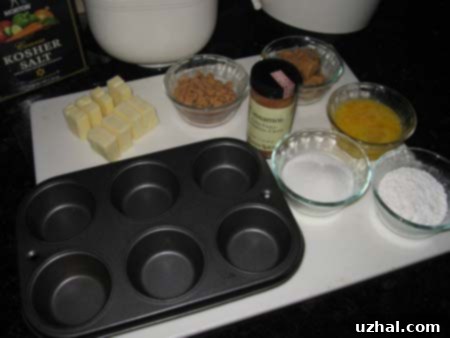
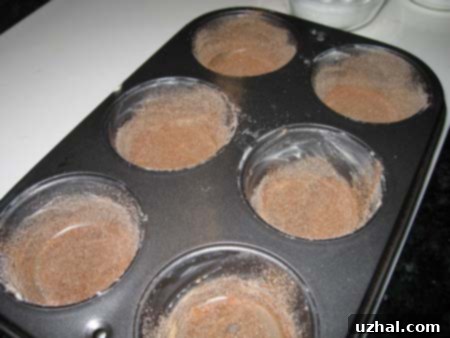
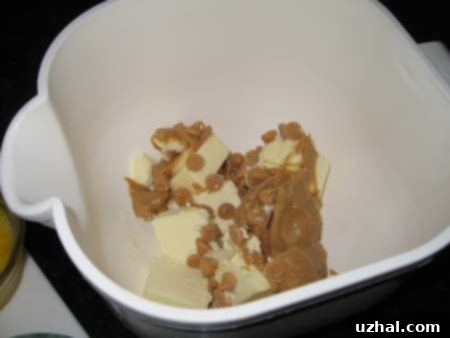
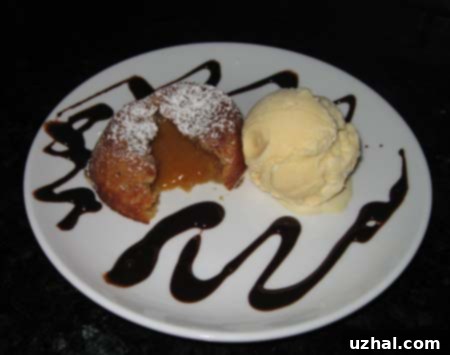
We sincerely hope you enjoy making and, more importantly, devouring these incredible Peanut Butter Molten Lava Cakes. They are truly a treat that combines the comforting familiarity of homemade baking with the exciting sophistication of a gourmet dessert. Perfect for satisfying those intense peanut butter cravings or impressing guests with minimal effort, this recipe is sure to become a cherished addition to your recipe collection. Happy baking and enjoy every decadent, molten bite!
