The Ultimate Guide to Irresistible Baked Double Chocolate Cake Doughnuts
Embarking on the quest for the ultimate baked double chocolate cake doughnut recipe has been a delicious journey, and after much experimentation, I can confidently say this particular recipe stands out as the absolute best – or at least the most practical and consistently rewarding. It’s a true gem for any home baker, offering a straightforward approach without an overwhelming list of obscure ingredients. What truly sets this recipe apart is its remarkable ability to produce beautifully rounded doughnuts with a perfect cake-like texture, making every bite a delightful experience. These aren’t just any chocolate doughnuts; they are a celebration of rich, deep chocolate flavor, elevated by a wonderfully moist crumb and a melt-in-your-mouth tenderness that will have you reaching for more.

One of the beauties of home baking lies in the flexibility to adapt recipes to your pantry and preferences. While the original version of this stellar recipe traditionally called for dark brown sugar, my kitchen only had light brown sugar on hand. This simple substitution proved to be a delightful one, resulting in a slightly milder, yet equally satisfying sweetness. To further enhance the moistness and tender crumb that defines a perfect cake doughnut, I opted for a small, yet impactful, adjustment: replacing a portion of the melted butter with a tablespoon of vegetable oil. This clever trick ensures an exceptionally soft texture that truly melts in your mouth.
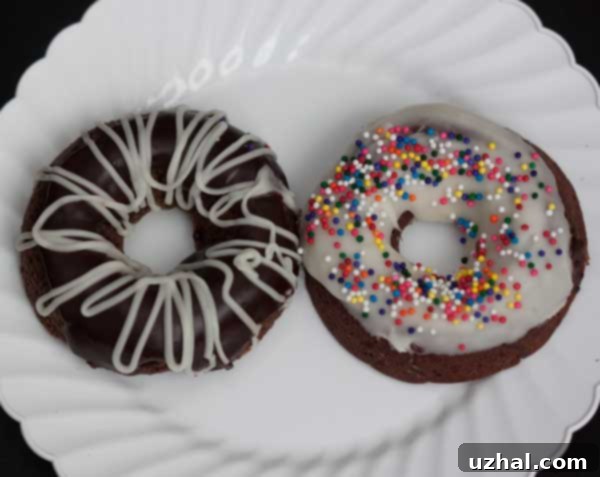
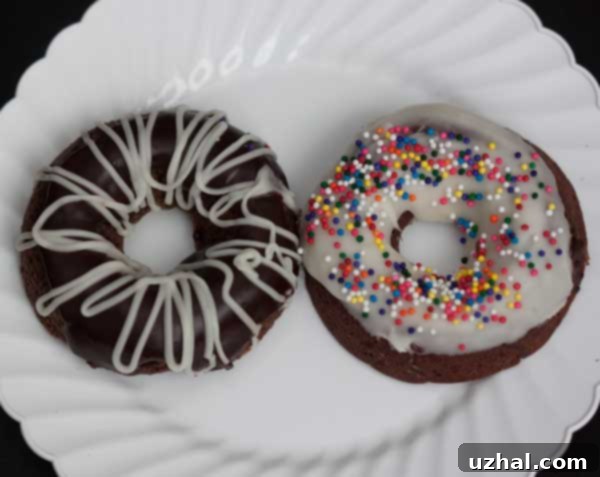
Beyond the doughnut itself, the glaze plays a crucial role in delivering that quintessential doughnut shop experience. For these chocolate wonders, I’ve experimented with a couple of fantastic options. The primary choice featured a rich, glossy glaze made with butter, decadent chocolate chips, and a touch of corn syrup, providing a beautiful sheen and an extra layer of chocolatey goodness. Additionally, a simple yet elegant basic vanilla glaze was prepared for those who appreciate a classic contrast. Each glaze offers a unique sensory experience, allowing for customization based on your craving.
Should you find yourself yearning for a chocolate glaze with a firmer, more set consistency—perhaps one that creates a satisfying crack when bitten—I highly recommend the powdered sugar-based chocolate glaze recipe that accompanies my Chocolate Pumpkin Doughnuts. That particular glaze sets up a bit more firmly, making it ideal if you plan to stack or transport your doughnuts. In contrast, the chocolate glaze featured here is designed to be on the softer, more yielding side, creating a wonderfully tender topping that complements the cake-like texture of the doughnuts perfectly. Experimenting with different glazes is part of the fun of doughnut making, offering endless possibilities to personalize your treats.
Freezing Chocolate Cake Doughnuts for Future Indulgence
One of the most practical aspects of this baked doughnut recipe, and indeed many of the baked goods I’ve been perfecting, is how incredibly well they freeze. This makes them an ideal make-ahead treat, perfect for busy mornings, unexpected guests, or simply having a delightful snack readily available. The process is straightforward and ensures your doughnuts retain their fresh taste and texture after thawing. To prepare them for freezing, I first arrange the glazed doughnuts in a single layer on a baking sheet or plate and place them in the freezer, uncovered, for approximately 10 to 15 minutes. This brief initial freeze allows the glaze to set firmly, preventing any stickiness or smudging when they are stored together. This crucial step ensures that each doughnut remains perfectly intact and beautifully glazed.
Once the glaze is set, the doughnuts are ready for longer-term storage. Transfer them carefully into a heavy-duty freezer bag, ensuring to press out as much air as possible before sealing. Alternatively, you can use an airtight container, layering the doughnuts with parchment paper to prevent sticking. Stored properly, these baked chocolate cake doughnuts will maintain their quality in the freezer for up to 1-2 months, although they rarely last that long in most households! When you’re ready to enjoy them, simply remove the desired number of doughnuts from the freezer. They thaw surprisingly quickly at room temperature, typically within 30-60 minutes, and will be just as moist and flavorful as when they were freshly baked. For an extra touch of warmth, you can gently microwave them for 10-15 seconds after thawing, but be careful not to overheat, as this can dry them out. The ability to freeze these delightful treats adds immense convenience, making homemade doughnuts a more accessible pleasure any day of the week.
Exploring Doughnut Varieties: Related Recipes and Inspiration
If you’ve enjoyed making these baked double chocolate cake doughnuts, you might be interested in exploring other delicious doughnut creations. The world of doughnuts is incredibly diverse, ranging from classic yeast-raised to tender cake varieties, each offering a unique texture and flavor profile. Below, you’ll find a curated list of related doughnut recipes that are worth trying, whether you prefer the pillowy softness of a yeast doughnut or the dense, cakey goodness of a baked one. These recipes showcase different techniques, flavor combinations, and glazing options, providing ample inspiration for your next baking adventure. Expand your doughnut repertoire and discover new favorites for every occasion.
- Instant Yeast Doughnuts with Glaze
- Classic Baked Cake Doughnuts
- Seasonal Chocolate Pumpkin Doughnuts
- Make Ahead Doughnuts with Glaze
- Unique Raised Potato Doughnuts
Recipe

Baked Chocolate Cake Doughnuts
Cookie Madness
Pin Recipe
Ingredients
- 1 cup all-purpose flour (4.5 oz, crucial for structure)
- ¼ cup unsweetened cocoa powder (for rich chocolate flavor)
- ½ teaspoon baking soda (leavening agent, works with buttermilk)
- ¼ teaspoon salt (enhances flavor and balances sweetness)
- ½ cup light brown sugar (packed, adds moisture and caramel notes)
- ½ cup buttermilk (for tenderness and to activate baking soda)
- 1 large egg (binds ingredients and adds richness)
- 1 teaspoon vanilla extract (enhances chocolate flavor)
- 2 tablespoons unsalted butter (melted and cooled, for flavor and richness)
- 1 tablespoon vegetable oil (for added moisture and tender crumb)
- 1 teaspoon vanilla (extra vanilla for the batter)
Chocolate Glaze
- 1 tablespoon butter (for richness and smoothness)
- 1 tablespoon corn syrup (adds shine and prevents crystallization)
- ¼ cup dark chocolate chips (1 ½ oz, for deep chocolate flavor)
- 1 teaspoon hot water or as needed (to achieve desired consistency)
Vanilla Glaze
- 1 tablespoon butter (for a rich, creamy base)
- ⅔ cup confectioners sugar (powdered sugar, for a smooth glaze)
- ¼ teaspoon vanilla (for classic vanilla aroma)
- Whole milk as needed (to thin to desired consistency)
Instructions
-
Begin by preheating your oven to 325 degrees F (160 degrees C). This ensures your oven is at the correct temperature for even baking. While the oven preheats, lightly spray a 6-count doughnut pan with cooking spray. For best results, use a non-stick spray and ensure all cavities are evenly coated to prevent sticking and ensure easy release of the doughnuts.
-
In a large mixing bowl, combine all the dry ingredients. Whisk together the all-purpose flour, unsweetened cocoa powder, baking soda, salt, and packed light brown sugar. Ensure these ingredients are thoroughly mixed to evenly distribute the leavening agents and flavorings. Breaking up any lumps in the brown sugar will help achieve a smooth batter.
-
In a separate, medium-sized bowl, prepare your wet ingredients. Whisk together the buttermilk, large egg, vanilla extract, melted and cooled unsalted butter, and vegetable oil. Ensure these are well combined and the egg is fully incorporated. The buttermilk adds a lovely tang and works with the baking soda to create a tender crumb.
-
Gently add the wet ingredient mixture to the dry ingredient mixture. Using a heavy-duty rubber spatula or a sturdy spoon, stir the batter until it is just well blended. Be careful not to overmix, as overmixing can develop the gluten in the flour too much, leading to tough doughnuts. A few small lumps are perfectly fine and often indicate a properly mixed batter.
-
Now it’s time to fill your doughnut pan. Spoon two generous tablespoons of batter into each of the 6 doughnut cavities. A piping bag with a wide tip can also make this process cleaner and more efficient. The batter should fill each cavity about two-thirds to three-quarters full, allowing room for the doughnuts to rise. You will have enough batter leftover to make 4 additional doughnuts, so repeat the baking process with a second batch after the first one is done.
-
Bake the doughnuts in the preheated oven for approximately 12 minutes. The exact baking time may vary slightly depending on your oven, so keep an eye on them. You’ll know they are perfectly baked when the cakes spring back gently when lightly touched in the center, and the edges are slightly firm.
-
Once baked, remove the doughnut pan from the oven and allow the doughnuts to cool in the pan for about 3 minutes. This brief cooling period helps them firm up slightly, making them easier to handle. After 3 minutes, carefully invert the pan onto a wire cooling rack to fully cool the doughnuts. Cooling on a rack ensures air circulates around them, preventing sogginess.
-
To prepare the rich Chocolate Glaze, combine the butter, corn syrup, and dark chocolate chips in a microwave-safe measuring cup or small bowl. Microwave at 50% power, stirring diligently every 30 seconds, until the mixture is completely smooth and luscious. If the glaze appears too thick, add hot water, one teaspoon at a time, until you achieve your desired drizzling consistency. You can then elegantly drizzle the warm glaze over the cooled doughnuts using a spoon, or for a more generous coating, pour the glaze into a shallow bowl and dip the top of each doughnut into it.
-
For a classic Vanilla Glaze, begin by melting the butter in a microwave-safe glass measuring cup. Once melted, add the confectioners’ sugar and stir vigorously until the mixture is fully combined and smooth. Gradually add whole milk, a teaspoon at a time, stirring after each addition, until the glaze reaches a smooth, pourable consistency that isn’t too runny. Finally, stir in the vanilla extract for that irresistible aroma. Similar to the chocolate glaze, you can spoon this vanilla glaze over your cooled doughnuts or transfer it to a bowl for dipping, ensuring an even and delightful coating. Allow the glaze to set slightly before serving for the best experience.
Notes
When measuring your all-purpose flour, accuracy is key to achieving the perfect cake-like texture. It is highly recommended to either weigh the flour using a kitchen scale for the most precise measurement or, if using measuring cups, make sure to aerate it well by whisking it first. Then, lightly spoon the flour into the measuring cup and level it off with a straight edge without packing it down. This prevents using too much flour, which can result in dry or dense doughnuts.
Ensure your buttermilk is at room temperature before mixing, as this helps it emulsify better with other ingredients and contributes to a smoother batter. If you don’t have buttermilk, you can easily make a substitute by adding one tablespoon of white vinegar or lemon juice to a liquid measuring cup, then filling the rest with regular milk (dairy or non-dairy) until it reaches the ½-cup mark. Let it sit for 5-10 minutes until it slightly curdles.
Don’t forget to cool your melted butter before adding it to the wet ingredients. Hot butter can start to cook the egg, leading to an undesirable texture. Allowing it to cool to room temperature ensures all ingredients combine harmoniously.
Whether you’re a seasoned baker or just starting your journey into the world of homemade treats, these baked double chocolate cake doughnuts are a recipe you’ll want to keep in your collection. Their straightforward nature, combined with the rich, indulgent flavor, makes them a perfect choice for any occasion, from a special breakfast to a delightful afternoon pick-me-up. Enjoy the process of creating these soft, chocolatey rings of joy, and relish every single bite!
