The Ultimate Classic Chocolate Layer Cake Recipe: Rich, Moist & Easy for Any Occasion
There’s nothing quite like a slice of perfectly moist, intensely chocolatey cake to bring joy to any gathering. What started as a festive creation for a Halloween party, affectionately dubbed “Halloween Chocolate Cake,” has truly blossomed into a beloved staple suitable for any celebration – or simply a delightful treat on an ordinary Tuesday. We’ve officially renamed it the Classic Chocolate Layer Cake to better reflect its universal appeal and timeless charm. Beyond the name change, we’ve meticulously added gram measurements for all ingredients, ensuring unparalleled precision and consistency, making this recipe even more accessible and foolproof for bakers of all skill levels. Prepare to indulge in a chocolate cake that will undoubtedly become your go-to recipe.

Unlocking the Perfect Flavor and Texture: Classic Chocolate Cake Recipe Notes & Tips
Achieving a truly exceptional chocolate cake hinges on a few key elements, and this recipe incorporates them to deliver a consistently delicious result. One of the most critical choices you’ll make is your cocoa powder. For this particular recipe, natural cocoa powder is highly recommended over Dutch-processed. Natural cocoa, like the widely available Hershey’s brand, is acidic, which reacts beautifully with the baking soda in the recipe to create a wonderfully tender crumb and a robust chocolate flavor. If you’re looking to elevate the experience, a premium natural cocoa powder such as Scharffen Berger will impart an even deeper, more complex chocolate essence. This subtle difference makes a significant impact on the final taste and texture of your cake.
When it comes to baking pans, this recipe is designed to be versatile. We initially developed it for two 9-inch round cake pans, resulting in a beautifully layered cake that strikes a perfect balance – it’s not overly tall or “stubby,” but boasts a substantial presence. This height is ideal for creating impressive celebratory cakes, like those popular Kit Kat cakes where you surround the sides with chocolate bars and fill the center with colorful M&Ms or other candies. The slightly shorter height of these layers makes them easy to handle and stack, providing a stable foundation for creative decorations.

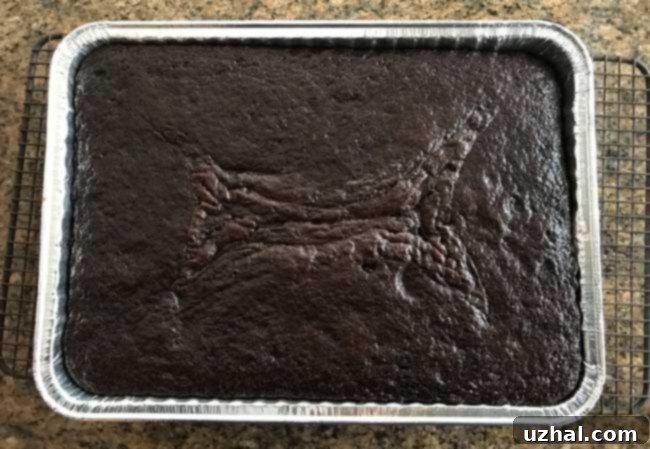
Should you be baking for a larger crowd or prefer a more casual presentation, this Classic Chocolate Layer Cake recipe easily adapts into a delightful sheet cake. To transform it into a 9×13 inch cake, simply follow the recipe instructions as written, then bake it in a single 9×13 inch pan. The baking time will adjust slightly; expect it to take approximately 50 minutes at 300°F. The lower baking temperature is key to ensuring even baking throughout the larger surface area, preventing dry edges while keeping the center perfectly moist. This adaptability makes it a fantastic recipe for potlucks, family dinners, or any occasion where you need a crowd-pleasing dessert that’s easy to slice and serve.
Beyond the pan size and cocoa choice, a few general tips will ensure your chocolate cake turns out perfectly every time. Always ensure your ingredients are at room temperature, especially eggs and buttermilk, as this helps them emulsify properly and creates a smoother batter. Do not overmix the batter once the wet and dry ingredients are combined; overmixing develops gluten, leading to a tough cake. Mix just until combined for a tender, moist crumb. Finally, trust the toothpick test – insert it into the center of the cake, and if it comes out clean, your cake is done. These small details contribute significantly to the exceptional quality of this classic chocolate cake.
Why This Classic Chocolate Cake Stands Out
What sets this Classic Chocolate Layer Cake apart from others? It’s the perfect harmony of rich, deep chocolate flavor and an incredibly moist, tender crumb, achieved through a thoughtful combination of ingredients and techniques. The use of hot brewed coffee, for instance, doesn’t make the cake taste like coffee; instead, it dramatically enhances and deepens the chocolate flavor, making it more intense and complex. The addition of buttermilk contributes to the cake’s signature moistness and fine texture, reacting with the baking soda to create a light and airy structure. The generous amount of natural cocoa powder ensures that every bite is bursting with authentic chocolate goodness, while the sour cream frosting adds a delightful tang that beautifully balances the sweetness of the cake, creating a truly irresistible dessert experience.
- Mini Halloween Oreo Cheesecakes
- Leftover Halloween Candy Cookies
- Chocolate Peanut Butter Squares
- Small Batch Halloween Monster Cookies
- Candy Bar Bars
The Full Recipe

Classic Chocolate Cake Recipe
Anna
Pin Recipe
Ingredients
For the Moist Cake Layers
- 2 ounces of semisweet chocolate, finely chopped (56 grams for rich chocolate depth)
- 1 cup hot brewed coffee (230 grams; essential for enhancing chocolate flavor without adding coffee taste)
- 2 cups granulated sugar (400 grams)
- 1 ⅔ cups all-purpose flour (210 grams, spooned and leveled for accuracy)
- 1 cup unsweetened natural cocoa powder (not Dutched) (84 grams; weighing is highly recommended for best results)
- 1 ½ teaspoons baking soda
- ½ teaspoon baking powder
- ¾ teaspoon salt
- 2 large eggs (at room temperature)
- ½ cup vegetable oil
- 1 cup buttermilk (230 grams, at room temperature for optimal mixing)
- ¾ teaspoon vanilla extract
For the Decadent Sour Cream Chocolate Frosting
- ½ cup unsalted butter (114 grams)
- 2 ounces unsweetened chocolate (56 grams, for intense chocolate flavor)
- ⅓ cup unsweetened natural cocoa powder (28 grams)
- 2 teaspoons vanilla extract
- 2 cups confectioners’ sugar (240 grams, sifted if lumpy)
- ⅔ cup sour cream at room temperature (for a smooth, tangy frosting)
Instructions
-
Prepare your pans: Begin by preheating your oven to 300°F (150°C). This lower temperature ensures a perfectly baked, moist cake. Thoroughly grease two 9×2 inch round cake pans. Line the bottoms of each pan with parchment paper circles. This step is crucial for preventing sticking and ensuring a clean release of your cake layers. Grease the parchment-lined pans again, then lightly dust them with all-purpose flour, tapping out any excess. This double-greasing and flouring technique guarantees easy removal of your delicate cake layers.
-
Melt chocolate: In a medium heatproof bowl, combine the finely chopped semisweet chocolate with the hot brewed coffee. Stir gently until the chocolate is completely melted and the mixture is smooth and uniform. Set this aside and allow it to cool slightly while you gather and prepare your other ingredients. This allows the chocolate mixture to cool enough so it doesn’t cook the eggs when combined.
-
Combine dry ingredients: In a large mixing bowl, thoroughly whisk together the granulated sugar, all-purpose flour, natural cocoa powder, baking soda, baking powder, and salt. Whisking ensures that the leavening agents and flavorings are evenly distributed, which is essential for consistent rising and flavor in your cake.
-
Prepare wet ingredients: In a separate, medium-sized mixing bowl, use an electric mixer to beat the large eggs for 2-3 minutes on medium-high speed. Continue beating until the eggs become light in color (lemon-colored) and fluffy. With the mixer still running on low speed, very gradually add the vegetable oil, buttermilk, and vanilla extract. Once these are incorporated, gently stir in the cooled melted chocolate and coffee mixture until just combined.
-
Combine wet and dry: Pour the wet egg mixture into the large bowl containing the dry flour mixture. Begin beating on a low to medium speed, just until the ingredients are blended and no streaks of dry flour remain. Be extremely careful not to overbeat the batter, as overmixing can develop the gluten in the flour, resulting in a tough, dense cake.
-
Ensure thorough mixing: As you mix, regularly use a heavy-duty rubber scraper or spatula to scrape down the sides and bottom of the mixing bowl. This ensures that all ingredients are fully incorporated and prevents any pockets of unmixed flour from forming, guaranteeing a uniform batter and a perfectly textured cake.
-
Bake the cake layers: Evenly divide the prepared cake batter between your two greased and floured 9-inch round pans. Place the pans in the middle rack of your preheated 300°F (150°C) oven. Bake for approximately 50 minutes, or until a wooden skewer or toothpick inserted into the center of the cakes comes out clean, with no wet batter clinging to it. Baking at a lower temperature for a longer time helps create a moister crumb.
-
Cooling process (initial): Once baked, remove the pans from the oven and immediately place them on a wire rack. Allow the cake layers to cool completely in their pans. This initial cooling helps the cakes firm up, preventing them from breaking when inverted. Rushing this step can lead to cracked or crumbly cakes.
-
Final cooling: After the cakes have cooled significantly in their pans (usually about 15-20 minutes), carefully run a thin knife around the edges to loosen them. Gently invert the cake layers onto clean wire racks. Carefully peel off the parchment paper from the bottoms. Allow the cake layers to cool completely to room temperature before attempting to frost them. Frosting warm cakes will cause the frosting to melt and slide off.
-
Prepare the frosting base: To begin preparing the luscious sour cream chocolate frosting, combine the unsalted butter and unsweetened chocolate in a small saucepan. Place the saucepan over very low heat, stirring constantly, until both the butter and chocolate are completely melted and the mixture is smooth and glossy. Be careful not to scorch the chocolate.
-
Finish the frosting: Transfer the melted chocolate and butter mixture to a large mixing bowl. Whisk in the unsweetened natural cocoa powder and vanilla extract until well combined. Next, gradually whisk in 1 cup of the confectioners’ sugar, followed by half of the room-temperature sour cream. Continue by whisking in the remaining 1 cup of confectioners’ sugar. Finally, gradually whisk in enough of the remaining sour cream until you achieve a smooth, spreadable frosting consistency. You might find you use all the remaining sour cream for the perfect texture. The sour cream provides a wonderful tang that cuts through the richness of the chocolate.
Serving Suggestions & Creative Decorating
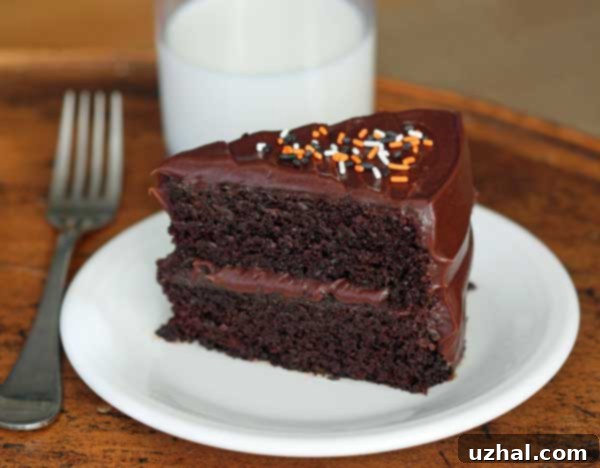
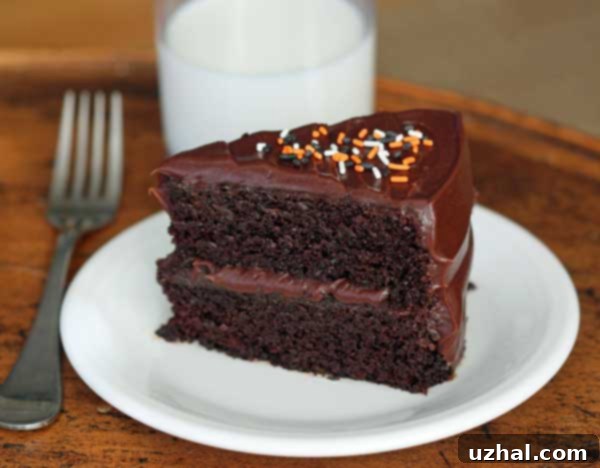
Once your Classic Chocolate Layer Cake is beautifully frosted, the possibilities for serving and decorating are endless! For a simple yet elegant presentation, dust the top with a fine layer of extra cocoa powder or confectioners’ sugar. Fresh berries, such as raspberries or strawberries, provide a lovely contrast in color and a burst of fresh flavor. For a more festive touch, colorful sprinkles (like the Halloween ones pictured), chocolate shavings, or even a drizzle of homemade caramel sauce can transform your cake. Serve slices with a dollop of whipped cream or a scoop of vanilla bean ice cream for an extra indulgent treat. This cake pairs wonderfully with a cup of strong coffee or a glass of cold milk.
Storage Tips for Optimal Freshness
To keep your Classic Chocolate Layer Cake tasting its best, proper storage is key. If your cake is unfrosted, wrap individual layers tightly in plastic wrap and store them at room temperature for up to 2 days, or in the refrigerator for up to 5 days. For longer storage, unfrosted layers can be frozen for up to 2 months; simply thaw them in the refrigerator overnight before frosting. Once frosted, store the cake in an airtight container at room temperature for up to 2-3 days. If your kitchen is particularly warm, or if your frosting contains dairy that requires refrigeration, it’s best to store the frosted cake in the refrigerator. Always bring refrigerated cake to room temperature for about an hour before serving for the best flavor and texture.
Troubleshooting Common Baking Challenges
Even seasoned bakers encounter hiccups. If your cake turns out dry, it might be due to overbaking or insufficient liquid. Always rely on the toothpick test and avoid baking longer than necessary. If your cake sinks in the middle, it could be underbaked, or you might have opened the oven door too early, causing a sudden temperature drop. Ensure your baking powder and soda are fresh. Lumpy frosting? Make sure your confectioners’ sugar is sifted and that your butter and sour cream are at room temperature to ensure smooth emulsification. With practice, you’ll master this classic recipe!
