Delicious & Easy Ice Cream Cone Cupcakes: The Perfect Party Treat (No Eggs!)
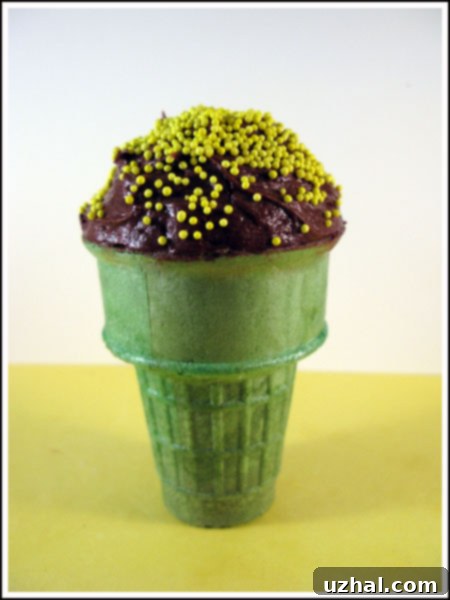
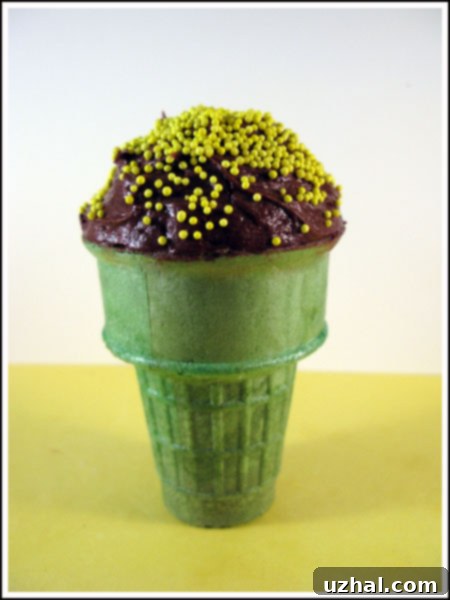
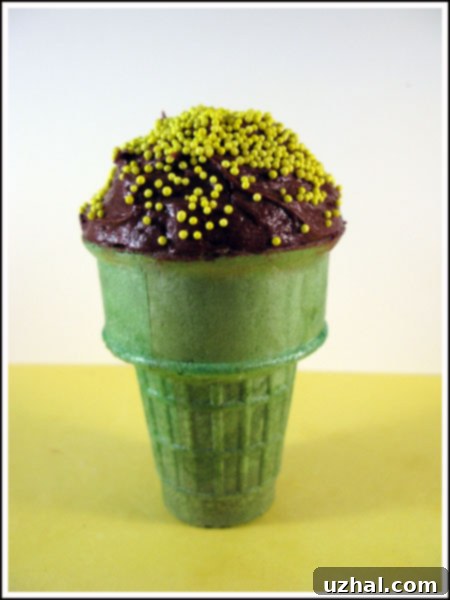
As the school year winds down and summer approaches, the excitement of birthdays often brings with it the joy of sharing treats with classmates. There’s something truly magical about a child bringing homemade cupcakes to school, a gesture that brightens everyone’s day. While all cupcakes are a welcome sight, there’s one particular kind that always held a special place in my heart: the whimsical ice cream cone cupcake. These delightful confections combine the fun of a classic ice cream cone with the comfort of a moist, fluffy cupcake, making them an instant hit for any occasion.
With Fuzz’s summer birthday just around the corner, her teacher gave the green light for bringing cupcakes to school. This presented the perfect opportunity to revisit a beloved classic. I hadn’t made these charmers in a while, so I decided to whip up a test batch to ensure they were just right. The results were fantastic, proving that some recipes are timeless and universally loved. Not only are they incredibly fun to look at, but they’re also surprisingly simple to make, especially with a few clever tricks up your sleeve.
Why Ice Cream Cone Cupcakes Are the Ultimate Kid-Friendly Treat
Ice cream cone cupcakes aren’t just a dessert; they’re an experience. Imagine the delight on a child’s face when they’re handed a cupcake that looks like an ice cream cone but requires no bowl or spoon – just pure, unadulterated eating fun! This unique presentation makes them ideal for school parties, birthday celebrations, picnics, or any event where easy-to-handle, mess-free treats are a must. They eliminate the need for extra plates and cutlery, simplifying cleanup and allowing guests to enjoy their sweet treat on the go.
Beyond their practicality, cone cupcakes offer a wonderful blend of textures. The slightly crunchy cone provides a delightful contrast to the soft, tender cake inside and the creamy frosting on top. They evoke a sense of nostalgia for classic ice cream parlors while offering a fresh, modern twist. This recipe is particularly special because it features an easy, egg-free chocolate cake batter, making it a great option for those with egg sensitivities or when you simply don’t have eggs on hand. The simplicity of the ingredients and the straightforward baking process ensure that even novice bakers can achieve impressive results.
The Ingenious Marshmallow Frosting Trick for Perfect Peaks
One of the challenges with frosting cone cupcakes is achieving that iconic, generous swirl of “ice cream” without piling on an excessive amount of rich icing. I’ve discovered a brilliant trick that not only solves this problem but also adds an extra layer of deliciousness and visual appeal: the marshmallow build-up. Instead of solely relying on frosting for height, I use frozen mini marshmallows as a structural base.
Here’s how it works: after your cupcakes have cooled completely, you simply stack a few frozen mini marshmallows on top of the cake, securing them in place. Then, you mold the frosting around them. This technique creates a beautiful, lofty dome, mimicking a generous scoop of ice cream, without making the cupcake overly sweet or heavy. In my test batch, I was out of pastry bags and parchment paper, so I used a knife to mold the icing, and it worked wonderfully! The frozen marshmallows hold their shape, allowing you to sculpt the frosting with ease and create a smooth, appealing finish.
For an even more dramatic effect, I plan to buy some giant marshmallows for future batches. Sticking one large marshmallow on top of each cone before frosting will provide an even more substantial and appealing base for the icing, making them look even more like a double scoop. This method is a game-changer for presentation and ensures that your ice cream cone cupcakes truly live up to their name. It’s a simple update that elevates the entire experience, and it’s a technique I now highly recommend for anyone looking to achieve that picture-perfect “ice cream” top.

Crafting the Perfect Egg-Free Chocolate Cake Base
The foundation of these fantastic cone cupcakes is a moist, flavorful chocolate cake, and what makes this particular recipe stand out is its egg-free nature. This is excellent news for anyone dealing with egg allergies or for those moments when your pantry is missing this common baking staple. The absence of eggs doesn’t compromise on taste or texture; in fact, this recipe delivers a wonderfully tender crumb that holds up beautifully in the cones.
The magic behind this egg-free delight lies in the combination of baking soda and apple cider vinegar. When these two ingredients react, they create carbon dioxide bubbles, which are essential for leavening the cake and giving it its light, airy texture. This chemical reaction effectively replaces the leavening power that eggs would typically provide, resulting in a cake that’s both moist and perfectly risen. Furthermore, the use of warm coffee in the batter isn’t just for moisture; it significantly enhances the chocolate flavor, making it richer and more profound without imparting a distinct coffee taste. If coffee isn’t available or preferred, warm water can be substituted, but for the ultimate chocolate experience, coffee is highly recommended.
Essential Tips for Baking Flawless Cone Cupcakes
Baking in ice cream cones can be a little different from traditional cupcake liners, but with a few simple tips, you’ll achieve perfect results every time:
- Preventing Leaks: While optional, wrapping a small square of aluminum foil around the base of each flat-bottomed ice cream cone can help prevent any batter leakage during baking. This creates a secure little cup for your cone, ensuring no precious batter is lost.
- Choosing the Right Cones: Flat-bottomed cones are generally easier to work with as they stand upright on their own in the muffin tin. If you only have pointed cones, you can try to prop them up carefully, but flat-bottomed ones are less hassle.
- Filling Them Just Right: Resist the urge to overfill the cones. Filling them about two-thirds of the way full is key. This allows the cake batter to rise without overflowing, creating a perfectly domed top that’s ready for frosting.
- Monitoring Baking Time: Ovens can vary, so keep a close eye on your cupcakes. They typically bake for about 20 minutes at 350°F (176°C). You can test for doneness by inserting a toothpick into the center of a cake; if it comes out clean, they’re ready.
- Cooling Completely: Ensure your cone cupcakes are completely cool before you attempt to frost them. Warm cakes will melt the frosting, leading to a runny mess. Patience is a virtue here!
Creative Variations and Serving Ideas
Once you’ve mastered the basic ice cream cone cupcake, the possibilities for customization are endless. Here are a few ideas to spark your creativity:
- Flavor Swaps: While chocolate is a classic, you can experiment with other cake flavors. A vanilla cake base with a colorful frosting, or a lemon-flavored cake for a zesty treat, could be wonderful.
- Frosting Adventures: Don’t limit yourself to chocolate frosting. Vanilla buttercream, cream cheese frosting, or even a strawberry or mint-flavored icing would be delicious. Add food coloring to make them vibrant and fun!
- Toppings Galore: This is where you can truly let your imagination run wild! Sprinkles (rainbow, chocolate, or themed), mini chocolate chips, chopped nuts, shredded coconut, or a drizzle of caramel or chocolate sauce can elevate your cupcakes. Don’t forget the classic maraschino cherry on top for that authentic ice cream sundae look.
- Miniature Versions: For smaller gatherings or as part of a dessert bar, consider using mini ice cream cones and adjusting baking times accordingly.
- Gifting and Transport: These cupcakes make fantastic party favors. You can wrap each one individually in cellophane and tie it with a ribbon. When transporting, a cupcake carrier or a box with individual dividers will help keep them upright and pristine.
These ice cream cone cupcakes are more than just a dessert; they are a delightful way to celebrate and bring smiles. Whether it’s for a school birthday, a summer gathering, or just a fun baking project at home, they promise a unique and enjoyable experience for both the baker and the eater.
The Recipe: Classic Ice Cream Cone Cupcakes

Ice Cream Cone Cupcakes
Cookie Madness
Pin Recipe
Ingredients
- 1 ½ cups all purpose flour – 6.75 oz / 185 grams
- 1 cup granulated sugar 192 grams
- 1 teaspoon salt 5 ml
- 1 teaspoon baking soda 5 ml
- ⅓ cup unsweetened natural cocoa powder
- ½ cup vegetable oil 120 ml
- 1 ½ teaspoons vanilla extract 7 ml
- 1 tablespoon apple cider vinegar 15 ml
- 1 cup warm coffee or water (240 ml)
For the Frosting:
- 4 oz unsweetened chocolate
- ⅔ cup butter softened
- 1 ⅓ cups powdered sugar sifted
- 1 ½ teaspoons vanilla extract
- Milk as needed or coffee
Instructions
-
Preheat your oven to 350 degrees F (176 C). Prepare 18 flat-bottomed ice cream cones by wrapping a small square of aluminum foil around the base of each cone. This step is optional but highly recommended to prevent any potential leakage. Alternatively, you can simply line 18 muffin cups with paper liners if you prefer traditional cupcakes.
-
In a large mixing bowl, combine the dry ingredients: flour, sugar, baking soda, salt, and unsweetened cocoa powder. Stir them together until well blended. Create a small well in the center of the dry mixture. Pour in the wet ingredients: vegetable oil, vanilla extract, and apple cider vinegar into the well. Begin to stir the ingredients from the center outwards until just moistened. Then, gradually add the warm coffee (or water) to the batter, stirring until everything is well mixed. Don’t worry if the batter has a few small lumps; overmixing can make cakes tough. Carefully fill each cone (or muffin cup) about two-thirds of the way full with batter. Bake for approximately 20 minutes, or until a toothpick inserted into the center of a cake comes out clean. Let the cone cupcakes cool completely on a wire rack before frosting.
-
For the Frosting: Start by melting the unsweetened chocolate. You can do this in a microwave-safe bowl, heating it in short intervals and stirring until smooth, or in a bowl set over a pot of barely simmering water (double boiler method). Once melted, set the chocolate aside to cool slightly. In a separate bowl, cream together the softened butter and sifted powdered sugar until the mixture is light and fluffy. Beat in the vanilla extract, then gradually add the slightly cooled melted chocolate. Continue beating until the frosting is smooth and well combined. If the frosting is too thick, add milk or coffee a teaspoon at a time until it reaches your desired creamy consistency. Once ready, frost your completely cooled cone cupcakes using a knife or a pastry bag, preferably employing the marshmallow trick mentioned above for a perfect “ice cream” dome!
Conclusion: A Sweet Treat for Every Occasion
Ice cream cone cupcakes are truly a fantastic dessert that combines novelty, flavor, and convenience. From their nostalgic appeal for school parties to their simple, egg-free cake base and clever marshmallow frosting trick, they offer a delightful experience for everyone involved. They are incredibly versatile, allowing for endless customization with different flavors, frostings, and toppings, making them suitable for any theme or celebration. Whether you’re baking for a special birthday, a casual get-together, or simply because you want a fun treat, these cupcakes are sure to be a showstopper.
We encourage you to try this recipe and experience the joy of making these unique and charming desserts. Don’t be afraid to get creative with your toppings and decorations! Share your creations and tell us how your ice cream cone cupcakes turned out. Happy baking!
