Indulge in Homemade Peanut Butter Whoopie Pies: The Ultimate Recipe Guide
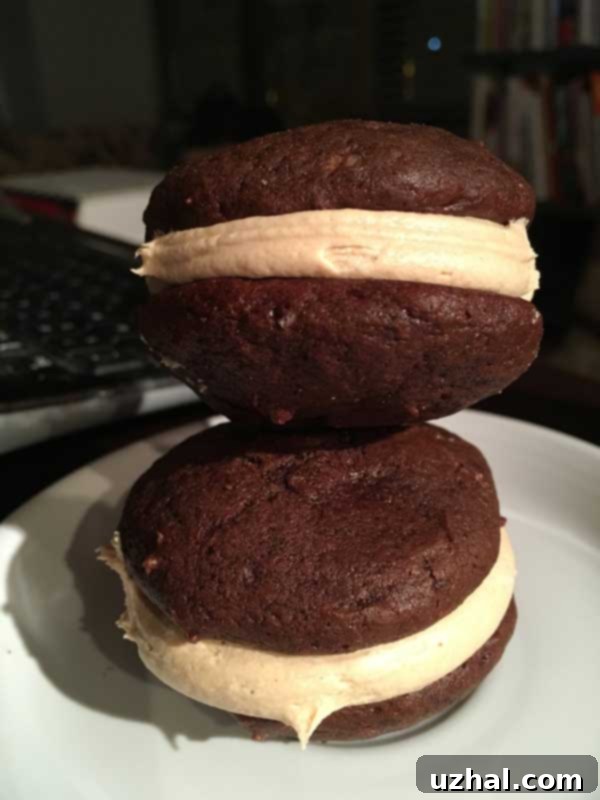
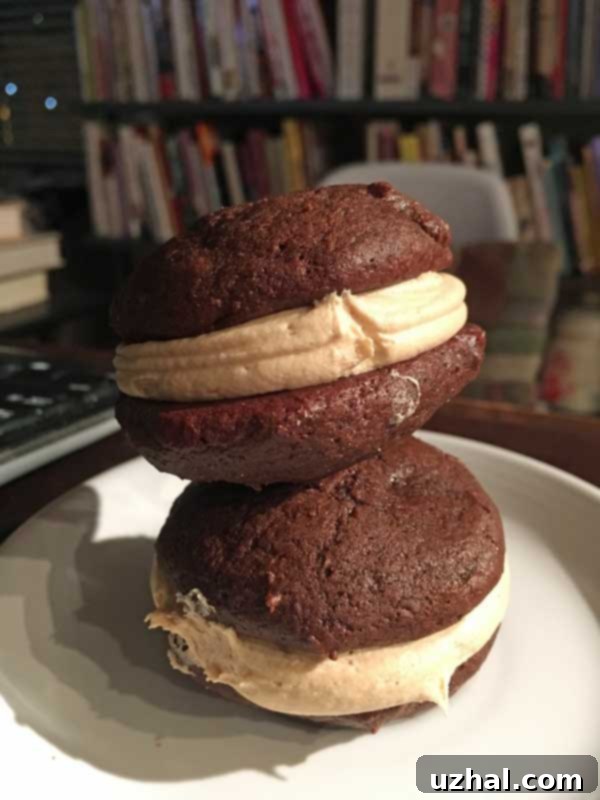
For years, my Chocolate Whoopie Pies have been a beloved classic, consistently receiving rave reviews and becoming a go-to recipe in my kitchen. There’s a certain comfort in sticking with what works, especially when it brings so much joy. However, the kitchen is also a place for culinary adventure, and this week, I decided to embark on a delightful experiment. The result? These incredibly satisfying Peanut Butter Whoopie Pies, a new favorite that perfectly marries the rich chocolate cookie base with a luscious peanut butter cream filling.
The Irresistible Allure of Peanut Butter Whoopie Pies
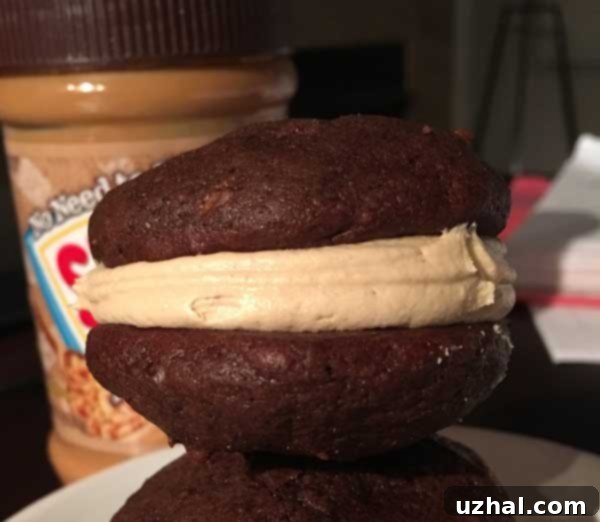
Whoopie pies are a cherished treat, often described as a cake-like cookie sandwich with a creamy, fluffy filling. They offer the best of both worlds: the chewiness of a cookie and the tender crumb of a cake. While the traditional chocolate with vanilla cream is undeniably delicious, introducing peanut butter takes this classic to a whole new level of indulgence. The rich, slightly salty notes of peanut butter perfectly complement the deep, sweet chocolate, creating a flavor combination that is universally loved and incredibly addictive. This recipe is designed to deliver a whoopie pie experience that is both familiar and excitingly new, perfect for any occasion from casual gatherings to special celebrations. Imagine the delight of biting into a soft chocolate shell, giving way to a velvety, sweet-and-salty peanut butter cloud – pure bliss!
Crafting the Perfect Whoopie Pie Cake Base: Proven Techniques
When it comes to whoopie pies, the “cake” or cookie part is just as crucial as the filling. Achieving that signature soft, slightly puffy, and deeply flavorful base requires careful attention to ingredients. My journey to perfecting these Peanut Butter Whoopie Pies involved some experimentation with the cookie component, ultimately leading me back to a tried-and-true method for optimal results. The original recipe for my chocolate whoopie pies calls for two key ingredients: tangy buttermilk and rich natural cocoa powder. During my initial tests for the peanut butter version, I tried a variation using Dutch-process cocoa powder and regular milk, hoping to simplify the process for those who might not always have buttermilk or natural cocoa on hand. While that version was certainly acceptable and produced a decent cookie, a side-by-side taste test revealed a clear winner: the buttermilk and natural cocoa combination.
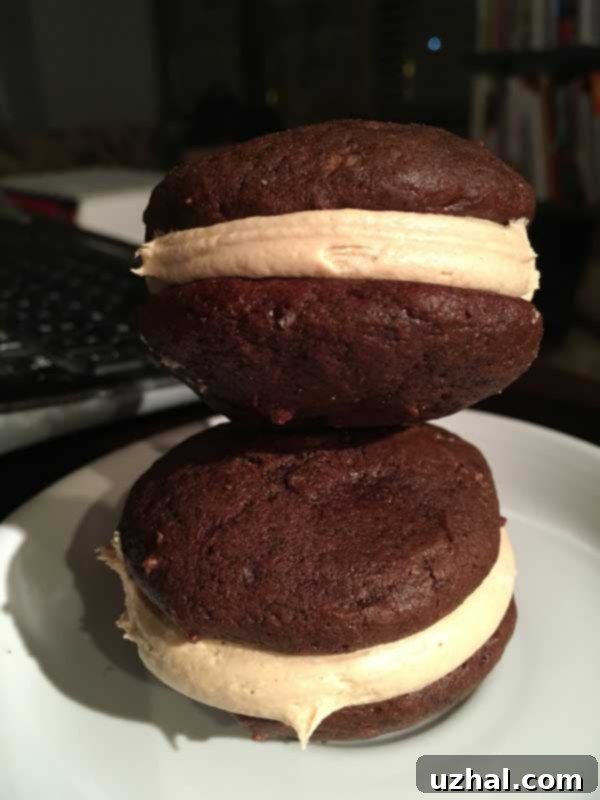
The reason for this preference is simple yet profound. Buttermilk, with its acidic properties, reacts beautifully with baking soda to create a tender, moist crumb and a subtle tang that enhances the chocolate flavor. Natural cocoa powder, which is acidic, also contributes to this chemical reaction, resulting in a deeper, more robust chocolate taste and a wonderfully airy texture. Dutch-process cocoa, being alkalized, behaves differently and doesn’t provide the same lift or flavor depth when paired with just baking soda, often requiring more baking powder for a similar effect. Therefore, for a truly exceptional whoopie pie base that is both puffy and intensely flavorful, I wholeheartedly recommend sticking with the natural cocoa powder and buttermilk. It’s a small detail that makes a significant difference in the final product, ensuring your whoopie pies have that classic, melt-in-your-mouth texture that makes them so beloved. This foundation sets the stage for the glorious peanut butter filling to shine.
The Star of the Show: Creamy Peanut Butter Marshmallow Filling
While the chocolate cookie halves provide the perfect foundation, the real magic in these Peanut Butter Whoopie Pies lies in their rich, decadent filling. This creamy concoction elevates the humble whoopie pie into an unforgettable dessert. The filling is a delightful blend of softened unsalted butter, creamy peanut butter, confectioners’ sugar, and a crucial secret ingredient: marshmallow cream. The marshmallow cream is what gives the filling its signature light, airy, and incredibly smooth texture, making it perfectly spreadable and utterly irresistible. It also provides a lovely sweetness and stability that complements the robust peanut butter flavor beautifully.
When preparing the filling, ensure your butter is properly softened. This will help it cream smoothly with the peanut butter and sugar, preventing any lumps and creating a uniformly velvety base. Once you’ve beaten these together until light and fluffy, fold in the vanilla extract and, most importantly, the marshmallow cream. The marshmallow cream not only adds a wonderful sweetness and a unique, springy texture but also helps the filling hold its shape, preventing it from oozing out of the whoopie pies, even at room temperature. Don’t be shy about tasting the filling as you go! This is your chance to adjust the peanut butter intensity to your liking. If you prefer a bolder, more pronounced peanut butter flavor, feel free to add a little extra. The perfect balance between the sweet chocolate cookies and the salty-sweet, cloud-like peanut butter filling is what makes these whoopie pies so extraordinary and keeps everyone coming back for more.
Mastering the Art of Filling: Piping for Perfection
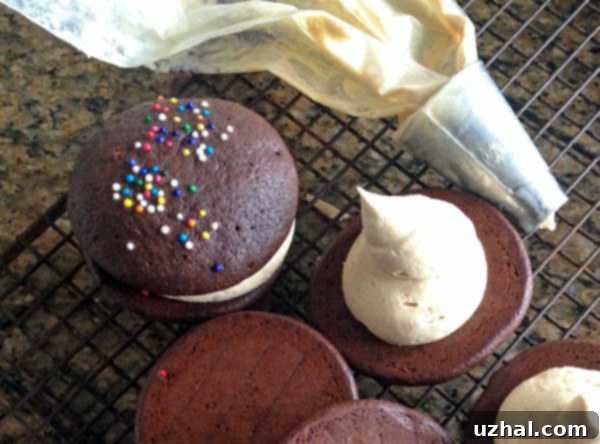
One of the most valuable lessons I’ve learned in whoopie pie making, particularly with this peanut butter version, is the immense benefit of piping the filling into the center of the cookies. While spreading the filling with a knife might seem quicker and less fussy, using a pastry bag offers significant advantages in both efficiency and neatness, instantly elevating the presentation of your homemade treats from rustic to refined. Once you try piping, you’ll wonder why you ever did it any other way – it truly transforms the assembly process!
For a clean, professional look and even distribution, I typically use a ½ inch round pastry tip. This size allows for a generous, even swirl of filling without making a mess or overflowing the cookie edges. It also ensures that each bite has the perfect cookie-to-filling ratio. However, don’t let the lack of a specific pastry tip deter you. A simple pastry bag with the corner snipped off, or even a sturdy, heavy-duty zipper-lock freezer bag with one corner carefully cut, works absolutely fine. The key is to create a small, consistent opening that allows for controlled dispensing of the creamy filling. This method ensures an even layer of filling, prevents unsightly bulges, and results in a more uniform and visually appealing whoopie pie. Plus, there’s a certain meditative satisfaction that comes from piping, adding a touch of professional flair to your home baking and making the final product truly Instagram-worthy.
Tips for Whoopie Pie Baking Success
To ensure your Peanut Butter Whoopie Pies turn out perfectly soft, moist, and delicious every single time, here are a few essential tips from my kitchen:
- Room Temperature Ingredients: This cannot be stressed enough! Always use room temperature butter, egg, and buttermilk for the cookie batter. Cold ingredients don’t emulsify properly, leading to a lumpy batter and inconsistent texture. Room temperature ingredients blend together smoothly, creating a consistent batter that bakes evenly and results in that signature tender, cake-like crumb.
- Accurate Measuring: Baking is often called a science, and for good reason! While cooking allows for more improvisation, baking thrives on precision. Use a kitchen scale for dry ingredients like flour and sugar for the most accurate results (weights are often provided in recipes for this reason), or at the very least, measure carefully with the spoon-and-level method for flour and cocoa powder to avoid dense cookies.
- Don’t Overmix the Batter: Once you add the dry ingredients to the wet, mix just until combined. Stop the mixer as soon as no dry streaks remain. Overmixing can develop the gluten in the flour, leading to tough, chewy whoopie pies instead of the desired soft, delicate, cake-like ones.
- Consistent Cookie Sizing: Whether you’re dropping spoonfuls or piping the batter, try to make your cookie halves as uniform in size as possible. This ensures they all bake at the same rate, preventing some from overbaking while others are still underdone. It also makes pairing them up for sandwiches much easier and creates a more aesthetically pleasing final product.
- Nonstick Baking Surface: Lining your baking sheets with nonstick foil or parchment paper is absolutely crucial. Whoopie pies can be delicate, and this simple step prevents sticking, ensures easy removal from the pan, and makes cleanup a breeze.
- Don’t Overbake: This is a common pitfall! Whoopie pies should be puffed, slightly cracked on top, and set to the touch, but still soft in the center. Overbaking, even by a minute or two, will dry them out and compromise their tender texture. Keep a close eye on them; 10-12 minutes is a typical bake time, but remember that ovens vary.
- Cool Completely Before Filling: Patience is a virtue, especially when it comes to whoopie pies. Allow the cookie halves to cool completely on a wire rack before attempting to fill them. If they are even slightly warm, the creamy peanut butter filling will melt, making assembly messy and potentially ruining the texture of the filling.
- Proper Storage: Store assembled whoopie pies in an airtight container at room temperature for up to 2-3 days to maintain their freshness and soft texture. For longer storage, they can be kept in the refrigerator for up to a week. They are also freezer-friendly for up to 2 months; simply thaw them at room temperature before serving.
Creative Variations and Serving Suggestions
While these Peanut Butter Whoopie Pies are undeniably divine as they are, don’t hesitate to get creative and put your own spin on them! For an extra layer of decadence and a beautiful, shiny finish, consider dipping half of the assembled whoopie pie in melted dark chocolate. This creates a stunning visual contrast and a delightful textural element. You could also sprinkle a few mini chocolate chips, finely chopped roasted peanuts, or even a pinch of sea salt over the filling before sandwiching the cookies for added texture and flavor complexity. For a playful twist within the cookie itself, try adding a pinch of cinnamon or a dash of espresso powder to the chocolate cookie batter to deepen its flavor and provide a subtle aromatic warmth.
These delightful treats are perfect for a wide range of occasions. They make excellent, eye-catching additions to a dessert platter for parties, a thoughtful and much-appreciated homemade gift for friends, neighbors, or family, or simply a comforting snack to enjoy with a tall glass of cold milk, a steaming cup of coffee, or a rich hot cocoa. Their portable nature and relatively sturdy structure also make them ideal for picnics, bake sales, school lunchbox surprises, or any event where individual desserts are a hit. No matter how or where you choose to enjoy them, these homemade Peanut Butter Whoopie Pies are sure to bring smiles and satisfy even the most ardent sweet tooth, solidifying their place as a new favorite in your dessert repertoire.
The Joy of Baking and Sharing
There’s an undeniable satisfaction that comes from creating something delicious from scratch, especially when it’s as universally loved as whoopie pies. The rich aroma of baking chocolate filling your kitchen, the rhythmic hum of the mixer as ingredients transform, and the eager anticipation of that first perfect bite all contribute to a truly rewarding and therapeutic experience. These Peanut Butter Whoopie Pies aren’t just a dessert; they’re a labor of love, a testament to the simple yet profound pleasures of homemade treats. Baking them is a process that engages the senses and brings a sense of accomplishment. But the joy doesn’t stop there. Sharing these delectable creations with loved ones is an even greater pleasure, watching their faces light up with each delightful bite. So gather your ingredients, follow this detailed guide, and prepare to create a batch of whoopie pies that will not only taste incredible but also become a cherished part of your baking repertoire, ready to be enjoyed and shared for years to come.
- Classic Chocolate Whoopie Pies
- Pumpkin Whoopie Pies (Version 1)
- Best Pumpkin Whoopie Pies (Version 2)
- Blueberry Spice Whoopie Pies
- Explore More Sandwich Cookies
Recipe

Peanut Butter Whoopie Pies
Anna
Pin Recipe
Ingredients
For the Chocolate Whoopie Pie Cookies:
- 1 ¾ cups all-purpose flour (220 grams)
- ½ teaspoon baking powder
- 1 ½ teaspoon baking soda
- ½ teaspoon salt
- ¾ cup unsweetened NATURAL style cocoa powder
- 8 tablespoons unsalted butter, softened (114 grams)
- 1 cup light brown sugar (200 grams)
- ¾ to 1 teaspoon vanilla extract
- 1 large egg, room temperature
- 1 cup buttermilk room temperature
For the Creamy Peanut Butter Filling:
- ½ cup unsalted butter softened
- ½ cup creamy peanut butter
- 1 cup confectioners’ sugar
- ½ of a 7 oz container marshmallow cream
- ½ teaspoon vanilla extract
Instructions
For the Chocolate Whoopie Pie Cookies:
-
Preheat your oven to 350 degrees F (175 degrees C). Line two large baking sheets with nonstick foil or parchment paper. This is essential for easy removal of the delicate whoopie pies.
-
In a medium bowl, thoroughly whisk together the all-purpose flour, baking powder, baking soda, salt, and unsweetened natural style cocoa powder. Ensure there are no lumps and the ingredients are well combined.
-
In a separate large bowl, using an electric mixer, beat the softened unsalted butter and light brown sugar together until the mixture is light, fluffy, and creamy. This can take 2-3 minutes. Beat in the vanilla extract until just combined. Add the large egg and continue to beat until the mixture is truly fluffy, scraping down the sides of the bowl frequently to ensure everything is incorporated.
-
Gradually add the flour mixture and the room temperature buttermilk to the butter mixture, alternating between the two. Begin and end with the flour mixture. Stir with a sturdy rubber spatula or heavy-duty scraper until the batter is smooth and thick, being careful not to overmix. Overmixing can lead to tough cookies.
-
For uniformly sized cookies, drop the batter by generously heaping tablespoons onto the prepared baking sheets, spacing them about 2 inches apart. For a neater and more professional look, transfer the batter to a pastry bag fitted with a ½-inch round tip, or a heavy-duty freezer bag with a corner snipped off. Pipe even gobs of batter onto the sheet.
-
Bake one sheet at a time in the preheated oven for approximately 10-12 minutes, or until the cookies are visibly puffed, slightly cracked on top, and set to the touch. Avoid overbaking. Let the baked cookies cool on the baking sheets for about five minutes to firm up before carefully transferring them to a wire rack to cool completely.
For the Creamy Peanut Butter Filling:
-
In a clean mixing bowl, using an electric mixer, beat the softened unsalted butter and creamy peanut butter together until the mixture is well combined and creamy. Gradually add the confectioners’ sugar, beating until smooth. Finally, beat in the vanilla extract and the marshmallow cream until the filling is light, fluffy, and smooth. Taste test the filling and, if desired, add a little more peanut butter for an extra intense flavor.
-
To assemble the whoopie pies, take one cooled chocolate cookie and spread a generous amount of filling onto its flat side. Top with another cooled cookie to create a sandwich. For the best presentation and ease, pipe the cream into the center of one cookie using a pastry bag; this ensures a neater, more even filling and a professional finish. Repeat with the remaining cookies and filling.
Notes
