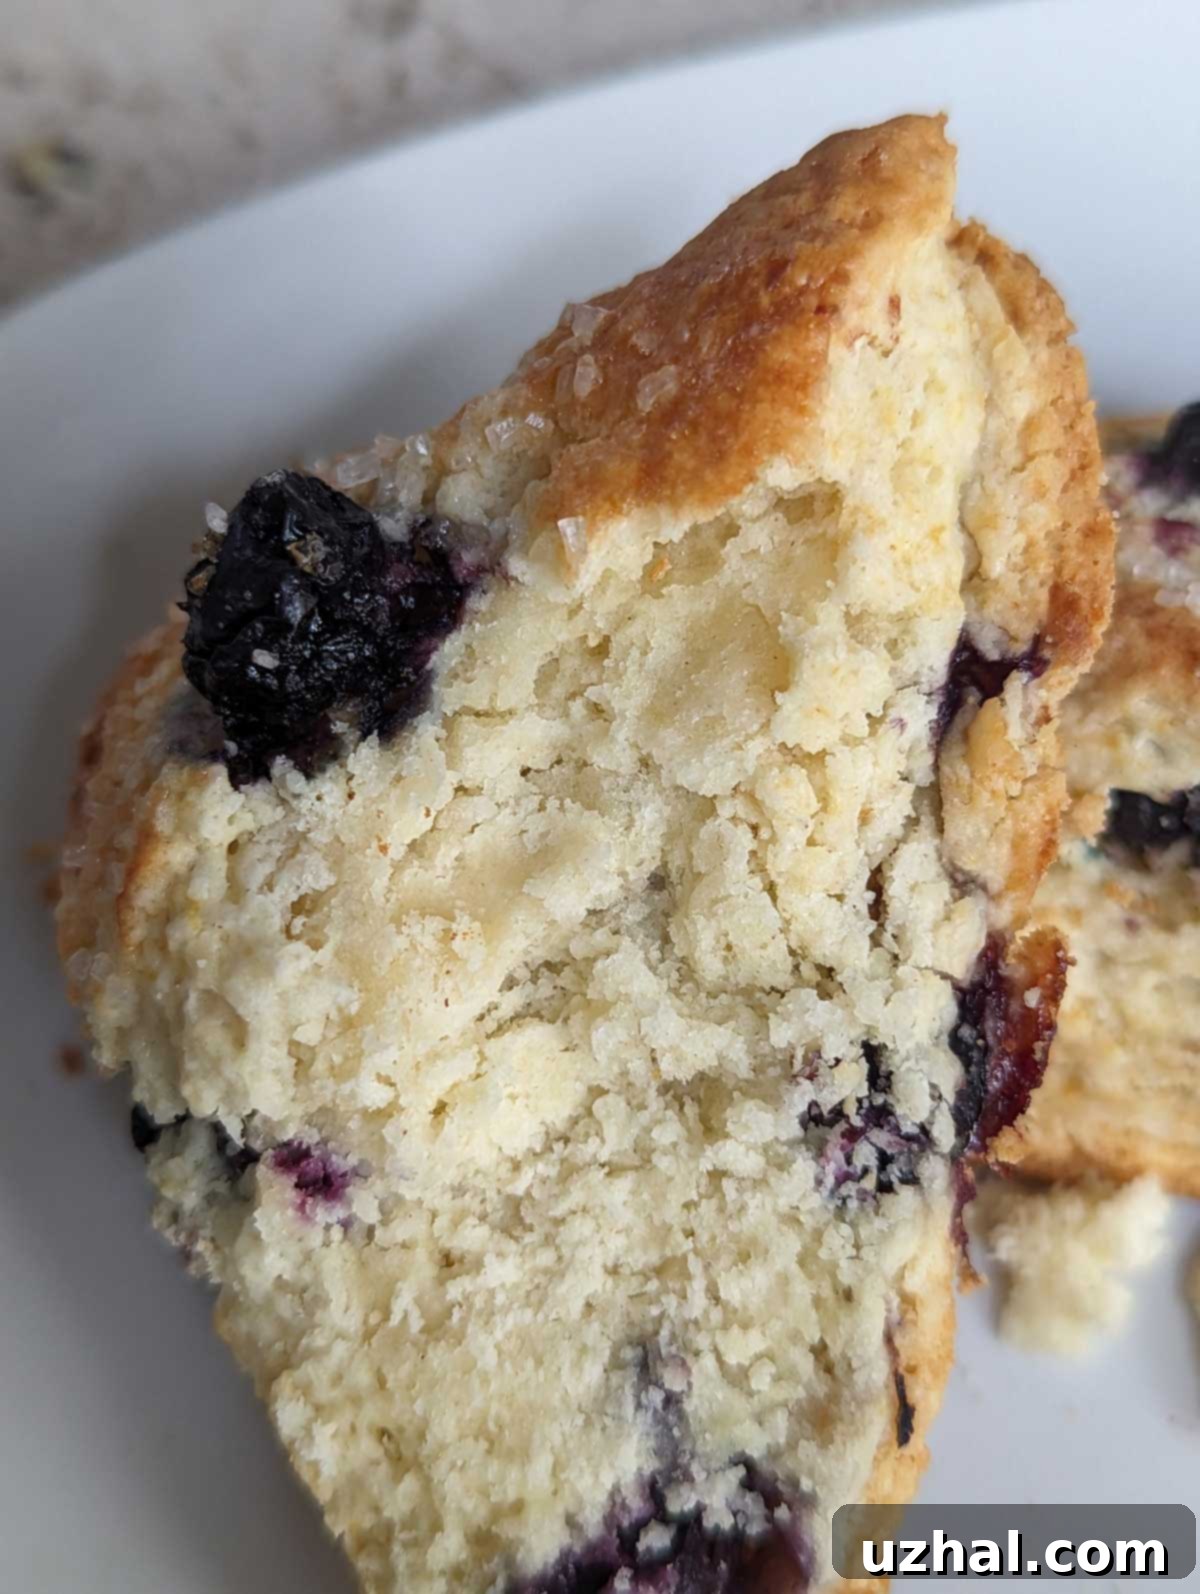
The Best Whipping Cream Scones: A Recipe for Fluffy, Flavorful, and Easy Homemade Perfection
Scones hold a special place in the heart of many bakers, and for good reason. They are the epitome of simple elegance, a comforting treat perfect for breakfast, brunch, or an afternoon tea. Over the years, I’ve experimented with countless scone recipes, always searching for that elusive combination of lightness, flakiness, and profound flavor. After extensive baking and tasting, I’ve finally distilled my collection down to the absolute cream of the crop, and this recipe for Basic Whipping Cream Scones is undoubtedly one of them. What sets these scones apart is a carefully balanced blend of both butter and heavy whipping cream, a combination that delivers a texture far lighter and more tender than most, coupled with a depth of flavor that cream-only scones simply can’t achieve. If you’re looking to master the art of homemade scones, start here. You’ll be rewarded with pastries that are rich, delicate, and utterly irresistible, a testament to the magic that happens when quality ingredients are brought together with a little baking wisdom.

Is Milk or Cream Better For Scones? Unlocking Superior Texture and Flavor
The choice between milk and cream is a common dilemma in scone baking, and while milk certainly has its place in many recipes, heavy whipping cream is, without a doubt, the superior choice for creating truly exceptional scones. Milk is perfectly acceptable for producing a decent scone, offering adequate moisture, but if your goal is a scone that transcends the ordinary—one that is remarkably richer, exquisitely flakier, and more akin to a delicate pastry than a hearty muffin—then heavy cream is your secret weapon. The higher fat content in whipping cream introduces a luxurious richness and moisture that milk cannot replicate. This recipe takes it a step further by incorporating both butter and cream. The cold butter creates steam pockets during baking, leading to those coveted flaky layers, while the heavy cream provides unparalleled moisture and tenderness, resulting in a scone that is both light and wonderfully flavorful. So, while milk might be okay, for an elevated scone experience that truly melts in your mouth, always opt for heavy cream.
Be the Boss of Your Scone Dough: Tips for Perfect Consistency
One of the most crucial lessons I learned in baking, particularly with biscuits and scones, is the importance of understanding and controlling your dough. Many novice bakers let the dough dictate terms, but to achieve consistently great results, you must learn to be its master. Think of the recipe’s measurements as a well-calibrated starting point, a reliable guide. However, dough consistency can be influenced by numerous factors beyond the recipe’s control, such as the specific flour’s absorbency, the ambient temperature of your kitchen, and even subtle variations in how ingredients are measured. For instance, if your dough feels excessively wet and sticky, don’t hesitate to add a small amount of extra flour, a tablespoon at a time, until it reaches a manageable, pliable state. Conversely, if the dough appears too dry, crumbly, or isn’t coming together, gently incorporate a bit more cream until it just hydrates sufficiently. While I’ve strived to provide precise measurements to minimize these adjustments, always trust your instincts and the feel of the dough. A slight tweak can make all the difference between a good scone and a truly great one.

How to Mix Scone Dough for Optimal Flakiness and Texture
The mixing process for scones is paramount to achieving their characteristic light and flaky texture. The key is to keep the butter as cold as possible and to avoid overworking the dough, which can lead to tough scones. There are a couple of effective methods for mixing scone dough:
Using a Food Processor: This is often considered the easiest and quickest method. Combine your dry ingredients (flour, sugar, baking powder, salt) in the food processor bowl. Add the cold, cubed butter and pulse it in short bursts. The goal is to break down the butter into pea-sized pieces, or even slightly smaller, and distribute it evenly throughout the flour. Be mindful not to over-process, as this can warm the butter and develop too much gluten. Once you have a coarse, sandy mixture with visible butter bits, transfer it to a large mixing bowl.
Mixing by Hand (No Food Processor? No Problem!): If you don’t have a food processor, fret not! Excellent scones can still be made by hand. Begin by combining the dry ingredients in a large mixing bowl. For the butter, you have a few options: you can grate the cold butter using a box grater directly into the flour mixture, which helps create small, uniform pieces. Alternatively, use a pastry cutter or two knives to cut the cold butter into the dry ingredients until it resembles coarse meal with some pea-sized chunks. Your fingers can also work in a pinch, but work quickly to prevent the butter from warming too much.
Once your flour and butter mixture is ready, whether from a food processor or by hand, whisk together the wet ingredients (egg, cream, vanilla extract) in a separate bowl. Then, pour this liquid mixture into the dry ingredients. Use a sturdy spatula or a large spoon to stir just until everything is moistened and starts to come together. Avoid vigorous mixing; a few dry streaks are perfectly fine. Since this particular recipe includes an egg, I find it slightly more straightforward to combine the whisked wet ingredients first, then add the dry mixture to that, ensuring the egg is fully incorporated without excessive handling. The less you handle the dough, the more tender your scones will be. Gently bring the dough together on a lightly floured surface, folding it a few times to incorporate any remaining dry bits and distribute the butter for maximum flakiness.
Creative Scone Variations: Honey and Orange and Beyond
While these basic whipping cream scones are delightful on their own, they also serve as a fantastic blank canvas for a myriad of flavor variations. One particularly exquisite combination is Honey and Orange Scones, where the bright citrus notes perfectly complement the subtle sweetness of honey. To transform this recipe, simply replace 2 tablespoons of the granulated sugar with a generous tablespoon of honey. Then, add about 2 teaspoons of fresh orange zest (feel free to adjust to your preference for more or less citrusy flavor) to the dry ingredients. Be aware that increasing the amount of honey significantly might alter the texture slightly due to its liquid nature. Beyond this delightful pairing, the possibilities are endless:
- Dried Fruits: Incorporate cranberries, raisins, chopped apricots, or dried cherries for a chewy texture and burst of fruitiness.
- Chocolate Chips: Mini chocolate chips, white chocolate chips, or even chopped dark chocolate can turn these into a decadent treat.
- Spices: Add a teaspoon of cinnamon, cardamom, nutmeg, or a pumpkin pie spice blend for warm, aromatic scones.
- Citrus Zest: Lemon or lime zest can be used in place of orange for a different bright flavor.
- Nuts: Toasted chopped pecans or walnuts can add a delightful crunch.
- Herbs: For a savory twist, consider adding chopped fresh rosemary and some grated cheddar cheese.
Remember to keep any added ingredients cold, especially if they are fruits, to maintain the dough’s temperature and prevent sogginess. Generally, about ½ cup to ¾ cup of add-ins per batch is a good starting point.
Serving and Storage Tips for Your Perfect Scones
Once your beautiful whipping cream scones emerge from the oven, golden brown and fragrant, the waiting game truly begins. While they are tempting to devour immediately, allowing them to cool for at least 5-10 minutes on a wire rack allows them to set properly and enhances their delicate texture. Scones are best enjoyed fresh, ideally on the day they are baked. Their tender crumb and crisp exterior are at their peak shortly after baking. Traditionally, scones are served with clotted cream and a good quality jam, such as strawberry or raspberry. However, they are equally delicious with just a dollop of butter, lemon curd, or even plain alongside a cup of hot tea or coffee.
Storage:
- Baked Scones: To store leftover baked scones, allow them to cool completely. Place them in an airtight container or a resealable plastic bag at room temperature for up to 2 days. For longer storage, freeze them for up to 1 month. Reheat frozen scones in a preheated oven at 300°F (150°C) for about 10-15 minutes, or until warmed through.
- Unbaked Scones: You can also prepare the scone dough, cut the wedges, and freeze them unbaked. Arrange the raw scones on a baking sheet and freeze until solid. Once frozen, transfer them to an airtight freezer bag. When ready to bake, place the frozen scones directly onto a parchment-lined baking sheet and bake as directed, adding a few extra minutes to the baking time. This is a fantastic way to have fresh, warm scones ready in no time!
Explore More Scone Recipes
If these whipping cream scones spark your passion for baking, here are a few more delightful scone recipes to inspire your next baking adventure:
- Cinnamon Topped Cream Scones
- Cinnamon Oat Scones
- White Chocolate Cranberry Ginger Cream Scones
- Cream and Berry Scones
- Maple Oat Scones
Recipe: Basic Whipping Cream Scones

Basic Whipping Cream Scones
Anna
Pin Recipe
Ingredients
- 2 cups all-purpose flour (260 grams)
- ¼ cup granulated sugar (20 grams)
- 2 teaspoons baking powder
- ¼ teaspoon salt plus an extra pinch
- ⅓ cup unsalted butter, cold and cut into chunks
- ½ cup heavy whipping cream (not light, not milk, not anything else but heavy whipping cream)
- 1 large egg
- ¼ teaspoon vanilla extract
- a little extra cream or extra egg white plus some sparkly or coarse sugar
- frozen blueberries, chocolate chips, anything else (optional)
Instructions
-
Preheat your oven to a robust 425 degrees F (220°C). Line a baking sheet with parchment paper to prevent sticking and ensure even baking.
-
In a large mixing bowl, or the bowl of your food processor, combine and thoroughly stir together the all-purpose flour, granulated sugar, baking powder, and salt. Ensure these dry ingredients are well-combined before proceeding.
-
Add the cold, cubed unsalted butter to the dry ingredients. If using a food processor, pulse until the mixture forms coarse crumbs, with some pieces resembling small peas. If mixing by hand, use a pastry blender, two knives, or your fingertips (working quickly!) to cut the butter into the flour mixture until a similar coarse texture is achieved. The key is to keep the butter cold and avoid overworking.
-
In a separate mixing bowl, whisk together the heavy whipping cream, large egg, and vanilla extract until well combined and smooth.
-
Pour the liquid cream mixture into the dry flour and butter mixture. Using a heavy-duty rubber scraper or a large spoon, stir gently just until the dry ingredients are moistened and the dough begins to come together. Do not overmix! Turn the shaggy dough out onto a lightly floured mat or surface. Gently press the dough down into a rough rectangle. Fold the dough into thirds (like a letter), sprinkling with a little extra flour if needed to prevent sticking. Press down again to further incorporate any loose flour and flatten the butter bits. You should still see distinct, small, hard pieces of butter throughout the dough; these are crucial for flakiness. Repeat the folding process once or twice more if necessary to achieve a cohesive, but still tender, dough.
-
If you are adding optional ingredients like frozen blueberries or chocolate chips, now is the time to incorporate them. Gently press the frozen additions into the dough on your floured surface. Then, fold the dough over itself a few times to evenly distribute the add-ins without overworking the dough. Keeping berries frozen prevents them from bleeding color into the dough.
-
Gather the dough and gently press it together to form a uniform circle, approximately ½ to 1 inch thick. The thickness will influence your baking time, with thinner scones baking faster. Using a sharp knife or a round cutter, cut the circle into 8 equal wedges. Arrange these wedges a few inches apart on your prepared parchment-lined baking sheet. For a beautiful golden crust and a hint of sparkle, brush the tops of the scones with a little extra heavy cream (or a lightly beaten egg wash) and generously sprinkle with coarse or sparkly sugar if desired. Bake for 13 to 18 minutes, or until the scones are lightly golden brown around the edges and cooked through. Let cool slightly on the baking sheet before transferring to a wire rack to cool completely. Serve warm with your favorite accompaniments!
