Authentic CPS Butter Cookies Recipe: A Taste of Chicago School Lunchroom Nostalgia
Moving to a vibrant new city always brings its share of excitement and exploration, and our recent relocation to the magnificent city of Chicago has been no exception. From its stunning architecture to its diverse neighborhoods, there’s an endless array of activities, and navigating the city is a breeze whether by foot, train, or car. Amidst the flurry of unpacking boxes and discovering new local gems, I’ve found a comforting rhythm in my kitchen, experimenting with new recipes and, of course, indulging in some truly exceptional cookies. Among our newfound favorites are what we affectionately call “School Butter Cookies,” or more precisely, the iconic CPS Lunchroom Butter Cookies. They carry a whisper of nostalgia, even for those of us new to Chicago, and have quickly become a staple in our home. Update: For those who love a visual guide, I’ve put together a fun video tutorial, which you can find towards the end of this post!
The Legacy of Chicago Public Schools Butter Cookies
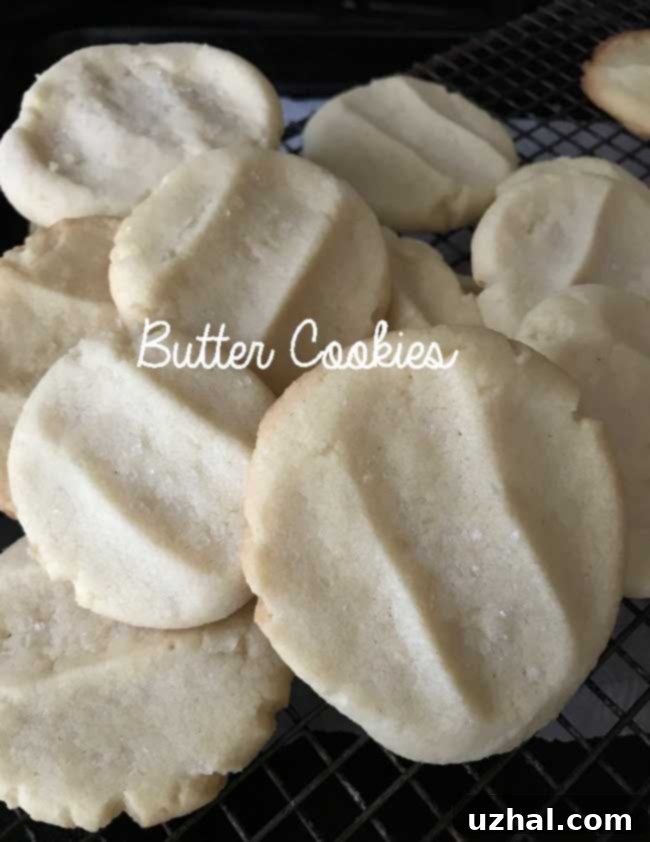
The journey to creating these delightful treats began with a thoughtful gift from a friend—a perfectly baked cookie, individually wrapped and shared with obvious love and care. Her friend, a passionate baker, creates these cookies with a dedication that shines through in every bite. There’s a strong belief that his cookies echo the beloved butter cookies once served in Chicago Public School lunchrooms, a taste that many locals recall with immense fondness. These aren’t just any cookies; they represent a beautiful cross between a traditional butter cookie and a classic sugar cookie, achieving a delicate balance of richness and sweetness. What truly sets them apart is their incredibly simple ingredient list: just four essential items—butter, sugar, flour, and vanilla. Remarkably, there’s no chemical leavening agent involved. Instead, their wonderfully light and crispy texture is achieved through the meticulous whipping of butter and sugar, incorporating ample air into the mixture. The resulting cookie is far lighter than a typical shortbread, yet the pure, unadulterated butter flavor shines through, making each bite a truly memorable experience.

Crafting the Perfect Copycat: My CPS Butter Cookie Journey
Inspired by this delicious discovery and the stories of its nostalgic charm, I embarked on a mission to replicate these legendary cookies in my own kitchen. My first batch, baked just yesterday, was an amalgamation of various “CPS butter school lunchroom cookie copycat” recipes I’d found. While my versions turned out a bit smaller than the originals that sparked the city’s sweet memories, they received a resounding seal of approval from a friend who fondly remembers attending Chicago public schools. This validation was incredibly rewarding! Even if my cookies aren’t an exact, perfect match to the historical lunchroom treats, they certainly stand on their own merit, delivering a delightful taste that resonates with the spirit of those classic school-day sweets. This recipe isn’t just about recreating a cookie; it’s about capturing a piece of Chicago’s culinary heritage and sharing that warmth with others.
The Key to Flavor: Understanding Your Butter
When it comes to butter cookies, the quality and type of butter you choose can significantly impact the final taste and texture. For my rendition of these Chicago Public School butter cookies, I opted for Danish butter, specifically Lurpak, which I’ve found readily available in many American grocery stores lately. I generally prefer unsalted butter for baking, as it allows me to control the salt content precisely. In this recipe, I added my own salt to complement the flavors. However, it’s worth noting that many shortbread-style recipes, and some butter cookie variations, actually recommend using salted butter for an enhanced flavor profile. Don’t hesitate to experiment with different brands to discover your personal favorite. High-quality butter brands like Land O’Lakes, New Zealand Grass Fed, or Kerrygold are excellent choices and consistently yield fantastic results, each imparting its own subtle nuances to the cookie. The higher fat content in European-style butters like Lurpak and Kerrygold often results in a richer, more tender cookie, which is ideal for this recipe.
Flour Power: Bleached vs. Unbleached and Precise Measurement
The choice of flour plays a crucial role in the texture and spread of your cookies. For these CPS-inspired butter cookies, I specifically used Pillsbury’s Best bleached all-purpose flour. While I typically gravitate towards unbleached flour for most of my baking, I reasoned that Chicago Public Schools likely used bleached flour due to cost-effectiveness and widespread availability at the time. My experience has also shown that cookies made with bleached flour tend to spread slightly less during baking, which is a desirable characteristic for these firm, yet tender butter cookies. The absolute key to achieving the perfect CPS butter cookie texture is getting the flour measurement just right. Too little flour, and your cookies might spread excessively, becoming thin and overly crispy. Too much, and they could turn out dry and crumbly. This can be particularly tricky with volume measurements, as a cup of flour can vary significantly in weight depending on how it’s scooped and packed. Therefore, if you own a kitchen scale, weighing your flour is highly recommended for accuracy. If you’re measuring by volume, aim for a light scoop-and-level method. Ultimately, also trust your senses and go by the feel of the dough. The ideal dough should be firm enough to handle easily without being sticky, yet pliable enough to shape without crumbling. It should not require any refrigeration before baking, making the process even more straightforward and enjoyable.
Simplified Steps to Make Your Own CPS Copycat Butter Cookies
Ready to bring a taste of Chicago nostalgia into your home? This straightforward recipe yields delicious butter cookies with that classic school lunchroom feel. You’ll only need a few essential ingredients: quality salted butter, granulated sugar, all-purpose flour, and vanilla extract. If you opt for unsalted butter, remember to add approximately ¾ teaspoon of fine salt to balance the flavors.
- Preparation is Key: Begin by preheating your oven to 350 degrees Fahrenheit (175°C). While the oven heats up, prepare one or two baking sheets by lining them with Silpat baking mats or parchment paper. This will ensure your cookies don’t stick and bake evenly.
- Creaming the Foundation: In a stand mixer fitted with the whisk attachment, combine the softened butter and granulated sugar. Beat them together on medium-high speed for about 5 minutes, or until the mixture becomes remarkably light, fluffy, and pale in color. This creaming process is vital for incorporating air, which contributes to the cookies’ light texture. Once almost done, beat in the vanilla extract until just combined. Remember to scrape down the sides of the bowl periodically to ensure everything is thoroughly mixed.
- Incorporating the Flour: Switch to the paddle attachment on your mixer, or gently stir by hand. Gradually add the flour, starting with 1 ½ cups. Continue to add the remaining flour, about 2 tablespoons at a time, mixing until a smooth, workable dough forms. The total amount should be around 2 cups of flour (approximately 280 grams), but always adjust based on the dough’s consistency. The dough should be firm enough to easily form into a ball without being sticky or dry.
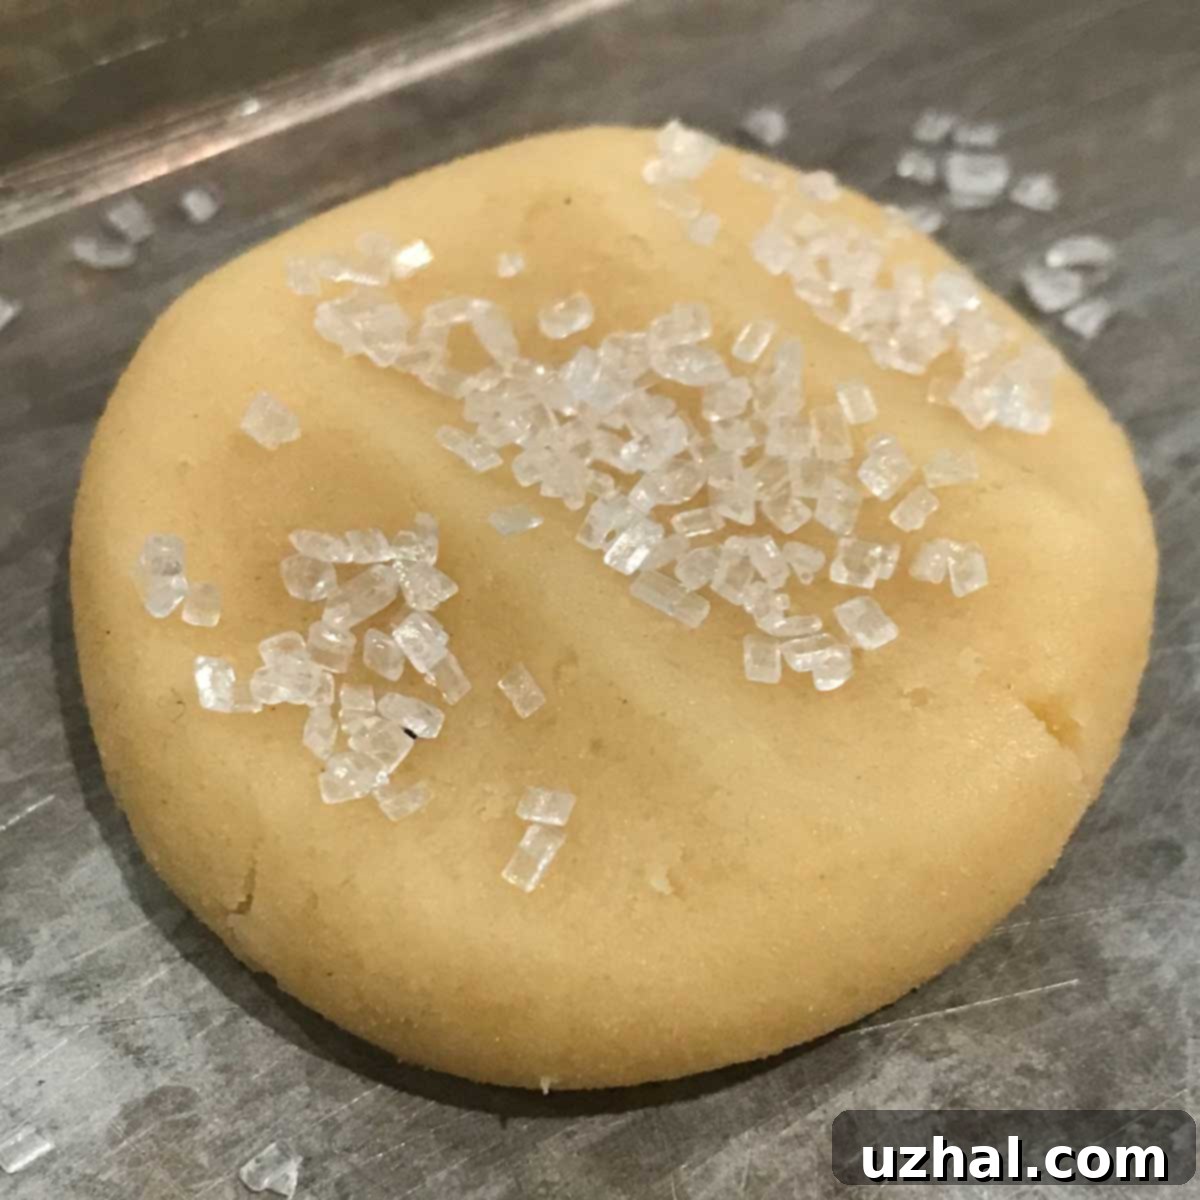
- Shaping and Flattening: Using a generously rounded tablespoon, scoop out portions of the dough. Roll each portion into a smooth ball, aiming for 24 uniform cookies. Arrange these dough balls on your prepared baking sheets, leaving approximately 2 ½ inches between each to allow for slight spreading. To achieve the classic indentations and flatten the cookies slightly, dampen your index, middle, and ring fingers and gently press them into the center of each dough ball. At this stage, you have the option to bake immediately or chill the flattened rounds on a plate, covered with plastic, until you’re ready to bake. Chilling can sometimes help maintain shape.
- Baking to Golden Perfection: Bake one sheet of cookies at a time in the preheated oven for about 12 minutes, or until the edges are lightly golden brown. The centers should still be pale, indicating a soft, tender interior. Once baked, let the cookies cool on the baking sheet for about 3 minutes to allow them to set. Then, very carefully transfer them to a wire cooling rack to cool completely. This prevents them from becoming soggy and helps maintain their crispiness.
Enjoy these simple yet incredibly satisfying CPS-style butter cookies. They’re perfect for an afternoon treat, a lunchbox surprise, or a comforting bite of nostalgia.
- Walnut Pie
- James Beard’s Gingerbread Recipe
- Vinegar Pecan Pie
Recipe

Chicago Public School Butter Cookies
Anna
Pin Recipe
Ingredients
- 2 sticks good quality salted butter at cool room temperature (230 grams)
- ¾ cup granulated sugar (150 grams)
- 1 ½ teaspoons pure vanilla extract
- 2 cups all-purpose flour (preferably bleached for less spread)
- 2 more tablespoons flour optional, only if needed to achieve desired dough consistency
Instructions
-
Preheat your oven to 350 degrees F (175°C) and prepare a baking sheet by lining it with an ungreased Silpat mat or parchment paper.
-
In a large bowl or stand mixer with an electric mixer, beat the butter and sugar for approximately 5 minutes, ensuring to scrape the bowl frequently. Continue until the mixture is very light, fluffy, and significantly paler in color. Beat in the vanilla extract, then scrape the sides of the bowl once more to incorporate all ingredients thoroughly.
-
Gradually add the flour, about ½ cup at a time, stirring (or mixing on low speed with a paddle attachment) until a smooth and cohesive dough forms. Ensure the dough is firm enough to handle.
-
Using a generously rounded tablespoon as a guide, scoop up individual portions of dough and gently shape them into 24 uniform balls.
-
Arrange the formed dough balls on your prepared baking sheets, leaving about 2 ½ inches of space between each cookie. Dampen your index, middle, and ring fingers with a little water, then gently press them into each dough ball to create the characteristic indentations and flatten the cookies slightly. At this point, you can proceed directly to baking, or you can place the flattened rounds on a plate, cover them with plastic wrap, and chill them until you are ready to bake.
-
Bake for 12 minutes, or until you observe the edges of the cookies turning a light golden brown. The centers should remain relatively pale. Allow the cookies to cool for approximately 3 minutes on the baking sheet before carefully transferring them to a wire cooling rack to cool completely.
Notes
Watch the Video: How to Make CPS Butter Cookies
For those who prefer a visual guide or just want to see the baking process in action, I’ve created a fun video tutorial. It walks you through each step of making these delicious CPS Butter Cookies, from creaming the butter and sugar to shaping and baking. You’ll find it below, offering even more tips and tricks to ensure your cookies turn out perfectly every time.
Final Thoughts: A Sweet Connection to Chicago’s Past
Baking these Chicago Public School butter cookies has been more than just a culinary experiment; it’s been a delightful way to connect with the rich history and vibrant culture of our new city. There’s a certain magic in recreating a taste from someone’s childhood, bringing back fond memories of school lunchrooms and simple pleasures. These cookies, with their crisp edges, tender centers, and unmistakable butter flavor, truly embody that spirit. They are incredibly easy to make, require minimal ingredients, and consistently deliver a comforting, homemade taste that appeals to everyone. Whether you’re a long-time Chicagoan reminiscing about your school days or a newcomer like us looking to embrace the local charm, I encourage you to try this recipe. Share them with friends, enjoy them with a cup of coffee, or pack them in lunchboxes for a sweet surprise. They’re a testament to how simple ingredients, combined with a little love, can create something truly special and enduring.
