Decadent Chocolate Peanut Butter Volcanoes: A Recipe for Fudgy Lava Cookies
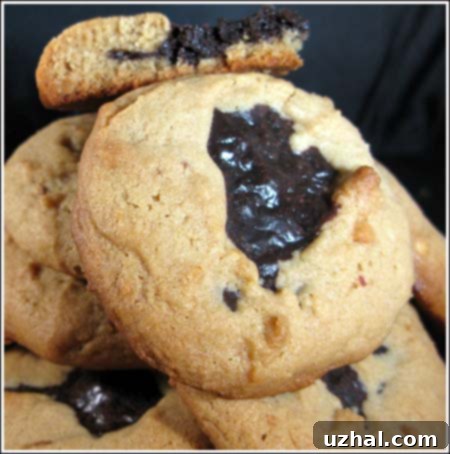
Prepare to unleash a flavorful eruption with these incredible Chocolate Peanut Butter Volcanoes! These aren’t just any peanut butter cookies; they’re a delightful twist on a classic, featuring a soft, chewy peanut butter base that cradles a rich, molten fudgy lava center. The recipe, a cherished find that originated from the esteemed Rosie’s Bakery Cookie Book, has been a favorite for years, transforming ordinary baking into an extraordinary experience. Imagine biting into a perfectly baked peanut butter cookie, only to discover a warm, gooey chocolate fudge surprise bursting forth – a truly volcanic delight for your taste buds!
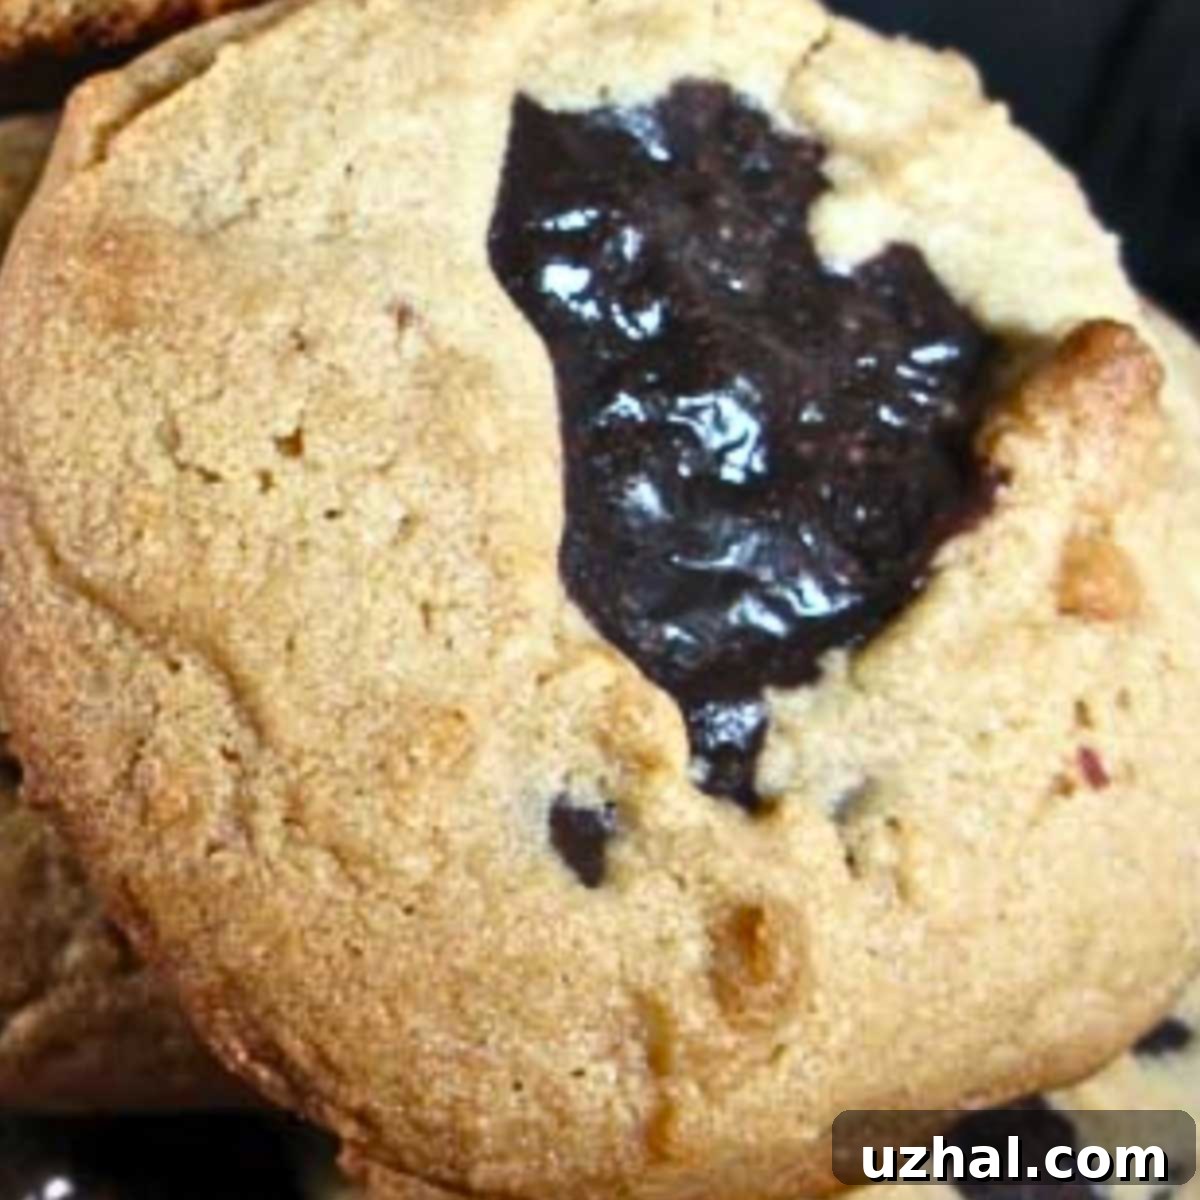
The allure of these cookies lies in their unique combination of textures and flavors. The slightly salty, comforting chewiness of the peanut butter cookie dough perfectly complements the deep, sweet, and unbelievably fudgy chocolate filling. As they bake, the cookies gently crack around the center, mimicking the mesmerizing flow of lava, hence their iconic name. This recipe offers a fantastic way to elevate your homemade cookie game, providing a dessert that is both visually striking and incredibly satisfying. Whether you’re a seasoned baker or just starting out, these Chocolate Peanut Butter Volcanoes are sure to become a cherished addition to your recipe collection, guaranteed to impress anyone lucky enough to try them.
The Magic of Sweetened Condensed Milk in Your Fudgy Lava Center
Initially, these incredible Chocolate Peanut Butter Volcanoes didn’t make it into my regular baking rotation, and for a simple yet common reason: the recipe for the decadent fudgy lava filling calls for a half cup of sweetened condensed milk. This often means opening a whole can for just a portion, leaving the rest to be used up quickly. While using leftover condensed milk for other treats like sauces, caramels, or even other cookie recipes is hardly a chore for many dessert enthusiasts (myself included!), it sometimes presented a small hurdle for spontaneous baking sessions. The thought of an “arduous task” was always more of a playful exaggeration because, let’s be honest, the reward of these fudgy, chocolate-filled peanut butter cookies far outweighs any minor inconvenience.
Sweetened condensed milk is truly the secret ingredient behind the molten, incredibly rich chocolate fudge center. Its thick, creamy texture and concentrated sweetness provide the perfect base for a filling that remains wonderfully soft and gooey even after baking. This unique quality is what allows the “lava” to flow so beautifully when you take a bite, creating that delightful contrast with the slightly crispy, chewy peanut butter cookie. The condensed milk not only adds sweetness but also a depth of flavor and a smooth consistency that you simply can’t achieve with other ingredients. It elevates the chocolate from a simple ganache to a truly luxurious, fudgy experience, making these peanut butter lava cookies truly special.

Revolutionizing Baking: Condensed Milk in a Pouch
A recent discovery has completely transformed my approach to baking these Chocolate Peanut Butter Volcanoes and similar recipes: the introduction of sweetened condensed milk in a convenient pouch! Brands like Eagle Brand now offer smaller, resealable pouches, making it incredibly easy to use just the amount you need without opening a full can. While it might be a tad more expensive per ounce, the elimination of waste and the sheer convenience make it a worthwhile investment for any baker who frequently needs smaller quantities of this versatile ingredient. This innovative packaging was the inspiration I needed to bring these beloved cookies back into regular rotation, allowing for more spontaneous baking and making it simpler than ever to enjoy their decadent goodness.
The pouch packaging is a game-changer, especially for recipes like these chocolate lava cookies where precision and minimal waste are appreciated. No longer do I need to plan another recipe around using up leftover condensed milk; now, I can simply grab a pouch, use the required half cup for the fudgy filling, and reseal the rest for later. This convenience encourages experimentation and makes baking less daunting, particularly for busy individuals. It also ensures that the condensed milk remains fresh, preserving its quality for your next baking adventure. This small but significant innovation has reignited my passion for making these delightful treats, prompting me to revisit the original recipe and add even more helpful notes and tips to ensure perfect results every time.
Mastering Your Chocolate Peanut Butter Volcanoes: Essential Baking Tips and Updates
Having recently made a half batch of these irresistible Chocolate Peanut Butter Volcanoes, I’ve gathered some invaluable insights and refined the recipe with a few crucial updates that will help you achieve the most perfect, fudgy, and delicious results. These tips are designed to ensure your chocolate lava center is smooth and luscious, and your peanut butter cookie dough is a dream to work with, guaranteeing a stress-free and enjoyable baking experience for these homemade chocolate peanut butter treats.
- Achieving a Smooth Chocolate Lava: The Art of Melting: When creating the rich, molten chocolate fudge center, resist the temptation to melt chocolate chips and cold condensed milk together in the microwave. I’ve found that this combination often leads to the mixture seizing up quickly, resulting in a gritty or lumpy filling rather than the silky “lava” we’re aiming for. The key to a perfectly smooth and glossy fudgy center is to melt the chocolate separately, either using a double boiler or carefully in the microwave in short bursts, stirring frequently. Once the chocolate is fully melted and smooth, *then* whisk it vigorously into the room temperature or slightly warmed condensed milk. This method allows the ingredients to combine seamlessly, yielding a luscious, pourable fudge that will create that beautiful, molten effect in your volcano cookies. The temperature difference is crucial here; cold condensed milk can shock the melted chocolate, causing it to seize, so ensuring both are at similar temperatures helps with emulsification.
- Customizing Your Chocolate Intensity: The recipe offers flexibility in your chocolate choices, allowing you to tailor the richness of your fudgy lava center. You can use ½ cup of semisweet chocolate chips (approximately 84 grams) combined with ½ ounce (14 grams) of unsweetened chocolate for a balanced chocolate flavor. This combination provides a lovely depth without being overly bitter. Alternatively, for a slightly more intense and less sweet fudge, you can opt for a heaping half cup of bittersweet chocolate chips (around 98 grams), omitting the unsweetened chocolate entirely. Bittersweet chocolate will lend a more sophisticated, rich cocoa note to your lava, appealing to those who prefer less sweetness. Whichever combination you choose, ensure your chocolate is of good quality for the best flavor.
- The Secret to Easy Dough Handling: Chilling is Key! Peanut butter cookie dough, while incredibly delicious, can sometimes be sticky and challenging to work with, especially when trying to create the “volcano” shape. My most important tip for this recipe is to chill the dough. Chilling significantly firms up the dough, making it much easier to handle and shape. You have a couple of options: you can chill the entire batch of dough for at least 30 minutes to an hour before scooping, or, for even greater ease, scoop out your portions of dough first, then chill these individual portions. Once chilled, the dough balls will be much firmer and less prone to sticking, allowing you to easily create the deep indentations for the chocolate lava and shape each volcano perfectly without frustration. This step is a small investment of time that pays off immensely in ease of preparation and the overall neatness of your finished cookies.
- Pouch Cake Mix Lemon Pound Cake
- Rosie’s Bakery Crunchy Chocolate Chip Cookies
- Low Fat Brownies With Condensed Milk
- Morning Cinny Buns
- Dr. Seuss Layer Cake
Recipe

Chocolate Peanut Butter Volcanoes
Anna
Pin Recipe
Ingredients
Chocolate Fudge Lava
- 3 ounces ½ cup semisweet chocolate chips (84 grams) OR use 3 ½ oz bittersweet chips and omit the unsweetened chocolate
- ½ ounce unsweetened chocolate 14 grams
- ½ cup sweetened condensed milk such as Eagle Brand, at room temperature or warm (155 grams)
- 1-½ teaspoons pure vanilla extract
Cookie Dough
- 1 ¾ cups all-purpose flour 220 grams
- ¼ teaspoon plus ⅛ teaspoon baking soda
- ¼ teaspoon salt
- 11 tablespoons 1 stick plus 3 tablespoons unsalted butter, at room temperature (155 grams)
- ¾ cup smooth peanut butter
- ½ cup plus 1 tablespoon lightly packed light brown sugar
- 6 tablespoons granulated sugar
- ¾ teaspoon pure vanilla extract
- 1 large egg
Instructions
-
Preheat the oven to 350 degrees F. Line several baking sheets with parchment paper.
-
Make the lava: Melt the chocolate in the top of a double boiler placed over simmering water. Alternatively, you may melt the chocolate in the microwave.
-
Using a whisk, stir the melted chocolate vigorously into the room temperature or slightly warmed condensed milk until the mixture is smooth and well blended. Whisk in vanilla; Set aside.
-
Make the cookie dough: Sift the flour, baking soda, and salt together into a small bowl and set aside.
-
Using an electric mixer on medium speed, cream the butter, peanut butter, both sugars, and the vanilla together in a medium-size mixing bowl until light and fluffy, about 10 minutes. Stop the mixer twice during the process to scrape the bowl with a rubber spatula.
-
Add the egg and beat on medium speed until blended, about 1 minute. Scrape the bowl.
-
Add the flour mixture and mix on low speed until blended, about 15 seconds. Scrape the bowl and mix several seconds more.
-
Measure out tablespoons (can use slightly more or slightly less) of the dough and roll them into balls with your hands, Place the balls 2 inches apart on the prepared baking sheets. Note: I found it very helpful to scoop the dough into portions, chill the scooped portions, then shape cold dough. It’s much easier to work with when cold.
-
Using your thumb, press a deep hole into the center of each ball, and plop a heaping teaspoon of the lava mixture into the hole. Pinch the opening together just a little bit so the lava will not overflow, but so that it is still visible.
-
Bake the cookies until they are lightly golden — check at 12 minutes, may need up to 16. Cool the cookies on the sheets or eat them while they are still warm for an extra- special treat.
-
Store the cookies in an airtight container in the refrigerator for 1 day. After that, store them in the freezer for up to 2 weeks. Bring them to room temperature before eating.
-
(Makes about 28)
Once you’ve made a batch of these delectable Chocolate Peanut Butter Volcanoes, you’ll understand why they are so beloved. The combination of classic peanut butter flavor with a surprise molten chocolate center is simply irresistible. They are perfect for dessert, a special treat, or even a unique addition to any bake sale or gathering. Enjoy them warm to fully appreciate the gooey “lava” effect, or at room temperature for a firmer, yet still incredibly fudgy, bite. Don’t forget to share your creations and any personal tips you discover along the way!
