The Best Melted Butter Scottish Shortbread Recipe: Crumbly Perfection
My journey to finding the perfect Scottish Shortbread recipe began, somewhat surprisingly, in the luxurious setting of The Ritz Hotel in London. The shortbread left in our room was an absolute revelation – incredibly light, wonderfully crumbly, and bursting with a rich, authentic butter flavor. It set a new standard for what shortbread could be.
Years later, a delightful surprise arrived from our neighbors in Austin: a batch of homemade shortbread that remarkably mirrored the exquisite taste and texture of that memorable Ritz treat. Naturally, I had to ask for the recipe. And ever since then, this particular method has become my absolute favorite for making shortbread. While I’m always open to trying new variations, this “melted butter” version holds a special place in my heart and my kitchen.
Jump to Recipe
The Secret to Perfect Shortbread: Key Ingredients Explored
What makes this shortbread stand out from the rest? It’s a combination of simple yet thoughtfully chosen ingredients, each playing a crucial role in achieving that sought-after light, crumbly texture and deep flavor. Let’s delve into the stars of this recipe:
Rice Flour: The Game Changer
- Why it’s essential: Rice flour is arguably the most critical ingredient in this recipe. It contributes significantly to the shortbread’s incredibly light and crisp yet crumbly texture. Unlike wheat flour, rice flour has no gluten, which prevents the shortbread from becoming chewy and ensures a melt-in-your-mouth experience.
- Finding or making it: The recipe doesn’t call for a large quantity, but its impact is immense. If you struggle to find fine rice flour in your local grocery store, or prefer to avoid buying a whole bag for a small amount, you can easily make your own. Simply grind plain white rice in a clean coffee grinder or spice grinder until it’s as fine as possible. While homemade rice flour might be slightly coarser than commercially milled varieties, it will still yield fantastic results. Aim for the finest grind you can achieve for the best possible texture.
A Hint of Ginger
- This recipe features a subtle touch of ground ginger. Its purpose isn’t to create a “ginger shortbread,” but rather to add delicate, warm undertones that complement the rich butter flavor beautifully. It provides a complexity that elevates the shortbread without overpowering it, making each bite more interesting and memorable.
Melted Butter: The Unsung Hero
- Ease of use: One of the most remarkable aspects of this recipe is the use of melted butter. This simple technique makes the mixing process incredibly easy, eliminating the need for creaming butter and sugar, which can often be time-consuming and messy. It’s a true shortcut that doesn’t compromise on quality.
- Butter quality matters: For shortbread, butter is not just an ingredient; it’s the foundation of its flavor. Using a high-quality butter is paramount. I typically opt for European-style butters like Plugra or KerryGold due to their higher fat content and richer flavor, which translate into a superior shortbread. Recently, I’ve also had great success experimenting with brands like President and Danish butter. Of course, reliable domestic brands like Land O’Lakes also work well.
- Salted vs. Unsalted: This recipe calls for salted butter, which adds a lovely balance to the sweetness. If you prefer using unsalted butter, simply add about a teaspoon of salt to the dry ingredients to achieve a similar flavor profile. Adjust to your preference – some love a touch more salt to bring out the sweetness.
- Gentle melting: When melting the butter, do so gently. Low heat on a stovetop or 50-60% power in the microwave is ideal. The goal is to melt it without browning it, preserving its clean, buttery flavor.
Pan Size Flexibility & Batch Adjustments
One of the beauties of this shortbread recipe is its adaptability to various pan sizes. My neighbors, from whom I originally got this recipe, often double the batch and bake it in a large 15×10 inch pan, yielding a generous supply. However, I enjoy experimenting with smaller formats to suit different needs.
I commonly use a 9-inch square pan or a 7×11 inch pan. Both yield excellent results, producing shortbread of a good thickness for classic fingers. If you’re craving shortbread but don’t want to make a huge quantity, you can easily halve the recipe again and bake it in a standard 9×5 inch loaf pan. This is perfect for a smaller household or when you just need a treat for a few days.
Loaf Pan Shortbread – Half Batch Details
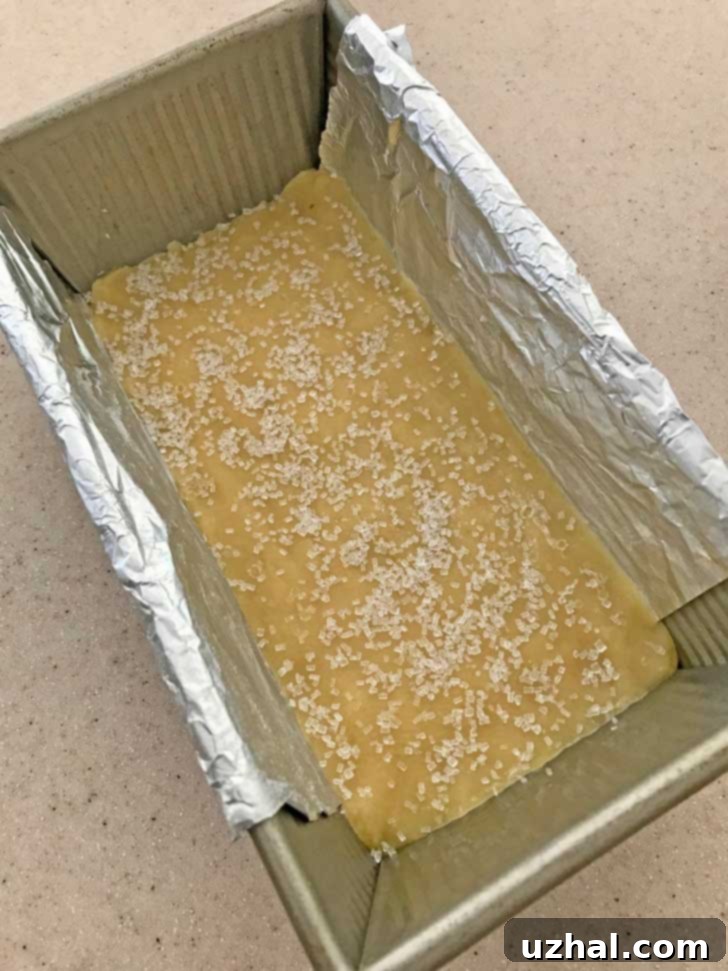
I recently perfected baking a half batch in an 8 ½ by 4 ½ inch loaf pan. The USA Pan brand, known for its excellent non-stick properties, works perfectly for this smaller quantity. To ensure easy removal and clean edges, I line the pan with a little foil, leaving overhangs to create “handles” for lifting. A light buttering and a touch of cooking spray in the corners also help prevent sticking.

Precision Matters: Weights Rather Than Volume
While many home bakers are accustomed to using volume measurements (cups and spoons), we have always made this particular shortbread recipe using weights. Baking is a science, and measuring ingredients by weight (grams) offers far greater precision than volume measurements, which can vary depending on how you scoop, the density of the ingredient, and even humidity.
If you’re new to using a kitchen scale, I highly recommend investing in one. It’s a game-changer for baking, leading to more consistent and accurate results. While this recipe might still turn out “okay” with volume measurements, using a scale will ensure you achieve the ideal texture and flavor every time. Give it a try and discover the difference! This recipe has a few quirks – the melted butter, a slightly higher baking temperature than some shortbreads, and the unique step of poking holes after baking rather than before – but these elements contribute to its distinct and beloved character. My family adores it!
I’ve compared this recipe to several others, including the highly regarded King Arthur Flour shortbread recipe (which is also excellent) and one from Food.com. While those are good, this melted butter version consistently delivers the unique crumbly texture and buttery richness that we all love.

A Comparison: New York Times Sugared Shortbread
Interestingly, while browsing the New York Times recipe section, I stumbled upon a very similar shortbread recipe that also called for melted butter and rice flour. Submitted by a reader in 2012, the NYT version presents a few key differences. It omits the ground ginger, uses a slightly different proportion of rice flour (¼ cup or 36 grams) and sugar (¼ cup or 62 grams), and specifies an 8-inch square pan with a bake time of 40 to 45 minutes. My daughter and I tested the New York Times version, and I must admit, it’s also very good. However, our preferred recipe’s specific ratios and subtle ginger hint truly make it shine for us, delivering that exceptional light and crumbly texture we fell in love with.
Tips for Shortbread Success
- Don’t overmix: Once you add the butter to the dry ingredients, mix just until combined. Overmixing can develop gluten in the all-purpose flour, leading to a tougher shortbread.
- Chill thoroughly: Chilling the dough before baking is crucial. It allows the butter to solidify, preventing excessive spreading in the oven and contributing to that classic firm, yet crumbly, texture.
- Watch your oven: Ovens can vary. Pay attention to the visual cues – a set middle and lightly browned edges – rather than strictly relying on the timer.
- Patience is key: Resist the urge to cut the shortbread while it’s still warm. It will be very fragile. Allowing it to cool completely in the pan ensures it firms up properly for clean cuts.
- Storage: Shortbread keeps exceptionally well. Store it in an airtight tin at room temperature, and it will remain fresh and delicious for weeks. It’s perfect for making ahead!
Serving Suggestions
Scottish Shortbread is wonderfully versatile. It’s fantastic on its own with a cup of tea or coffee. You can also serve it:
- Dusted with a little extra granulated or confectioners’ sugar.
- Alongside fresh berries and whipped cream for a simple dessert.
- As a base for fruit tarts or trifles.
- Crumbled over ice cream.
- As a gift for friends and family – it’s always appreciated!
This recipe truly captures the essence of traditional Scottish Shortbread, enhanced by the ingenious use of melted butter and rice flour. It’s an approachable recipe that delivers consistently outstanding results, promising to become a cherished addition to your baking repertoire. Enjoy the process, and savor every buttery, crumbly bite!
- Vanilla Fudge — Scottish Style
- Loaf Pan Cheesecake
- Pretzel Caramel Shortbread Bars
- Chocolate Chunk Shortbread Cookies
- New York’s Best Cupcakes
Recipe

Scottish Shortbread Fingers
Anna
Pin Recipe
10 mins
30 mins
40 mins
Dessert
Scottish
36 pieces
Ingredients
- 1 ¾ cups all-purpose flour (do not use pastry flour)** (½ pound / 240 grams)
- 6 tablespoons rice flour** (56 grams)
- ½ cup plus 1 tablespoon granulated sugar (114 grams)
- ¼ teaspoon ground ginger
- ½ pound European style or really good quality salted butter (or add 1 scant teaspoon salt to recipe) — see note about salt levels (Plugra works well) (240 grams)
- ½ teaspoon vanilla extract
Instructions
- Line a 9-inch square metal pan with nonstick foil or parchment paper. This will make lifting the cooled shortbread much easier.
- In a large mixing bowl, combine the all-purpose flour, rice flour, granulated sugar, and ground ginger. Whisk briefly to ensure all dry ingredients are evenly distributed.
- Gently melt the butter. You can do this in a microwave-safe glass measuring cup using 50% power, or in a saucepan over low heat. Be careful not to let it brown.
- Mix the vanilla extract with the melted butter. Allow this mixture to cool slightly for about five minutes – it should still be liquid but not hot.
- Add the cooled melted butter mixture to the dry flour mixture. Stir with a sturdy wooden spoon until just blended and a soft dough forms. Avoid overmixing. Transfer the dough to your prepared pan and pat it down evenly and firmly.
- Place the pan with the shortbread dough into the refrigerator for at least 30 minutes, or until the dough is thoroughly chilled and firm. This step is crucial for texture.
- Preheat your oven to 350ºF (175ºC).
- Once chilled, remove the pan from the refrigerator. Lightly sprinkle the top of the shortbread with a little extra granulated sugar for a lovely crunchy finish. Place the pan in the preheated oven and bake for about 30 minutes, or until the middle appears set and the edges are lightly golden brown. Do not over-bake; it should still be slightly soft in the center when removed.
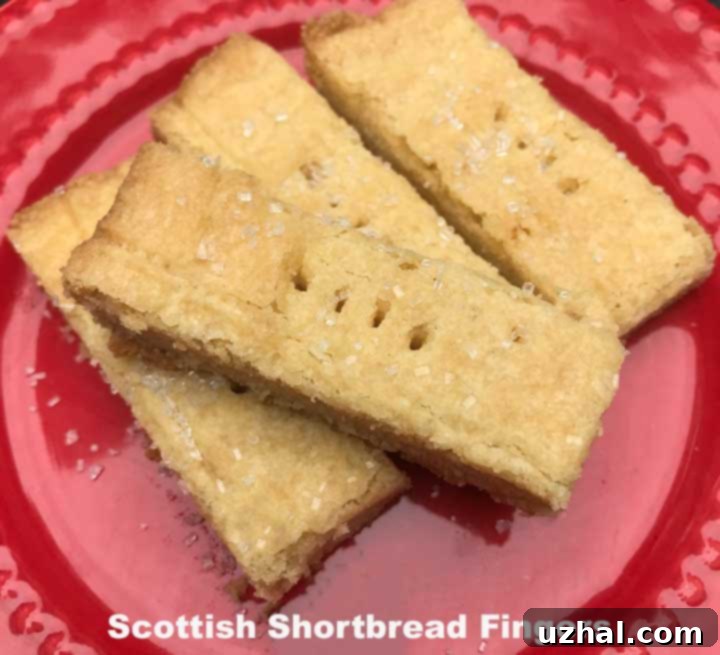
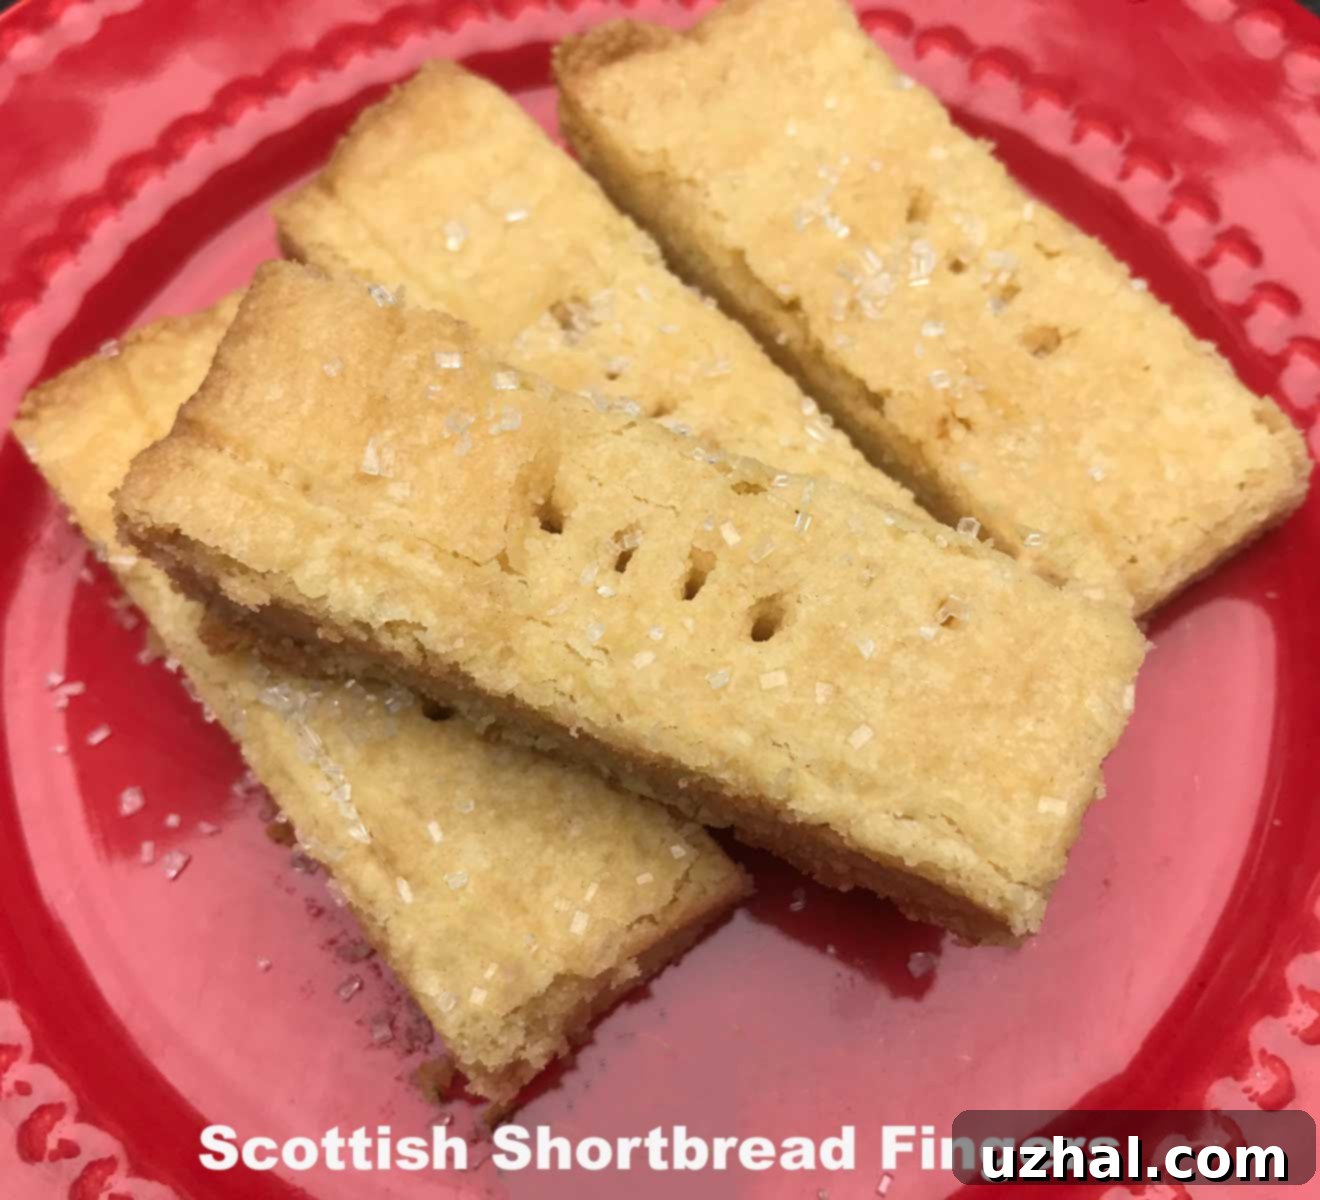
- Immediately after removing the shortbread from the oven, while it’s still warm, use a 4-pronged fork (or any fork you have) to gently poke holes across the surface. These holes are decorative and will mark where you plan to cut the shortbread later.
- Using a sharp knife or a razor blade, gently score the warm shortbread into 32 fingers (or your desired size and shape). Do not attempt to cut all the way through or lift it from the pan at this stage. The scoring helps create clean lines once cooled.
- Allow the shortbread to sit in the pan until it is completely cool – this is essential for it to firm up properly. Once fully cooled, use the foil/parchment overhangs to lift the shortbread from the pan. Then, use a sharp knife to cut through the scored lines.
- Store your delicious shortbread in an airtight tin at room temperature. It stays fresh and wonderful for weeks, making it perfect for gifting or enjoying over time.
Notes
Salt: The shortbread gets its delightful saltiness from the salted butter. If you enjoy a sweet & salty contrast, feel free to add an extra pinch of salt to the dry ingredients. If you opt for unsalted butter, make sure to add ¾ teaspoon of fine salt to the recipe.
Homemade Rice Flour: No rice flour? No problem! If you have an old coffee grinder or spice grinder, you can easily make your own by grinding about 2 ounces of white rice until it reaches a fine powder. Use the finest setting for best results.
Precision Baking: For the most consistent and professional results, we highly recommend weighing your ingredients using a kitchen scale rather than relying on volume measurements.
Baking Doneness: The key to perfect shortbread is to not over-bake it. The edges should be just lightly browned, and the center should still feel relatively soft when you remove it from the oven. It will continue to set as it cools.
Version Two (8-inch Square Pan): For a slightly different take, you can adapt this recipe for an 8-inch square pan. In this case, use only 36 grams (¼ cup) of rice flour, 63 grams (¼ cup) of sugar, and use salted butter. If using unsalted, add ½ teaspoon of salt.
Shortbread
Tried this recipe?
Let us know how it was!
