Delicious Mini Cherry Pies: Your Guide to Perfect Individual Dessert Treats
While handheld mini pies often steal the spotlight, there’s a timeless charm and convenience in perfectly portioned mini pies baked in individual tins. These delightful single-serving treats are not only adorable but also incredibly satisfying, offering a personal dessert experience that’s hard to beat. Thanks to the accessibility of online retailers like Amazon, procuring large packs of disposable pie pans in various sizes has never been easier or more affordable.
When it comes to baking miniature masterpieces, the size of your pie pan makes a significant difference. Through personal experience, I’ve discovered that the smaller 3-inch disposable pans are ideally suited for compact desserts such as miniature ice cream cakes, creamy cheesecakes, rich pecan pies, and delicate mini tarts. However, for juicy fruit pies, particularly those with a generous filling like cherry, the 5-inch pans truly shine. My initial attempts at making mini cherry pies in 3-inch shells often resulted in unfortunate boil-overs or disappointingly dough-y textures – a learning curve captured in Exhibit A below.
To avoid similar baking mishaps and ensure your mini fruit pies turn out perfectly, I highly recommend investing in these 5-inch pie pans from Amazon. Their larger capacity provides ample space for bubbling fruit fillings, preventing mess and promoting even baking, which is crucial for achieving that ideal balance of flaky crust and luscious fruit.
Crafting the Perfect Pie Crust: All-Butter Excellence
Once you have your ideal small pie pans ready, the next crucial step is selecting and preparing your pie crust. For this delectable mini cherry pie recipe, I advocate for an all-butter crust. An all-butter crust is renowned for its rich flavor and incredibly flaky texture, making it the superior choice for any pie enthusiast. While you can certainly prepare it by hand in a large bowl, a food processor offers a much quicker alternative, cutting down on prep time significantly. However, as someone who dislikes cleaning the food processor, I often opt for the bowl method.
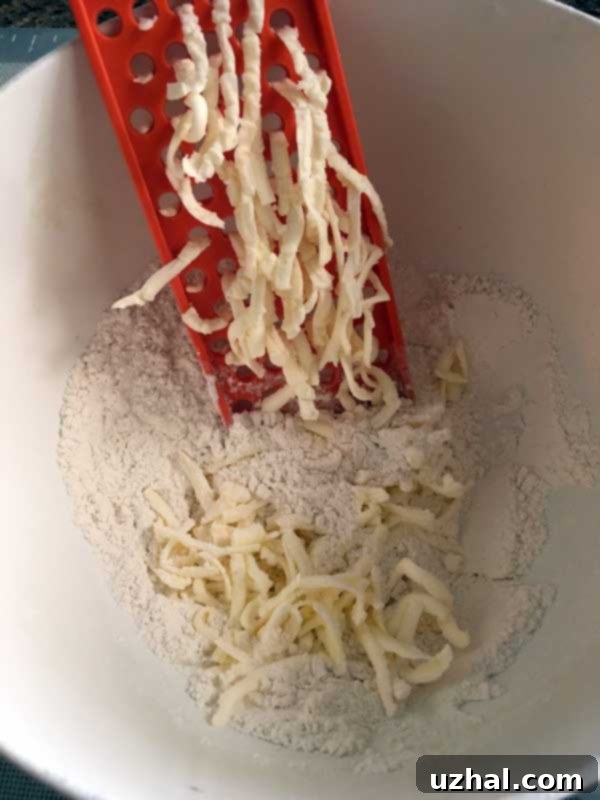
My secret to an effortless, flaky, and easy-to-manage crust by hand involves grating very cold butter directly into the flour mixture. This technique disperses the butter evenly in small, cold pieces, minimizing the amount of work required with a pastry cutter or your fingertips. The result is a beautifully tender and flaky crust with minimal effort, ensuring every bite of your mini cherry pie is a delight.
The Star of the Show: Luscious Cherry Filling
The heart of any cherry pie is, of course, its filling. Timing is everything when it comes to fresh cherries. If you’re lucky enough to be baking these pies in June, when cherries are plentiful and often available for around $2 a pound, fresh, dark sweet cherries are undoubtedly the way to go. Their vibrant flavor and natural sweetness are unparalleled. However, if you find yourself craving mini cherry pies outside of peak cherry season, don’t despair! Canned or frozen cherries can be excellent substitutes. For those instances, you might consider adapting a recipe specifically designed for preserved cherries, such as this one that calls for Trader Joe’s cherries, which will guide you on necessary adjustments.
For fresh cherries, my preferred thickening agent is instant tapioca (specifically, Minute Tapioca). Unlike cornstarch or flour, tapioca creates a slightly thicker, clearer, and more stable filling, significantly reducing the chances of boil-over and ensuring a beautifully set pie. You can usually find Minute Tapioca discreetly tucked away in the baking aisle of most grocery stores. The trick with tapioca is to let the filling mixture stand for a full 20 minutes before baking; this crucial step allows the tapioca granules to soften and begin absorbing the cherry juices, preventing a lumpy texture in your finished pies and ensuring a smooth, glossy filling.
Topping It Off: Streusel or Lattice?
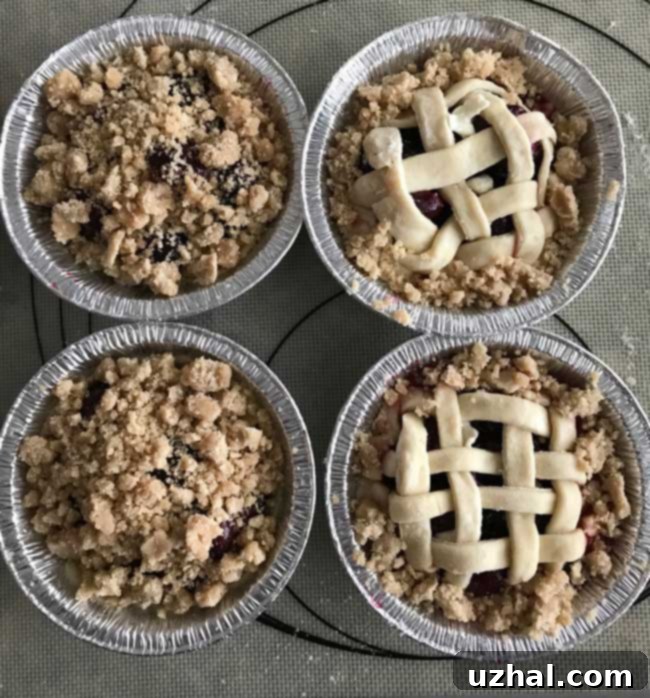
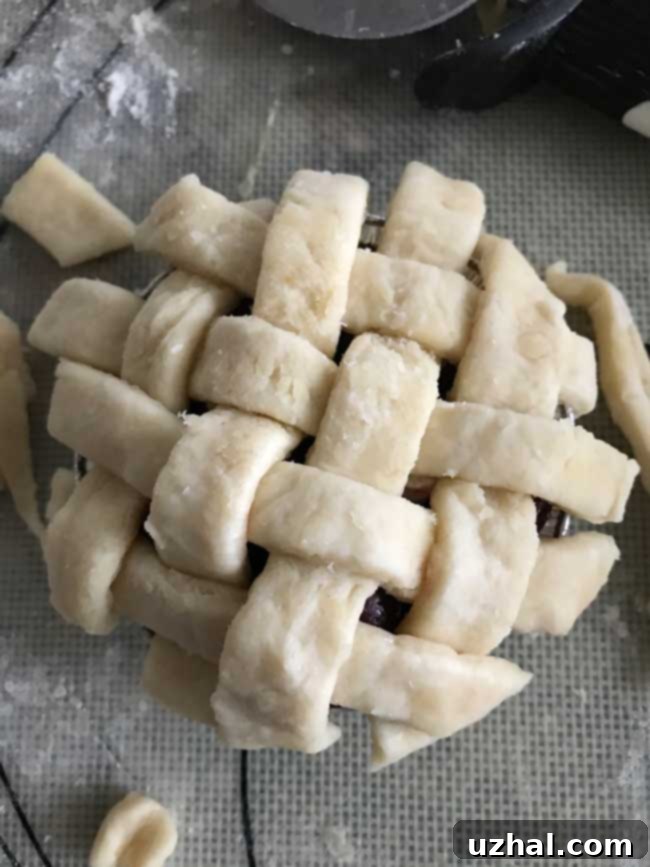
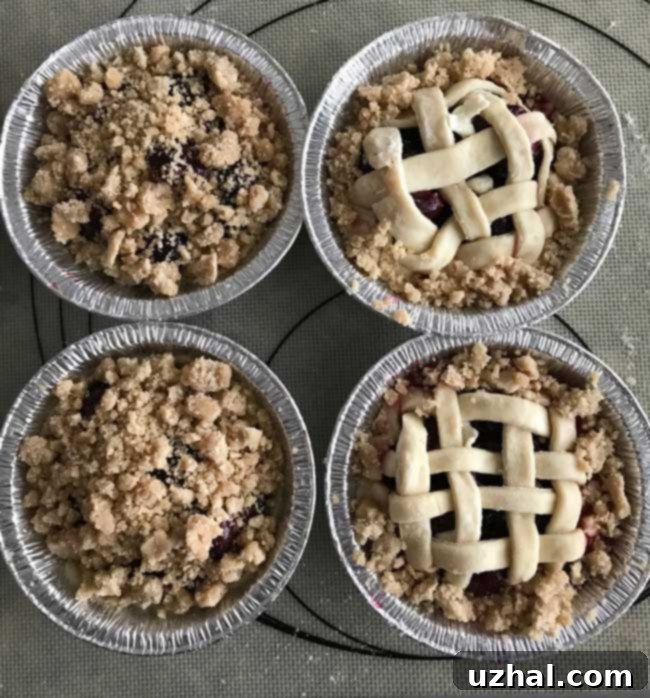
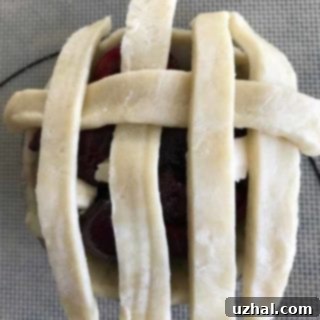
One of the most enjoyable dilemmas in pie-making is choosing the perfect topping. Do you opt for the comforting crumbly texture of a streusel, or the artistic elegance of a woven lattice? In my experience, why choose when you can have both! This recipe offers the flexibility to indulge in either or even both, allowing you to customize your mini pies to your heart’s content. If you’re feeling creative and have a bit more time, the lattice topping adds a beautiful, homemade touch that’s sure to impress. However, if you’re short on time or simply prefer a simpler approach, a buttery streusel topping is always a fantastic and equally delicious choice. Feel free to skip the lattices if you’re not in the mood for an “arts & crafts” session in the kitchen!
No matter which topping you choose, the aroma of these baking mini cherry pies will fill your kitchen with an inviting warmth that promises a delightful treat. Each mini pie offers a burst of sweet-tart cherry flavor, encased in a golden, flaky crust. Let’s dive into the detailed recipe to get you started on your baking adventure.
Recipe
Mini Cherry Pies
Cookie Madness
Pin Recipe
Ingredients
Crust:
- 1 ¼ cups 5.8 oz of all-purpose flour or pastry flour (not cake)
- 1 ½ teaspoons granulated sugar
- ½ teaspoon salt — use ⅛ if using salted butter.
- 8 tablespoons very cold unsalted butter
- 4-6 tablespoons of ice cold water or as needed
Streusel
- ½ cup plus 2 tablespoons all purpose flour 85 grams
- 2 tablespoons packed golden brown sugar
- 2 tablespoons sugar
- ¼ teaspoon ground cinnamon
- ⅛ teaspoon salt
- 4 tablespoons unsalted butter melted
- ⅛ teaspoon vanilla extract
Filling
- 12 oz 2 heaping cups dark sweet cherries
- ¾ granulated sugar
- 1 ½ tablespoons Minute tapioca
- 1 tablespoons fresh lemon juice or lime juice
- ⅛ teaspoon almond extract
- ¼ teaspoon vanilla extract
- Cream for brushing if making lattices
- Sugar for sprinkling on top
Instructions
-
Mix the flour, sugar and salt very well in a bowl. Shred about ⅓ of the cold butter into the flour mixture and toss to coat. Continue shredding butter and tossing. Using a pastry cutter or your fingers, work the mixture into a coarse meal. Add about 3 tablespoons of water and mix with a heavy scraper. Keep adding water until dough comes together. Dump the mixture onto a pie mat, then press into a block, wrap in plastic, and chill for at least 30 minutes (preferably longer).
-
While dough is resting, make the streusel. Combine all dry ingredients, then stir together melted butter and vanilla and pour over. Stir until crumbly and put in the refrigerator until ready to use.
-
Now make the filling. Pit and stem the cherries, breaking the cherries in half by hand as you pit. Put the now pit-free cherries in a mixing bowl, then toss with tapioca. Add the sugar and stir to coat (it may seem like a lot), then stir in the lemon juice and both extracts.
-
Allow the filling to stand for a full 20 minutes. This step is important because it softens the tapioca and keeps it from being lumpy in the baked pies.
-
Preheat oven to 425 degrees F. and have ready a rimmed baking sheet.
-
To make the pies, cut your dough block into 4 sections (3 oz each) and take out two sections. Keep the remaining sections refrigerated.
-
Cut each section in half so that you have four 1 ½ oz pieces. Roll or press each piece into a circle a little over 3 inches and press into and slightly up sides of the pie shell. You don’t need it to go all the way up, just about ½ or so. Also, it doesn’t need to look perfect because it will be completely covered up.
-
Divide the filling among the 4 pie tins, then sprinkle tops with streusel. You can sprinkle all four with streusel or you can sprinkle just two with streusel and use another section of dough to make two lattices. .
-
See note if making lattices.
-
Set on a rimmed baking sheet and bake at 425 for 10 minutes.
-
Reduce oven temperature to 375°F and bake for about 20 minutes or until tops are golden brown.
-
Transfer pies to rack and cool completely.
Notes
Baking Tips for Success
To ensure your mini cherry pies are nothing short of perfect, here are a few additional baking tips:
- Keep everything cold: For the flakiest crust, ensure your butter, flour, and water are all very cold. This prevents the butter from melting too quickly and creates those desirable pockets of steam during baking.
- Don’t overmix the dough: Overworking the dough develops gluten, leading to a tough crust. Mix just until the dough comes together.
- Proper chilling: Chilling the dough is essential. It allows the butter to firm up, prevents shrinkage during baking, and makes the dough easier to handle. Don’t skip the refrigeration steps.
- Prevent soggy bottoms: Baking at an initial high temperature (425°F) helps to set the bottom crust quickly before the filling has a chance to soak in. Placing the pies on a preheated baking sheet also helps to conduct heat to the bottom.
- Watch for doneness: Pies are typically done when the crust is golden brown and the filling is bubbling thickly. If the crust is browning too quickly, you can loosely tent the pies with foil.
- Cool completely: Resist the urge to cut into your pies immediately! Allowing them to cool completely on a wire rack ensures the filling sets properly and prevents a messy slice.
Serving Suggestions & Storage
These mini cherry pies are versatile and can be enjoyed in many ways. Serve them slightly warm with a scoop of vanilla bean ice cream for a classic dessert experience, or top them with a dollop of freshly whipped cream for an added touch of indulgence. They are also fantastic on their own, perfect for picnics, potlucks, or a special individual treat at home.
To store your leftover mini cherry pies, cover them loosely with plastic wrap or aluminum foil and keep them at room temperature for up to two days. For longer storage, refrigerate them for up to 4-5 days. If you’ve made a larger batch, mini cherry pies can also be frozen, either baked or unbaked. Wrap them tightly in plastic wrap and then in foil, and they will keep well for up to 3 months. Thaw in the refrigerator overnight and reheat gently in the oven for a freshly baked taste.
Enjoy Your Baking Journey!
Baking mini cherry pies is a rewarding experience, transforming simple ingredients into a delightful array of individual desserts. Whether you prefer the rustic charm of a streusel or the intricate beauty of a lattice, these pies are sure to bring joy to your kitchen and to anyone lucky enough to taste them. So gather your ingredients, follow this guide, and prepare to impress with your homemade mini cherry pies!
