Mastering Sourdough Honey Whole Wheat Bread: A Perfect Small Batch Recipe for Your Starter
Are you an avid sourdough baker managing a modest-sized sourdough starter? Then you understand the constant quest for recipes that gracefully accommodate smaller quantities of starter without demanding excessive feeding or creating an overwhelming surplus of dough. This Sourdough Honey Whole Wheat Bread recipe is precisely crafted for those moments, offering a delightful solution for anyone seeking efficient, small-batch sourdough endeavors.

Like many home bakers, I find myself in this very situation. My sourdough starter, nurtured from the excellent recipe found on Serious Eats, is a true champion: consistently healthy, wonderfully bubbly, and arguably the most vigorous starter I’ve ever cultivated. Its small-batch nature is a key advantage, as it doesn’t consume vast amounts of flour. Instead of the common 4 oz per day, I typically feed it around 1 oz of flour and 1 oz of water daily. This sustainable approach means I’m always on the lookout for sourdough recipes that are equally mindful of starter quantities.
This particular recipe for Sourdough Honey Whole Wheat Bread is a perfect fit, utilizing approximately 3 oz (or 80 grams, about 6 tablespoons) of active starter to produce one magnificent loaf. It’s a testament to the fact that you don’t need a massive amount of starter to create truly exceptional, artisanal bread at home. This method ensures minimal waste and makes sourdough baking a more accessible and less daunting activity for those with smaller, more manageable starters.

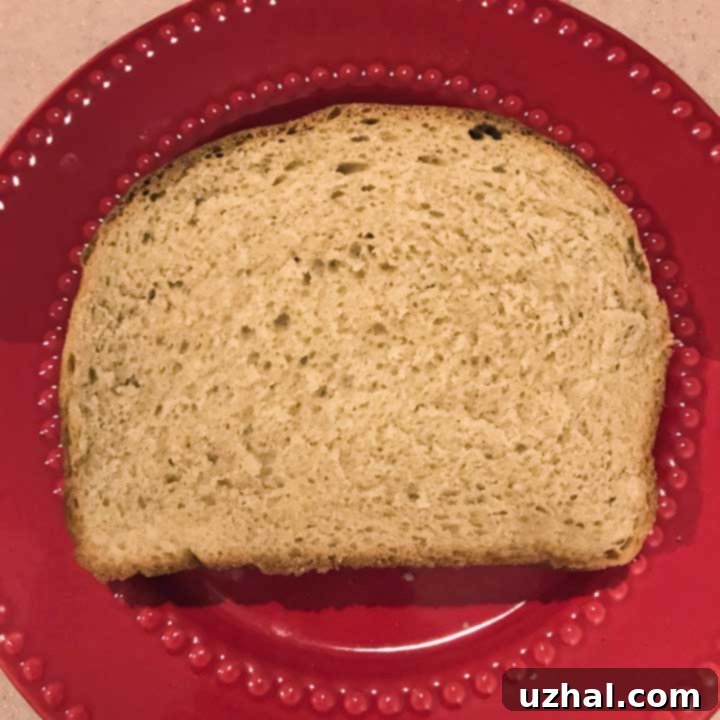
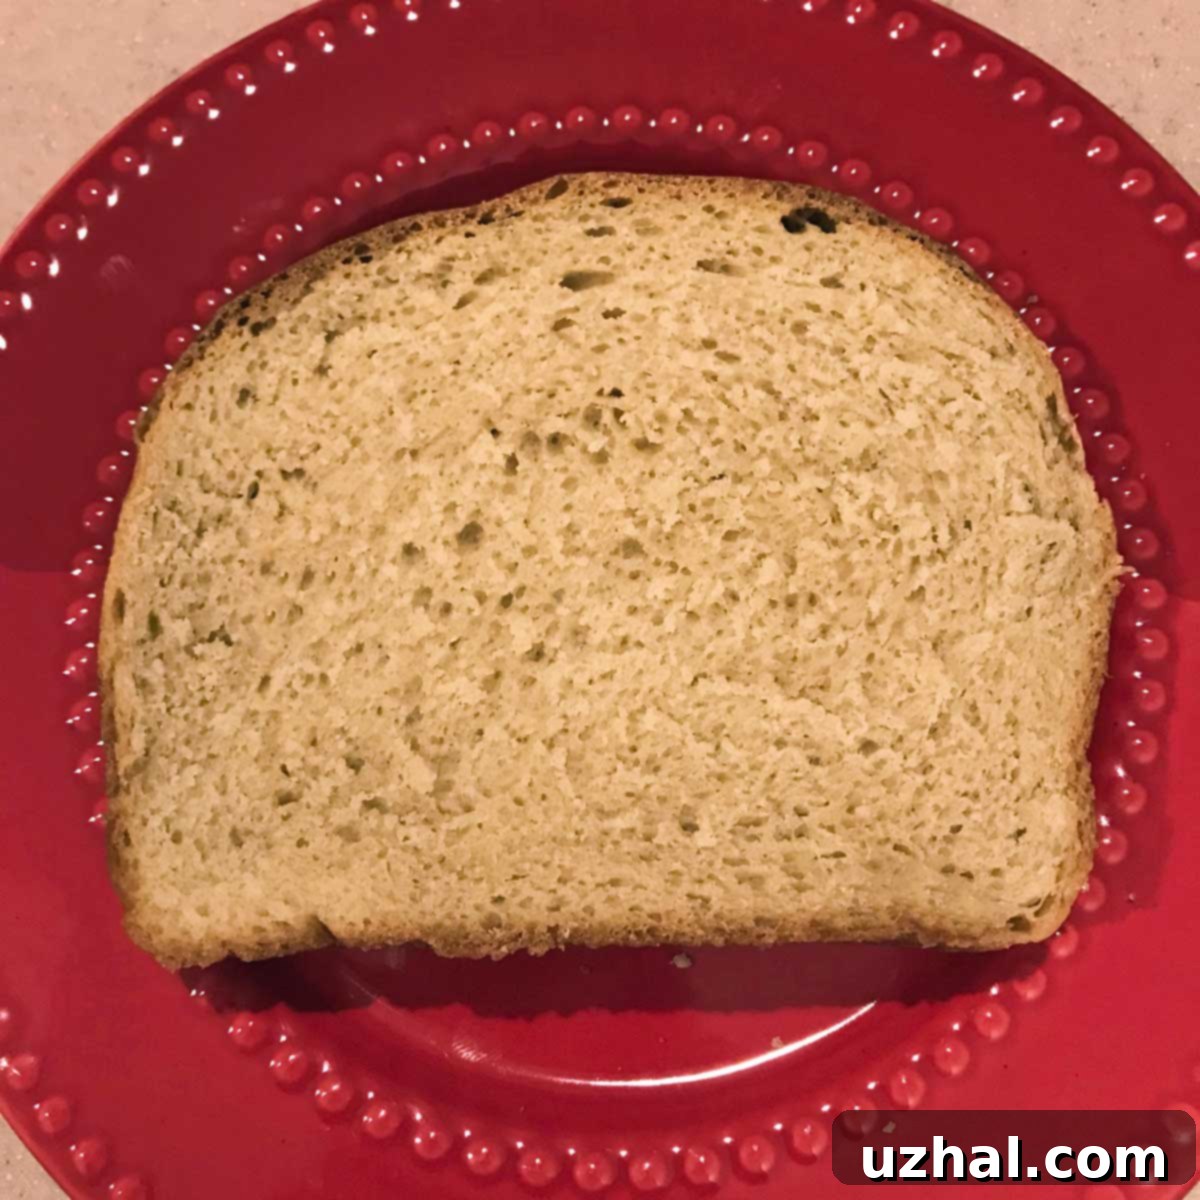
While this bread features three distinct rising phases, don’t let that intimidate you. If you begin your baking journey early in the afternoon, you can easily have a warm, freshly baked loaf ready to grace your dinner table. The dough rises beautifully, resulting in a handsomely shaped loaf with a golden crust and a tender, flavorful interior. Its versatile texture and subtle sweetness make it absolutely perfect for everything from morning toast slathered with butter to hearty sandwiches packed for lunch. This recipe truly brings the joy of homemade sourdough into your kitchen with ease.
Why Choose Sourdough Honey Whole Wheat Bread?
This bread isn’t just another sourdough recipe; it’s a delightful blend of flavors and textures that stands out. The combination of sourdough’s characteristic tang, the earthy depth of whole wheat, and the subtle sweetness of honey creates a truly unique and satisfying loaf. Whole wheat flour brings not only a nutritional boost but also a wonderful, complex flavor profile that complements the sourdough perfectly. Honey acts as more than just a sweetener; it helps to tenderize the crumb and contributes to the beautiful golden-brown color of the crust. This bread offers a wholesome, hearty experience that is both nourishing and incredibly delicious.
Understanding Your Ingredients for Perfect Sourdough Honey Whole Wheat Bread
The quality and type of your ingredients play a crucial role in the final outcome of your Sourdough Honey Whole Wheat Bread. Let’s delve into each component to understand its contribution and how to make the best choices for your bake.
- Bread Flour or All-Purpose Flour: For this recipe, I opted for White Lily brand bread flour, which is known for having a lower protein content among bread flours, making it quite similar to King Arthur All-Purpose (AP) flour. If bread flour isn’t readily available, King Arthur AP is an excellent substitute. Other brands of all-purpose flour can also work, but keep in mind that slight variations in protein content might affect the dough’s elasticity and the bread’s final texture. The higher protein in bread flour generally contributes to a stronger gluten network, leading to a chewier crumb, while AP flour can yield a softer texture.
- Whole Wheat Flour: I specifically used white whole wheat flour. This type of whole wheat flour comes from white wheat berries, which are milder in flavor and lighter in color than traditional red whole wheat. It offers all the nutritional benefits of whole wheat but with a less assertive flavor and a softer crumb, making it an excellent choice for those who are new to whole wheat baking or prefer a more subtle whole grain taste.
- Active Dry Yeast: You’ll need 1 ⅛ teaspoon of active dry yeast, which is roughly half a standard packet. It’s crucial to use *active dry* yeast, not instant or fast-rising. While the sourdough starter provides much of the lift and flavor, the addition of a small amount of commercial yeast ensures a consistent and reliable rise, especially when working with a smaller amount of starter or when you need the bread ready within a specific timeframe. It acts as a booster, giving the bread that extra push to achieve a beautiful volume.
- Milk: Full-fat whole milk would ideally contribute to a richer flavor and a softer crumb. However, I successfully used reconstituted nonfat skim milk when I was out of my usual. The key here is the liquid and its temperature. When combining and heating the milk and water, always measure the temperature to ensure it reaches 125°F (52°C). This temperature is vital for activating the yeast without killing it, ensuring a proper rise.
- Sourdough Starter: You’ll need 6 tablespoons of active sourdough starter, which weighs approximately 80 grams. “Active” means your starter should be bubbly and vigorous, having been fed within the last 4-8 hours and showing clear signs of activity. A healthy, active starter is the heart of this bread, imparting its signature flavor and contributing significantly to the rise.
- Honey: The recipe calls for 2 “generous” tablespoons of honey (about 40 grams). This amount provides a subtle sweetness that balances the tang of the sourdough and the earthiness of the whole wheat, without making the bread overly sweet. If you prefer a slightly sweeter loaf, you can slightly increase the honey, but remember that too much can affect the dough’s hydration and texture. Honey also aids in browning the crust and keeping the bread moist.
- Salt: With 1 ½ teaspoons of salt, this bread is quite flavorful, offering a pleasant savory note that enhances all the other flavors. I personally enjoy this level of saltiness. However, if you are sensitive to salt in bread or prefer a milder taste, feel free to reduce it to 1 ¼ teaspoons or even 1 teaspoon. Salt is essential not just for flavor but also for controlling yeast activity and strengthening the gluten structure.
- Butter: You’ll need 1 ½ tablespoons of softened butter. Butter contributes to the richness, tenderness, and overall flavor of the bread. Using softened butter makes it easier to incorporate into the dough evenly. If you prefer, oil could likely work as a substitute, but it might slightly alter the final flavor and texture.
- Baking Soda: The recipe technically calls for ½ teaspoon of baking soda, though I candidly admit I forgot to add it during my test bake! The bread still rose beautifully and achieved a wonderful texture. Baking soda is often included in recipes like this to assist with browning the crust and can offer a slight boost to the rise, especially in recipes with acidic components like sourdough. Its omission didn’t hinder the result in my case, proving the robustness of the recipe, but including it can help achieve that perfectly golden crust.
For those who are intrigued by the idea of homemade whole wheat bread but might not have a sourdough starter on hand, I highly recommend exploring the Wheat and Flax Bread recipe. It’s a fantastic option for a wholesome and delicious loaf without the sourdough commitment. And if your craving is specifically for a classic white bread, the Gold Medal White Bread recipe is an absolute winner, delivering a consistently great loaf every time.
The Baking Process: Achieving the Perfect Loaf
Baking sourdough, even a small batch, is a journey of patience and observation. This recipe guides you through three critical rising stages, each essential for developing flavor and texture. The initial rise after activating the yeast and combining with the starter allows the cultures to become highly active, creating gas that will expand the dough. The second rise, after kneading, focuses on developing the gluten structure and building significant volume. Finally, the third rise in the loaf pan ensures your bread has that classic, beautiful dome shape and an airy crumb. Paying attention to your dough – how it feels, how it looks, and its responsiveness – is key to success.
Tips for Sourdough Success
- Proofing Environment: Sourdough loves a warm, consistent environment for rising. If your kitchen is cool, consider using a proofing box, your oven with just the light on, or a warm spot near a sunny window.
- Don’t Rush the Rise: While approximate times are given, always let your dough be your guide. It should look noticeably doubled in bulk, feel soft and airy. Under-proofed dough can result in a dense loaf, while over-proofing can lead to collapse.
- Check for Doneness: The hollow sound when tapped on the bottom is a classic indicator that your bread is fully baked. For extra certainty, use an instant-read thermometer; the internal temperature should reach 200-210°F (93-99°C).
- Cool Completely: It’s tempting to slice into a warm loaf, but for the best texture and flavor, allow your bread to cool completely on a wire rack. This allows the internal moisture to redistribute and the crumb to set.
Recipe

Sourdough Honey Whole Wheat Bread
Pin Recipe
Equipment
-
Stand mixer with dough hook (Optional, kneading can be done by hand)
-
9×5 inch Loaf Pan
-
Large Mixing Bowl
-
Plastic Wrap
-
Thermometer (for liquid temperature)
Ingredients
- ½ packet of active dry yeast (equates to 1 ⅛ teaspoon)
- 1 ½ cups whole wheat flour (210 grams, preferably white whole wheat)
- 2 cups AP or bread flour (250 grams)
- ½ cup water
- ½ cup milk (whole milk preferred, but nonfat works)
- 6 tablespoons active sourdough starter (about 80 grams)
- 2 tablespoons honey (40 grams, adjust to taste for sweetness)
- 1 ½ teaspoons salt (can reduce to 1 ¼ or 1 teaspoon if sensitive to salt)
- 1 ½ tablespoons butter (softened; oil can be substituted)
- ½ teaspoon baking soda (optional, for crust browning and slight rise boost)
Instructions
-
Thoroughly grease a 9×5 inch loaf pan, ensuring all inner surfaces are coated.
-
In a large mixing bowl, combine the active dry yeast, ½ cup of the whole wheat flour (70 grams), and ½ cup of the all-purpose or bread flour (63 grams). Whisk briefly to combine.
-
In a separate small saucepan or microwave-safe bowl, combine the milk and water to make exactly 1 cup of liquid. Heat this mixture until it reaches 125°F (52°C) – use a thermometer for accuracy. Pour the warm liquid mixture into the flour and yeast mixture, stirring well until fully combined. Next, add your bubbly, active sourdough starter and beat thoroughly until it’s well blended into the mixture. Cover the bowl tightly with plastic wrap and place it in a warm, draft-free spot for 1 ½ to 2 hours. This initial rise allows the yeast and starter to become highly active.
-
After the first rise, remove the plastic wrap. Stir in the honey, salt, softened butter, and the optional baking soda (if using). Then, add the remaining 1 cup (140 grams) of whole wheat flour. Gradually add the remaining 1 ½ cups of all-purpose or bread flour, about half a cup at a time, mixing after each addition. Continue stirring until the dough comes together and feels soft and pliable, but is no longer overly sticky.
-
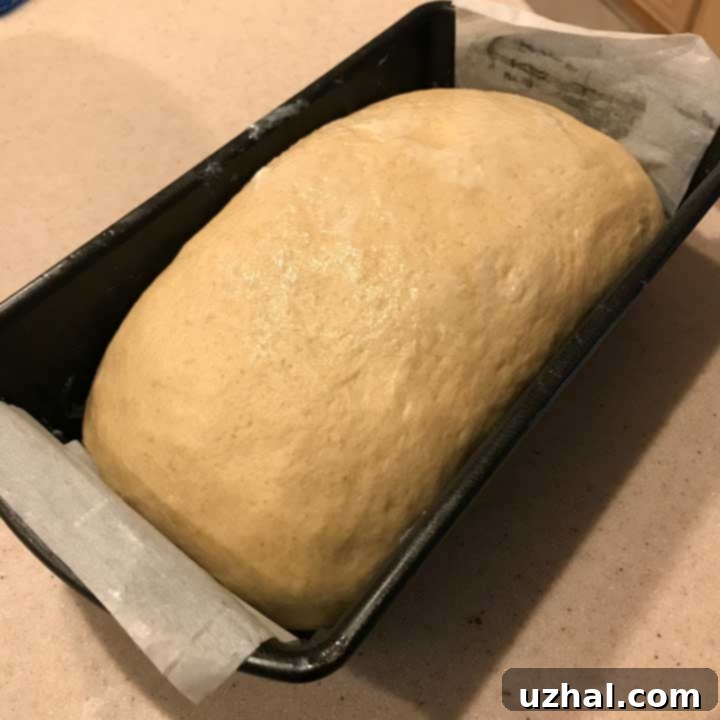
If using a stand mixer with a dough hook, knead the dough on medium speed for about 7-10 minutes, or until it becomes smooth, elastic, and passes the windowpane test (a small piece of dough can be stretched thin enough to see light through it without tearing). If kneading by hand, this process will take about 10-15 minutes of vigorous kneading. Once kneaded, transfer the dough to a lightly greased bowl, turn it once to coat, then cover it again with plastic wrap. Let it rise in a warm place until it has doubled significantly in bulk, which typically takes about 1 hour. After this rise, gently punch down the dough to release the air, shape it into a loaf, and transfer it into your greased 9×5 inch loaf pan. Cover the pan and allow the dough to rise for a third time until it has doubled in size once more, usually another hour or so, creating a beautiful domed top.
-
When the dough has completed its final rise and you are ready to bake, preheat your oven to 375°F (190°C). Bake the loaf for approximately 35 minutes, or until the crust is a deep golden brown and the loaf sounds hollow when tapped gently on the bottom. If desired, you can use an instant-read thermometer to confirm doneness; the internal temperature should be between 200-210°F (93-99°C). Remove the bread from the oven, immediately turn it out onto a wire rack, and let it cool completely before slicing and serving to ensure the best texture and flavor.
Enjoying Your Homemade Sourdough Honey Whole Wheat Bread
Once your Sourdough Honey Whole Wheat Bread has cooled, it’s ready to be enjoyed in countless ways. Its robust flavor and satisfying texture make it incredibly versatile. Slice it thick for hearty sandwiches piled high with your favorite fillings, or toast it lightly and spread with butter, jam, or avocado for a delightful breakfast or snack. It also makes an excellent accompaniment to soups and stews, perfect for soaking up rich broths. The subtle sweetness from the honey means it can even be served alongside fruit or a light cheese board. This bread is not just food; it’s an experience, a product of your patient efforts, and a warm, comforting presence in your home.
Final Thoughts on Small Batch Sourdough Baking
Baking with a small sourdough starter, as this recipe demonstrates, is a highly rewarding practice. It reduces waste, makes your starter more manageable, and still allows you to enjoy the unparalleled taste and texture of homemade sourdough bread. This Sourdough Honey Whole Wheat Bread is a shining example, proving that big flavor and a perfect loaf don’t require a monumental effort or an oversized starter. So, gather your ingredients, fire up your oven, and prepare to be delighted by the rich, wholesome goodness of this exceptional small batch sourdough creation. Happy baking!
