The Best Biscotti Thins Recipe: Crispy, Customizable & Irresistibly Delicious
Biscotti Thins hold a special place in my heart as one of my absolute favorite cookies, and the recipe I’m sharing with you today is truly my go-to, all-time best. These delightful crunchy egg white cookies are not just a treat for the palate; they’re also incredibly versatile, making them a joy to bake again and again. While the core technique remains consistent, I love to experiment with different combinations of fruits, nuts, and chips, ensuring every batch offers a unique culinary adventure. Whether you’re looking for a fun project in the kitchen or a clever way to use up those extra egg whites, these homemade biscotti thins are a perfect choice.
Their signature crispness and delicate texture make them an ideal accompaniment to your morning coffee or afternoon tea. Unlike their thicker cousins, these “thins” offer a lighter, more ethereal crunch that simply melts in your mouth. You’ll find yourself reaching for another slice before you even realize it! This comprehensive guide will walk you through every step, from whipping up a perfect meringue to achieving that coveted twice-baked perfection, along with plenty of tips for customization and storage.
Ready to bake the most irresistible biscotti thins you’ve ever tasted? Let’s dive into the details! You can jump directly to the full recipe below, or read on for all my expert tips and tricks to master these delightful Italian-inspired treats.
Crafting Perfect Biscotti Thins: A Simple Overview
Making these delicate biscotti thins might seem intricate, but the process is surprisingly straightforward. It primarily involves creating a stable meringue base, gently folding in your chosen mix-ins, baking it in a loaf form, and then slicing and twice-baking for that signature crispness. Here’s a quick rundown to give you an idea of the flow:
- **Whip Egg Whites:** Begin by beating egg whites in a stand mixer until they form soft, airy peaks. This is the foundation of your light and crisp biscotti.
- **Form the Meringue:** Gradually incorporate sugar, a pinch of salt, and vanilla extract. Continue beating until the mixture transforms into stiff, glossy peaks – essentially, you’re creating a beautiful meringue.
- **Fold in Flavor:** Gently fold in the flour, followed by your favorite nuts, chocolate chips, and dried fruit. Don’t worry if the meringue deflates a bit; that’s perfectly normal at this stage.
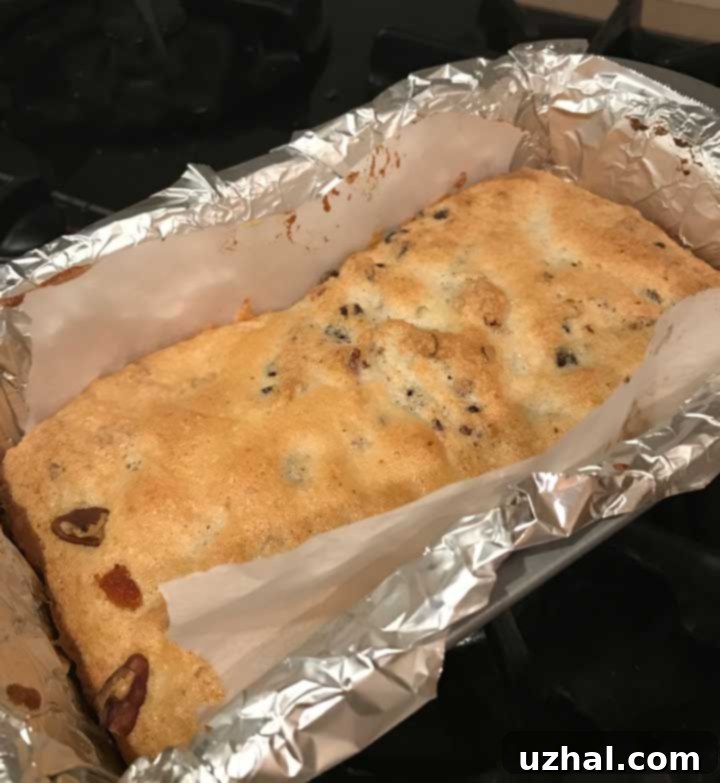
- **Bake & Chill:** Spread the mixture evenly into a prepared loaf pan and bake. Once the first bake is complete and the loaf has cooled slightly, it’s crucial to chill or even freeze it thoroughly. This step is key for effortless, super-thin slicing.
- **Slice & Crisp:** Once firm, slice the loaf into thin pieces using a serrated knife. Arrange these slices on baking sheets and return them to a low-temperature oven for a second bake, which dries them out and creates their characteristic crisp texture.
This two-stage baking process is what gives biscotti its unique crunch and extended shelf life, making these homemade treats truly special. The magic lies in the details, and we’ll explore each step more thoroughly below.

The Secret to Super Thin Biscotti: Freezing and Precise Slicing
Achieving those perfectly thin, delicate slices of biscotti is a game-changer, and the secret lies in a simple yet effective technique: freezing the baked loaf before slicing. After the initial bake, your biscotti loaf will be soft and somewhat fragile. Trying to slice it at this stage would likely result in crumbled pieces and uneven thicknesses.
By transferring the cooled loaf to the refrigerator until very cold, or even better, freezing it solid, you firm up the structure of the cookie dough. This allows you to cut through it cleanly with minimal crumbling. I typically freeze the loaf for several hours, or even overnight, and find that a completely frozen log yields the best results. Once frozen, use a sharp serrated knife to carefully slice the loaf crosswise. Aim for slices between ⅛ and ¼ inch thick for that ideal “thin” biscotti experience. The firmer the loaf, the more control you’ll have, ensuring each slice is uniformly delicate.
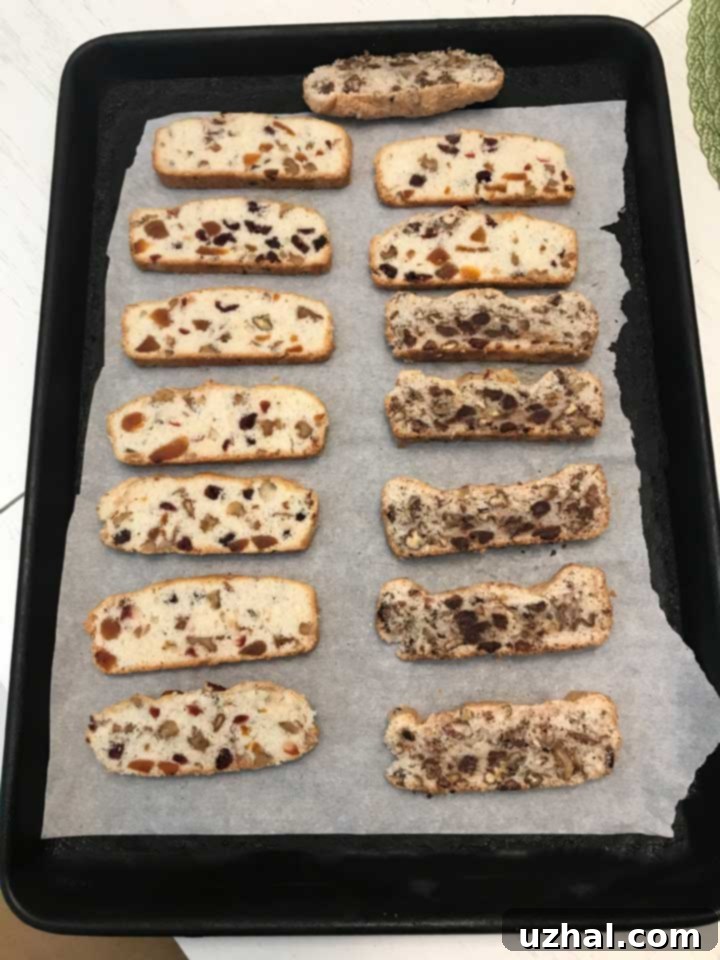
In a recent experimental batch, I even made half regular biscotti and half keto-friendly versions. The photo above shows them after their first bake, side-by-side. The “normal” ones on the left were crafted with a delightful combination of walnuts, dried apricots, and tart cranberries. On the right, my keto experiment involved substituting almond flour for regular flour, using Lakanto monk fruit blend as a sugar alternative, and loading them up with Lily’s chocolate chips and pecans, enhanced with a touch of maple extract. A notable observation was that the keto biscotti took a significantly longer time to dry out during the second bake, a common characteristic of almond flour-based recipes. This highlights the importance of keeping a close eye on your biscotti during the drying phase, regardless of the ingredients.
Elevate Your Biscotti with a Swedish Almond Cake Pan
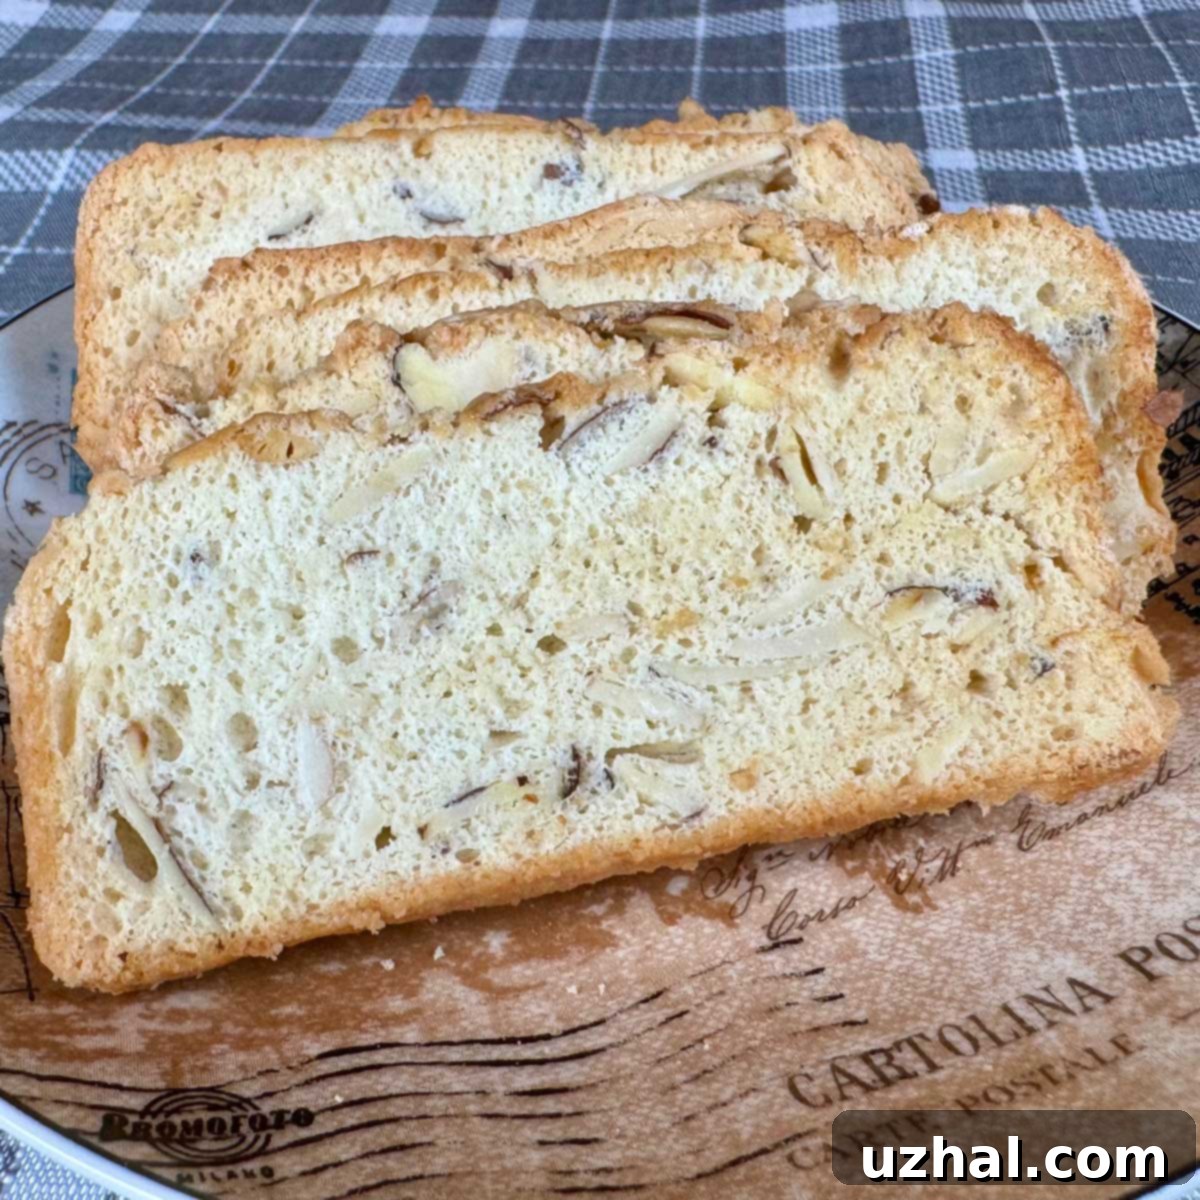
While this recipe works beautifully in a standard 9×5 inch loaf pan, I’ve recently discovered a tool that promises to take your biscotti thins to the next level: a loaf pan with a rounded bottom, often used for Swedish almond cakes. While I haven’t yet tested this specific recipe in one of these unique pans, the potential benefits for biscotti thins are clear.
The rounded bottom design would naturally create a more aesthetically pleasing, slightly domed biscotti loaf, resulting in elegantly curved slices. This could add a touch of professional bakery charm to your homemade treats. Instead of lining with parchment paper, you would simply grease the pan thoroughly, which can sometimes be an even easier prep step. I’ve just placed an order for one of these pans and am eagerly anticipating testing it out with this recipe. I’m confident it will produce beautifully shaped, crunchy egg white cookies, enhancing their visual appeal without compromising on taste or texture. I will certainly report back with my findings once I’ve had a chance to experiment!
Storing Your Homemade Biscotti Thins for Lasting Freshness
The only real “downside” to these homemade biscotti thins is how incredibly addictive they are! Seriously, it’s a challenge to eat just one. Fortunately, proper storage can help you manage your indulgence and keep them fresh for longer. At room temperature, in an airtight container, your biscotti thins will maintain their peak freshness and crispness for about a week. After that, while they’ll still be perfectly edible and tasty, they might lose some of their signature crunch.
For longer storage, the freezer is your best friend. I often eat a few fresh from the oven and then tuck the rest away in the freezer. When stored in an airtight container or freezer bag, biscotti thins will stay perfectly fresh for months. You can simply pull out a few slices as needed; they thaw quickly at room temperature and regain their crisp texture. This makes them an excellent make-ahead treat, allowing you to always have a delicious, homemade cookie on hand for unexpected guests or a personal craving.

A Vegan Twist: Using Aquafaba for Eggless Biscotti Thins
For those seeking a delicious egg-free or vegan option, I’m thrilled to share that this biscotti thins recipe can be successfully adapted using aquafaba – the liquid from a can of chickpeas. Aquafaba is a remarkable ingredient that mimics the properties of egg whites, making it an excellent substitute in meringues and other baked goods where egg whites provide structure and lift.
I’ve recently experimented with a couple of batches using aquafaba, and the results were fantastic. For my vegan version, I used 140 grams of aquafaba (roughly the equivalent of 4 large egg whites). To compensate for potential textural differences and to enhance the flavor, I increased the amount of sliced almonds significantly to 2 cups, adding more body and crunch. The dry ingredients included 100 grams of all-purpose flour and 100 grams of sugar (I typically use 125 grams in the egg white version, so this was a slight reduction). For flavoring, I opted for 2 teaspoons of almond extract and 1 teaspoon of vanilla, as almond extract pairs beautifully with aquafaba and gives a lovely aroma. I also included an optional ¼ teaspoon of baking powder, which seemed to lighten the texture somewhat, though it’s not strictly critical for success.
This recipe is incredibly flexible, allowing you to swap in almost any kind of chopped dried fruit, nuts, candy pieces, or flavorings you desire. Feel free to get creative with combinations like pistachios and dried cherries, or hazelnuts and dark chocolate chips. If you’re baking for a smaller crowd or want to experiment with different shapes, you can easily halve the recipe and bake it in cupcake tins (for round biscotti bites) or smaller loaf tins. Just remember to adjust the baking time accordingly, as smaller portions will bake faster. However, for the classic biscotti thin shape, a standard 9×5 inch loaf pan remains the ideal choice.
Customizing Your Biscotti Thins: Endless Flavor Combinations
One of the most exciting aspects of this biscotti thins recipe is its incredible adaptability. While the Cranberry, White Chip, and Pecan combination is a beloved classic, the base meringue recipe is a blank canvas for your culinary imagination. Don’t be afraid to mix and match to create your signature biscotti!
- **Nuts & Seeds:** Beyond pecans, consider toasted almonds, walnuts, pistachios, hazelnuts, or even pumpkin seeds for varying textures and flavors. Toasting them beforehand will significantly enhance their nutty aroma.
- **Dried Fruits:** Swap cranberries for dried apricots, cherries, raisins, figs, or even candied citrus peel. Chop larger fruits into small, even pieces to ensure they distribute well throughout the batter.
- **Chocolate & Other Chips:** Dark chocolate chips, milk chocolate chunks, butterscotch morsels, or even toffee bits can add delightful pockets of sweetness and richness.
- **Extracts & Spices:** While vanilla and almond extract are staples, a hint of orange zest, a dash of cinnamon, or a pinch of cardamom can transform the flavor profile entirely. Maple extract works wonderfully with pecans, as seen in my keto experiment.
- **Trail Mix or Blends:** For ultimate convenience, grab a bag of your favorite trail mix or a pre-made dried fruit and nut blend. Just chop them roughly and fold them in!
The key is to maintain a similar total volume of mix-ins to ensure the integrity of the meringue base. Generally, about 1 to 1.5 cups of total add-ins (nuts, fruit, chips combined) works best for this recipe.
Troubleshooting Common Biscotti Issues
Even experienced bakers can run into snags. Here are a few common issues and how to address them:
- **Biscotti not crisp enough?** The second bake is crucial for drying them out. If they’re still soft after cooling, don’t hesitate to put them back in the oven at a low temperature (around 225-250°F / 107-120°C) for another 15-30 minutes, checking frequently. Ensure they are completely cool before assessing their crispness, as they firm up significantly upon cooling.
- **Too crumbly when slicing?** This usually means the loaf wasn’t chilled or frozen enough. Make sure it’s very firm before attempting to slice. A sharp serrated knife also makes a huge difference.
- **Biscotti got too brown during the second bake?** The goal is to dry them, not to toast them excessively. Keep the oven temperature low and keep a close eye on them, especially after 30 minutes. You can also cover them loosely with foil if they’re browning too quickly.
Serving Suggestions for Your Delicious Biscotti Thins
These crispy biscotti thins are wonderful on their own, but they truly shine when paired with the right beverage or dessert.
- **Coffee & Tea:** Their classic pairing! Dip a thin slice into your hot coffee, espresso, or a comforting cup of tea. The slight softening of the biscotti adds another layer of enjoyment.
- **Dessert Accompaniment:** Serve them alongside a scoop of vanilla bean ice cream, a fruit sorbet, or a rich chocolate mousse for an elegant dessert.
- **Wine Pairing:** For a more sophisticated treat, pair your biscotti thins with a dessert wine like Vin Santo or a crisp Moscato.
- **Snack Time:** Keep a stash on hand for a quick, satisfying snack that’s lighter than most cookies.
No matter how you choose to enjoy them, these homemade biscotti thins are sure to impress.
Ready to Bake? Your Ultimate Biscotti Thins Recipe Awaits!
I hope this detailed guide has inspired you to try your hand at making these utterly delightful biscotti thins. With their perfect crunch, endless customization possibilities, and satisfying sweetness, they are truly a cookie lover’s dream. Whether you stick to the classic Cranberry, White Chip, and Pecan or venture into your own unique flavor combinations, you’re in for a treat. Don’t forget the power of freezing for easy slicing and the joy of a second bake for that unbeatable crispness. Happy baking!
- Double Chocolate Thin Biscotti
- Banana Biscotti
- Chocolate Hazelnut Biscotti Thins
- Small Batch Butterscotch Whole Wheat Biscotti
- Coconut Sugar Biscotti Thins
Recipe

Cranberry, White Chip and Pecan Biscotti Thins
Anna
Pin Recipe
Ingredients
- 4 large egg whites (140 to 150 grams)
- ⅔ cup granulated sugar (125 grams)
- ⅛-1/4 teaspoon salt can omit or use less if desired**
- ½ teaspoon vanilla
- ¾ cup all-purpose flour (100 grams)
- ⅔ cup toasted and chopped pecans
- ⅓ cup white chips or other flavor chip
- ⅓ cup dried cranberries
Instructions
-
Preheat oven to 350 degrees F (175°C). Line a 9×5 inch loaf pan with strips of parchment paper, leaving an overhang on the long sides for easy removal.
-
In a clean metal or glass bowl (ensure it’s grease-free), beat the egg whites using a stand mixer with the whisk attachment on medium-high speed until soft peaks form. This means the peaks curl over slightly when the whisk is lifted. Gradually add the granulated sugar, vanilla extract, and salt, continuing to beat until the whites are stiff and glossy. When you lift the whisk, the peaks should stand upright without drooping.
-
Gently sprinkle the all-purpose flour over the meringue mixture. Using a heavy-duty silicone scraper or a large spoon, carefully fold the flour into the meringue. Use a gentle, sweeping motion from the bottom to the top, turning the bowl as you go, to incorporate without deflating the meringue too much.
-
In a separate small bowl, mix together the toasted and chopped pecans, white chips (or other flavor chips), and dried cranberries. Add this mixture to the batter and fold them in carefully until just combined. Overmixing will deflate the meringue and result in a denser biscotti.
-
Spoon the prepared batter evenly into your parchment-lined loaf pan. Use the back of a spoon or a spatula to spread it smoothly. Bake on the center rack of your preheated oven for 35 minutes, or until the loaf is golden brown on top and feels slightly firm to the touch. It will still be a little soft in the center. Remove the loaf from the oven and let it cool in the pan for about 20 minutes before carefully lifting it out by the parchment paper overhangs. Transfer it to a wire rack and let it cool completely to room temperature. Once cool, transfer the loaf to the refrigerator and chill until it’s very cold and firm – this makes slicing much easier. For best results and maximum firmness, freeze the loaf for several hours or overnight. You can keep the log frozen for as long as you want, then slice it while still frozen.
-
Once the loaf is thoroughly chilled or frozen, preheat your oven again to a lower temperature: 250 degrees F (120°C). This low temperature is crucial for drying the biscotti without over-browning.
-
Carefully peel the parchment paper off the cold loaf. Using a sharp serrated knife, cut the loaf crosswise into very thin slices. Aim for slices typically between ⅛ and ¼ inch thick. Arrange these slices in a single layer on two large baking sheets. Bake for approximately 45 minutes, or until the biscotti thins are crisp and dry. Start checking at 30 minutes, and rotate the baking sheets halfway through the baking time to ensure even drying. The goal is to dry them out without letting them get too dark brown, so keep a close eye on them. Remove the biscotti thins from the oven and let them cool completely on the baking sheets. If they’re not completely crisp while still warm, they should firm up and become perfectly crisp as they cool. Store in an airtight container at room temperature for up to a week, or freeze for longer storage.
Notes
