Indulge in Ultimate Moistness: The Best Double Chocolate Apple Butter Bread Recipe
There’s something uniquely comforting about a warm slice of homemade quick bread, especially when it’s infused with rich chocolate and a subtle hint of fruit. While applesauce often steals the spotlight as a healthy oil substitute in baking, its more decadent cousin, apple butter, offers an even deeper, more complex flavor profile. This Double Chocolate Apple Butter Bread recipe masterfully combines the best of both worlds, using a thoughtful blend of apple butter and vegetable oil to achieve an unparalleled moistness that truly sets it apart.
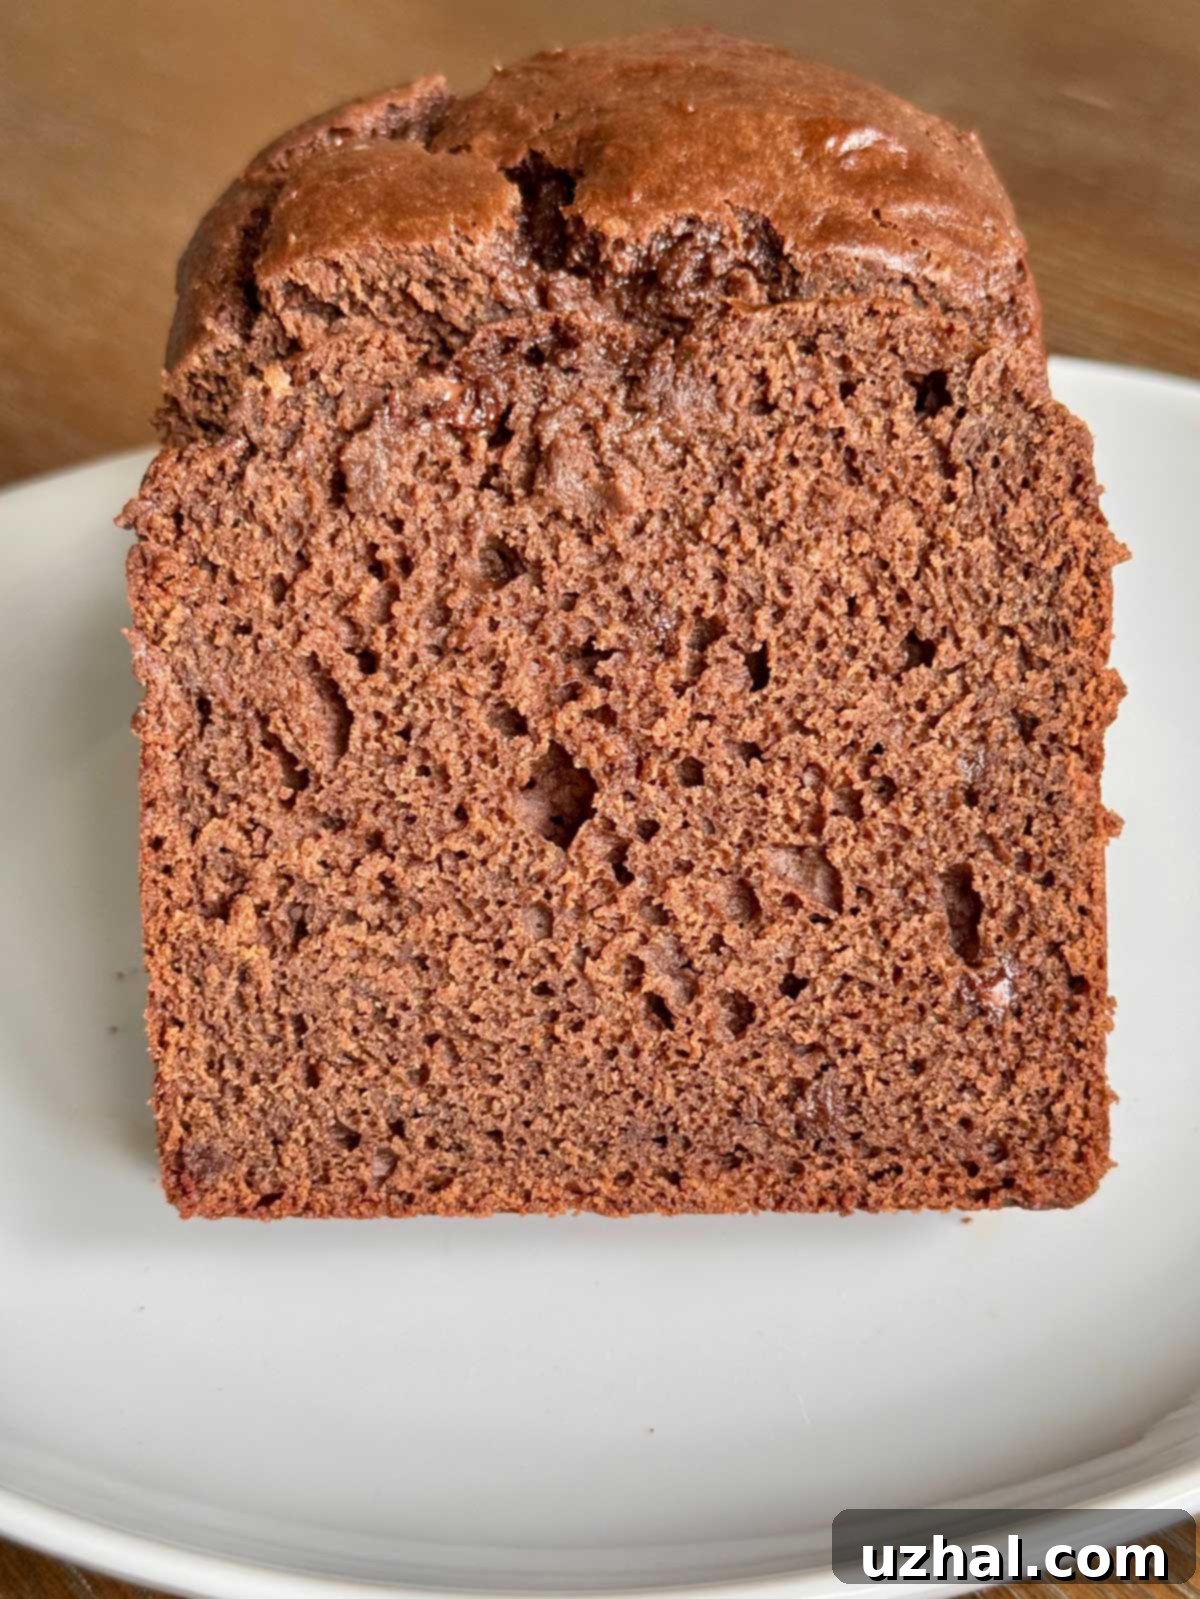
Far from merely being a healthy swap, the apple butter in this recipe plays a crucial role in developing a rich, tender crumb, all while imparting just a whisper of its signature caramelized apple notes. The result? A deeply satisfying chocolate bread that’s incredibly moist, intensely flavorful, and perfect for any occasion. Whether enjoyed with your morning coffee, as an afternoon treat, or a comforting dessert, this quick bread is guaranteed to become a new favorite. Prepare to experience a chocolate bread like no other, where the nuanced sweetness of apple butter elevates every bite without overpowering the star – chocolate!

Unraveling the Mystery: What Exactly is Apple Butter?
For those new to the culinary delights of apple butter, the name itself can be a bit misleading. Rest assured, despite its rich and spreadable texture, apple butter contains no actual dairy butter! Instead, it’s a highly concentrated, intensely flavored fruit spread made from apples, often sweetened with sugar and spiced with warming notes like cinnamon, cloves, and nutmeg.
So, how does it differ from its more common counterpart, applesauce? The key lies in the preparation method. While applesauce is typically cooked relatively quickly and retains a lighter color and often a chunkier texture, apple butter undergoes a prolonged, slow cooking process. This extended cooking time allows the natural sugars in the apples to caramelize, transforming the mixture into a deep, dark brown hue and developing an incredibly rich, concentrated flavor. Think of it as applesauce’s sophisticated, more complex sibling – the flavors are deeper, more intense, and wonderfully aromatic. This caramelization process not only darkens the color but also creates that signature silky-smooth texture, making it perfect for spreading, baking, or even using as a glaze.
The beauty of apple butter extends beyond its unique flavor; it also brings exceptional moisture to baked goods, making it an ideal ingredient for quick breads and muffins. Its natural sweetness often allows for a reduction in added sugars, contributing to a more balanced profile. You can easily find apple butter in most well-stocked grocery stores, often located near jams and jellies or in the specialty food aisles. However, for a truly rewarding experience, consider making your own. Homemade apple butter, especially prepared in a slow cooker, offers a level of freshness and customizable flavor that store-bought versions often can’t match. Plus, the aroma that fills your kitchen while it simmers is an added bonus!
Craft Your Own: Easy Slow Cooker Apple Butter Recipe
While buying apple butter is convenient, making it yourself is incredibly satisfying and surprisingly simple, especially with a slow cooker. This hands-off method allows the apples to slowly break down and caramelize over hours, deepening their flavor without constant stirring. Here’s a streamlined “recipe” to guide you:
Ingredients for Homemade Apple Butter:
- 6 pounds of your favorite baking apples (Fuji, Gala, Honeycrisp, or a mix work wonderfully for balanced flavor and texture)
- ¾ cup granulated sugar
- ¼ cup brown sugar (adds depth and moisture)
- ½ tablespoon ground cinnamon
- ¼ teaspoon ground nutmeg
- ⅛ teaspoon ground cloves (for a hint of warmth)
- ¼ teaspoon salt (enhances all the flavors)
- 1 tablespoon vanilla extract (added at the end to preserve its delicate flavor)
Instructions for Slow Cooker Apple Butter:
- **Prepare the Apples:** Begin by peeling, coring, and chopping your 6 pounds of apples. Don’t worry too much about uniform pieces, as they will be pureed later. The goal is to expose more surface area for cooking.
- **Combine Ingredients:** Place all the chopped apples into your slow cooker. Add the granulated sugar, brown sugar, cinnamon, nutmeg, cloves, and salt. Toss everything gently until the apples are well coated with the spice mixture.
- **Slow Cook to Perfection:** Cover your slow cooker and set it to low. Allow the mixture to cook for approximately 9 hours. During this time, the apples will soften considerably, release their juices, and the sugars will begin to caramelize, darkening the mixture and intensifying its flavor. You’ll notice a delightful aroma filling your kitchen!
- **Puree to Smoothness:** Once the cooking time is up and the apples are very tender, use an immersion blender (or carefully transfer to a regular blender in batches) to puree the apple mixture directly in the slow cooker until it reaches your desired smooth consistency. Be cautious, as the mixture will be hot.
- **Final Simmer:** Return the lid and continue to slow cook on low for another 30 minutes. This final simmer allows any remaining moisture to evaporate, further concentrating the flavors and thickening the apple butter to a perfect spreadable consistency.
- **Flavor Enhancement & Cooling:** Turn off the slow cooker and stir in the vanilla extract. The vanilla adds a lovely aromatic finish. Let the apple butter cool completely before transferring it to storage containers.
- **Storage:** Store your homemade apple butter in airtight jars in the refrigerator for up to 3-4 weeks, or freeze it in freezer-safe containers for longer-term enjoyment (up to 6 months). This homemade batch will elevate your baking and toast to new heights!
Key Notes for Crafting the Perfect Double Chocolate Apple Butter Bread
This Double Chocolate Apple Butter Bread stands proudly as a true quick bread, distinct from a mere cake, offering a dense yet tender crumb that is characteristic of the best homemade loaves. Its inherent structure and texture make it versatile enough for breakfast, a snack, or even a light dessert. Understanding a few key components will help you achieve baking perfection.
The Spice Debate: To Add or Not to Add?
The inclusion of warming spices like cinnamon and allspice in this chocolate bread is entirely optional, a matter of personal preference. When I first developed this recipe, my goal was to allow the pure, unadulterated chocolate flavor to shine through. However, after experimenting with a small whisper of these spices, I discovered they add a wonderful depth and complexity that beautifully complements both the chocolate and the subtle apple notes from the apple butter. They don’t overpower the chocolate but instead enhance it, creating a more nuanced and inviting aroma and taste profile. If you’re on the fence, I highly recommend adding a small amount – perhaps just a quarter teaspoon of each, as suggested in the recipe. It’s truly amazing how such a tiny quantity can elevate the entire experience, transforming a great chocolate bread into an extraordinary one.
The Indispensable Chocolate Chips: Why More is Always Better
While spices might be debatable, for me, the chocolate chips are non-negotiable. Even with the inherent sweetness of the bread and the rich cocoa flavor, the addition of chocolate chips elevates this quick bread from good to truly exceptional. They provide pockets of melty, intense chocolate that burst with flavor in every bite, adding not only extra sweetness but also a delightful textural contrast. My top recommendation is to opt for mini chocolate chips. Their smaller size ensures a much more even distribution throughout the batter. This means that instead of encountering large clumps of chocolate in some bites and none in others, you get a consistent, delightful burst of chocolate in virtually every single morsel. It truly creates the illusion of more chocolate and an all-around more satisfying experience. Feel free to use semi-sweet or dark chocolate chips based on your preference for sweetness and chocolate intensity.
Mastering Your Bake: Essential Tips for Success
Achieving a perfectly moist and flavorful quick bread is an art, but with these proven tips, you’ll be baking like a pro. Paying attention to these details will ensure your Double Chocolate Apple Butter Bread turns out beautifully every time.
- **Choose the Right Loaf Pan:** The recommended size is an 8 ½ by 4 ½ inch metal loaf pan. This specific dimension ensures the batter bakes evenly and rises to form that classic, high-domed loaf. If your loaf pan is wider or made of a different material (like glass or ceramic, which conduct heat differently), you might need to adjust your baking time. Wider pans can lead to a shorter baking time (potentially 5-10 minutes less) as the batter spreads out more thinly, while glass pans often require a slight reduction in oven temperature (by about 25°F) and a slightly longer bake. Always be prepared to adapt!
- **Monitor Baking Time Closely:** While the recipe suggests a bake time of 50 to 60 minutes, oven temperatures can vary significantly, even between identical models. Start checking your loaf for doneness as early as 45 minutes. The most reliable test is to insert a wooden skewer or toothpick into the very center of the bread. It should come out clean or with a few moist crumbs clinging to it, but not wet batter. If it’s still gooey, continue baking in 5-minute increments until done. Overbaking is the enemy of moist quick bread!
- **Accurate Flour Measurement is Key:** This is perhaps one of the most critical tips for quick bread success. Never scoop flour directly from the bag with your measuring cup, as this compacts the flour and can add up to 25% more than needed, resulting in a dense, dry bread. Instead, use one of two methods:
- **Weighing:** For the most precise results, use a kitchen scale. The recipe provides gram measurements (220 grams for 1 ¾ cups), which is always the most accurate way to measure flour.
- **Spoon and Level:** If you don’t have a scale, gently fluff up the flour in its container with a spoon. Then, spoon the flour into your measuring cup until it’s overflowing. Use the straight edge of a knife or an offset spatula to level off the excess flour across the top of the cup. This method ensures you get the correct amount without compacting it.
- **Understanding Cocoa Powder Types:** This recipe calls for unsweetened natural cocoa powder. Natural cocoa powder is acidic, and it reacts with baking soda to create lift in baked goods. Since this recipe also includes baking powder (which contains its own acid), you might be able to substitute Dutch-processed cocoa powder (which is non-acidic) without completely compromising the rise. However, the flavor profile will differ slightly, as Dutch-processed cocoa has a milder, less fruity chocolate flavor. I haven’t specifically tested this variation, so for consistent results as intended, stick with natural cocoa powder.
- **The Magic of Full-Fat Plain Yogurt:** Using full-fat plain yogurt (such as Greek yogurt) is highly recommended. The fat content contributes significantly to the bread’s moistness and rich texture. Additionally, the slight tanginess of the yogurt can interact with the leavening agents, enhancing the rise and adding a subtle depth of flavor that complements the chocolate and apple butter beautifully. If you don’t have full-fat plain yogurt, whole milk sour cream can be a suitable substitute, but avoid low-fat or fat-free versions as they can compromise the bread’s texture and moisture.
- **Don’t Overmix the Batter:** Once you add the dry ingredients to the wet, mix just until combined. Overmixing develops the gluten in the flour, leading to a tough, chewy bread rather than the desired tender quick bread texture. A few small lumps are perfectly fine!
- **Allow for Proper Cooling:** It’s tempting to slice into a warm loaf right out of the oven, but patience is a virtue here! Letting the bread cool in the pan for about an hour allows it to set properly and prevents it from falling apart when you remove it. Cooling it completely on a wire rack after removing it from the pan helps to maintain its moist interior and prevents it from becoming gummy or soggy.
- Slow Cooker Pudding Cake
- Slow Cooker Chocolate Mocha Pudding Cake
- Perfect Cream Cheese Pound Cake
- Chocolate Apple Butter Muffins
- Apple Pie Muffins
Double Chocolate Apple Butter Bread Recipe

Double Chocolate Apple Butter Bread
Anna
Pin Recipe
Ingredients
- 1 ¾ cup all-purpose flour (220 grams) Weigh or measure with a light hand — do not pack
- ½ cup unsweetened natural cocoa powder (45 grams)
- ½ teaspoon baking powder
- ½ teaspoon baking soda
- ¾ teaspoon salt
- ¼ teaspoon each of cinnamon and allspice (optional)
- ⅓ cup apple butter or pumpkin butter (The weight should be around 105 grams)
- ⅓ cup vegetable oil
- 1 cup granulated sugar (200 grams) Do not lower the sugar or you’ll lose moisture
- 2 large eggs
- 1 ½ teaspoon vanilla extract
- 1 cup full fat plain yogurt (220 grams)
- ¾ cup mini chocolate chips
- ¼ cup chopped pecans (optional)
Instructions
-
Preheat oven to 350 degrees F. Grease and flour an 8 ½ by 4 ½ inch metal loaf pan.
-
Mix the flour, cocoa powder, baking powder, baking soda, salt and spices together in a bowl and set aside. Make sure they are very evenly mixed.
-
In a large mixing bowl, whisk the apple butter, oil and sugar together until smooth. Add the eggs one by one, then whisk in the vanilla and the yogurt until smooth.
-
Add the flour mixture and stir with a heavy duty scraper until it is fully blended, then stir in the mini chips.
-
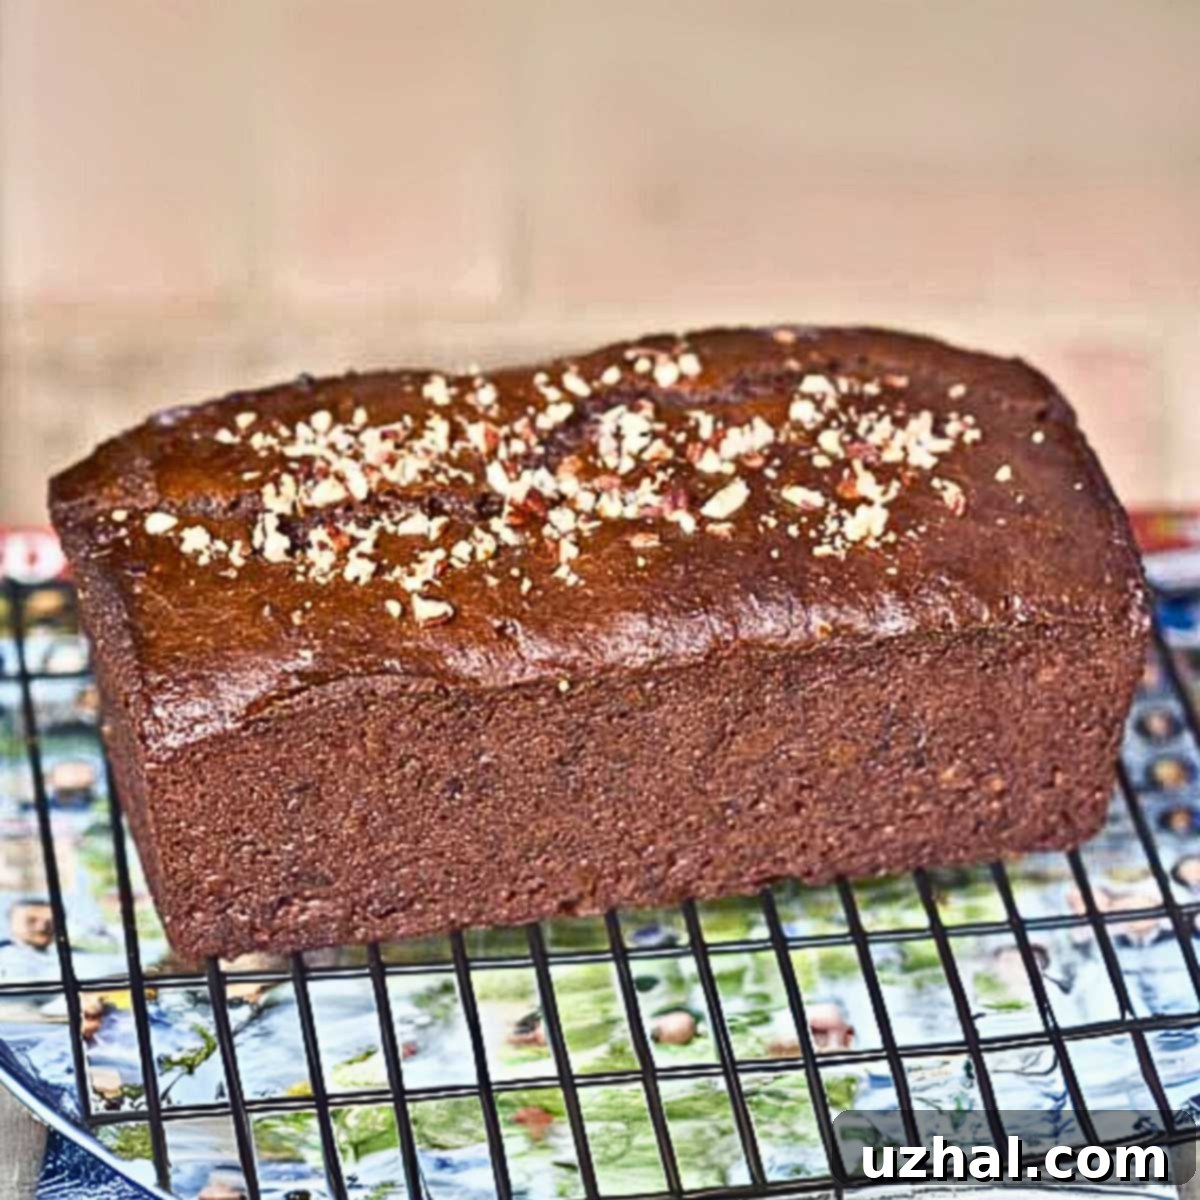
Scrape the (thick!) batter into the loaf pan and sprinkle nuts (if using) across the top.
-
Bake on center rack for 50 to 60 minutes or until a pick inserted in the center comes out clean.
-
Let cool in the pan for about an hour, then remove from pan and let cool completely before serving.
We hope you enjoy baking and tasting this exceptional Double Chocolate Apple Butter Bread as much as we do. Its delightful combination of deep chocolate flavor, subtle apple notes, and incredible moistness makes it a standout quick bread. Perfect for sharing with loved ones or savoring a quiet moment, this recipe is a testament to how simple ingredients can create extraordinary results. Don’t hesitate to experiment with different apple varieties for your homemade apple butter or adjust the chocolate chip type to suit your taste. Happy baking!
