Crafting the Perfect Honey Rye Pretzels: A Deep Dive into Flavor and Technique
My kitchen always has a secret weapon tucked away in the freezer: a bag of rye flour. I love experimenting with it, subtly introducing it into various bakes to observe its transformative effects on both texture and flavor. It adds a delightful complexity to cookies, though sometimes its robust character can be a bit assertive. However, its true magic shines in recipes like Franciscan bread. Recently, I decided to incorporate it into a pretzel recipe, creating what I now affectionately call “Rye Flour Pretzels.” To be honest, my expectations were modest, yet the outcome was nothing short of astonishing. These were, without exaggeration, the finest pretzels I have ever tasted, or at the very least, the most exceptional I’ve had the pleasure of baking myself.
This recipe transforms the humble pretzel into something extraordinary, infusing it with a unique character that will undoubtedly impress anyone who tries it. From the subtle earthy notes of rye to the golden crispness of the crust, every bite is a testament to the power of thoughtful ingredient choices and precise techniques. Whether you’re a seasoned baker or a curious beginner, embarking on this pretzel-making journey promises a deeply rewarding culinary experience.

The Distinctive Flavor Profile of Rye Flour Pretzels
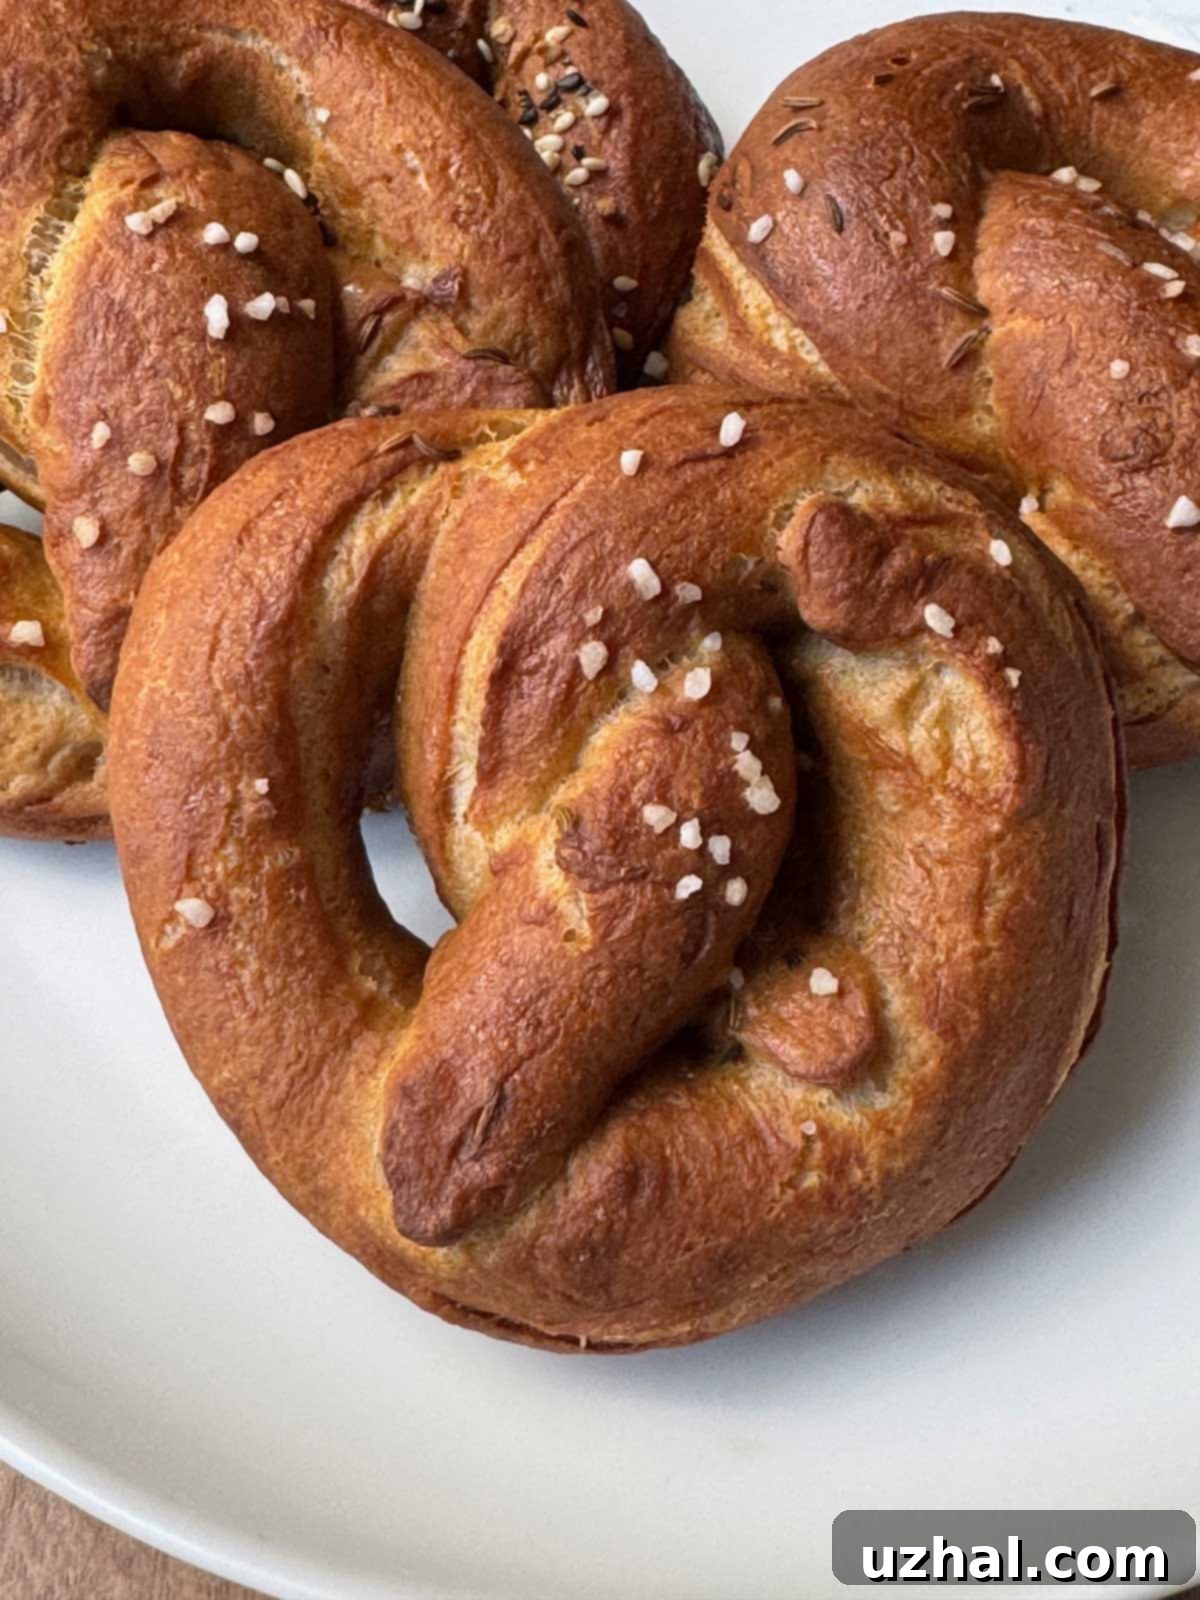
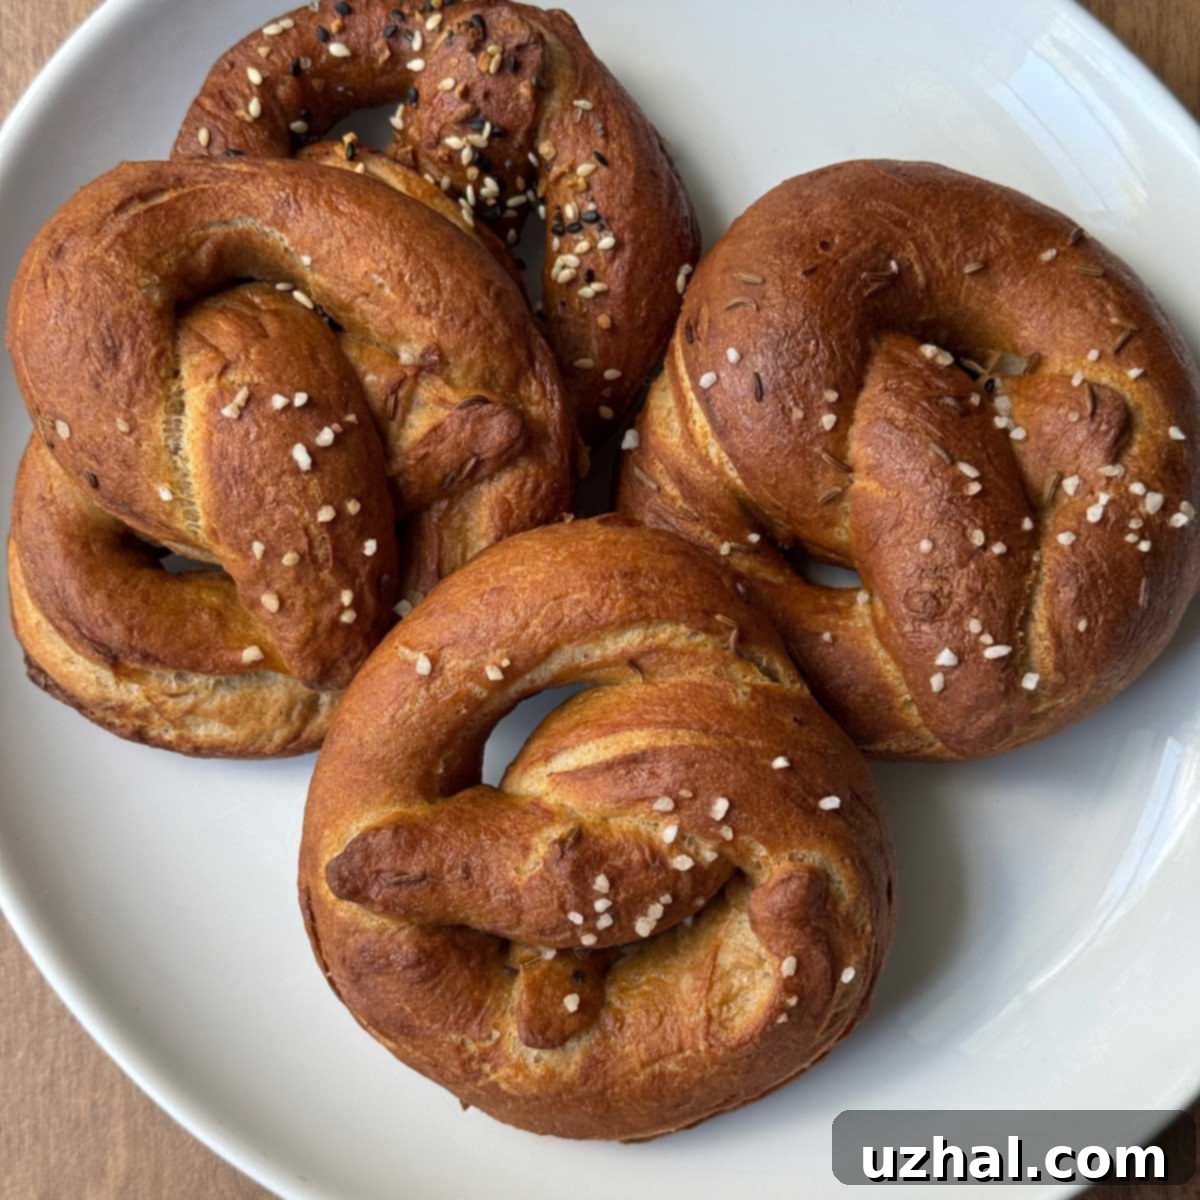
What truly sets these pretzels apart is their remarkable flavor. The rye flour plays a pivotal role, imparting a subtle depth and richness to the crumb without making the pretzels taste overtly like traditional rye bread. Instead, it adds a nuanced, slightly earthy undertone that complements the classic pretzel profile beautifully. The honey, a seemingly small addition, introduces a delicate sweetness that balances the rye’s earthiness, creating a harmonious and addictive flavor. This subtle sweetness also contributes to the beautiful golden-brown crust during baking.
For those who appreciate an extra layer of aromatic complexity, caraway seeds are a fantastic, albeit optional, addition. The original recipe, developed by Kim Boyce and featured in Food and Wine, didn’t include them. I initially had reservations, fearing they might push the flavor too close to pumpernickel bread, which isn’t the desired profile for a pretzel. However, I decided to experiment by adding a sprinkle, and I was genuinely delighted with the results. The caraway seeds add a warm, slightly peppery note that enhances the rye flour, making these pretzels even more captivating. If you’re a fan of the spice, I highly recommend including them; if not, feel free to omit them without compromising the overall deliciousness of the pretzel.
Essential Tools for Effortless Pretzel Making: The Stand Mixer Advantage
Making pretzels from scratch might seem daunting, but with the right tools, the process becomes surprisingly quick and enjoyable. A stand mixer equipped with a dough hook is a game-changer for this recipe. It significantly reduces the labor involved in kneading, allowing the machine to develop the gluten in the dough efficiently. This ensures a smooth, elastic dough that is much easier to work with when shaping.
On a related note, I recently upgraded from a traditional dough hook to a dough spiral, and I’ve found that the spiral attachment performs the task even more quickly and effectively. If you ever find yourself needing to replace a dough hook, I strongly encourage you to consider investing in a dough spiral – it’s a worthwhile upgrade that genuinely speeds up the kneading process. For those who don’t own a stand mixer, don’t despair! A handheld mixer with dough hooks can also get the job done, albeit with a bit more manual effort. My daughter, for instance, finds hers perfectly adequate for various baking projects, including bread doughs. The key is to ensure the dough is thoroughly kneaded until it reaches the desired smooth and elastic consistency, regardless of the equipment used.
The Golden Secret: Baking with Clarified Butter
Here’s a practical tip that can elevate your pretzel-baking experience: consider using clarified butter to grease your baking pans. Historically, I’ve always relied on parchment paper for baking pretzels, and while it generally works, there are times when it can be quite finicky and annoying, especially when handling wet dough. During the first trial of this rye pretzel recipe, the parchment just wasn’t cooperating, leading to unnecessary frustration.
For the second batch, I opted for a different approach: I simply brushed a generous layer of clarified butter onto one of my well-used, trusty sheet pans. The results were outstanding. Clarified butter, also known as ghee, has a higher smoke point than regular butter because the milk solids and water have been removed. This means it can withstand the high oven temperatures required for pretzels without burning or smoking excessively, keeping your kitchen air clear. More importantly, it creates a non-stick surface that releases the pretzels effortlessly, preventing any sticking disasters. Beyond its functional benefits, clarified butter also imparts a subtle, rich, and nutty flavor to the pretzel crust, adding an extra layer of deliciousness that you wouldn’t get from parchment paper or plain cooking spray. It’s a small change that makes a noticeable difference in both ease of baking and final taste.

Mastering Pretzel Making: Expert Tips for Perfect Results
Achieving bakery-quality pretzels at home is entirely possible with a few key insights and techniques. Here are some non-professional, yet highly effective, tips gathered from years of baking experience to help you create truly outstanding pretzels:
- Yeast Activation Temperature: The temperature of your water is crucial for yeast activity. For active dry yeast, aim for a range of 105-110°F (40-43°C). This warmth helps activate the yeast without killing it. If you’re using instant or rapid-rise yeast, which can be mixed directly with the flour, slightly hotter water up to 130°F (54°C) is generally acceptable as it activates faster and doesn’t require a separate proofing step. Many recipes suggest around 115°F (46°C) as a safe and reliable middle ground that works well for most yeast types and ensures robust fermentation.
- The Power of Strong Bread Flour: Whenever possible, opt for good quality, strong bread flour. Bread flour has a higher protein content compared to all-purpose flour, which means it develops more gluten when kneaded. Gluten is the elastic network that gives pretzels their characteristic chewiness and helps the dough maintain its shape during the often-vigorous shaping process, preventing strands from tearing or breaking.
- Precision with a Kitchen Scale: For consistently excellent baking results, using a digital kitchen scale is paramount. Flour, in particular, can vary greatly in weight depending on how it’s scooped and its inherent absorbency. While I provide cup measurements, the weights given (in grams) are far more accurate. If you don’t have a scale, be prepared to adjust the flour amount. It’s always best to add the last ½ cup of flour gradually, feeling the dough as you go. The ideal dough should be soft, pliable, and slightly “tacky” to the touch – meaning it feels slightly sticky but doesn’t leave a significant residue on your fingers – but never overly sticky or dry.
- Mindful Second Proofing: Avoid over-proofing during the second rise, which happens after shaping. This rise should be relatively short, typically around 20 minutes. By the time you’ve finished shaping the entire batch of pretzels, they will likely be perfectly proofed and ready for boiling. Remember, pretzels will puff up further during the boiling process and then again in the hot oven, so a moderate second rise is key to their final texture and appearance. Over-proofed dough can lead to a less chewy texture and a tendency to deflate when boiled.
- The Art of Boiling: The boiling step is what gives pretzels their signature chewy crust and deep brown color. Aim to boil each side for approximately 20 seconds. This duration is sufficient to set the crust and gelatinize the starches on the surface, ensuring a wonderfully chewy exterior without making the interior gummy. Longer boils can cause the pretzels to deflate slightly or develop an unpleasantly gummy texture inside, so precise timing is important. The alkaline baking soda solution is what creates that distinct pretzel flavor and browning.
- Adjusting for a Half Batch: If you’re making a smaller batch of pretzels (e.g., just 6 instead of 12), you can easily halve the recipe. For the boiling solution, a wide 3 ½ quart (approx. 3.3 liters) pan filled with 5 cups of water and ¼ cup of baking soda will be perfectly adequate. The key is to ensure enough liquid for the pretzels to float freely without crowding.
- Optimal Pan Preparation: As mentioned earlier, I highly recommend skipping parchment paper and instead using a high-heat oil or, even better, clarified butter to grease your baking pans. This method helps prevent the pretzels from sticking to the pan, especially after the boiling step, and adds a delicate layer of flavor to the crust that parchment simply cannot provide. It’s a simple trick that improves both the baking experience and the final product.
These rye flour pretzels are a testament to how small variations can lead to extraordinary results. The combination of earthy rye, sweet honey, and aromatic caraway seeds creates a flavor profile that stands out from typical pretzels, making them a truly special treat. Following these detailed tips will ensure that your homemade pretzels are not just good, but truly exceptional, with a perfect balance of chewiness, flavor, and a beautiful golden crust.
- Clarified Butter Chocolate Chip Cookies
- 8 Inch Pan Baklava
- Dark Chocolate Rye Flour Cookies
- Rye Flour Chocolate Chip Cookies
- Marble Rye Bread
Honey Rye Pretzels Recipe

Rye Flour Pretzels
Anna
Pin Recipe
Ingredients
- 1 ½ cups warm water (340 grams, ideally 105-110°F for active dry yeast or up to 130°F for instant)
- 2 ¼ teaspoons active dry yeast or 2 teaspoons instant yeast
- 1 tablespoon honey (20 grams, for sweetness and flavor)
- 1 cup rye flour (130 grams, adds depth of flavor)
- 2 ½ cups bread flour, divided use (350 grams, high protein for chewiness)
- 1 ⅛ teaspoons salt (Morton kosher, or equivalent)
- 1 large egg white for brushing (optional, for shine and adherence of toppings)
- 1-2 teaspoons caraway seeds (optional, for shaping and topping)
- Pretzel salt or sesame seeds (optional, for topping)
Boiling Solution
- 10 cups water
- ½ cup baking soda
Instructions
-
In the bowl of a stand mixer, combine the warm water, active dry yeast, and honey. Allow this mixture to sit for about 10 minutes until the yeast becomes foamy and bubbly, indicating it’s active. If you are using instant yeast, you can alternatively skip this proofing step and add it directly to the flour in the bowl. For instant yeast, heat the water to approximately 130°F (54°C) for optimal activation.
-
To the mixer bowl, add the rye flour, 2 cups (280 grams) of the bread flour, and the salt. Stir these ingredients together until a shaggy dough begins to form.
-
Attach the dough hook (or spiral attachment) to your stand mixer. Knead the dough on medium-low speed for about 7 minutes. During this process, gradually add the remaining ½ cup of bread flour, a few spoonfuls at a time. The exact amount needed will vary based on your flour’s absorbency; you might use all of it, or perhaps only a third of a cup. The goal is to achieve a dough that is smooth, elastic, and just slightly tacky to the touch, indicating good gluten development.
-
Lightly brush a separate large bowl with melted butter or rub it with a small amount of oil. Scrape the kneaded dough into the greased bowl and turn it over to ensure all sides are lightly coated. Cover the bowl tightly with plastic wrap or a damp towel and let it rise in a warm place until it has doubled in bulk. This typically takes about 1 hour if using active dry yeast, or slightly less, around 45 minutes, for instant yeast.
-
While the dough is rising, preheat your oven to 450°F (232°C). Prepare two large sheet pans either by lining them with parchment paper, or for best results, brushing them generously with clarified butter or a high-heat cooking oil. This helps prevent sticking and adds flavor.
-
In a large, wide pot (at least 5-6 quarts), bring about 10 cups of water to a rolling boil. Carefully add the ½ cup of baking soda to the boiling water. Be cautious as the mixture will foam up vigorously. Reduce heat to a gentle simmer.
-
Once the dough has doubled, gently turn it out onto a clean, lightly floured surface or a lightly greased pan. Press it down into a slab. If using caraway seeds, sprinkle them over the dough and gently work them in. Divide the dough into 12 equal pieces. Clear your workspace and focus on shaping one piece at a time.
-
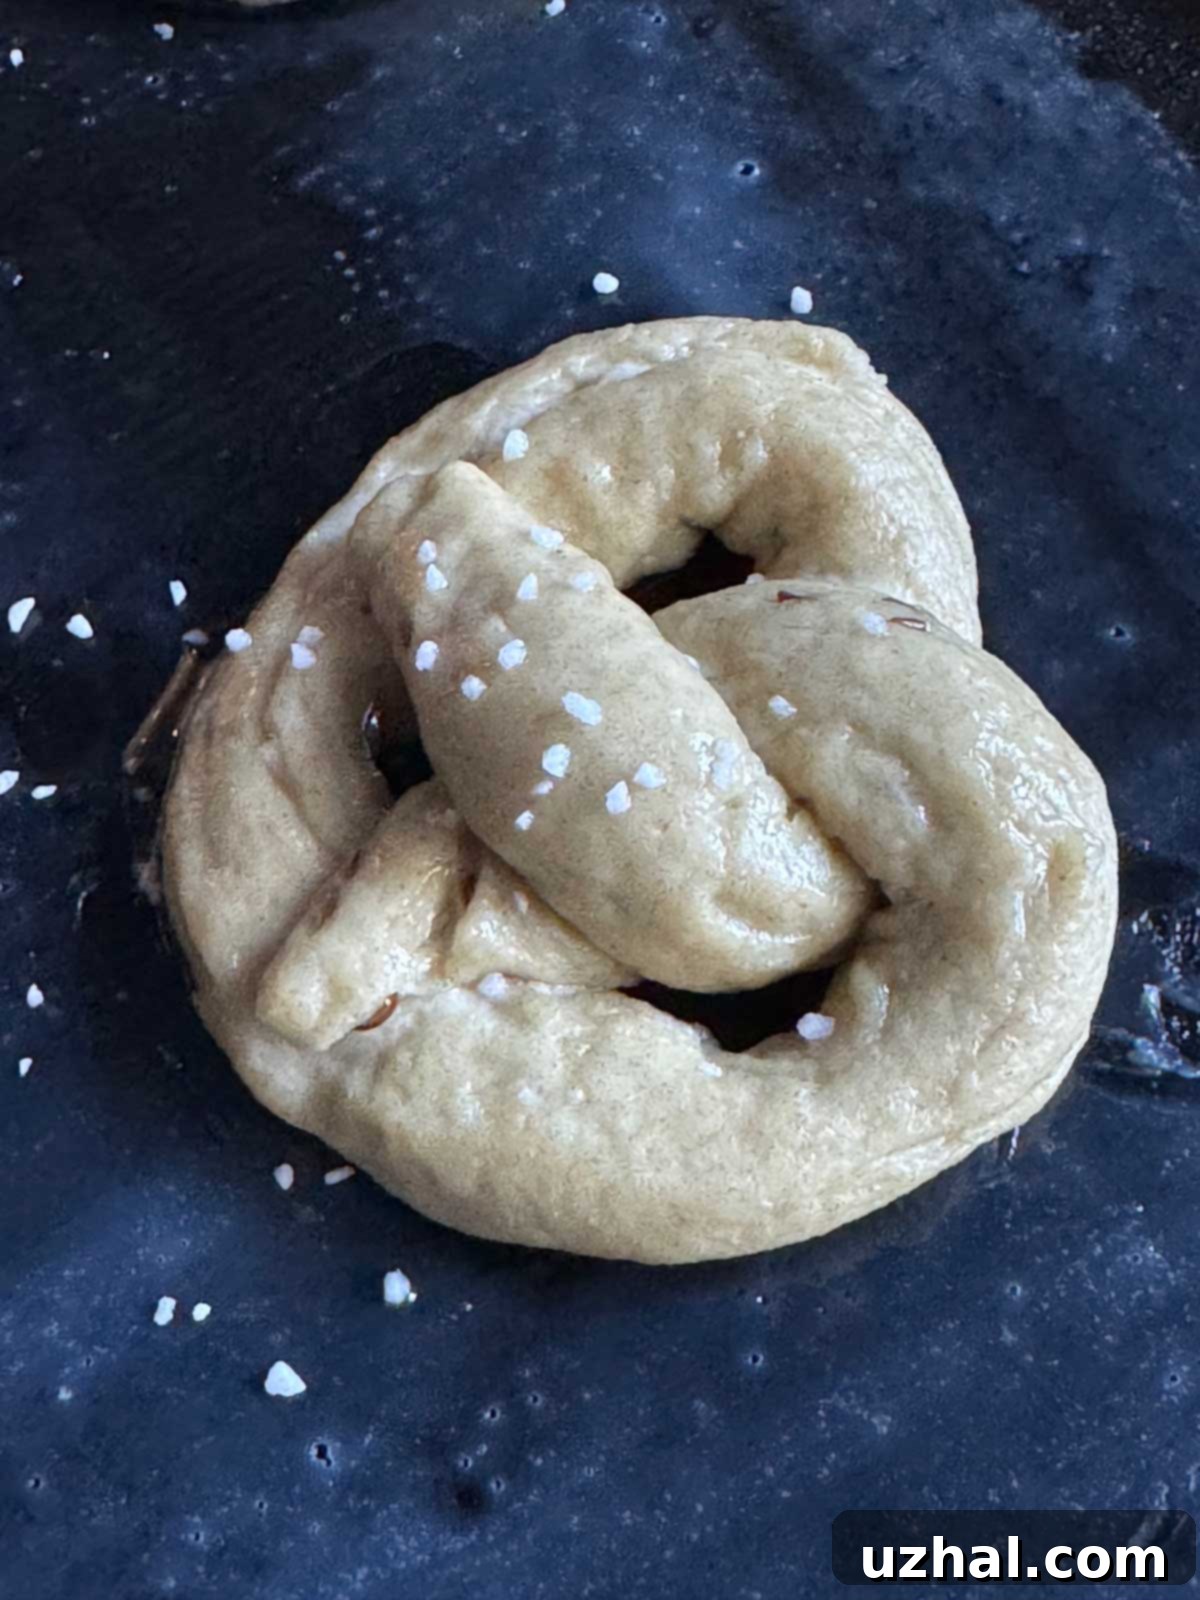
Roll each piece of dough into a long, thin strand, approximately 17 inches (43 cm) in length. This dough should be strong and elastic, making it relatively easy to shape without needing much, if any, additional flour. Form each strand into a classic pretzel shape (a “U” with crossed ends). Carefully place the shaped pretzel onto your prepared baking sheet, ensuring space between each one.
-
Ensure the boiling solution is at a steady simmer, not a vigorous rolling boil. Using a slotted spatula or spider, gently lift 2 or 3 pretzels and carefully drop them into the simmering water. Boil for a total of about 45 seconds, carefully turning them halfway through to ensure even cooking. It is crucial not to over-boil, as this can cause the pretzels to deflate or become gummy. Promptly remove the pretzels with the slotted spatula, allowing excess water to drip off, and transfer them back to your prepared baking sheet. Repeat this process until all pretzels have been boiled.
-
Once all pretzels are boiled and on the baking sheets, brush them lightly with the egg white (if using). Immediately sprinkle them with your desired toppings, such as pretzel salt, sesame seeds, or additional caraway seeds. The egg wash helps these toppings adhere.
-
Bake the pretzels in the preheated oven for approximately 18 minutes, or until they achieve a deep, dark golden-brown color. The exact baking time may vary slightly depending on your oven. Once baked, transfer the hot pretzels to a wire cooling rack and allow them to cool for at least 5 minutes before serving to ensure the crust sets and the interior is perfectly chewy. Enjoy your homemade honey rye pretzels warm!
