Delicious & Easy Clumpy Banana Nut Granola: Your Go-To Vegan & Gluten-Free Recipe
There’s nothing quite like the aroma of homemade granola baking in the oven. For a while, I confess, I took a little break from creating new granola recipes, especially since my collection already boasts an impressive array, with something like 30 different variations. But then, this magnificent Banana Nut Granola came along, and my hiatus was joyfully over! This recipe isn’t just another addition; it’s a game-changer. It’s perfectly crafted for those moments when you need a quick, wholesome energy boost, a delightful way to utilize those perfectly ripe, browning bananas that are often destined for banana bread, and it proudly stands as both vegan and gluten-free. Forget the store-bought varieties loaded with unknown ingredients and excessive sugars; this homemade version offers unparalleled flavor and control over what goes into your body.
Making your own granola is a rewarding experience, transforming simple ingredients into a crunchy, satisfying snack or breakfast component. This particular recipe highlights the natural sweetness and moistness of ripe bananas, creating a granola that’s not only incredibly flavorful but also wonderfully clumpy – a characteristic many granola lovers cherish. We’ll delve into the secrets behind achieving those perfect clusters, ensuring every bite is a delightful combination of sweet banana, crunchy nuts, and wholesome oats. Whether you’re a seasoned granola maker or a beginner, this recipe is designed for ease and guaranteed success.
Jump to Recipe

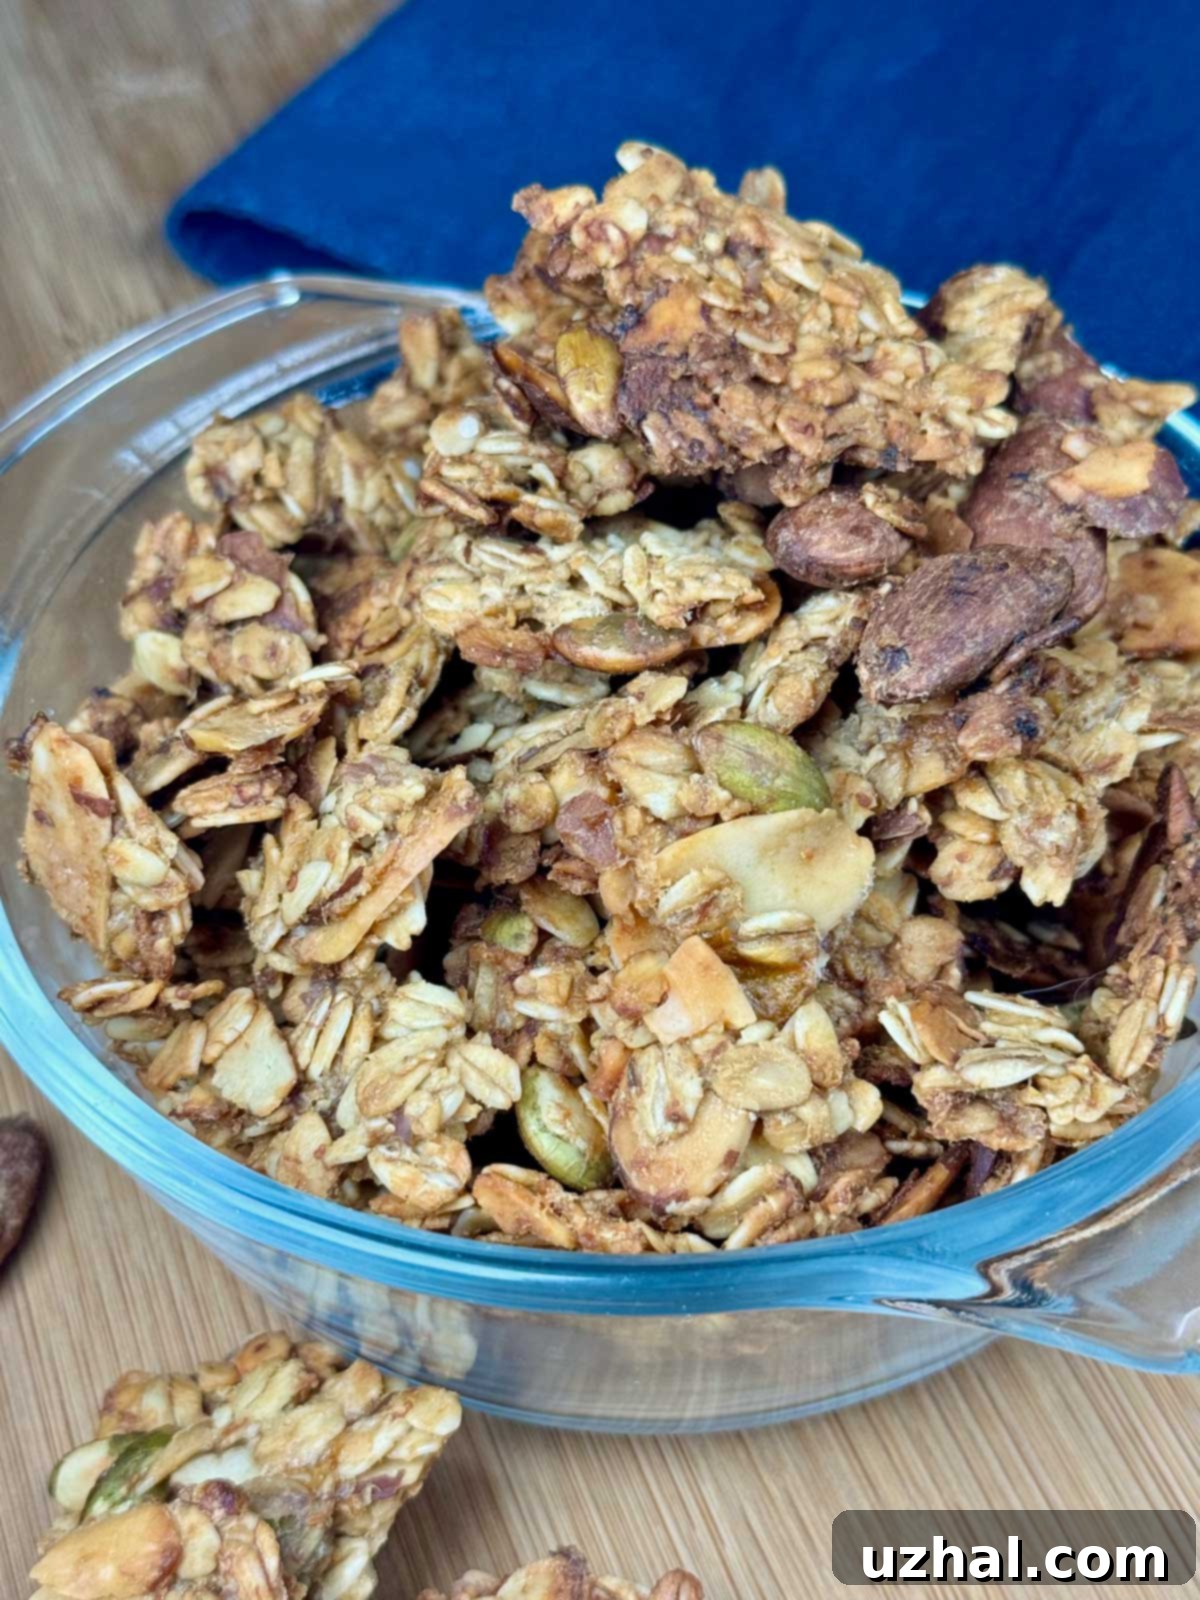
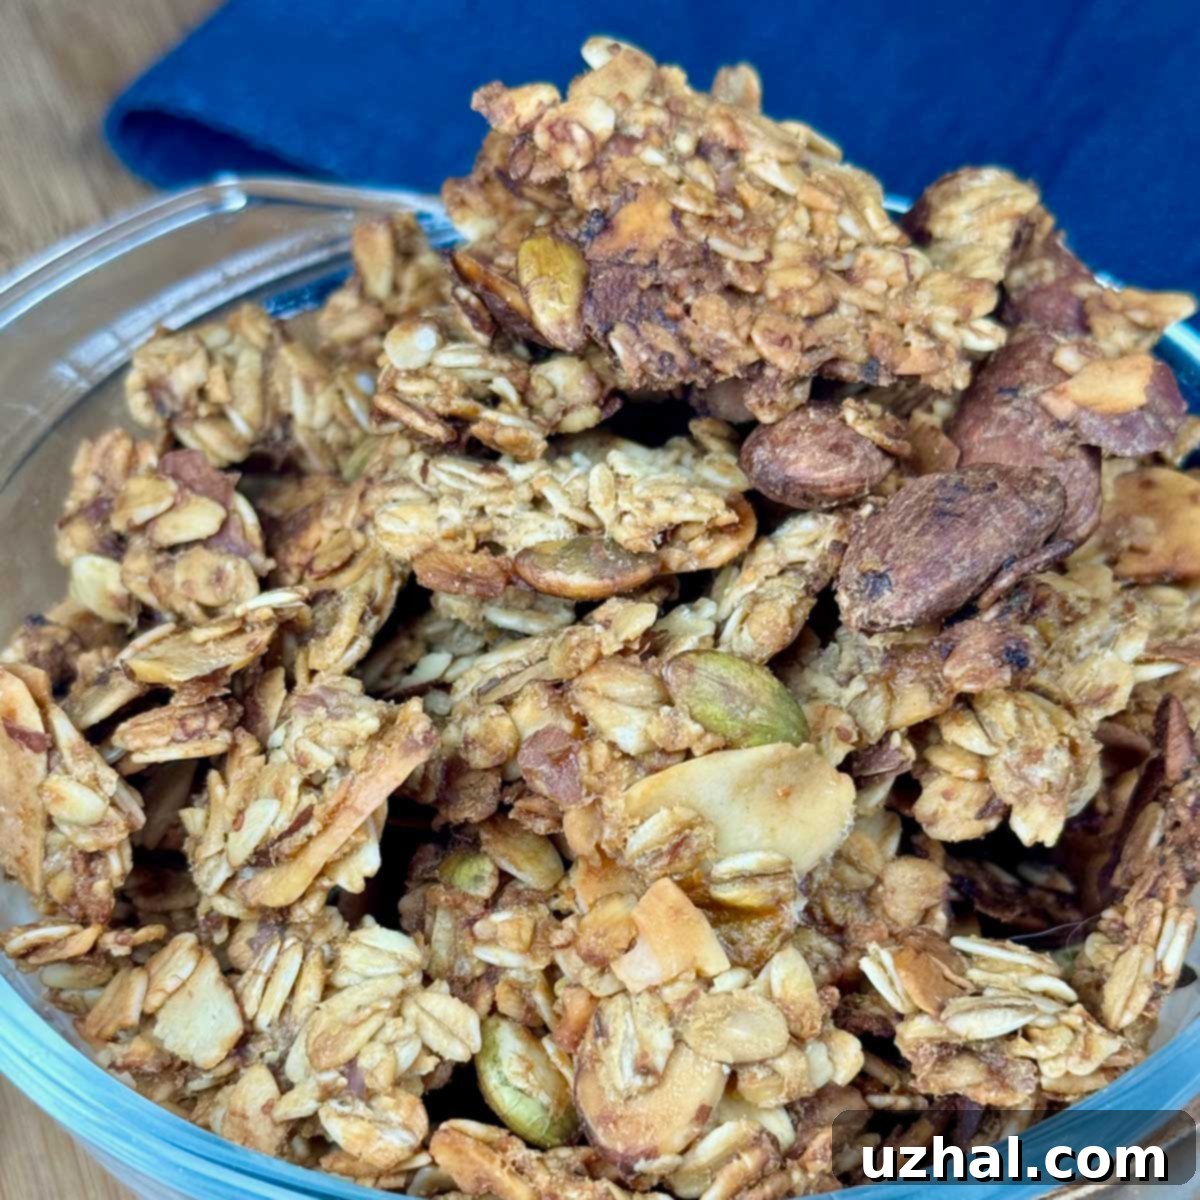
One of the many beauties of this Banana Nut Granola recipe is its incredible simplicity. You can whip up the entire mixture in just one bowl, minimizing cleanup and making it an ideal choice for busy mornings or weekend meal prep. The inherent moisture from the ripe bananas requires a longer, slower baking time compared to drier granola recipes, but trust me, it’s worth every minute. As it bakes, your kitchen will be filled with the most fantastic, comforting aroma – a delightful preview of the treat to come. Just be sure to keep a watchful eye on your granola as it bakes to prevent it from getting too dark. I’ve learned from experience; the batch featured in these photos was baked *a little* too long, resulting in a slightly deeper brown hue than intended. While still delicious, aiming for a golden-brown finish ensures the best flavor and texture.
The Art of Making Clumpy Banana Nut Granola
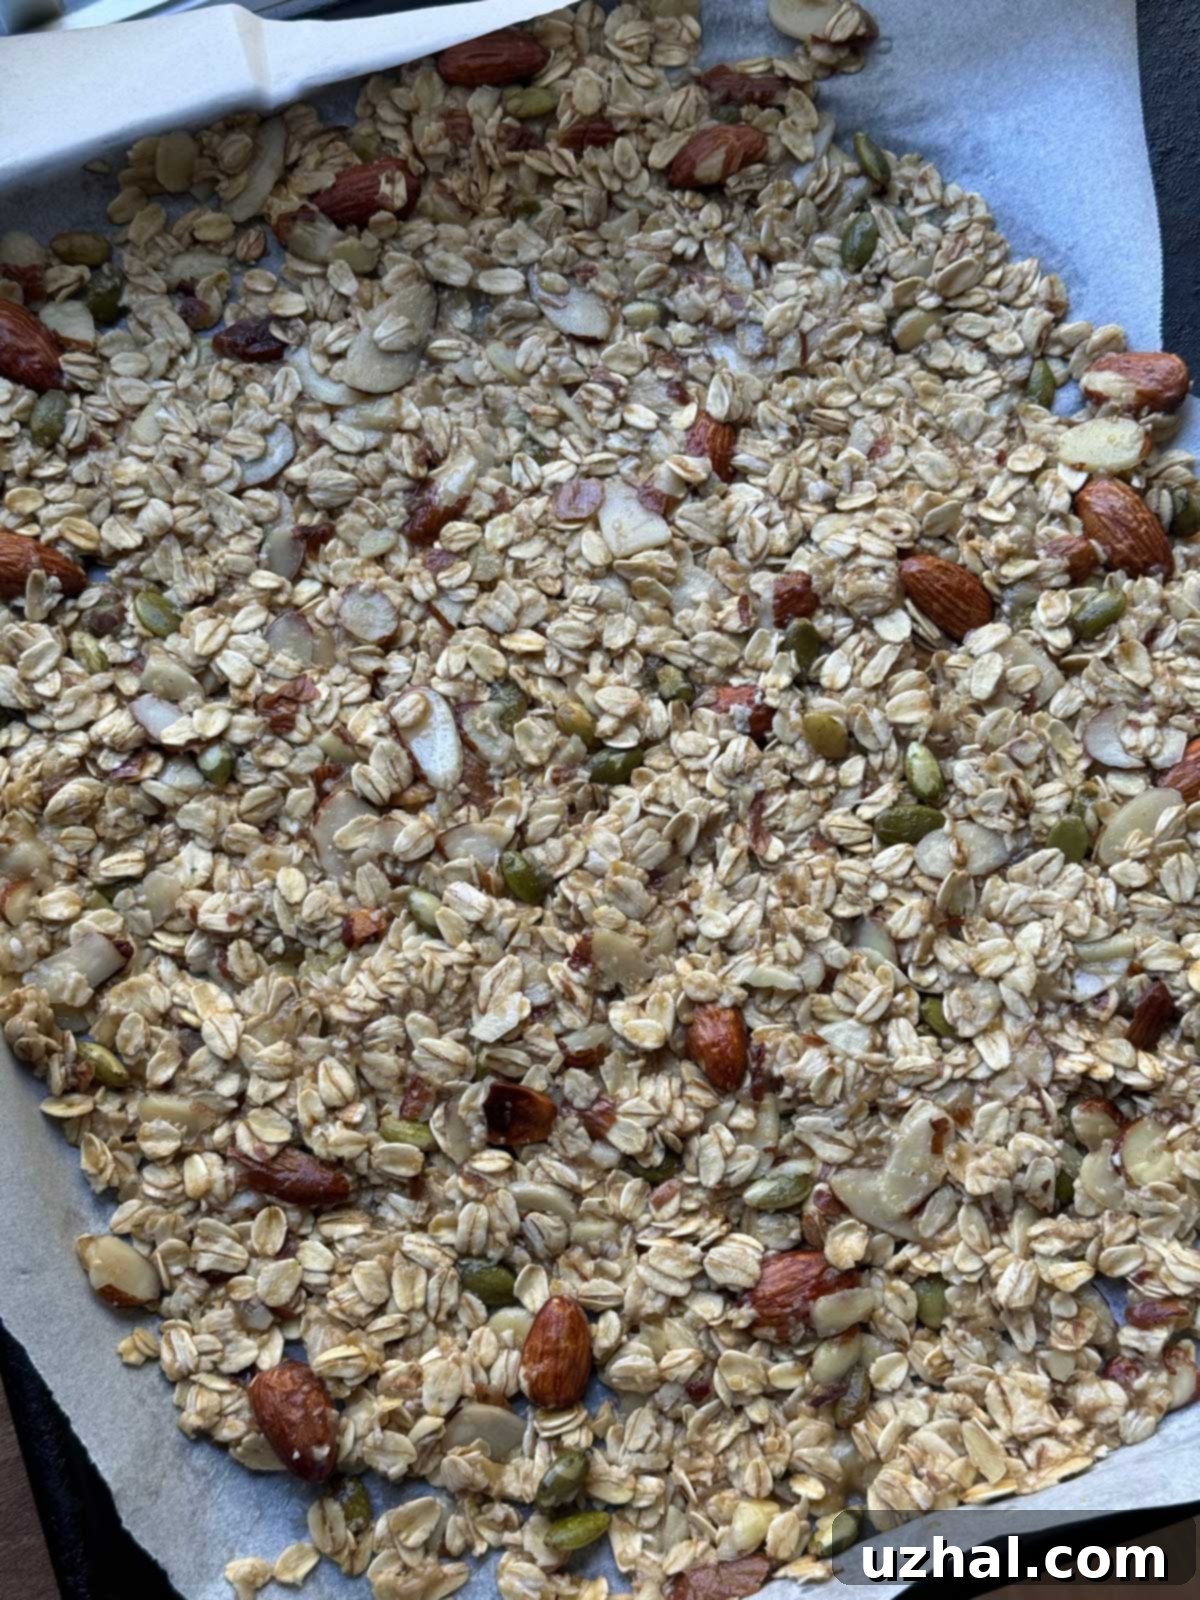
If you’re like me, you love granola with generous, satisfying clumps. This Banana Nut Granola is specifically designed to be wonderfully clumpy, giving you those delightful clusters that are perfect for snacking or sprinkling over yogurt. Achieving this isn’t rocket science, but it does involve a specific technique. To start, instead of spreading the granola loosely, you’ll want to press the entire mixture onto your baking sheet in one large, compact slab. This close contact between the oats and other ingredients is key to the clumping process.
After the initial 10-12 minutes in the oven, when the granola is just beginning to brown and the ingredients have started to meld, you’ll use a spatula to gently turn the slab. Don’t worry if it naturally breaks into several large sections – that’s exactly what we want! This turning step ensures even baking and promotes the formation of distinct clusters. Once the full baking time is complete and the granola has cooled, you can further break it up into clumps of your preferred size, from large, satisfying chunks to smaller, bite-sized pieces. The cooling process is crucial here; as the granola cools, it will firm up and become perfectly crisp and clumpy. Below is a picture of the granola before it goes into the oven, demonstrating how it should look as a single, pressed slab.

Customizing Your Banana Nut Granola: Nuts, Seeds, and More!
While this recipe traditionally calls for almonds, the beauty of homemade granola lies in its versatility. Feel free to use any nuts you prefer! Pecans and walnuts are fantastic choices, offering a richer, buttery flavor that complements the banana beautifully. Cashews can provide a creamier texture, while hazelnuts add a distinct, aromatic touch. Don’t hesitate to mix and match to create your perfect nutty blend. Beyond nuts, consider incorporating a little ground flaxseed – it’s not only a great source of omega-3 fatty acids but also helps with the clumping action thanks to its mucilaginous properties. For an extra punch of banana flavor and texture, a handful of crunchy banana chips (added after baking, to prevent burning) would be a superb addition.
Expanding on seeds, while pumpkin seeds (pepitas) are a wonderful inclusion for their vibrant color, delicate crunch, and nutritional benefits, you could also experiment with sunflower seeds, chia seeds, or even hemp hearts. Each adds its own unique nutrient profile and textural element. A sprinkle of cinnamon or nutmeg could also enhance the warm, comforting banana flavor, transforming your granola into a truly autumnal delight. Remember, this recipe is a canvas for your culinary creativity!
Why Choose Homemade Vegan & Gluten-Free Granola?
Opting for homemade granola offers numerous advantages over store-bought versions. First and foremost, you have complete control over the ingredients. This means you can choose high-quality, organic components and adjust the sweetness to your liking, avoiding the excessive sugars and artificial additives often found in commercial granolas. For those following a vegan diet, this recipe ensures no animal products are used, making it a reliable and delicious option. Similarly, by using certified gluten-free oats, this granola becomes a safe and enjoyable treat for individuals with gluten sensitivities or celiac disease.
Beyond dietary considerations, the fresh taste and superior texture of homemade granola are simply unmatched. The slow baking process allows the flavors to deepen and the oats to develop a perfectly crisp, yet tender, consistency. It’s not just a snack; it’s a labor of love that fills your home with incredible aromas and your pantry with a wholesome, versatile food item. It’s also incredibly cost-effective in the long run, as buying bulk oats, nuts, and seeds is generally more economical than purchasing pre-made gourmet granola.
Serving Suggestions and Storage Tips
Once your Banana Nut Granola has cooled and achieved its perfect clumpiness, the possibilities for enjoying it are endless. It makes a fantastic breakfast served with your favorite plant-based milk or swirled into a creamy yogurt parfait with fresh berries. Sprinkle it over smoothie bowls for added crunch and flavor, or simply enjoy a handful as a satisfying snack on the go. For a delightful dessert, use it as a topping for baked apples or peaches, or even incorporate it into homemade energy bars. Its robust flavor profile also makes it a delightful addition to trail mix.
To keep your homemade granola fresh and crunchy, proper storage is key. Once completely cooled, transfer it to an airtight container. A glass jar with a tight-fitting lid works perfectly. Store it at room temperature in a cool, dry place away from direct sunlight. This granola should stay fresh and delicious for up to two weeks. If you make a large batch and want to extend its shelf life further, you can even freeze it in a freezer-safe bag or container for up to three months. Just make sure it’s completely cool before freezing to prevent condensation and sogginess. Thaw at room temperature before enjoying.
- Clumpy Granola
- Clumpy Crunchy Granola Without Oil
- Granola Chocolate Chip Cookies
- Chocolate Pecan Pie Granola
- Chewy Coconut Chocolate Chip Granola Bars
Recipe: The Best Vegan & Gluten-Free Banana Nut Granola

Banana Nut Granola
Anna
Pin Recipe
Ingredients
- 2 medium-sized bananas, very ripe and mashed
- 3 tablespoons melted coconut oil (approx. 36 grams)
- 3 tablespoons pure maple syrup (approx. 80 grams)
- 1 teaspoon vanilla extract
- ⅛ teaspoon fine sea salt, or a generous pinch more to taste
- 2 ½ to 3 cups old-fashioned rolled oats (ensure certified gluten-free if needed) (total weight around 260 grams)
- ⅔ cup almonds, either sliced or whole
- ⅓ cup pumpkin seed kernels (pepitas)
Instructions
-
Preheat your oven to 350°F (175°C). Prepare a large (13×18 inch) rimmed baking sheet by lining it with a sheet of parchment paper. This prevents sticking and makes cleanup easy.
-
In a spacious mixing bowl, thoroughly mash the very ripe bananas until mostly smooth. Then, stir in the melted coconut oil, pure maple syrup, vanilla extract, and salt until all wet ingredients are well combined.
-
Add 2 ½ cups of the old-fashioned oats, along with the pumpkin seeds and almonds to the wet mixture. Stir gently but thoroughly until all the dry ingredients are fully coated. At this stage, assess the mixture’s moisture; if it seems too wet, you can incorporate the remaining ½ cup of oats. The goal is a moist, cohesive mixture. I typically use around 260 grams of oats in total.
-
Pour the granola mixture onto the prepared baking sheet. Using a spatula or the back of a spoon, press it down firmly and evenly to form one large, cohesive slab across the entire sheet. This pressing action is crucial for creating those coveted granola clumps.
-
Bake at 350°F (175°C) for 20 minutes. About halfway through this 20-minute bake (after 10 minutes), carefully use a sturdy spatula to flip the entire slab of granola. It will naturally break into larger sections, which is perfectly fine and desired for clump formation. After flipping, continue baking for the remaining 10 minutes. Reduce the oven heat to 250°F (120°C) and cover the baking sheet loosely with a large sheet of aluminum foil. Continue baking for an additional 45 minutes, or until the granola is beautifully golden brown and smells fragrant. It won’t be completely crisp when hot, but it will crisp up significantly as it cools.
-
Once baked, remove the granola from the oven and allow it to cool completely on the baking sheet. Resist the urge to break it apart while warm, as cooling is essential for maximum crispness and clump formation. Once fully cooled, break it into your desired chunk sizes and store.
