Mastering the Art of Kahlua Fudge Brownies: Your Guide to Perfectly Dense & Delicious Treats
There’s nothing quite like a rich, decadent fudge brownie, especially one infused with the subtle, alluring hint of Kahlua. This particular recipe, originally shared by Steven (who inherited it from his godmother), initially presented a challenge. While undeniably delicious in flavor, his brownies consistently turned out “goopy” and appeared underdone, even after what seemed like sufficient baking time. Understanding the frustration of a seemingly perfect recipe gone wrong, I took on the task of troubleshooting these Kahlua Fudge Brownies to unlock their true potential. The mission: to transform them from a delicious but problematic dessert into a consistently perfect, dense, and truly fudgy treat.
The Quest for Fudgy Perfection: Unraveling the Brownie Mystery
Baking can sometimes feel like a delicate science, where small variations can lead to drastically different outcomes. Steven’s experience with his Kahlua Fudge Brownies is a classic example. The taste was always there – the deep chocolate, the warm Kahlua notes – but the texture was off. A goopy, seemingly underbaked center is a common pitfall for many home bakers attempting fudge brownies. This problem often stems from an imbalance in the wet-to-dry ingredient ratio, or sometimes, from oven temperature inconsistencies or even premature removal from the oven.
Before diving into a direct re-bake, my first step in troubleshooting any recipe, especially one involving precious ingredients like good chocolate and Kahlua, is always research. A quick search online often reveals similar recipes or common issues associated with a particular type of bake. Indeed, I found this very recipe on sites like Cooks.com and Recipesource. What immediately stood out were subtle, yet significant, differences in the ingredient lists, particularly regarding the flour.
The Critical Role of Flour: Why Weight Matters More Than Volume
The online versions of the Kahlua Fudge Brownie recipe consistently called for 1 ¼ cups of flour, whereas Steven’s version specified 1 ½ *sifted* cups. This seemingly small discrepancy – 1/4 cup difference, plus the instruction to sift – proved to be the likely culprit behind the goopy texture. In baking, flour acts as the primary structural component. Too little flour, and your baked goods won’t set properly; too much, and they’ll be dry and tough.
The main issue here isn’t just the quantity, but the measurement method. Measuring flour by volume (cups) is notoriously inaccurate. The density of flour can vary significantly depending on how it’s scooped. For example, if you scoop flour directly from the bag, you can pack in up to 25% more flour than if you spoon it lightly into the measuring cup and then level it. Even the act of sifting adds another layer of variability. One and a half cups of *sifted* flour can weigh anywhere from 6 ounces to 8 ounces or more, influenced by how vigorously it’s sifted, how compact it was before sifting, and even ambient humidity.
This is precisely why professional bakers and serious home cooks advocate for using a kitchen scale to measure dry ingredients. A gram or ounce measurement provides an exact, reproducible amount every single time, eliminating the guesswork and potential for error inherent in volume measurements. In Steven’s case, if his 1 ½ cups of sifted flour weighed closer to 6 ounces, while other recipes assumed a denser, unsifted 1 ¼ cups that might weigh 6.5-7 ounces, he was effectively using less flour than needed for the given liquid content, leading to the dreaded goopy outcome.
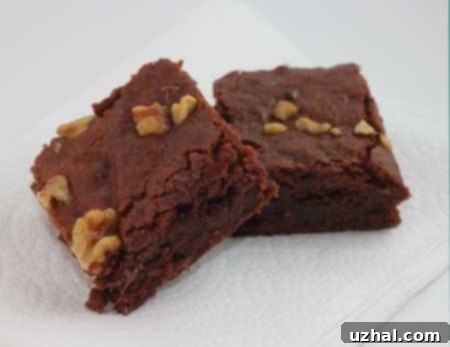
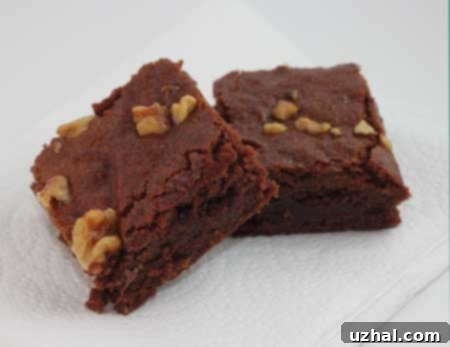
To pinpoint the ideal amount, I used a measured weight. After consulting multiple sources and considering the overall richness of the recipe, I decided to aim for approximately 6.5 ounces (185 grams) of all-purpose flour. This amount, for 1 ½ cups of sifted flour, struck a balance that would provide sufficient structure without making the brownies overly dry. The result? Pure magic. The brownies emerged from the oven dense, thick, and perfectly fudgy – exactly what a Kahlua brownie should be.
Crafting the Ultimate Kahlua Fudge Brownies: Key Ingredients & Techniques
Achieving the perfect Kahlua Fudge Brownie isn’t just about the flour; it’s a symphony of high-quality ingredients and careful execution. Each component plays a vital role in creating that rich, dense, and intensely flavored dessert:
- Unsweetened Chocolate: For truly fudgy brownies, opting for good quality unsweetened chocolate is paramount. It provides the deep, intense chocolate flavor without adding extra sugar, allowing you to control the sweetness with granulated sugar. Melting it gently with butter ensures a smooth, luscious base.
- Butter: Along with chocolate, butter contributes to the luxurious richness and moist texture. Eleven tablespoons might seem like a lot, but it’s essential for achieving that characteristic dense, melt-in-your-mouth quality of a true fudge brownie.
- Granulated Sugar: Two cups of sugar provide ample sweetness, creating a delightful contrast with the bitterness of the unsweetened chocolate and the robustness of the Kahlua. While sweet, it’s balanced by other elements.
- Large Eggs: Eggs are crucial for structure, moisture, and emulsification. Beating them with sugar until light incorporates air, which helps create a slightly chewy crust while maintaining a dense interior.
- Kahlua: The star flavor! Five tablespoons of Kahlua are incorporated into the batter, infusing the brownies with its signature coffee liqueur aroma and taste. The extra tablespoon brushed on top after baking intensifies this flavor, making each bite an aromatic delight. Don’t be shy with that extra brush – it truly elevates the experience.
- Toasted Walnuts: These are not optional! The recipe calls for ¾ cup of toasted and chopped walnuts, and for good reason. Walnuts provide a much-needed textural contrast to the soft, fudgy brownie. More importantly, their slightly bitter, earthy flavor perfectly tempers the sweetness of the brownies, preventing them from being cloyingly sweet. Toasting the walnuts beforehand enhances their flavor, bringing out their nutty aroma and making them even more satisfying.
- Baking Powder & Salt: A small amount of baking powder helps with a slight lift, contributing to a desirable texture without making them cakey. Salt is vital in all sweet recipes; it enhances the chocolate flavor and balances the sweetness.
Baking to Perfection: Tips for Success
Even with the right ingredients, baking technique matters. Follow these tips for consistently perfect Kahlua Fudge Brownies:
- Pan Preparation: Always preheat your oven to 350°F (175°C). Use a 9-inch square metal pan. Metal pans conduct heat more efficiently than glass, which is important for even baking. Greasing the pan thoroughly or lining it with foil (with an overhang for easy lifting) and then greasing the foil prevents sticking and ensures clean cuts.
- Mixing Method: Melt the butter and chocolate gently to avoid scorching. Beat eggs with sugar until light and fluffy – this step incorporates air, contributing to the brownies’ texture and crust. Incorporate the melted chocolate and Kahlua, then gently fold in the dry ingredients and nuts. Overmixing after adding flour can develop gluten, leading to tougher brownies, so blend just until combined.
- Knowing When They’re Done: Fudge brownies can be tricky because the toothpick test isn’t always reliable for a truly fudgy texture. For these brownies, bake for 30 to 35 minutes. Look for visual cues: the top should appear set and slightly spring back when gently touched in the center, and the edges should begin to pull away from the sides of the pan. A slightly moist crumb sticking to a toothpick is acceptable for fudgy brownies; you don’t want it to come out completely clean as you would for a cake.
- Cooling is Key: Patience is a virtue, especially with brownies. Allow them to cool thoroughly in the pan before attempting to lift or cut them. This cooling period is crucial for the brownies to set completely and achieve their dense, fudgy consistency. Brushing with an extra tablespoon of Kahlua while still warm or after cooling allows the flavor to soak in beautifully.
Beyond the Recipe: Serving & Variations
Once cooled and cut, these Kahlua Fudge Brownies are a showstopper on their own. However, they are also incredibly versatile. Serve them slightly warm with a scoop of vanilla bean ice cream and a drizzle of chocolate sauce for an ultimate dessert experience. A dusting of cocoa powder or a sprinkle of flaky sea salt can also elevate their presentation and flavor. They make fantastic additions to potlucks, parties, or simply as a comforting treat with a cup of coffee.
Want to experiment? While this recipe is perfect as is, you could explore variations:
- Other Liqueurs: Swap Kahlua for another coffee liqueur, or try a different spirit like Irish cream, rum, or even an orange liqueur for a citrusy twist.
- Different Nuts: Pecans or macadamia nuts could also work beautifully instead of walnuts, offering a different flavor profile and crunch.
- Chocolate Chips: Fold in a cup of chocolate chips (milk, dark, or white) along with the walnuts for an extra chocolatey burst.
- Espresso Powder: A teaspoon of instant espresso powder added to the dry ingredients can deepen the chocolate flavor without making it taste like coffee.
With these adjustments and techniques, Steven’s godmother’s recipe has been perfected, ensuring that every batch of Kahlua Fudge Brownies is gloriously dense, rich, and utterly irresistible. It’s a testament to how understanding key baking principles can transform a good recipe into a truly great one.
Recipe

Kahlua Fudge Brownies
Anna
Pin Recipe
Ingredients
- 1 ½ cups sifted all-purpose flour (6.5 oz or 185 grams, measured by weight for accuracy)
- ½ tsp. baking powder
- ½ tsp. salt
- 11 tablespoons unsalted butter (154 grams)
- 3 oz unsweetened chocolate, chopped (84 grams)
- 3 large eggs
- 2 cups granulated sugar (390 grams)
- 5 T Kahlua (plus an extra 1 T for brushing on top)
- ¾ cup toasted and chopped walnuts (toasting enhances flavor)
Instructions
-
Preheat oven to 350 degrees F (175°C).
-
Lightly grease a 9-inch square metal baking pan, or line it with foil, leaving an overhang on two sides, and then grease the foil. This helps with easy removal.
-
In a medium bowl, whisk together the sifted all-purpose flour, baking powder, and salt. Set aside.
-
In a microwave-safe bowl or a saucepan over low heat, melt the butter with the unsweetened chocolate, stirring until smooth. Let it cool slightly.
-
In a large bowl, using an electric mixer, beat the eggs with the granulated sugar until the mixture is light in color and fluffy. This can take 2-3 minutes. Gradually add the cooled chocolate mixture and Kahlua, mixing until just combined. Stir in the flour mixture and the toasted walnuts, blending well but being careful not to overmix.
-
Pour the batter evenly into the prepared pan and spread it to the edges. Bake for 30 to 35 minutes, or until the top springs back when lightly touched in the center and the edges just begin to pull away from the pan. A toothpick inserted into the center should come out with moist crumbs, not wet batter.
-
Remove from the oven and immediately brush the top evenly with the extra 1 tablespoon of Kahlua. This enhances the flavor.
-
Allow the brownies to cool thoroughly in the pan on a wire rack before lifting them out by the foil overhang and cutting them into 16 thick, fudgy squares. This cooling period is essential for their dense texture.
- Fluffy Carrot Coconut Bread Recipe
- The Best Basic Angel Food Cake Recipe
- Celebrating National Coffee Cake Day with Delicious Recipes
- Rich & Moist Cream Cheese Chocolate Cake
- Unforgettable Chocolate Chip Cookies: A David’s Copycat
