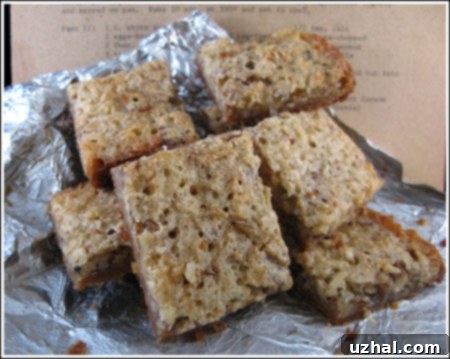
Classic Dream Bars: A Nostalgic Recipe for Pecan, Coconut & Brown Sugar Perfection
There’s something truly magical about a classic dessert bar – easy to make, share, and utterly satisfying. Today, we’re diving into the delightful world of Dream Bars, a confection that beautifully combines crunchy pecans, chewy coconut, and rich brown sugar atop a buttery shortbread crust. This recipe holds a special place, harkening back to a time when homemade treats were a staple in every kitchen, bringing warmth and comfort to gatherings or simply brightening an ordinary day.
My journey with Dream Bars started with a desire to recreate a taste from an old family cookbook. While my initial adaptation of that vintage recipe yielded delicious results, I found the bars to be a bit on the thin side, leaving me craving just a little more substance. This quest for the perfect Dream Bar led me to experiment, combining the best elements of classic techniques with modern insights. The result is a robust, flavor-packed bar that delivers on both texture and taste, embodying the dreamiest qualities of this beloved dessert. While many swear by Kraft’s trusted back-of-the-box recipe, this version offers a delightful homemade touch, ensuring a generously thick and wonderfully decadent treat every single time.

The Enduring Appeal of Dream Bars: A Bite of Nostalgia
Dream Bars are more than just a dessert; they’re a timeless classic that evokes feelings of nostalgia and comfort. These delightful bar cookies have graced countless potlucks, family gatherings, and holiday tables for generations. Their enduring popularity lies in their simplicity, combined with an irresistible blend of textures and flavors. The contrast between the firm, buttery crust and the gooey, chewy topping creates a truly memorable eating experience. Whether you’re a seasoned baker or a novice, mastering Dream Bars is a rewarding endeavor that promises to impress.
What makes these bars truly “dreamy”? It’s the harmonious interplay of key ingredients. The rich, caramel notes of brown sugar infuse every layer, providing a depth of flavor that’s both sweet and comforting. Shredded coconut adds a delightful chewiness and a subtle tropical aroma, while crunchy pecans contribute a nutty earthiness and satisfying bite. Together, these elements create a symphony of flavors and textures that is truly unmatched in the world of bar cookies. This recipe aims to maximize these elements, ensuring each bite is packed with the delightful characteristics that make Dream Bars a beloved treat.
Understanding the Key Components: Crust and Filling
The success of any great bar cookie often hinges on the balance between its crust and its topping. For our Classic Dream Bars, we focus on two distinct yet complementary layers: a tender, buttery shortbread crust and a rich, chewy filling. The crust provides a stable and flavorful foundation, designed to hold up to the dense and decadent topping without becoming soggy. The filling, on the other hand, is where the “dreamy” magic truly happens, bringing together the star ingredients in a cohesive, irresistible mixture.
Achieving the right consistency for each layer is paramount. The crust needs to be sturdy enough to support the filling but still crumble deliciously in your mouth. The filling requires a balance of wet and dry ingredients to ensure it sets properly while retaining its signature chewiness. This recipe meticulously guides you through each step, from preparing the perfect shortbread base to mixing and baking the luscious topping, guaranteeing a successful batch of Dream Bars every time. We’ll explore the role of each ingredient and offer tips to ensure your bars come out perfectly browned and beautifully textured.
Classic Dream Bars Recipe

Dream Bars
Anna
Pin Recipe
Ingredients
Crust:
- 1 cup all purpose flour (140 grams)
- ¼ cup firmly packed brown sugar (50 grams)
- ⅓ cup softened salted butter** (75 grams)
Filling:
- 2 large eggs
- ¾ cup firmly packed brown sugar (150 grams)
- ¼ cup flour (35 grams)
- ½ teaspoon baking powder
- 1 ⅓ cups shredded sweetened coconut (angel flake)
- 1 teaspoon vanilla
- 1 cup chopped pecans
Instructions
-
Preheat your oven to 350 degrees F (175 C). Prepare a 9-inch square metal baking pan by greasing it thoroughly to prevent sticking and ensure easy removal of the bars.
-
For the crust, in a medium bowl, combine the 1 cup of all-purpose flour and ¼ cup of firmly packed brown sugar. Add the softened salted butter and mix until the ingredients are well blended and a crumbly dough forms. Press this mixture evenly into the bottom of your prepared 9-inch square pan. Bake for 15 minutes, or until the edges are just lightly golden. This pre-baking step ensures a crisp crust.
-
While the crust bakes, prepare the filling. In a large mixing bowl, beat the 2 large eggs until they are thick and light in color, indicating they are well aerated. Gradually beat in ¾ cup of firmly packed brown sugar, continuing to beat until the mixture becomes light and fluffy. In a separate small bowl, whisk together the ¼ cup of flour with the ½ teaspoon of baking powder. Gently fold this dry mixture into the egg mixture until just combined. Finally, stir in the 1 ⅓ cups of shredded sweetened coconut (angel flake), 1 teaspoon of vanilla extract, and 1 cup of chopped pecans. Spread this rich, decadent filling evenly over the warm, pre-baked crust in the pan. Return to the oven and bake for an additional 20 to 25 minutes, or until the topping is lightly browned and set. A toothpick inserted into the center should come out clean. Allow the Dream Bars to cool completely in the pan before cutting them into squares or bars. Cooling thoroughly is essential for clean cuts and the perfect chewy texture.
Tips for Perfect Dream Bars Every Time
Creating perfect Dream Bars is straightforward, but a few key tips can elevate your results from good to absolutely fantastic. First, ensure your butter for the crust is truly softened, not melted. This allows it to cream properly with the sugar and flour, creating a tender, crumbly base that holds its shape. When pressing the crust into the pan, aim for an even layer to ensure uniform baking. Use the back of a spoon or your knuckles for best results.
For the filling, beating the eggs until they are thick and light in color is crucial. This step incorporates air, contributing to the light and fluffy texture of the topping. Gradually adding the brown sugar prevents the eggs from deflating and ensures a smooth, well-combined mixture. Don’t overmix once you’ve folded in the flour and baking powder, as this can lead to tough bars. Gentle folding preserves the delicate airiness of the egg mixture. Finally, allowing the bars to cool completely before cutting is perhaps the most important tip. Warm bars are prone to crumbling and messy cuts; patience will be rewarded with clean, beautifully shaped squares.
Customizing Your Dream Bars: Delicious Variations
While the classic Dream Bar recipe is perfect as is, it also lends itself beautifully to creative variations. If you’re a chocolate lover, consider adding a ½ cup of mini chocolate chips or chopped chocolate to the filling mixture for an extra layer of decadence. For a different nutty flavor, swap out half of the pecans for walnuts or almonds. A pinch of cinnamon or nutmeg can add a subtle warmth to the filling, especially appealing during the fall and winter months.
You can also experiment with different types of coconut. While sweetened shredded coconut (angel flake) is traditional, unsweetened coconut can be used if you prefer a less sweet bar, or if you want to control the sugar content. Just be aware that the texture might be slightly different. For those who enjoy a hint of citrus, a teaspoon of orange or lemon zest folded into the filling can provide a bright contrast to the richness of the brown sugar. These simple adjustments allow you to personalize your Dream Bars and cater to various tastes without straying too far from the beloved original.
Serving Suggestions and Storage
Dream Bars are incredibly versatile and perfect for a variety of occasions. They make an excellent dessert for parties and potlucks, as they are easy to transport and serve. Pair them with a scoop of vanilla bean ice cream for an elevated treat, or simply enjoy them with a hot cup of coffee or tea for a cozy afternoon snack. They are also wonderful additions to holiday cookie platters or as thoughtful homemade gifts for friends and neighbors.
To store your Dream Bars, place them in an airtight container at room temperature for up to 3-4 days. For longer storage, you can refrigerate them for up to a week. If you’re planning to make a larger batch, Dream Bars freeze exceptionally well. Once completely cooled and cut into squares, arrange them in a single layer on a baking sheet and freeze until firm. Then, transfer the frozen bars to an airtight freezer-safe container or bag, separating layers with parchment paper. They can be frozen for up to 2-3 months. Thaw at room temperature or in the refrigerator before serving. This makes them an ideal make-ahead dessert for busy times.
Embrace the joy of baking and treat yourself and your loved ones to these irresistible Classic Dream Bars. Their rich flavors and delightful textures are sure to bring smiles and sweet memories. Happy baking!
