The Ultimate Guide to Smooth Lemon Squares: Perfectly Creamy & Irresistibly Tart
Lemon squares, often lovingly referred to as lemon bars, are a timeless dessert that captures the essence of sunshine in every bite. Their bright, tangy flavor combined with a sweet, buttery crust makes them an absolute favorite for many. While countless recipes exist, this particular version stands out as truly exceptional, earning its title as “smooth lemon squares” due to the unparalleled texture of its luscious filling. It’s a recipe I’ve cherished for years, and even after trying many others, I consistently return to this one as the best. Prepare to indulge in a perfectly balanced treat that offers just the right amount of tartness without overwhelming your palate, all encased in a tender, melt-in-your-mouth crust.

The Secret to a Smooth and Creamy Lemon Filling
The magic behind these smooth lemon squares lies predominantly in their exquisite filling. Originally adapted from a Cook’s Illustrated recipe, this iteration incorporates a touch of half & half cream, which is truly a game-changer. The addition of half & half serves multiple crucial roles, elevating the filling from good to extraordinary. Firstly, it masterfully curbs the inherent acidity of the lemon, creating a more mellow and balanced tartness that’s incredibly pleasant on the tongue. Instead of a sharp, sometimes aggressive tang, you get a harmonious blend of sweet and tart.
Beyond balancing flavor, the fat content in the half & half acts as a superb flavor carrier, ensuring the vibrant lemon notes are beautifully distributed throughout the filling. This not only enhances the overall taste but also contributes significantly to the filling’s signature smooth and slightly creamier texture. Moreover, one common challenge with lemon bar fillings is an unwanted eggy taste. The half & half helps to mitigate this, allowing the pure, bright lemon flavor to shine through without any distracting undertones. This results in a silky, custard-like consistency that is truly irresistible.
For the best results, always opt for freshly squeezed lemon juice and high-quality lemon zest. The zest, in particular, contains essential oils that provide a powerful aromatic boost, deepening the lemon flavor without adding extra acidity. Whisking the ingredients thoroughly until completely smooth is also key to achieving that perfect, uniform texture. This careful balance of ingredients and preparation ensures a lemon filling that is wonderfully smooth, perfectly tart, and utterly luxurious.
The Perfect Crust: A Melted Butter Approach
While the filling is paramount, a stellar lemon square is incomplete without a complementary crust. Over time, I’ve refined the crust recipe from its original version to maximize convenience without compromising on taste or texture. The traditional Cook’s Illustrated crust called for cold butter, powdered sugar, and cornstarch, requiring a food processor to achieve the right consistency. While this method yields a firm and crumbly crust, I’ve found a simpler yet equally delicious alternative.
My preferred method now utilizes extra soft or gently melted butter, granulated sugar, and all-purpose flour. This adaptation makes the crust incredibly easy to prepare by hand in a single bowl, eliminating the need for special equipment. The resulting crust is wonderfully buttery and tender, providing a perfect foundation for the vibrant lemon filling. Although its texture differs slightly from the original — being a bit softer and more crumbly rather than firm and crisp — it complements the smooth filling beautifully and is significantly more convenient to make, especially for home bakers looking for a quick yet satisfying dessert.
If you have a strong preference for a firmer, more biscuit-like crust and don’t mind using a food processor, the original powdered sugar and cornstarch version is included in the recipe notes for your reference. This offers a good contrast for those who enjoy a distinct textural difference between the crust and the filling. For my recipe, the convenience and delightful chewiness of the melted butter crust make it the ideal choice, creating a harmonious balance that truly lets the lemon shine.

Choosing Your Pan: Achieving the Ideal Lemon Bar Thickness
The pan you choose can significantly influence the final presentation and eating experience of your lemon squares. While I typically bake these delights in a metal pan, an 8-inch glass dish would also work perfectly fine, though you might need to adjust baking times slightly as glass conducts heat differently than metal. The classic 8-inch square pan yields a thicker, more substantial lemon square, providing a generous ratio of creamy lemon filling to buttery crust. This is ideal for those who love a rich, decadent bite where the lemon flavor takes center stage.
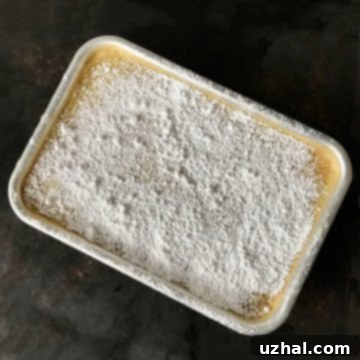
However, for a slightly different experience, I’ve also experimented with baking them in a ⅛ sheet pan, which typically measures around 6 ½ by 9 ½ inches. This results in thinner lemon bars, which are equally delicious and, arguably, a little easier to eat. The reduced thickness offers a more balanced ratio of crust to filling, allowing both components to be savored in equal measure. Some prefer these thinner bars for their delicate presentation and lighter feel, making them perfect for larger gatherings or dessert platters.
Ultimately, both pan sizes work beautifully, and your choice depends on your personal preference for thickness and crust-to-filling ratio. Don’t be afraid to experiment to find your ideal lemon square. If you need to prepare a larger batch for a party or event, simply double all the ingredients and use a standard 9×13 inch pan. Remember to line your chosen pan with parchment paper or foil, greased and floured, to ensure easy removal and clean slices, regardless of pan size or material. Adjust baking times as needed for larger or thicker batches, keeping an eye on the filling’s set.
Pro Tips for a Perfectly Smooth and Non-Eggy Filling
While this recipe inherently minimizes an eggy taste thanks to the half & half, some individuals are particularly sensitive to it. For an extra layer of assurance, and to further enhance the filling’s smoothness, there’s a simple yet effective technique: removing the chalaza from the eggs. The chalaza refers to the opaque, white stringy bits found within an egg, which are responsible for anchoring the yolk in place. While completely natural and harmless, they can sometimes contribute to a slightly less smooth texture or a faint eggy aroma in delicate custards like lemon bar filling.
To implement this tip, crack your eggs into a separate bowl before mixing them with other ingredients. Using a fork, a small spoon, or even clean tweezers, gently scoop out and discard the chalazae. This step helps to ensure the filling is as uniform and silky as possible. Although you might still detect a very subtle egg flavor (after all, eggs are a core ingredient), removing the chalazae significantly refines the texture and reduces any prominent eggy notes, letting the bright lemon flavor truly dominate.
Another crucial tip for a perfect filling is to avoid overbaking. Lemon fillings set as they cool, so it’s important to pull them from the oven when they still have a slight jiggle in the center. The edges should appear set and perhaps lightly puffed, but the very center might still look a bit wet or shaky. This is exactly what you want! Overbaking will result in a rubbery texture, diminishing the desired smooth and creamy consistency. Trust the process; the residual heat will continue to cook the filling as it cools, leading to a beautifully set and wonderfully smooth lemon square.
Serving and Storage Suggestions
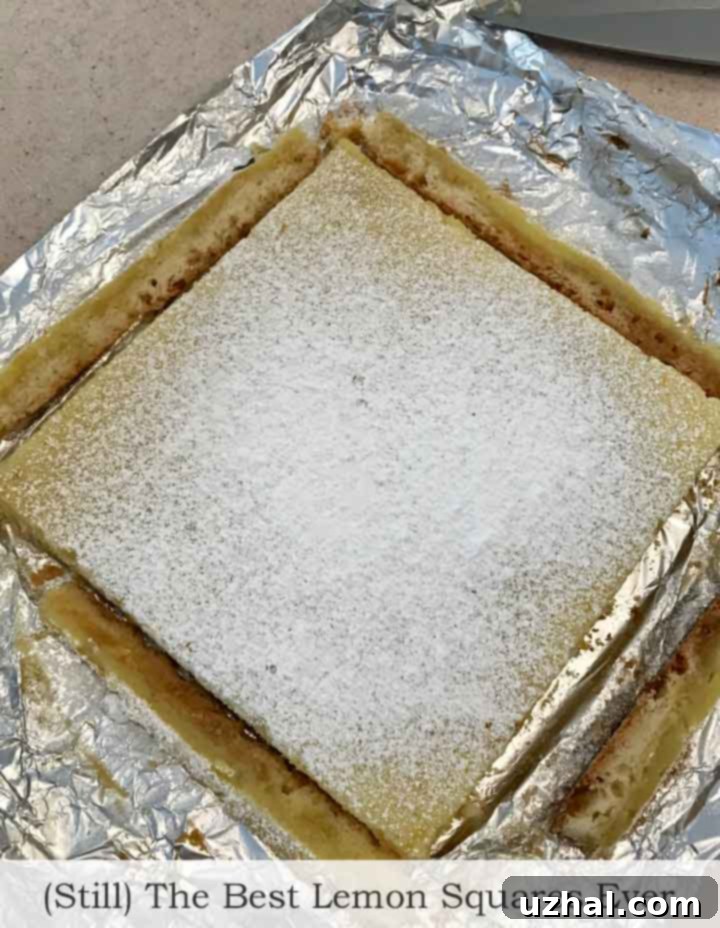
Once your smooth lemon squares have cooled completely to room temperature, they are ready for their final flourish and presentation. Cooling is a critical step, allowing the filling to fully set, ensuring clean cuts and a stable texture. After cooling on a wire rack, transfer the whole slab from the pan to a cutting board. For a professional look, you can gently dust the entire surface with a light layer of powdered sugar before trimming the edges. Trimming the edges creates neat, uniform bars and removes any slightly drier bits, enhancing the overall aesthetic.
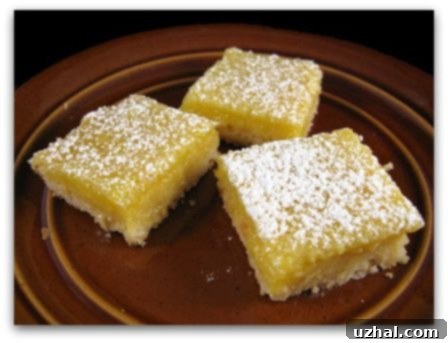
Cut the lemon squares into your desired size and shape. Typically, an 8-inch pan yields 12-16 squares, while a ⅛ sheet pan might offer more, albeit thinner, pieces. For an extra touch of elegance, consider garnishing individual squares with fresh berries like raspberries or blueberries, a sprig of mint, or a dollop of whipped cream just before serving. These additions not only add visual appeal but also introduce complementary flavors and textures.
For storage, lemon squares are best kept in an airtight container in the refrigerator. They will maintain their freshness and delightful texture for up to 3-5 days. While they can be enjoyed chilled, some prefer to let them sit at room temperature for about 15-20 minutes before serving to soften the filling slightly. These lemon bars also freeze surprisingly well! Wrap individual squares tightly in plastic wrap, then place them in a freezer-safe bag or container. They can be frozen for up to 2-3 months. Thaw them in the refrigerator overnight or at room temperature for a few hours before serving. This makes them a fantastic make-ahead dessert, perfect for busy hosts or when a sudden craving strikes.
Why These Lemon Squares Are a Must-Try
In a world brimming with dessert options, these smooth lemon squares distinguish themselves as a truly exceptional treat. Their unique balance of intense lemon flavor, mitigated and made creamy by the inclusion of half & half, sets them apart from more conventional, sharply tart recipes. The convenience of the melted butter crust means you can achieve bakery-quality results with minimal effort, making this recipe approachable for even novice bakers.
Every element of this recipe has been thoughtfully refined to ensure a superior eating experience. From the velvety smooth filling that melts in your mouth to the tender, buttery crust that provides the perfect counterpoint, these lemon squares are a symphony of textures and flavors. They are not just a dessert; they are a celebration of fresh, bright ingredients and simple, elegant baking. Whether you’re a long-time fan of lemon desserts or new to their charm, these smooth lemon squares are guaranteed to impress and become a staple in your baking repertoire. Give them a try – your taste buds will thank you!
- Homemade Lemon Curd
- Chewy Brownies Made in One Bowl
- White Chocolate Chunk Lemon Cookies
- Double Lemon Cheesecake Bars
- Cake Mix Lemon Cheesecake Bars
Recipe

Quite Possibly The Best Lemon Squares Ever
Anna
Pin Recipe
15 minutes
40 minutes
1 hour
1 hour
55 minutes
Dessert
American
12
bars
Ingredients
Crust:
-
1
cup
all-purpose flour
(130 grams), pastry flour okay too -
4
tablespoons
granulated sugar OR powdered sugar
(50 grams granulated or 30 grams powdered) -
⅛
teaspoon
salt, increase to ½ if using unsalted butter -
8
tablespoons
salted butter, gently melted or extremely soft
(114 grams)
Filling:
-
2
large
eggs -
⅔
cup
granulated sugar
(130 grams) -
1 ½
tablespoons
all-purpose flour
(9 grams) -
1
teaspoon
lemon zest -
⅓
cup
fresh lemon juice -
3
tablespoons
half & half (light cream)
Or use 1 ½ T. cream and 1 ½ T. milk for a lighter option -
⅛
teaspoon
salt
Instructions
-
Grease and flour an 8-inch square metal pan or a ⅛ sheet pan (approx. 6 ½ x 9 ½ inches). You can line the pan with parchment paper or foil, but ensure you still grease and flour the lined pan for best results. This prevents sticking and ensures easy removal.
-
In a medium mixing bowl, combine the all-purpose flour, granulated sugar, and salt. Pour in the gently melted and cooled butter, then stir with a fork or spatula until a soft, cohesive dough forms. Press this dough evenly into the bottom of the prepared pan, ensuring it’s compact. Chill the dough-lined pan for at least 30 minutes in the refrigerator, or until firm, while you prepare the filling. This chilling step helps prevent the crust from shrinking during baking.
-
Preheat your oven to 350 degrees F (175 degrees C). Once the oven is preheated, bake the chilled crust for 18-20 minutes, or until the edges are very lightly golden brown. For a slightly less browned and more tender crust, you can bake it at 325 degrees F (160 degrees C) for 25 to 28 minutes instead. The goal is to partially bake the crust before adding the filling.
Lemon Filling
-
While the crust is baking and cooling slightly, prepare the lemon filling. Crack the large eggs into a separate bowl. Using a fork or small tweezers, carefully remove the white stringy bits (chalazae) from each egg. This step helps ensure a perfectly smooth filling texture.
-
A few minutes before the crust is due to finish baking, whisk together the prepared eggs, granulated sugar, all-purpose flour, fresh lemon zest, fresh lemon juice, half & half, and salt in a medium bowl until the mixture is completely smooth and well combined. Ensure no lumps of flour remain.
-
Once the crust is ready, reduce the oven temperature to 325 degrees F (160 degrees C). Give the lemon filling another quick stir, then carefully pour it over the warm, pre-baked crust in the pan. Immediately place the pan back into the preheated oven. Bake for 20-25 minutes, or until the filling no longer appears wet and has only a slight jiggle in the center when gently shaken. It won’t look completely firm, but if small, fine bubbles have formed on the surface (especially around the edges), it should be ready to remove. The filling will continue to set as it cools.
-
Carefully remove the pan from the oven and place it on a wire rack to cool completely to room temperature. This can take several hours. Once fully cooled, lift the entire slab of lemon squares from the pan using the parchment paper/foil overhang. Place it on a clean cutting board, dust generously with extra powdered sugar if desired, then trim the edges for a clean presentation. Cut into 12-16 uniform bars. Serve and enjoy!
Notes
Alternative Crust: Firm, Powdery, Food Processor Version
For those who prefer a more traditional, firm, and crumbly crust, here’s an alternative recipe using a food processor. This crust offers a distinct textural contrast to the smooth lemon filling.
- ¾ cup plus 2 tablespoons all-purpose flour (114 grams)
- ⅓ cup powdered sugar (40 grams)
- 2 tablespoons cornstarch (16 grams)
- ⅜ teaspoon salt
- 6 tablespoons cold unsalted butter, cut into small chunks (84 grams)
Instructions for Alternative Crust: Pulse the flour, powdered sugar, cornstarch, and salt together in a food processor until well combined. Add the cold butter chunks and pulse until the mixture resembles coarse meal. It will appear quite dry. Pour this mixture into your prepared (greased and floured) 8-inch square pan and press it firmly and evenly over the bottom. Refrigerate the crust for at least 30 minutes to chill thoroughly. While it chills, you can proceed with preparing the lemon filling as instructed in the main recipe.
Preheat your oven to 350 degrees F (175 degrees C). Once the oven is preheated, bake this pre-chilled crust for 18-20 minutes, or until the edges are very lightly browned. Then, proceed with adding the lemon filling as per the main recipe instructions.
lemon squares, lemon bars, smooth lemon filling, creamy lemon dessert
Tried this recipe?
Let us know how it was!