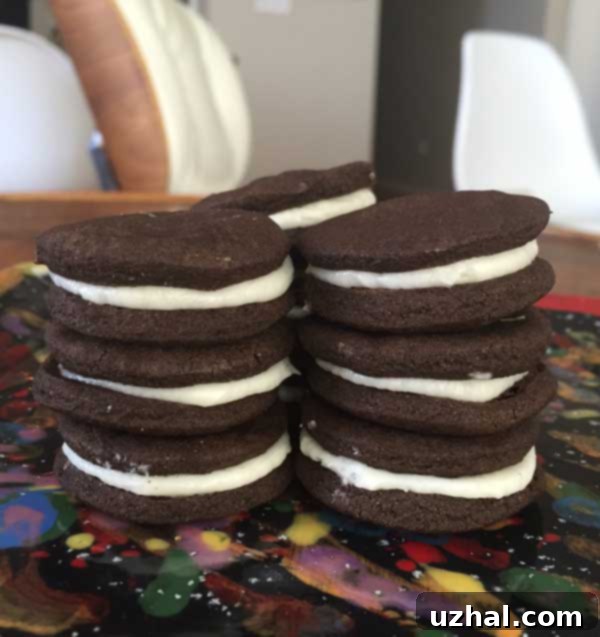
The Ultimate Homemade Chocolate Sandwich Cookies: A Decadent Recipe for a Classic Treat
There’s nothing quite like the timeless appeal of a classic chocolate sandwich cookie. While many are familiar with store-bought versions, the inspiration for these particular treats actually sprang from an unexpected place: numerous photos of Swedish Fish Oreos that kept popping into my feed. Frankly, the idea of a red, fruity filling in a chocolate cookie didn’t quite sit right with me. I appreciate most Oreo flavors, but that one is definitely an acquired taste! However, despite that peculiar inspiration, all those images sparked an undeniable craving for proper chocolate sandwich cookies – rich, dark, and perfectly balanced with a creamy filling. The result of that craving? These delightful little gems, which are not only irresistibly delicious but also incredibly charming. Forget the artificial flavors and embrace the superior taste of homemade!

This recipe for homemade chocolate sandwich cookies is a carefully adapted version, originally inspired by the renowned Wayne Brockman recipe and popularized by Smitten Kitchen. While their versions are fantastic, I embarked on a mission to enhance the flavor and texture even further, making a few deliberate tweaks that I believe elevate these cookies to perfection. My goal was to create a sandwich cookie that truly stands out, offering a deeper chocolate flavor, a chewier texture, and a more robust, homemade appeal that store-bought varieties simply can’t match.
The adjustments I made were designed to optimize every aspect of the cookie, from its dark, rich crumb to its luscious, smooth filling. Here’s a detailed look at the modifications and the delicious impact they have:
- Incorporated Espresso Powder and Brown Sugar: Adding a touch of instant espresso powder doesn’t make the cookies taste like coffee; instead, it magically intensifies the chocolate flavor, making it richer and more profound. It acts as a natural enhancer, bringing out the best in the cocoa. Brown sugar, on the other hand, contributes a wonderful depth of flavor with its molasses notes and also ensures a chewier, softer cookie texture, a delightful contrast to the crisp edges.
- Increased the Salt Content: Salt is often an unsung hero in baking. A slight increase in salt helps to balance the sweetness of both the cookie and the filling, cutting through the richness and highlighting the complex chocolate notes. It’s a small change with a big impact on the overall flavor profile, ensuring each bite is perfectly seasoned and never cloyingly sweet.
- Utilized the Regular Creaming Method: Many recipes call for mixing cold butter with dry ingredients, which can sometimes lead to a denser crumb. I opted for the classic creaming method, where softened butter is beaten with sugar until light and fluffy. This incorporates more air into the dough, resulting in a lighter, more tender, and cakier cookie texture that melts in your mouth, providing a delightful contrast to the creamy filling.
- Eliminated Shortening from the Filling: While shortening is often used in fillings to maintain stability at room temperature, I found it unnecessary for a homemade treat that would likely be enjoyed fairly quickly or stored appropriately. By using only unsalted butter in the filling, we achieve a superior, richer, and more natural flavor. Plus, with a refrigerator readily available, keeping these delectable cookies fresh and their filling perfectly set is no issue at all.
Beyond the ingredient adjustments, the size and shape of these cookies also played a crucial role in achieving the perfect bite. My invaluable set of graduated round cookie cutters allowed me to experiment with various dimensions. After some testing, I settled on using a 1 ½ inch circle cutter. Initially, these seemed quite small, almost diminutive. However, once baked to a crisp yet tender perfection and generously filled with the creamy vanilla frosting, they proved to be the absolute ideal size for a sandwich cookie. This smaller size makes them perfect for snacking, sharing, or adding to a dessert platter without feeling overly indulgent. Plus, using this smaller cutter yields a significantly larger batch of cookies, perfect for parties or for stocking your cookie jar. If you opt for a standard 2-inch cutter, you’ll still get wonderfully sized cookies, but the overall yield will naturally be fewer.
Creating these homemade chocolate sandwich cookies is not just about following a recipe; it’s an experience that brings joy from start to finish. The aroma of rich chocolate filling your kitchen as they bake is simply intoxicating. And the taste? Far superior to any mass-produced cookie. Each bite offers a harmonious blend of deep chocolate and sweet, creamy vanilla, a testament to the quality ingredients and thoughtful adjustments made to this recipe. They are perfect for special occasions, as a delightful treat with your afternoon coffee, or simply when you’re craving that comforting taste of a classic.

The beauty of making your own sandwich cookies lies in the control you have over the ingredients and the fresh quality you achieve. You can choose the finest Dutch-processed cocoa powder for that deep, dark chocolate color and mellow flavor, and real vanilla extract for an authentic taste. The creaming method, meticulously beating the butter and sugars, creates a light and airy dough that bakes into cookies with a delightful snap and a tender interior. This attention to detail transforms a simple cookie into an extraordinary indulgence.
When it comes to the filling, the pure butter base creates a velvety, melt-in-your-mouth experience that shortening simply cannot replicate. Adjusting the milk or half-and-half allows you to achieve your desired consistency, ensuring it’s firm enough to hold its shape but soft enough to be delightfully creamy. Piping the filling with a freezer bag or piping bag makes assembly quick and neat, creating professional-looking cookies every time. These chocolate sandwich cookies are not just a dessert; they are a homemade labor of love that promises to satisfy any chocolate craving.
Consider serving these with a cold glass of milk, a steaming cup of coffee, or even alongside a scoop of vanilla bean ice cream for an extra special treat. They also make wonderful edible gifts for friends and family, showcasing your baking prowess and spreading a little bit of homemade happiness. With their rich flavor, perfect texture, and charming appearance, these cookies are bound to become a favorite in your recipe collection.
- Lemon Filled Sandwich Cookies
- White Sandwich Bread
- Chocolate Banana Ice Cream Sandwiches
- Loaf Pan Ice Cream Sandwich Cake
- Walnut Sandwich Bread
Recipe

Chocolate Sandwich Cookies
Anna
Pin Recipe
Ingredients
- 1 ¼ cup all-purpose flour (155 grams)
- ½ cup Dutch processed cocoa powder (40 grams)
- ½ teaspoon instant espresso powder
- 1 teaspoon baking soda
- ¼ teaspoon baking powder
- ⅜ teaspoon salt
- 10 tablespoons unsalted butter softened (140 grams)
- ½ cup granulated sugar 100 grams
- ½ cup light brown sugar lightly packed (100 grams)
- 1 large egg
- 1 teaspoon vanilla extract
Filling
- 1 stick ½ cup unsalted butter, softened
- 1 ½ cups confectioners’ sugar
- 1 teaspoon vanilla extract
- ¾ to 1 teaspoon milk or half & half
Instructions
-
Preheat your oven to 325 degrees F (160 C). Line a large baking sheet with parchment paper or nonstick foil to prevent sticking and ensure easy cleanup.
-
In a medium bowl, thoroughly whisk together the all-purpose flour, Dutch-processed cocoa powder, instant espresso powder (if using for enhanced chocolate flavor), baking soda, baking powder, and salt. Set this dry mixture aside.
-
In a separate large mixing bowl, using an electric mixer, beat the softened unsalted butter on medium speed until it’s light and creamy, about 2-3 minutes. Gradually add the granulated sugar and light brown sugar, continuing to beat until the mixture is fluffy and well-combined, scraping down the sides of the bowl as needed. Beat in the large egg and vanilla extract until fully incorporated. Finally, add the reserved flour mixture to the wet ingredients, mixing on low speed until a thick, cohesive dough forms. Be careful not to overmix.
-
Using a level teaspoon, scoop out portions of the dough and gently roll them into small, uniform balls. Place these dough balls onto your prepared baking sheet. For perfectly uniform cookies, flatten each ball to about ⅛ of an inch thickness using the bottom of a glass or the palm of your hand. For truly pristine circles reminiscent of classic sandwich cookies, lightly press a 1 ½ inch round cookie cutter over each flattened dough disc, then carefully remove any excess dough scraps.
-
Bake the cookie circles for approximately 10 minutes, or until the edges appear set and the centers look slightly soft. Avoid overbaking, as they will continue to firm up as they cool. Let the cookies cool on the baking sheet for about 3 minutes before carefully transferring them to a wire rack to cool completely. This resting period helps them maintain their shape and prevents breakage.
-
While the cookies cool, prepare the creamy filling. In a clean mixing bowl, beat together the softened unsalted butter and confectioners’ sugar until the mixture is light, fluffy, and well blended. Add the vanilla extract and ¾ teaspoon of milk (or half & half), beating until the filling is wonderfully creamy. If the filling seems too stiff, add the remaining ¼ teaspoon of milk, a tiny bit at a time, until you reach your desired piping consistency. Transfer the filling to a heavy-duty freezer bag or a piping bag fitted with a round tip. Snip off a small bottom corner of the bag. Squeeze a generous dab of icing onto the flat side of half the cooled cookies, then gently cap with the remaining cookies to create perfect sandwich cookies.
-
The total yield of cookies should be around 40, depending on the size of your cookie cutter and how thinly you press the dough. If using a larger cutter, you will naturally get fewer cookies.
Notes
