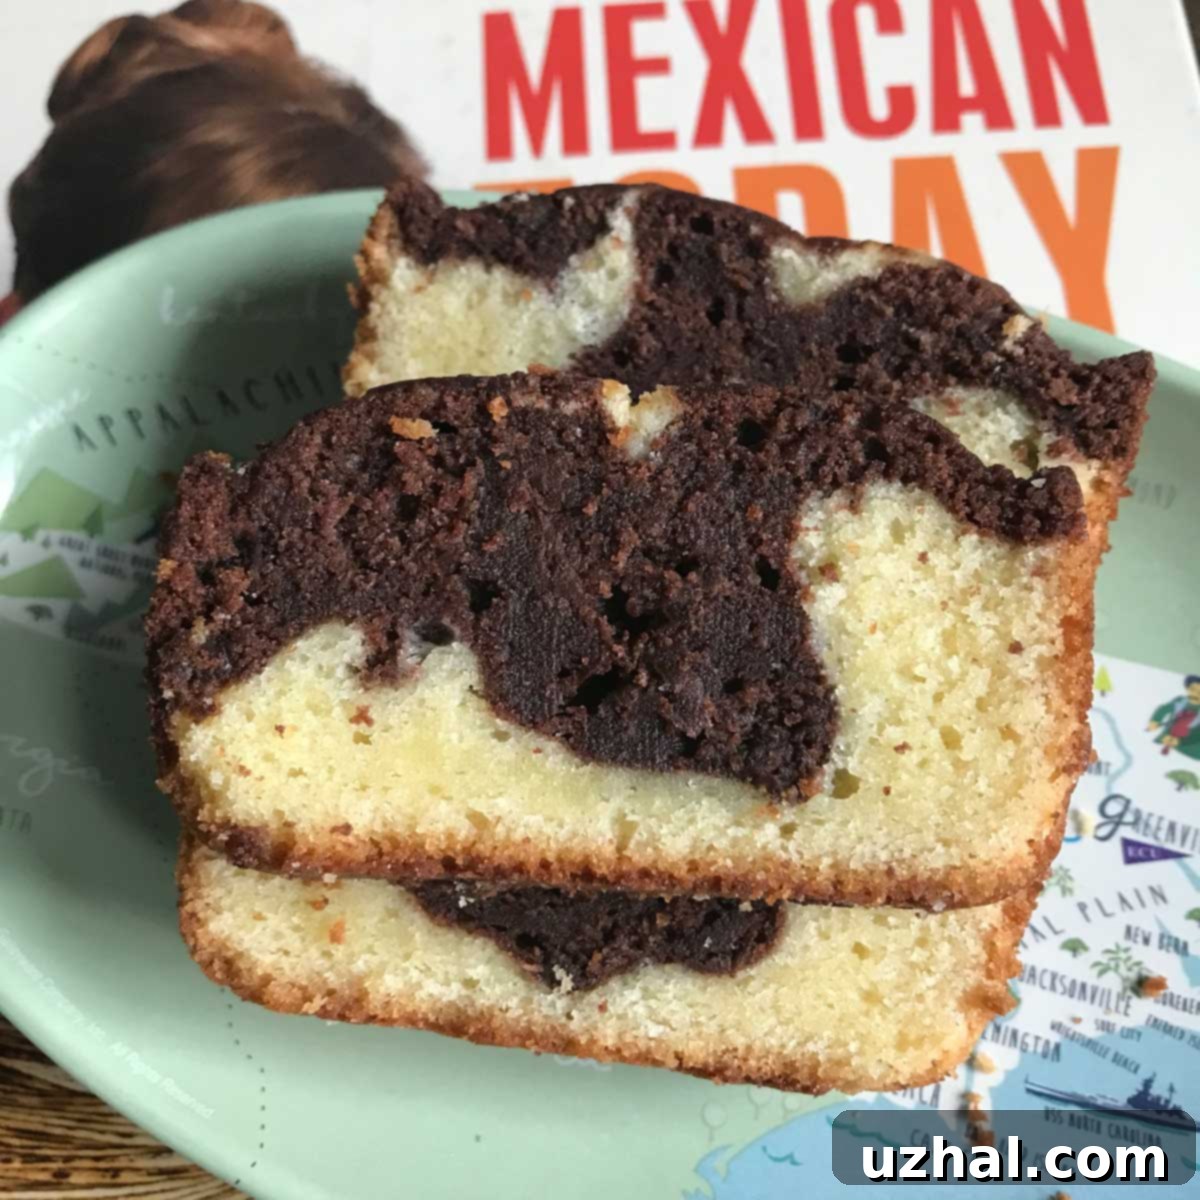
The Ultimate Guide to Baking a Flawless Vanilla and Chocolate Marble Pound Cake in a Loaf Pan
There’s something truly magical about a classic marble pound cake. It’s the best of both worlds, offering the rich, comforting flavors of both vanilla and chocolate in every single slice. For years, I’ve experimented with countless variations, but my absolute favorite rendition is a robust vanilla and chocolate pound cake, perfectly baked in a loaf pan. This particular recipe, which I lovingly refer to as my Loaf Pan Marble Pound Cake, consistently delivers an exquisite balance of taste and texture that will undoubtedly become a staple in your baking repertoire. Forget choosing between your two favorite flavors – with this recipe, you get to savor them both in one beautifully marbled masterpiece. It’s a delightful treat that’s perfect for any occasion, from a casual family dessert to a more formal gathering, embodying the essence of homemade comfort.
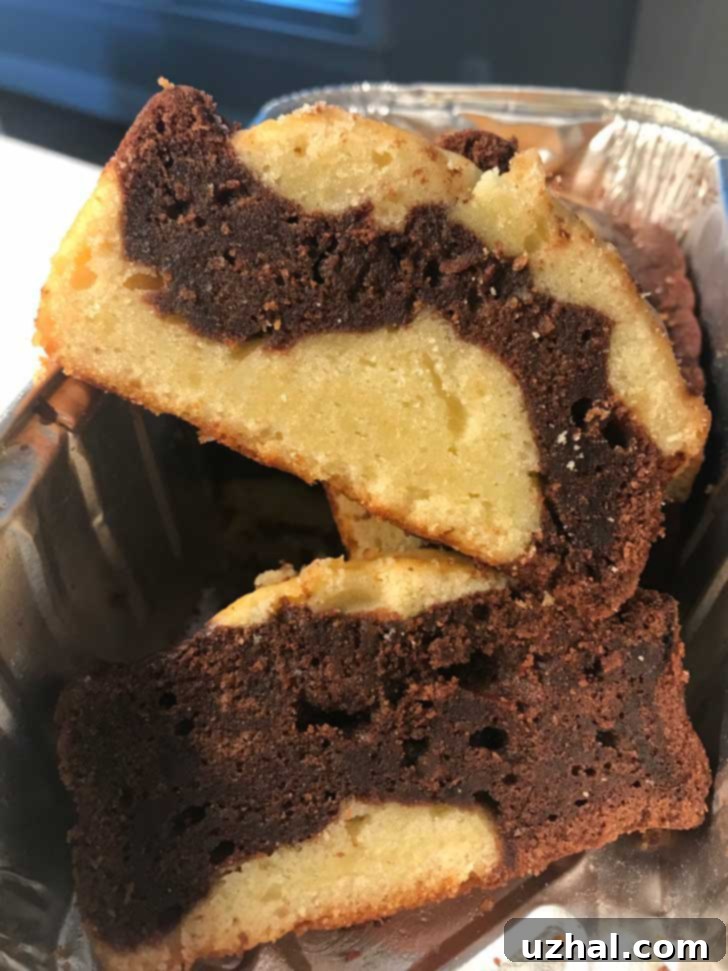
Achieving the Perfect Texture and Rich Flavor in Your Marble Pound Cake
The hallmark of an exceptional pound cake lies in its texture, and this Loaf Pan Marble Pound Cake truly excels. Each bite reveals a velvety smooth, dense crumb that is characteristic of a well-made pound cake, yet it remains wonderfully moist and tender. This impeccable texture is not by chance; it’s a direct result of the meticulous balance of ingredients. Both the vanilla and chocolate batters contribute to this richness, being intensely buttery and bursting with flavor. The generous amount of butter used is crucial, as it provides not only flavor but also a tenderizing effect, creating that melt-in-your-mouth sensation.
The secret ingredient that elevates this cake further is sour cream, which not only adds a delightful tang that brightens the overall flavor but also ensures an unparalleled moistness, preventing the cake from drying out. The acidity in sour cream reacts with the baking powder, contributing to the cake’s impressive rise and contributing to its fine, even crumb structure. This makes it perfectly suited for a loaf pan, where a beautiful domed top is often desired. While you could certainly bake this versatile recipe in a Bundt or tube pan, the loaf pan offers a distinct advantage. Because pound cakes tend to rise significantly in the center, a loaf pan beautifully accommodates this characteristic, resulting in a charming domed top that’s visually appealing and indicative of a perfectly baked cake. The uniform baking environment of a loaf pan also helps in achieving that consistent, fine crumb throughout the cake, making every slice a pleasure.
When it comes to flavor, the base vanilla and chocolate combination is a timeless classic that pleases nearly everyone. However, there’s always room for subtle enhancements to personalize your cake. I haven’t strayed far from the traditional, but I’ve found a few simple additions can truly make this marble pound cake your own. For the chocolate batter, consider incorporating a teaspoon of espresso powder to deepen its cocoa notes, transforming it into a more sophisticated mocha marble cake. Alternatively, stirring in a handful of mini chocolate chips can add an enjoyable textural surprise and an extra boost of chocolate goodness. In the vanilla batter, a dash of almond extract can introduce a sophisticated, nutty aroma, or a touch of finely grated orange zest can add a bright, citrusy counterpoint, providing a refreshing contrast to the richness. These small tweaks allow you to tailor the cake to your personal preferences while retaining its fundamental classic charm and luxurious texture.
Effortless Slicing and a Crumble-Free Experience
One of the many delightful qualities of this specific marble pound cake recipe is how beautifully it slices, yielding clean, thin pieces with remarkably few crumbs. This is a testament to its tight, yet incredibly soft and tender crumb structure, a direct result of the generous amounts of butter and sour cream in the recipe. The high fat content from the butter and the moisture from the sour cream work in harmony to create a dense, yet yielding cake that holds together perfectly. Unlike some cakes that can crumble upon cutting, this pound cake offers precise, neat slices every time, making it ideal for various serving styles. Whether you’re cutting it into elegant thin slices for a refined dessert platter, or sturdy cubes for a casual snack, you won’t find yourself battling a crumbling mess. This attribute is a huge plus, especially when preparing lunchbox treats, packing for picnics, or arranging delicate dessert presentations where presentation matters as much as taste.
This exceptional recipe comes from the acclaimed cookbook “Mexican Today” by Pati Jinich, who graciously credits her sister, Alisa, a professional baker, for its perfection and a deep understanding of what makes a truly great pound cake. Pati herself shares how she often slices this cake for her son’s lunchboxes, and mischievously mentions her personal habit of saving the chocolate-rich, bite-sized pieces for herself – a delightful quirk many home bakers can undoubtedly relate to! My own modifications to this already fantastic recipe have been minimal, focusing mainly on scaling for practicality and minor flavor adjustments to suit my taste. After experimenting with various loaf pan sizes, I found that halving the original recipe was ideal for smaller households, ensuring a fresh cake without excess, or for when I wanted to test new variations without committing to a full-sized cake. I also increased the salt content slightly from ¼ teaspoon to ½ teaspoon to better balance the sweetness and deepen the overall flavor profile, creating a more nuanced taste. Additionally, I love adding mini chocolate chips to the chocolate batter for an extra layer of texture and indulgence, a delightful surprise in every bite. These small changes merely customize an already brilliant foundation, making it even more adaptable and enjoyable for various preferences and occasions.
Mastering the Mix: Avoiding “Sad Streaks” in Your Pound Cake
Baking a consistently beautiful marble pound cake can sometimes present a common challenge for even experienced bakers: the dreaded “sad streaks.” These are typically dense, gummy lines that can appear in the otherwise perfect crumb, often due to inconsistencies in mixing. I’ve encountered them myself on a few occasions, particularly when I’ve deviated from the instructions, such as when halving the recipe and using a smaller Wilton 7.5×4.5 inch removable bottom tube pan. While a cake with a sad streak is still undeniably delicious – its flavor remains superb – preventing them ensures a perfectly uniform and aesthetically pleasing result that will impress every time.
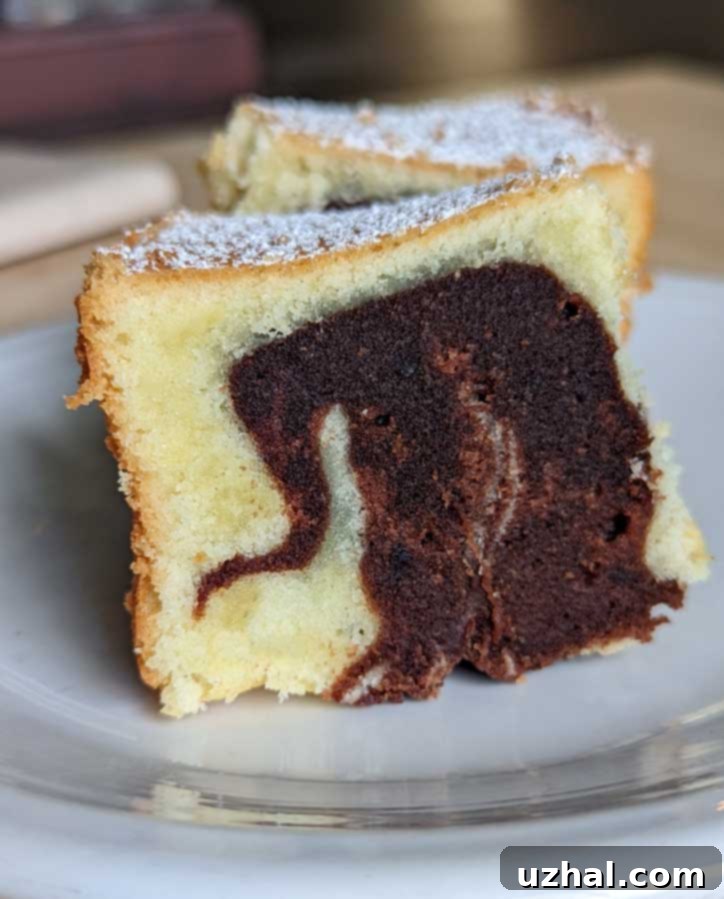
The primary culprit for these streaks is often over-mixing, especially when creaming the butter and sugar, or when incorporating the wet and dry ingredients at too high a speed. After experiencing these streaks, I began paying much closer attention to my mixer speed and the specific power of my stand mixer (or handheld mixer). Reducing the mixing speed, particularly when adding ingredients after the initial creaming, significantly mitigates the formation of these dense pockets. It’s crucial to understand that while creaming butter and sugar is essential for incorporating air and creating a light texture, over-creaming can incorporate too much air, leading to a fragile structure that collapses slightly during baking, thus creating those undesirable streaks. Furthermore, when adding the dry ingredients (flour, baking powder, salt) and wet ingredients (eggs, sour cream), gentle, low-speed mixing is paramount. The key is to combine until *just* blended, scraping the bowl often and avoiding any excessive beating once the flour is added. Overworking the flour develops gluten unnecessarily, which can lead to a tough, streaky cake. The tight, buttery, soft crumb is a natural and desirable outcome of this cake’s high butter ratio, and careful mixing helps preserve that luxurious quality, ensuring a consistent and delightful texture throughout.
Another highly effective method to prevent sad streaks and gumminess is to meticulously follow the original recipe’s precise instructions for adding eggs and flour. The cookbook wisely advises an alternating method: adding half of the whisked eggs simultaneously with half of the flour mixture, beating until just incorporated, and then repeating with the remaining half of each. This alternating addition method helps to create a stable emulsion, gradually incorporating the liquids and solids, which promotes an even distribution of ingredients and reduces the chance of dense, gummy spots. This technique helps the batter maintain its creamy texture and prevents it from curdling. Essentially, the main pitfalls to avoid are over-creaming the butter and sugar, or over-mixing the batter once the flour is introduced. Even if you make a slight mistake in the mixing process, the inherent richness, moisture, and robust flavor of this pound cake ensure that it will still be incredibly tasty, making it a surprisingly forgiving recipe for home bakers of all skill levels.
Choosing the Ideal Loaf Pan Size for Your Marble Pound Cake
Selecting the correct pan size is a critical, yet often overlooked, aspect of successful pound cake baking, as it significantly impacts both the cake’s appearance and its baking time. The original recipe specifies a standard 9×5 inch loaf pan, which typically results in a slightly shorter cake compared to what some might expect from a pound cake. Through my own baking trials and extensive experience, I’ve come to believe that an 8½ by 4½ inch loaf pan might be a superior choice for achieving a taller, more substantial loaf with a proportionally higher dome, giving it a more classic pound cake aesthetic. This slightly smaller footprint allows the batter to rise higher, creating a more impressive presentation.
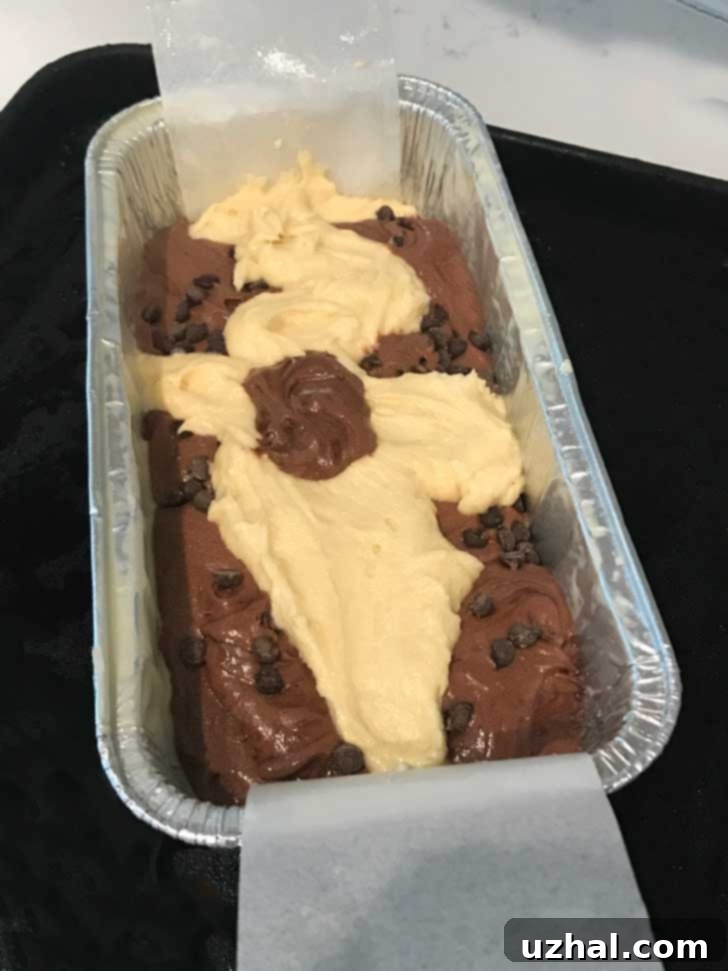
However, since I’ve primarily been halving the recipe for my personal use – perfect for smaller households or when I simply want a fresh, warm cake without the commitment of a large batch – I’ve explored baking in smaller loaf pans with great success. For a half-batch of this delicious marble pound cake, an 8×4 inch pan (approximately 4-cup capacity) works wonderfully. These older-school 8×4 inch pans often measure 8×4 inches at the top but taper slightly to about 7×3 inches at the bottom. While these specific dimensions can be harder to find nowadays, as many bakeware items have been “super-sized” over the years, some disposable aluminum pans available at stores like Dollar Tree surprisingly fit this older dimension perfectly, offering a convenient and affordable option. If you can’t find an exact 8×4 inch pan, a standard 8.5×4.5 inch loaf pan will also accommodate a half recipe beautifully, just ensure you don’t overfill it – a good rule of thumb is to fill the pan no more than two-thirds full to allow for proper rise. Always remember that pan size directly impacts baking time; larger or smaller pans will require adjustments to the baking duration. A reliable strategy is to monitor the cake closely towards the end of the baking cycle and rely on the doneness test (a wooden pick inserted into the center coming out with a few moist crumbs) rather than strictly adhering to the recipe’s timed instructions.
Exploring Alternatives: Nordicware Bundtlettes and Other Baking Pans
Beyond the traditional loaf pan, this marble pound cake recipe adapts beautifully to a variety of other bakeware, opening up exciting possibilities for different presentations and portion sizes. One fantastic alternative that I highly recommend is a Nordicware Bundtlettes Pan. These pans feature six individual Bundts, which are larger and more substantial than standard mini Bundt cakes, offering a generous single serving that feels special. The full recipe for this cake typically yields about eight delightful Bundtlettes, making it perfect for entertaining guests, preparing individual treats for a potluck, or simply having perfectly portioned slices ready for an afternoon coffee break. When baking in Bundtlettes, it’s advisable to make a slight adjustment to your oven settings: reduce the temperature to 325°F (160°C) and begin checking for doneness around the 35-minute mark, as smaller cakes will naturally bake faster and can dry out if overbaked. Greasing and flouring these intricate pans meticulously is crucial to ensure easy release and preserve the beautiful Bundt shape.
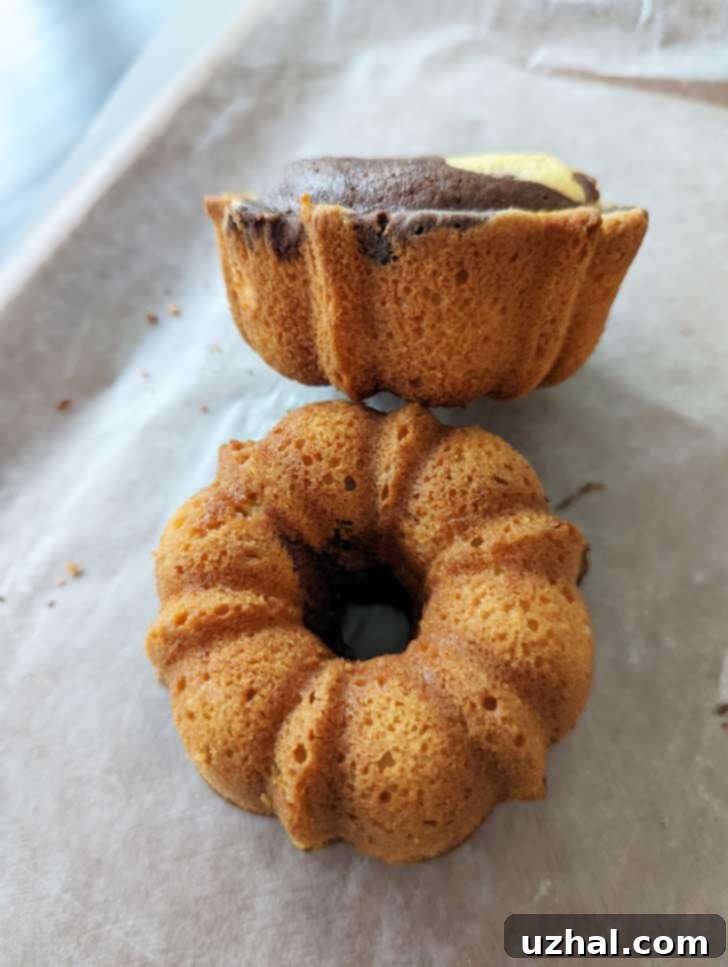
The versatility of this pound cake recipe doesn’t stop there. You can also successfully bake it in jumbo-sized muffin tins for a more casual, cupcake-like presentation, which are excellent for grab-and-go treats or children’s parties. Alternatively, mini loaf pans are a wonderful option for creating charming individual gifts or smaller, personal-sized loaves. For all these smaller formats, ensure your pans are thoroughly well-greased and floured to prevent sticking. Always remember to adjust baking times accordingly – smaller cakes will require significantly less time in the oven than a full-sized loaf. While I haven’t extensively tested the exact timing for jumbo muffin tins, monitoring for visual cues like golden edges, firm tops, and, most importantly, using the wooden pick test will reliably guide you to perfection. The ability to adapt this recipe to various bakeware means you’re not confined to just one pan type, allowing you to get creative with your baking and presentation, always yielding a consistently delicious result.
Ready to bake this delicious and versatile marble pound cake? Below you’ll find the full recipe, along with a convenient link to Pati Jinich’s excellent cookbook, Mexican Today. Her books are highly recommended for anyone with an interest in authentic, vibrant, and accessible Mexican cooking, offering a wealth of culinary inspiration that extends far beyond just cakes.
- Old Fashioned Molasses Butterscotch Cookies
- Tried and True Chocolate Chip Cookie Recipes
- Mini Loaf Pan or Bar Cookies
- Not Quite David’s Cookies
Marbled Pound Cake Recipe
Marbled Pound Cake
Anna
Pin Recipe
Ingredients
- ¼ cup water
- ¼ cup unsweetened cocoa powder
- 1 ½ cups all-purpose flour (210 grams)
- ¼ teaspoon salt (I use ½ teaspoon for enhanced flavor balance)
- 1 teaspoon baking powder
- 4 large eggs at room temperature (allow 30 minutes to warm up)
- 2 sticks unsalted butter, softened (1 cup) (230 grams)
- 1 ¼ cups granulated sugar (250 grams)
- 1 teaspoon vanilla extract
- ½ cup sour cream (120 grams)
Instructions
-
Preheat your oven to 350 degrees F (175 degrees C). Prepare a 9×5 inch loaf pan by greasing it thoroughly, then lining it with a strip of parchment paper that extends over the sides for easy removal. Grease the parchment paper again and dust the entire pan with a light coating of flour, tapping out any excess. While the original recipe suggests a 9×5 inch pan, an 8 ½ by 4 ½ inch pan might yield a slightly taller loaf with a more pronounced dome.
-
In a small, microwave-safe bowl, heat the water until it’s very warm but not boiling. Add the unsweetened cocoa powder to the warm water and stir vigorously with a spoon or whisk until the mixture is completely smooth and free of lumps. Set this chocolate mixture aside to cool slightly while you prepare the other ingredients. This crucial step helps to “bloom” the cocoa, intensifying its flavor and ensuring a rich chocolate taste.
-
In a medium-sized bowl, whisk together the all-purpose flour, baking powder, and salt until they are thoroughly combined. This ensures that the leavening agent and salt are evenly distributed throughout the dry ingredients, leading to a consistent rise and balanced flavor in your finished cake. Set this dry mixture aside.
-
In a separate, preferably medium-sized bowl (or one large enough to easily divide the batter later), whisk the 4 large room-temperature eggs until they are light and frothy. Having the eggs at room temperature is crucial as it helps them emulsify better with the butter and sugar, creating a smoother, more stable batter that incorporates air efficiently.
-
In the bowl of a stand mixer fitted with the paddle attachment (or a large mixing bowl with a handheld electric mixer), beat the softened unsalted butter on medium-high speed for 3 minutes. Stop and scrape down the sides of the bowl as needed to ensure even creaming. Add the granulated sugar and reduce the mixer speed to medium-low. Continue beating for another 2 minutes, scraping the bowl thoroughly once or twice. This creaming process incorporates air into the butter and sugar, which is vital for the pound cake’s light yet dense texture. Finally, add the vanilla extract and beat for 1 minute until fully incorporated and fragrant.
-
With the mixer on medium-low speed, gradually add half of the whisked flour mixture, followed by half of the beaten eggs. Beat until just blended, scraping down the sides of the bowl to ensure everything is combined without overmixing. Then, add the remaining beaten eggs and the rest of the flour mixture, continuing to beat on medium-low speed until the batter is smooth and no dry streaks of flour remain. Remember, overmixing at this stage can develop gluten too much, leading to a tough cake and those undesirable “sad streaks.”
-
Add the sour cream to the batter and beat on low speed until it is fully incorporated and the batter appears smooth and homogenous. The sour cream plays a vital role in adding moisture, richness, and a slight tang, significantly enhancing the overall flavor and tenderness of the pound cake.
-
Carefully divide the completed batter into two equal portions. You can eyeball it or, for greater precision, weigh out approximately 480 grams (or half the total weight) into a separate bowl (the egg bowl works perfectly for this). To one of these portions, add the cooled cocoa mixture you prepared earlier. Beat this chocolate batter gently until the cocoa is thoroughly combined and the batter achieves a rich, uniform chocolate color. Leave the other half as your vanilla batter.
-
To create the beautiful marble effect, spoon dollops of vanilla batter and chocolate batter alternately into your prepared loaf pan. You can start with vanilla, then add chocolate, topping with vanilla, and continue layering until all batter is used. For a more pronounced and artistic swirl, after spooning in the batters, gently drag a knife or skewer through the batter in a swirling motion (a figure-eight pattern works well) just once or twice. Avoid over-swirling, as this can mix the colors too much, losing the distinct marble pattern and resulting in a muddied look.
-
Bake the cake for 50-60 minutes, or until it is golden brown on top and a wooden pick or skewer inserted into the center comes out with only a few moist crumbs clinging to it. If baking a halved version in a smaller pan, it will typically be done in about 50 minutes in my oven. Always begin checking for doneness around the 45-minute mark to avoid the common pitfall of overbaking, which can lead to a dry cake.
-
Once baked, remove the cake from the oven and let it cool in the pan on a wire rack for 20 minutes. This essential step allows the cake to set and firm up before handling. After 20 minutes, run a thin knife around the inner and outer edges of the cake to loosen it from the pan. Then, invert the wire rack over the pan and carefully flip the cake onto the rack. Remove the pan and parchment paper, allowing the cake to cool completely on the rack before slicing and serving. Cooling completely ensures the best texture, prevents crumbling, and allows the flavors to fully develop.
Notes
