Indulge in Perfectly Portioned Bliss: The Ultimate Crème Brûlée for Two Recipe
There’s something uniquely satisfying about a rich, creamy Crème Brûlée, especially when it’s perfectly portioned for two. This exquisite dessert, with its silky smooth custard and signature caramelized sugar crust, often feels like a restaurant luxury, but it’s surprisingly simple to master at home. As a two-person household, I find myself reaching for this scaled-down recipe more frequently, as it delivers all the elegance and flavor of a full-sized batch without the overwhelming leftovers. While it’s not a ‘last-minute’ dessert due to its required baking and chilling time, the preparation itself is straightforward, featuring a short and sweet ingredient list that makes it accessible to even novice bakers. The beauty of Crème Brûlée lies in its make-ahead versatility: you can bake the custards, chill them for several hours (or even overnight), and then torch the sugar topping right before serving, ensuring a show-stopping finish every time. This approach makes it an ideal dessert for dinner parties, romantic evenings, or simply a delightful treat to savor at your leisure.
The Simple Elegance of Crème Brûlée Ingredients
Creating an exceptional Crème Brûlée relies on a handful of high-quality ingredients. For this Crème Brûlée for Two recipe, you’ll need heavy cream, which is the cornerstone of its rich, velvety texture. The fat content in heavy cream is crucial for achieving that characteristic luxurious mouthfeel. Next, you’ll need 5-6 teaspoons of sugar, providing just the right amount of sweetness to balance the richness of the cream. You can adjust this slightly to your personal preference; a little more sugar can make it slightly sweeter without compromising the integrity of the custard. Two large egg yolks are essential for the custard’s structure and vibrant color, giving it that classic creamy consistency. Finally, a good quality vanilla—preferably vanilla bean paste or a premium vanilla extract—will infuse your custard with a delicate, aromatic fragrance that is truly captivating. Vanilla bean paste, in particular, offers those beautiful specks of vanilla bean, enhancing both the flavor and visual appeal.
For the iconic crackly topping, the type of sugar you choose makes a difference. Ideally, Demerara or turbinado sugar is recommended. These coarse sugars have larger crystals that melt and caramelize beautifully under the torch, creating a thick, crunchy, and distinctly flavored shell. However, don’t fret if you don’t have these on hand! More often than not, I find myself using regular brown sugar, and it performs admirably. Brown sugar melts readily and produces a crunchy, intensely flavorful, almost toffee-like shell that is equally delicious. Experiment with both to discover your preferred caramelized crust.
Choosing Your Ramekins: Size, Material, and Impact on Baking
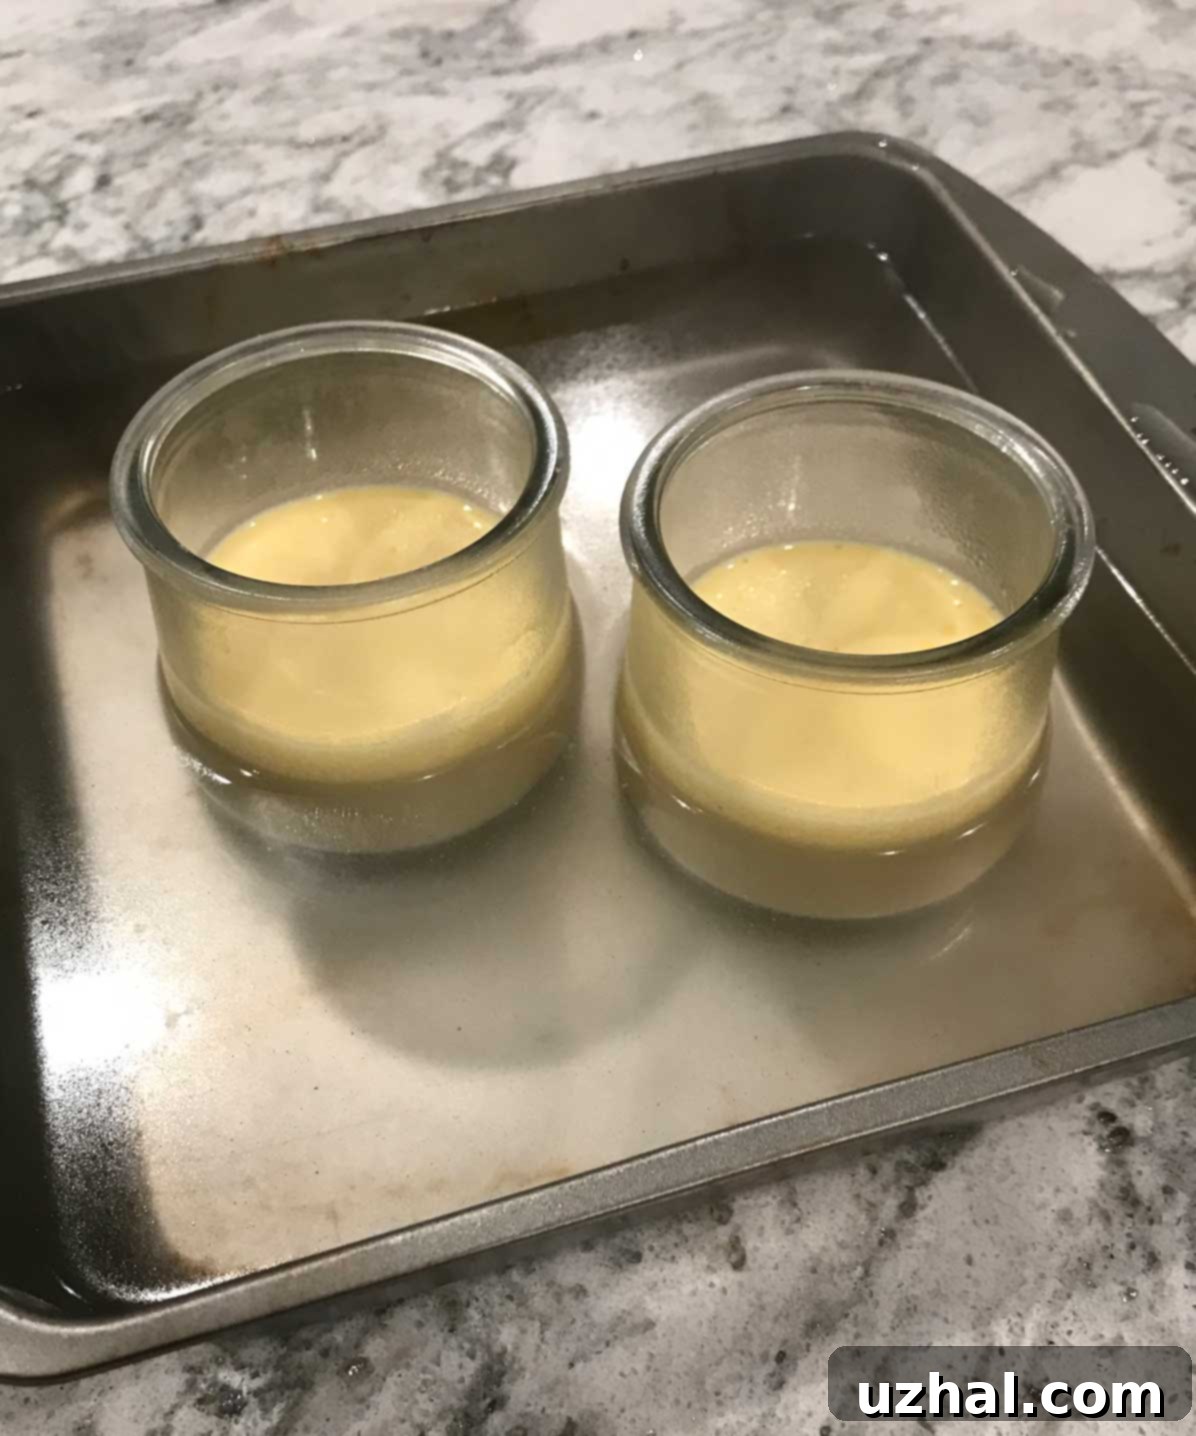
The vessel you choose for your Crème Brûlée, commonly known as a ramekin, plays a significant role in both the baking process and the final presentation. Ramekins are small, oven-safe ceramic or glass dishes designed for individual portions. Over the years, I’ve used a variety of containers, from traditional little custard cups to charming recycled glass Yoplait containers (as pictured below), which are surprisingly well-suited for this purpose. Currently, I’m enjoying a set of “Cermer” ramekins I discovered at a thrift store. These particular ramekins are approximately 1 ½ inches deep and 3 inches wide, barely holding 4 oz of custard. The key takeaway here is flexibility: you can use almost any oven-safe individual serving dish you like, as long as it can withstand the heat of a water bath.
It’s important to note that the size and depth of your chosen ramekins will directly impact the baking time. Shallower, wider ramekins will bake faster than deeper, narrower ones, as the heat can penetrate the custard more quickly. Therefore, while you have creative freedom with your dish selection, be prepared to adjust the baking time accordingly. Always keep an eye on the custards and rely on a digital thermometer for accuracy rather than solely on the recommended baking duration, especially when experimenting with different ramekin sizes. Uniformity in your ramekin choice will also ensure even baking across your batch.

The Digital Thermometer: Your Secret to Perfect Custard Consistency
For achieving consistently perfect Crème Brûlée, a digital thermometer is an invaluable tool. It eliminates the guesswork often associated with baking custards, ensuring they are cooked to the ideal doneness without being over or undercooked. The delicate nature of custard means that a slight variation in baking time or temperature can dramatically alter its texture. Overbaked custard can become rubbery or curdled, while underbaked custard will be too runny.
When making Crème Brûlée, I typically aim to pull the custards from the oven when they register between 176°F and 180°F (80°C and 82°C) in the center. At this temperature, the custards will be just barely set, with a slight wobble in the middle that indicates their creamy, luscious texture. The residual heat will continue to cook them slightly as they cool, leading to that perfect, melt-in-your-mouth consistency. Inserting the thermometer into the center of one of the custards will give you an accurate reading, allowing you to confidently remove them at the optimal moment. This small investment in a digital thermometer will elevate your custard-making game significantly, transforming uncertain baking into a precise and rewarding culinary experience.
Embracing the Flame: The Essential Pastry Torch for Crème Brûlée
The definitive characteristic of Crème Brûlée is its crispy, caramelized sugar topping, and the best way to achieve this is with a pastry torch. My journey into making Crème Brûlée began precisely when I acquired my first torch, and I haven’t looked back since. While some home cooks attempt to caramelize the sugar under a broiler, I’ve never personally tried this method. The broiler can certainly melt and brown sugar, but it often lacks the precision and control of a torch, leading to uneven browning, burnt spots, or even overheating the custard itself. A broiler can also heat the entire custard, which goes against the desired cold custard/hot topping contrast.
A pastry torch, on the other hand, allows you to direct a focused flame directly onto the sugar crystals, giving you complete control over the caramelization process. You can gently melt and brown the sugar to a perfect amber hue, creating that satisfying crack when tapped with a spoon, all while keeping the underlying custard cool and undisturbed. If you plan on making Crème Brûlée more than once, investing in a culinary torch is undoubtedly worthwhile. Beyond its primary use for this classic dessert, a good pastry torch is incredibly versatile in the kitchen. It can be used for toasting meringues, browning gratins, skinning peppers, or even as a handy tool for lighting candles. Its precision and ease of use make it an indispensable gadget for any aspiring home chef.
The Perfect Chill: Serving Crème Brûlée at Its Best
Crème Brûlée is traditionally served chilled, offering a delightful contrast between the warm, crisp caramelized topping and the cool, creamy custard beneath. After baking, it’s crucial to allow the custards to cool completely to room temperature before covering them with plastic wrap and chilling them in the refrigerator. This chilling process, typically for at least two hours, ensures the custard sets properly and achieves its optimal texture. The ideal serving temperature for the custard is cool, but not ice-cold; a slight chill allows the flavors to truly shine. Some culinary experts suggest that a slightly cool, rather than super cold, custard leads to a better caramelized shell, as the temperature difference helps the sugar set quickly. While I haven’t noticed a drastic difference, ensuring the custard is adequately chilled before torching is key to preventing it from becoming overly warm during the caramelization.
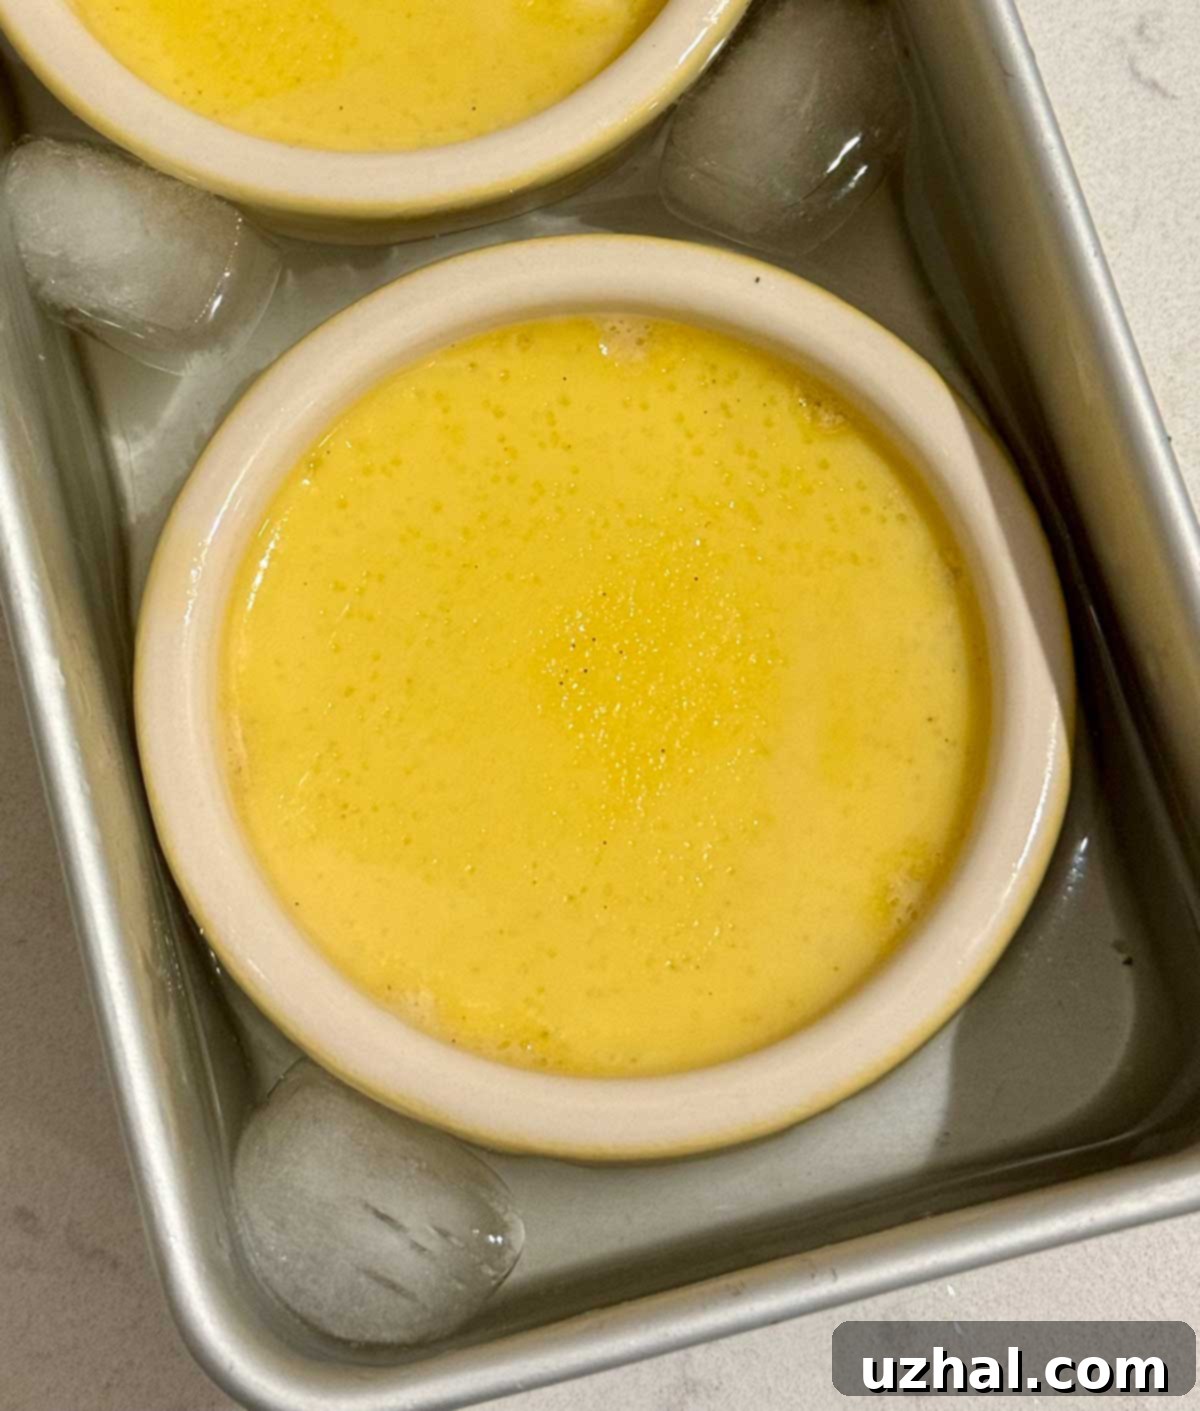
Life, however, doesn’t always adhere to perfect dessert timelines. If you find yourself in a rush, perhaps starting your dessert late in the afternoon, a quick-cooling method using a water bath can be a lifesaver. After baking, let the ramekins cool on a wire rack for about 10-15 minutes to allow some initial heat to dissipate. Then, carefully transfer them to a loaf pan or a larger dish. Gather some ice and cold water, then pour the cold water around the ramekins, being careful not to let it spill over into the custards, and add the ice. This creates an ice bath that rapidly brings down the temperature of the custards. This method can cool them significantly in about an hour. Once they’ve cooled sufficiently in the ice bath, you can transfer them to the refrigerator to finish chilling completely. This efficient cooling process allows you to enjoy your Crème Brûlée without a lengthy wait, ensuring the perfect balance of cool custard and a fresh, torched topping.

The Essence of Classic Crème Brûlée and Vanilla Bean Alternatives
This delightful Crème Brûlée for Two recipe is an adaptation of a classic from Cook’s Illustrated, renowned for their meticulous testing and reliable recipes. If you’re looking to scale up and prepare a full batch for a larger gathering, their original “Classic Crème Brûlée” recipe is an excellent resource, readily available through a quick online search or directly from their publications. The original version traditionally calls for a vanilla bean, which offers an unparalleled depth of vanilla flavor and the beautiful visual appeal of tiny black specks distributed throughout the custard. However, my personal advice is to consider a more practical, yet equally flavorful, alternative: high-quality vanilla bean paste.
Vanilla bean paste provides an almost identical flavor profile to a whole vanilla bean, often superior to some lower-grade beans, and it comes with the added convenience of being pre-scraped and ready to use. It also boasts a significantly longer shelf life compared to fresh vanilla beans, which can be quite expensive and prone to drying out. Using paste ensures you capture that rich, complex vanilla essence with ease, making it a fantastic investment for any baker. It simplifies the process without compromising the authentic taste that makes classic Crème Brûlée such a beloved dessert. Whether you opt for the traditional bean or the convenient paste, the goal is to infuse your custard with the purest, most aromatic vanilla flavor possible.
- Creme Brulee Recipe from Holland America
- Weight Issues: Why Get a Kitchen Scale
- White Bean Chocolate Chip Cookies
- Banana Bean Muffins
- Small Batch Hard Boiled Egg Chocolate Chip Cookies
Recipe

Crème Brulee for Two
Anna
Pin Recipe
Ingredients
- 10 tablespoons and 2 teaspoons heavy cream (about 170ml for ultimate richness)
- 5-6 teaspoons of granulated sugar (adjust to your sweetness preference)
- 2 large egg yolks (for perfect custard texture and color)
- ⅓ to ½ teaspoon of vanilla bean paste or high-quality vanilla extract (for rich aroma)
- ⅓ teaspoon turbinado or Demerara sugar (for the signature crunchy topping; brown sugar is also a great alternative)
Instructions
-
Preheat your oven to 300°F (150°C). Ensure the oven rack is positioned in the lower third of the oven. This helps in providing gentle, even heat from below for the water bath.
-
Prepare an 8-inch square metal baking pan by lining the bottom with a small dish rag or a folded paper towel. This cushioning prevents the ramekins from sliding around during baking and allows for more even heat distribution in the water bath. If you don’t have a rag, simply proceed with extra caution when placing and removing ramekins.
-
Fill a teapot or a spouted saucepan with water and bring it to a rolling boil. Keep this hot water on the stove over low heat to maintain its temperature until you are ready to use it for the water bath. Hot water is crucial for a consistent bain-marie.
-
In a 2-cup microwave-safe measuring cup or a small saucepan, combine half of the heavy cream with the granulated sugar. Heat this mixture for approximately 20-40 seconds in the microwave (or gently on the stovetop) until the cream is very hot and steam begins to rise, but not boiling. Stir thoroughly until the sugar is completely dissolved. Then, add the remaining cold cream to this hot mixture; this helps to cool it down slightly, preventing the eggs from scrambling when added.
-
In a separate small bowl, whisk the two egg yolks together with the vanilla bean paste or vanilla extract until well combined and slightly lighter in color. Gradually and continuously whisk in the cream/sugar mixture into the egg yolks. Pouring slowly while whisking vigorously is essential to temper the egg yolks, preventing them from cooking prematurely and ensuring a smooth, uniform custard base.
-
Place two 4 or 5-ounce ramekins into the prepared 8-inch square baking pan, ensuring they are positioned so they do not touch each other or the sides of the pan. This allows for even heat circulation around each ramekin.
-
Carefully pour the custard mixture evenly into the two ramekins. Then, pour the very hot water (from step 2) into the baking pan, around the ramekins, until the water level reaches about two-thirds up the sides of the ramekins. Carefully transfer the pan to the preheated oven. Bake until the centers of the custards are just barely set, with a slight jiggle, and register between 175°F to 180°F (80-82°C) on a digital thermometer. In my new oven, this usually takes about 50 minutes, but oven temperatures can vary significantly. Begin checking for doneness at 30-35 minutes to prevent overbaking.
-
Once baked, carefully remove the baking pan from the oven. Using tongs or oven mitts, carefully lift the ramekins out of the hot water bath and transfer them to a wire rack. Allow them to cool completely to room temperature. This gradual cooling is important for the custard’s texture. Once cooled, cover each ramekin tightly with plastic wrap and chill in the refrigerator until very cold (approximately 2 hours or more, ideally). While some believe a slightly cool rather than ice-cold custard yields a better caramelized shell, I haven’t noticed a huge difference; the key is that it’s thoroughly chilled to maintain its integrity during torching.
-
When ready to serve, remove the plastic wrap from the chilled custards. Evenly sprinkle about ⅓ teaspoon of turbinado, Demerara, or brown sugar over the top of each custard, ensuring a consistent layer for caramelization.
-
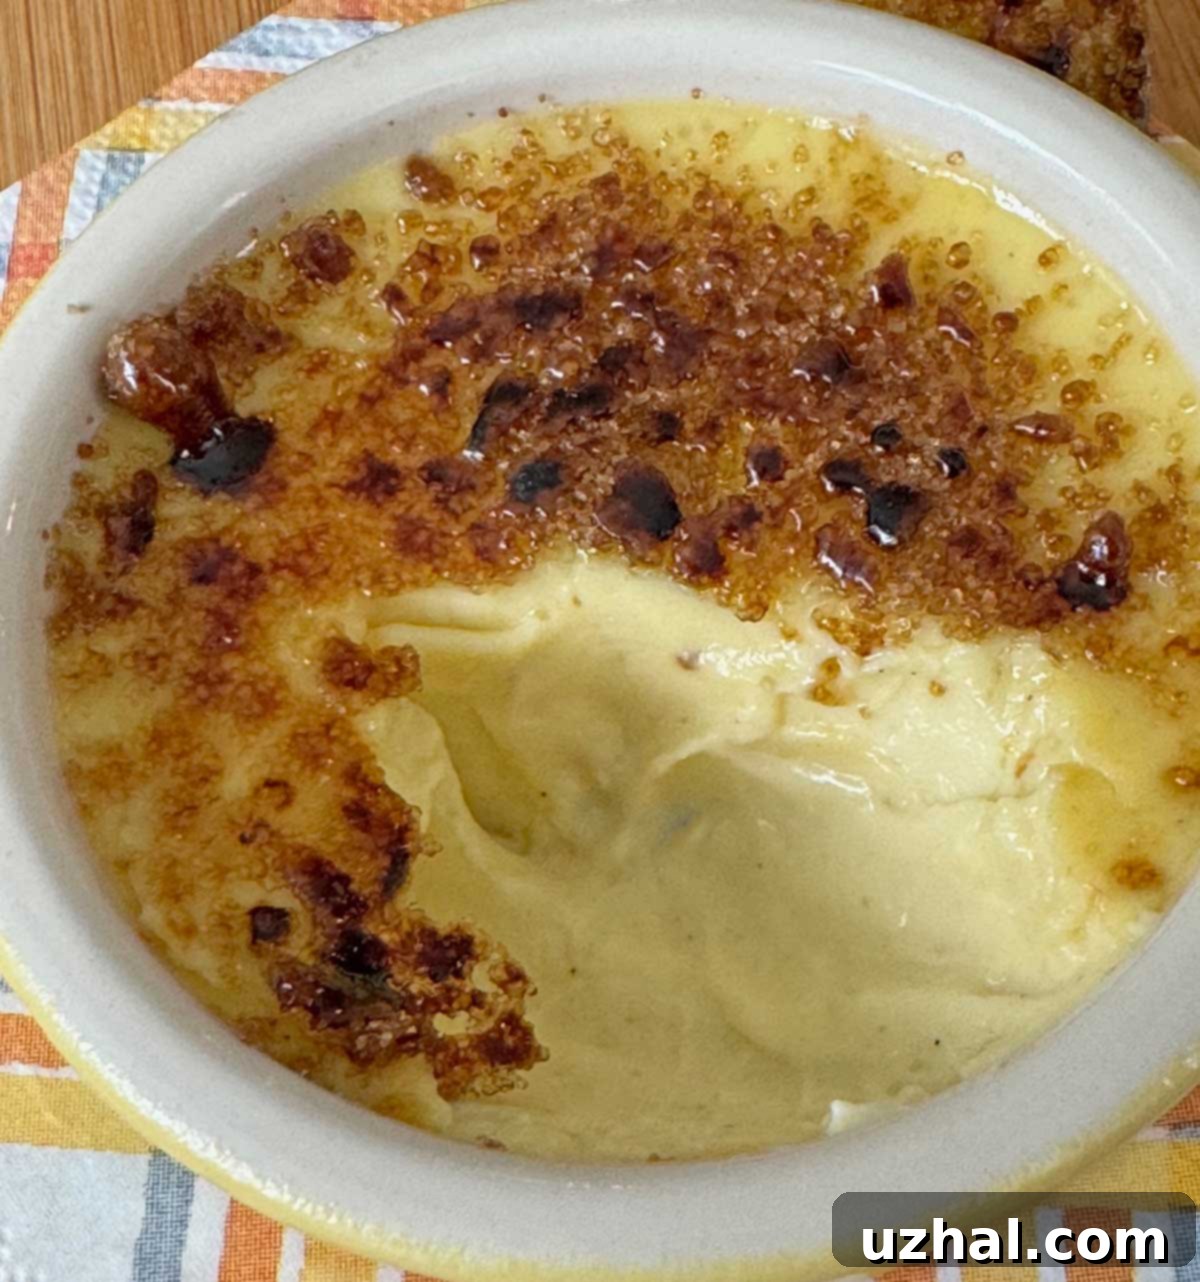
Ignite your pastry torch and carefully caramelize the sugar topping. Hold the torch a few inches above the sugar, moving it constantly in a circular motion until the sugar melts, bubbles, and turns a beautiful amber-brown color. Be careful not to burn it! For the best contrast, you can return the brûléed custards to the refrigerator for about ½ an hour to re-chill the custard slightly (though I often skip this step for immediate gratification). Serve immediately and enjoy the satisfying crack of the caramelized shell. This recipe yields 2 perfect servings.
Notes
