Homemade Baked Kale Chips: The Ultimate Crispy & Healthy Snack Recipe
Kale chips have become a beloved staple in many households, and for good reason! While perhaps not a brand-new revelation for everyone, our family recently discovered the sheer delight of perfectly baked kale chips, and they’ve quickly become a go-to healthy snack. As far as satisfying cravings go, you could certainly do a lot worse than these nutrient-packed, incredibly crispy greens. They offer a fantastic alternative to traditional fried snacks, providing a satisfying crunch without the guilt.
A common question that arises when baking vegetables is about nutrient retention. It’s true that some of kale’s impressive nutritional profile might be altered or diminished during the baking process, especially with prolonged exposure to heat. I’ve often wondered exactly how much of its vitamins and minerals remain after a quick 12-minute session in a 350-degree oven. Some sources suggest that dehydrating kale preserves more nutrients, and while that’s an intriguing thought, we haven’t ventured into that territory just yet. Perhaps the built-in dehydrator function on my oven is calling my name – it might be time to explore that option for an even more nutrient-dense version in the future. However, for now, the simplicity and deliciousness of baked kale chips reign supreme.
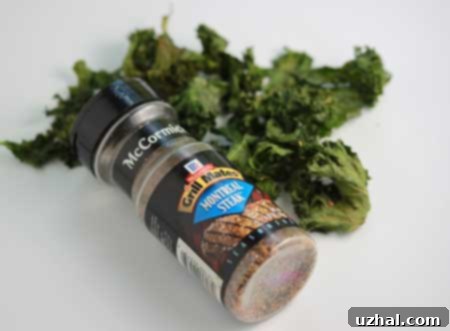
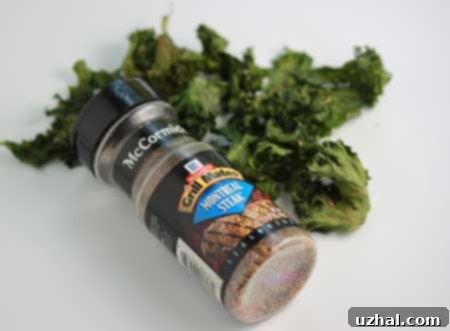
The beauty of homemade baked kale chips lies in their versatility and the minimal effort required. While a simple dash of olive oil and a sprinkle of salt is always a winner, my current favorite method involves using McCormick’s Montreal Steak Seasoning. This robust blend adds a fantastic depth of flavor that elevates the humble kale chip to something truly extraordinary. It’s a great way to introduce a savory, umami note that complements the earthy taste of kale beautifully. Whether you prefer a straightforward seasoning or an adventurous blend, these chips are incredibly adaptable to your taste preferences.
Baked Kale Chips Recipe

Easy & Crispy Baked Kale Chips
Recipe by Cookie Madness
Pin Recipe
Ingredients
- 1 large bunch of fresh Kale (curly or Lacinato)
- 1 tablespoon of olive oil, or slightly more if needed for coating
- Coarse sea salt, a seasoned salt blend like Montreal Steak Seasoning, or your favorite spice mix
Instructions
-
Preheat your oven to 350 degrees F (175 degrees C). Take a large, rimmed non-stick baking sheet and pour the olive oil onto it, spreading it evenly across the surface. This ensures every kale chip gets a light, crispy coating.
-
Begin by thoroughly washing and drying the kale leaves. This step is critical: ensure the kale is completely dry, as any moisture will prevent it from getting crispy. Next, carefully cut or tear the leafy greens away from the tough, fibrous stems. Break the leaves into smaller, chip-sized pieces, ranging from approximately 1 to 2 inches. Place the dry kale pieces onto the oiled baking sheet and gently toss or swirl them around in the oil until each piece is lightly coated. Finally, sprinkle generously with coarse salt, seasoned salt, or your preferred spice blend.
-
Bake the kale chips on the center rack of your preheated oven for 12 to 15 minutes. It’s important to keep a close eye on them, especially after the 10-minute mark, as they can go from perfectly crispy to burnt very quickly. The exact baking time can vary depending on your oven and the thickness of the kale.
-
Once baked, remove the baking sheet from the oven and allow the kale chips to cool completely on the sheet. They will crisp up even further as they cool. Serve immediately and enjoy your homemade, healthy snack!
Why Kale Chips Deserve a Spot in Your Snack Rotation
Kale is often touted as a “superfood,” and its nutritional benefits are undeniably impressive. It’s packed with vitamins K, A, and C, as well as essential minerals like manganese, calcium, and copper. It also provides a good source of fiber and antioxidants. Transforming this leafy green into a crunchy chip makes it incredibly appealing, even to those who might typically shy away from raw kale. The baking process mellows its sometimes bitter flavor, resulting in a more palatable and addictive snack.
Beyond the health aspect, kale chips are remarkably convenient to make. With just a few simple ingredients and a short baking time, you can whip up a batch faster than it takes to drive to the store for processed snacks. They are naturally vegan, gluten-free, and can be customized to fit various dietary needs and taste preferences. This makes them an excellent choice for anyone looking for a wholesome and satisfying alternative to greasy potato chips or sugary treats.
Tips for Achieving Perfectly Crispy Kale Chips Every Time
While the recipe itself is straightforward, a few key tips can elevate your kale chip game from good to extraordinary. The goal is maximum crispiness without burning, and that requires attention to detail.
- Thorough Drying is Paramount: This cannot be stressed enough. Any residual water on the kale leaves will steam them instead of allowing them to crisp up. After washing, use a salad spinner, then pat them completely dry with paper towels or a clean kitchen towel. You want them as dry as possible before adding oil.
- Remove Stems: The tough, fibrous stems of kale leaves do not crisp up well and can be unpleasant to eat. Always tear or cut the leafy parts away from the central rib.
- Even Oil Distribution: Less is more with oil. You need just enough to lightly coat the leaves, not drench them. Too much oil can make them soggy. Tossing the kale in a large bowl with the oil (rather than directly on the baking sheet) can help achieve a more even, light coating.
- Don’t Overcrowd the Pan: This is another crucial step for crispiness. Kale needs space to breathe in the oven. If your baking sheet is too crowded, the leaves will steam each other, leading to limp chips. Use two baking sheets if necessary, baking them in batches or rotating them halfway through.
- Monitor Baking Time Closely: Ovens vary, and kale can burn quickly. Start checking around the 10-minute mark. You want the chips to be brittle and crispy, but still green, not browned or blackened.
- Cool Completely: Kale chips will continue to crisp up as they cool. Allow them to cool undisturbed on the baking sheet for at least 5-10 minutes before serving.
Exploring Flavor Variations for Your Kale Chips
While salt and Montreal Steak Seasoning are excellent choices, the world of spice offers endless possibilities for customizing your kale chips. Don’t be afraid to experiment!
- Cheesy Flavor: Nutritional yeast is a vegan-friendly ingredient that provides a delicious, savory, and slightly cheesy flavor. Sprinkle it generously over the kale before baking for a truly addictive treat.
- Spicy Kick: A pinch of chili powder, smoked paprika, or a dash of cayenne pepper can add a wonderful warmth and heat.
- Garlic & Onion: Garlic powder and onion powder are classic seasonings that enhance almost anything. Use them alone or in combination for a savory, aromatic chip.
- Herbal Notes: Dried herbs like oregano, basil, or Italian seasoning can lend a Mediterranean flair.
- Sweet & Savory: For a unique twist, a tiny sprinkle of brown sugar or maple syrup along with a touch of salt can create a delightful sweet and savory contrast.
- Lemon Zest: A little finely grated lemon zest (added after baking, or very sparingly before) can brighten the flavor considerably.
Remember to toss your kale thoroughly with your chosen seasonings to ensure an even distribution of flavor on every chip.
Troubleshooting Common Kale Chip Challenges
Even with the best intentions, sometimes kale chips don’t turn out quite right. Here are solutions to common problems:
- Soggy Chips: This is almost always due to moisture. Ensure kale is bone dry after washing. You might also be using too much oil or overcrowding the baking sheet. Give them space and minimal oil, and ensure your oven is at the correct temperature. Undercooking can also lead to limpness, so extend baking time slightly if needed, watching carefully.
- Burnt Chips: If your chips are turning black, your oven might be too hot or you’re baking them for too long. Reduce the temperature slightly or shorten the baking time. Uneven oven heat can also be a culprit; rotating the baking sheet halfway through can help.
- Unevenly Cooked Chips: If some chips are crispy and others are not, it’s often a sign of uneven coating (oil or seasoning) or uneven spreading on the pan. Make sure to toss thoroughly and spread them in a single layer.
Storing Your Homemade Kale Chips
Kale chips are best enjoyed fresh, right after they’ve cooled to maximum crispiness. However, if you have leftovers, store them in an airtight container at room temperature. To maintain their crispness, you might add a small desiccant packet (like those found in vitamin bottles) to the container. They will typically stay crispy for 1-2 days, after which they may start to soften slightly. Reheating them in a low oven for a few minutes can sometimes revive their crunch.
Serving Suggestions
Beyond being a fantastic stand-alone snack, baked kale chips can be incorporated into various meals:
- Soup Topping: Crumble them over creamy soups for added texture and flavor.
- Salad Crunch: Replace traditional croutons with kale chips for a healthier, more nutrient-dense crunch in your salads.
- Sandwich Garnish: Add them to sandwiches or wraps for an extra layer of flavor and texture.
- Breakfast Bowl Booster: A surprising but delicious addition to savory breakfast bowls with eggs and avocado.
So, if you haven’t yet embarked on the journey of making your own baked kale chips, now is truly the time. With these simple instructions and tips, you’re well on your way to creating a healthy, incredibly delicious, and satisfying snack that your whole family will love. Enjoy the process, experiment with flavors, and savor every crispy bite!
