The Ultimate Guide to Homemade Soft Pretzels: Dairy & Vegan Milk Doughs for Perfect Shine
For years, my go-to soft pretzel recipes relied on water or even beer as the primary liquid, yielding consistently delicious results. However, a recent culinary experiment led me to try a pretzel recipe incorporating milk, and I can honestly say I regret not trying this sooner! While using milk in pretzel dough isn’t a groundbreaking concept, my loyalty to established recipes meant I hadn’t ventured into this territory. This new approach, however, proved to be a revelation, particularly due to how incredibly easy the dough was to handle. I found myself so captivated by its texture and pliability that I ended up making several batches, exploring different variations – from classic shiny pretzels made with dairy milk to equally delightful vegan pretzels crafted with oat milk. This recipe truly opens up a world of possibilities for pretzel enthusiasts, promising a smooth, enjoyable baking experience and a wonderfully tender, flavorful end product, whether you prefer traditional or plant-based ingredients.
Jump to Recipe
Effortless Dough Handling for Perfect Pretzels
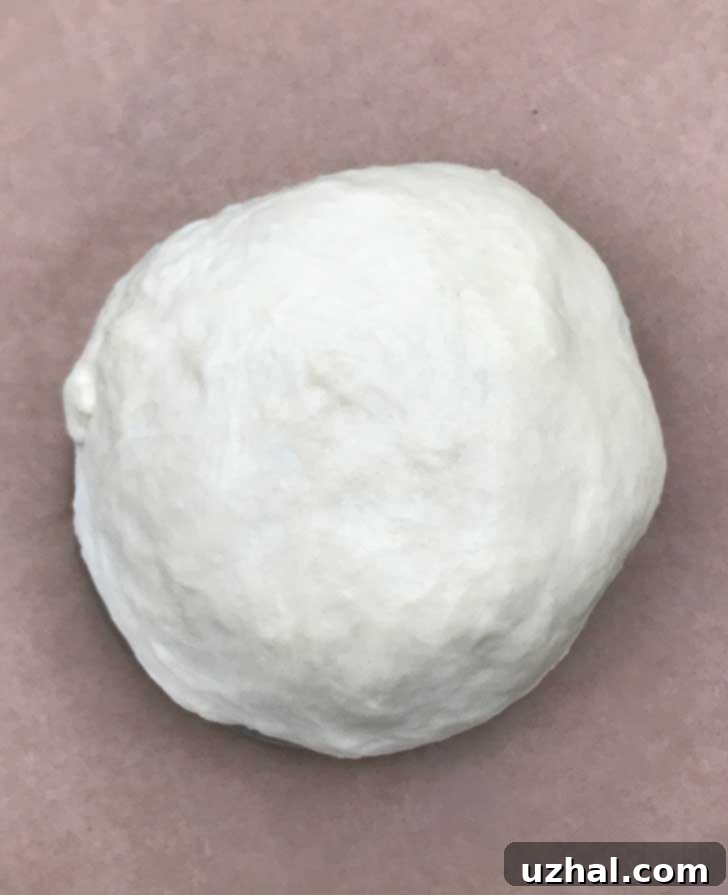
One of the most remarkable aspects of this milk-based pretzel recipe is the dough itself. It possesses an ideal consistency that is neither sticky nor prone to falling apart, making the shaping process an absolute joy, even for novice bakers. This incredible pliability allows for easy rolling into long, uniform strands without frustration. Unlike some finicky doughs, this one is forgiving and robust, holding its shape beautifully. Its versatility is another major highlight; I’ve successfully prepared multiple batches using both traditional dairy milk and butter, as well as plant-based alternatives like oat milk and vegan butter. The image above, in fact, showcases a batch of dough made with oat milk and vegan butter, which resulted in vegan pretzels that were every bit as delicious and satisfying as their dairy counterparts. This means you don’t have to compromise on taste or texture if you’re catering to different dietary preferences.
Furthermore, this dough is incredibly adaptable when it comes to kneading. While I personally favor the convenience and efficiency of a stand mixer fitted with a dough hook for consistent results, this recipe is perfectly suited for hand-kneading. If you prefer a more hands-on approach, or if a stand mixer isn’t available, you’ll find the dough a pleasure to work with by hand. Its elasticity develops quickly, transforming into a smooth, supple ball that indicates it’s ready for its first rise. This ease of handling, coupled with its delicious outcome, makes it an excellent choice for anyone looking to master the art of homemade soft pretzels.
Achieving the Signature Shiny Pretzel Finish: An Egg Wash Experiment
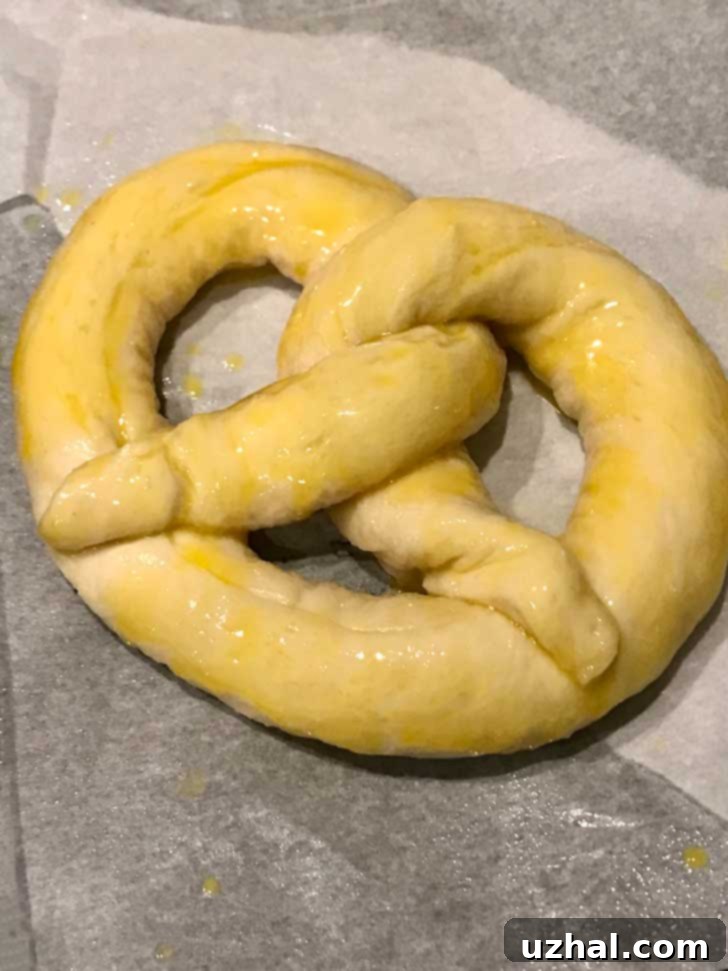
The iconic shine of a classic soft pretzel is more than just aesthetics; it’s a hallmark of a well-made pretzel, often achieved through careful application of an egg wash. Given that I was preparing numerous batches of these milk-based pretzels, I seized the opportunity to conduct an informal, yet insightful, experiment to determine the optimal egg wash for that coveted glossy finish. I tested brushing the pretzels with whole egg, egg white only, and egg yolk only, observing the differences in shine and color development. As anticipated by many bakers, the pretzels brushed solely with egg yolk exhibited the most intense, deep golden sheen, creating a truly irresistible appearance. The rich fat content in the yolk is primarily responsible for this superior gloss and browning.
In contrast, pretzels brushed with only egg white yielded a noticeably less shiny finish, though still contributing to some browning. A whole egg wash fell somewhere in between, offering a good balance of shine and color. For the vegan pretzel batches, which were made with oat milk and vegan butter, an alternative approach was needed. I brushed these pretzels with melted vegan butter instead of egg. The results were surprisingly delightful; these vegan pretzels developed a unique, almost donut-like quality. The vegan butter imparted a subtle richness and a slightly softer crust, distinct from the traditional egg wash but equally appealing in its own right. This discovery offers fantastic flexibility for those seeking a plant-based option without sacrificing flavor or an appealing finish.
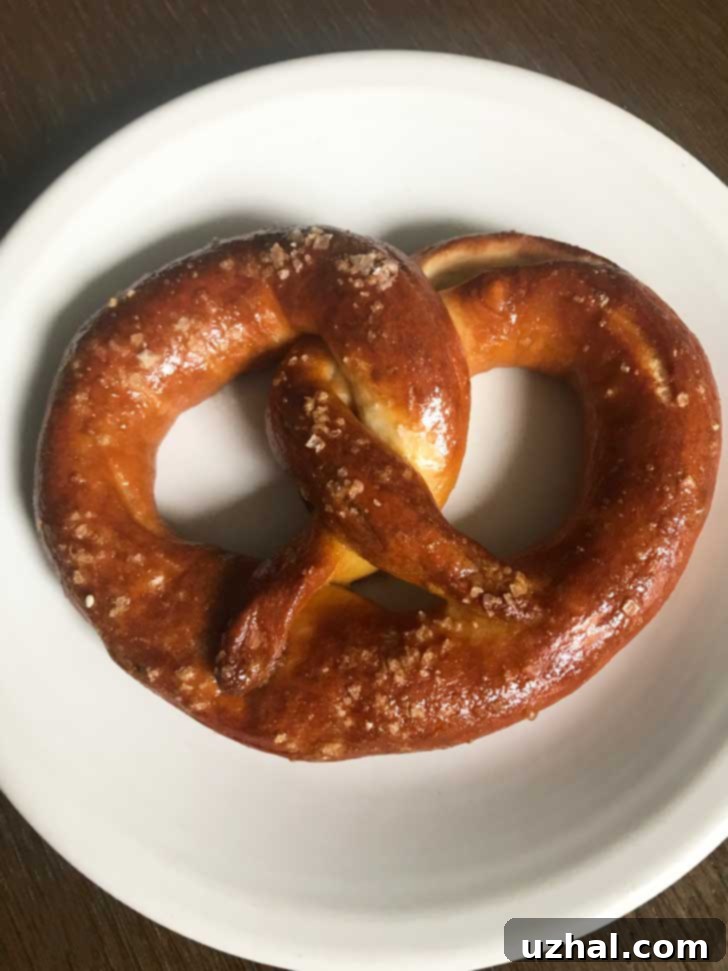
After successfully mastering full batches, I decided to scale down and try making a half batch, yielding about four pretzels. This proved equally successful, demonstrating the recipe’s flexibility for different needs. If you’re new to pretzel making and wish to start with a smaller, more manageable quantity, simply halve all the ingredient measurements for the dough. However, it’s crucial to keep the baking soda and water mixture for the boiling solution the same, as its concentration is key to the pretzel’s characteristic flavor and texture development. This adaptability makes the recipe perfect for experimentation or for those simply craving a fresh batch without committing to a large quantity.
Essential Ingredients for Perfect Milk Pretzels
Crafting delicious homemade pretzels starts with understanding the role of each ingredient. Here’s a detailed look at what you’ll need and why:
- Milk: This is the star of our recipe. Any type of milk should work beautifully, contributing to a softer crumb and richer flavor compared to water-based pretzels. I’ve personally achieved excellent results with both whole dairy milk and oat milk, making this recipe highly adaptable for various dietary preferences. Milk also aids in browning, giving your pretzels a lovely golden hue.
- Yeast: I prefer using SAF fast-rising yeast for its reliability and speed. I typically proof it in the warmed milk to ensure it’s active and ready to make the dough rise beautifully. If you’re using instant yeast and prefer not to proof it separately, you can simply mix it with the dry ingredients. In that case, ensure your milk is heated to between 120 and 125 degrees F to activate the yeast effectively.
- Sugar: A combination of granulated sugar and brown sugar is used to add a subtle depth of flavor to the pretzels. The sugar also acts as food for the yeast, encouraging a vigorous rise, and contributes to the overall tenderness and browning of the crust. While the blend offers a richer profile, feel free to use just one type if that’s what you have on hand.
- Bread Flour: For that quintessential chewy pretzel texture, bread flour is a must. Its higher protein content develops more gluten, resulting in a delightfully chewy interior. I consistently use King Arthur brand bread flour, which I find to be very reliable. Accurate measurement is important, so I highly recommend weighing your flour for the most consistent results.
- Kosher Salt: Morton Brand kosher salt is my preferred choice for its clean taste and coarser crystals that dissolve well into the dough. It’s crucial for balancing the flavors and bringing out the savoriness of the pretzel. If you typically bake with Diamond Crystals kosher salt, which is less dense, you might need to use a slightly larger amount to achieve the same level of seasoning.
- Butter: Unsalted butter is specified to allow precise control over the salt content in the dough. I’ve successfully tested this recipe with both regular unsalted dairy butter and Trader Joe’s brand vegan butter, both yielding fantastic results. If you opt for vegan butter or any type of salted butter, be sure to reduce the added salt in the dough to ¾ teaspoon to avoid an overly salty product.
- Salt on the Pretzel: The finishing touch! While professional pretzel salt offers a unique crunch and slow dissolution, I’ve found excellent alternatives. Maldon sea salt provides a delicate, flaky crunch and bursts of flavor, while Everything Bagel seasoning adds a complex, savory profile. If you’re keen on authentic pretzel salt, you can order it here. A clever (though unconventional) trick is to buy the cheapest box of frozen pretzels (like those from Dollar Tree) and salvage only their salt, but then, of course, you’re left with the frozen pretzels themselves!
Why Choose Milk for Your Pretzel Dough?
While traditional pretzel recipes often call for water, incorporating milk brings several distinct advantages to your homemade soft pretzels. Milk contributes to a richer, more tender crumb, thanks to its fat and sugar content. This results in pretzels that are not only incredibly soft on the inside but also have a slightly more luxurious flavor profile. The milk sugars also aid in better browning during baking, giving the pretzels a more appealing golden crust. Moreover, the proteins in milk can contribute to a slightly more stable and easy-to-handle dough, which aligns perfectly with the positive experiences I’ve had with this recipe. For those exploring dairy-free options, plant-based milks like oat milk perform exceptionally well, offering similar benefits without compromising on taste or texture.
Shaping Pretzels Like a Pro
The distinctive pretzel shape is part of its charm, and with this easy-to-handle dough, it’s simpler than you might think. After your dough has risen, gently punch it down and roll it out into an even rectangle. Using a pizza cutter, divide it into equal strips. The key to successful shaping is to work with one strip at a time, rolling it with your fingertips into a long, thin rope – aim for about 24 inches for a standard-sized pretzel. If the dough feels a bit dry or starts to crack, a tiny dab of oil or melted butter on your hands will make it more pliable. Form a U-shape with the rope, then cross the ends over each other once, and optionally twist them. Finally, bring the crossed ends down and press them firmly onto the bottom curve of the U to seal the shape. Don’t worry if your first few aren’t perfect; practice makes perfect, and they’ll taste delicious no matter the shape! For a fun variation, you can also roll the dough into sticks or small bites.
The Science of the Baking Soda Bath
The boiling soda bath is a non-negotiable step for authentic soft pretzels, and understanding its purpose elevates your baking. Dipping the shaped pretzels into a hot bath of water and baking soda before baking is what gives them their characteristic chewy crust, deep brown color, and distinct “pretzel-y” flavor. The alkaline baking soda reacts with the surface of the dough, gelatinizing the starches and accelerating the Maillard reaction during baking. This process creates that beautiful, dark golden-brown exterior and the unique flavor that sets pretzels apart from regular bread. It’s a quick dip—just about 30 seconds—but it’s crucial, and the exact concentration, as specified in the recipe, is important for the best results.
Troubleshooting Common Pretzel Problems
Even with an easy recipe, baking can sometimes present challenges. Here are a few common pretzel issues and how to address them:
- Dough not rising: Ensure your yeast is fresh and your milk is at the correct temperature (110-115°F). If it’s too hot, it kills the yeast; too cold, and it won’t activate. A warm, draft-free spot is also essential for a good rise.
- Pretzels are tough: Over-kneading can lead to tough pretzels. Knead until the dough is smooth and elastic, but not overly stiff. Also, overbaking can dry them out, so watch the baking time closely.
- Pretzels not shiny enough: For maximum shine, use an egg yolk wash and ensure a uniform coating before baking. The baking soda bath also contributes to the browning and some degree of sheen, but the egg wash is key for that glossy finish.
- Pretzels are too salty/not salty enough: Adjust the kosher salt in the dough based on your preference and whether you’re using salted or unsalted butter. For the topping, apply pretzel salt immediately after the egg wash so it adheres well.
- Shiny Top Brownies
- Shiny Happy Chocolate Cookies
- White Chocolate Cookie Butter Pretzels
- Chocolate Chip Pretzel Bars
- Chocolate Pretzel Toffee
Recipe
Pretzels Made With Milk
Cookie Madness
Pin Recipe
Ingredients
- 1 cup milk (I’ve tested with dairy milk and oat milk) (230 grams/8 oz)
- 2 ¼ teaspoons instant yeast (SAF)
- 1 ½ tablespoon granulated sugar (18 grams)
- 1 ½ tablespoons brown sugar (18 grams)
- 3 cups bread flour, measure by weighing (390 grams)
- 1 teaspoon kosher salt (scant or you can use ¾ if desired)
- 4 tablespoons melted unsalted butter
Boiling Solution
- 6 cups water
- ⅓ cup baking soda
- egg yolk
- Pretzel salt or Maldon sea salt
Instructions
-
In a microwave-safe measuring cup, gently heat the milk for approximately 30 seconds. Use a thermometer to ensure its temperature is between 110 and 115 degrees F. Pour the warmed milk into the bowl of a stand mixer. Add the instant yeast and stir lightly, then let the mixture stand undisturbed for about 5 minutes, or until small bubbles form on the surface, confirming the yeast is active.
-
To the activated yeast mixture, add both sugars, 3 cups (390 grams) of bread flour, kosher salt, and melted butter. Initially, stir the ingredients together as best you can by hand to combine. Then, attach the dough hook to your stand mixer and begin mixing on low speed until the ingredients are well blended. Continue kneading with the dough hook for several minutes until the dough becomes perfectly smooth and elastic. It should be non-sticky to the touch and possess a good bounce-back. If the dough feels too sticky, add flour in small increments (½ teaspoon at a time). Conversely, if it appears too dry, add a few teaspoons of water until the desired consistency is achieved.
-
Once kneaded, transfer the dough to a lightly oiled bowl, turning it once to coat. Cover the bowl tightly with plastic wrap or a damp kitchen towel. Let the dough rise in a warm, draft-free spot in your kitchen until it has visibly doubled in size, which typically takes about 45 minutes to an hour, depending on your kitchen’s temperature.
-
While the dough rises, prepare your baking station. Preheat your oven to a hot 450 degrees F (232 C). Line two large baking sheets with parchment paper and lightly spray them with cooking spray or rub them with a thin layer of vegetable oil to prevent sticking.
-
In a large pot, combine 6 cups of water and ⅓ cup of baking soda. Place the pot on the stovetop over high heat and bring the mixture to a rolling boil. Keep it at a steady simmer while you proceed with shaping the pretzels.
-
Gently punch down the risen dough and turn it out onto a lightly floured pastry mat or clean countertop. Using a rolling pin, roll the dough into a rectangular shape, approximately 16 inches by 8 inches. With a pizza cutter or sharp knife, cut the dough into 8 equal-sized strips. Working with one strip at a time, use your fingertips to roll and stretch the strip into a long tube, aiming for about 24 inches in length. If the dough seems dry or resistant, lightly slick your hands with a tiny bit of oil or melted butter as you roll. To form the classic pretzel shape, create a U-shape with the rope, then hold the ends, cross them over each other, and optionally give them a gentle twist. Finally, bring the crossed ends down and firmly press them onto the bottom curve of the U to secure the shape. Carefully place the formed pretzels onto the prepared parchment-lined baking sheets.
-
Using a large flat slotted spatula, carefully transfer the shaped pretzels one or two at a time (as many as comfortably fit without overcrowding) into the boiling baking soda solution. Boil each pretzel for approximately 30 seconds. There’s no need to flip them, but ensure some of the hot water is covering the top sides. Remove the pretzels from the water, allowing any excess moisture to drain off. Return them to the parchment-lined baking sheet. Immediately brush the top of each pretzel with your chosen wash: beaten egg yolk for the shiniest result, a whole beaten egg for good shine, or just egg white for a less glossy finish. For vegan pretzels, brush with melted vegan butter. Generously sprinkle your choice of topping, such as pretzel salt, Maldon sea salt, or Everything Bagel seasoning, over each pretzel.
-
Bake the pretzels in the preheated oven for approximately 12 to 14 minutes, or until they achieve a beautiful dark golden brown color. Keep an eye on them, as oven temperatures can vary. Once baked, carefully transfer the hot pretzels to a wire cooling rack and allow them to cool for at least 5 minutes before serving. This brief cooling period helps the crust set and the interior remain perfectly soft.
Notes
