The Ultimate Recipe for Soft & Fluffy Peanut Butter Yeast Bread with Potato Water
The world of homemade bread offers endless possibilities, but few recipes are as uniquely intriguing and deliciously satisfying as this Peanut Butter Yeast Bread. This isn’t your typical sweet, dense quick bread often found in lunchboxes. Instead, we’re diving into the delightful realm of a light, fluffy yeast bread, subtly infused with the comforting essence of peanut butter, and boasting an incredibly tender crumb thanks to a secret ingredient: potato water. Imagine a loaf that’s perfect for a sophisticated brunch, served warm and toasted with an array of sweet or savory toppings, yet equally at home as your go-to everyday sandwich bread. It’s a testament to how simple ingredients can create extraordinary results, transforming everyday meals into something special and memorable.

Unlocking Incredible Softness with Potato Starch
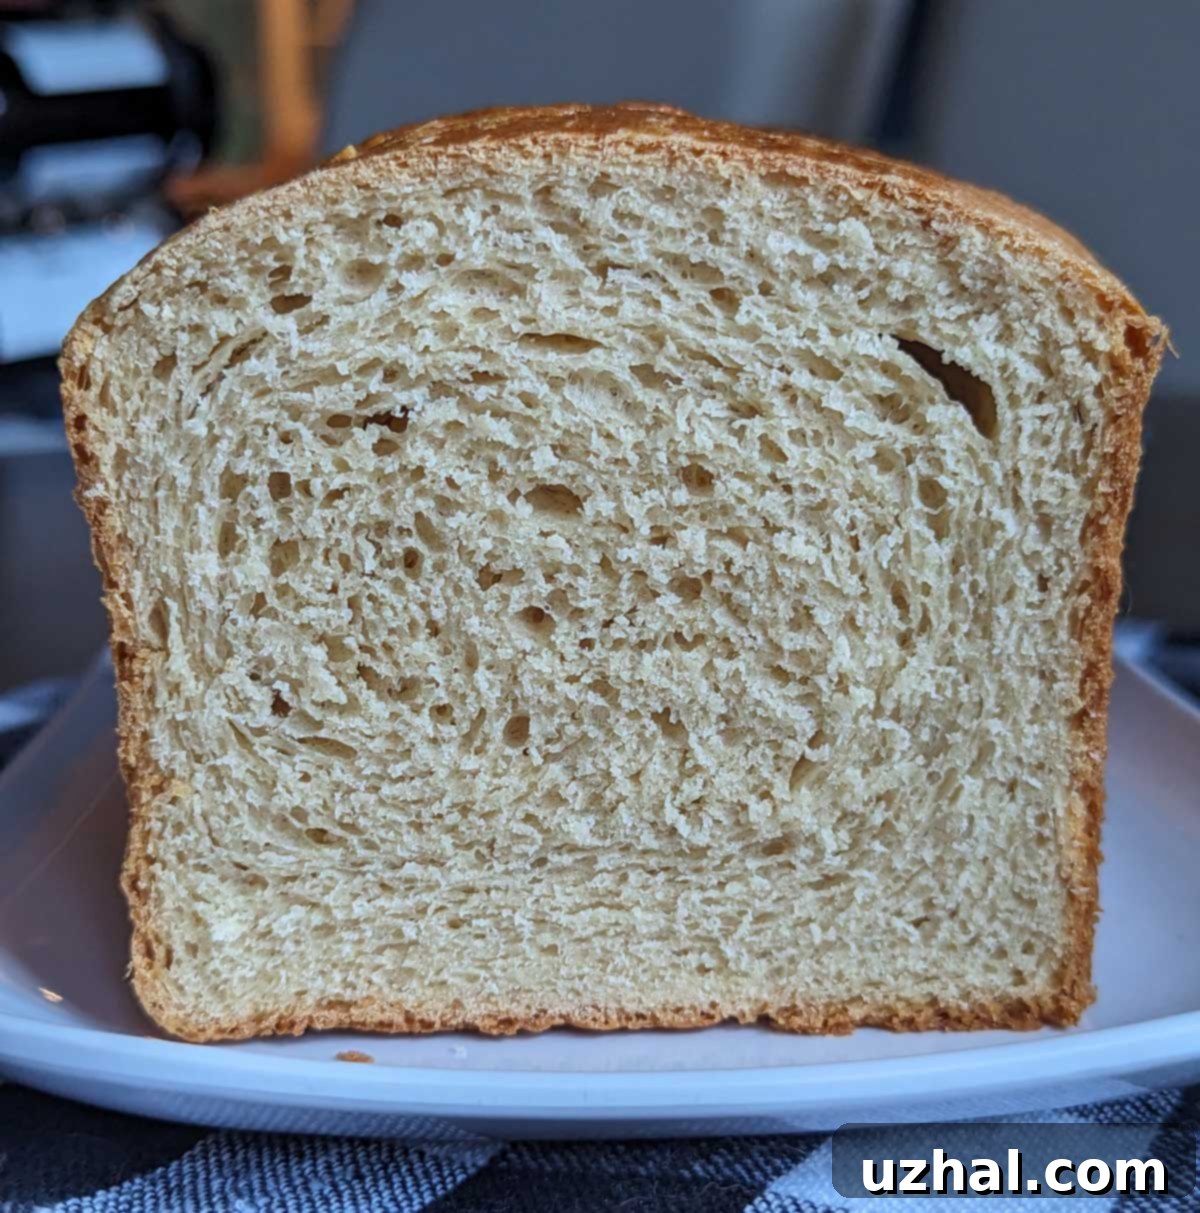
The exceptional softness and moist texture of this peanut butter yeast bread are largely attributed to the ingenious inclusion of potato starch. This technique is not new to the baking world; potato bread has long been cherished for its remarkably tender crumb, fine texture, and extended freshness compared to breads made with water alone. In this particular recipe, we harness the power of potato water, rather than the mashed potatoes themselves, to achieve that desirable soft quality. The starches released into the water during the potato boiling process contribute significantly to a softer, more pliable dough, which in turn yields a wonderfully fluffy finished loaf that stays fresh longer.
For those who regularly boil potatoes, simply reserving the starchy water from your next batch is the most straightforward and economical approach. After boiling your potatoes until tender, carefully drain them and measure out the required amount of liquid. If you don’t have fresh potato water readily available, or prefer a quicker, more convenient method, a clever shortcut involves using readily available potato starch. Just dissolve ½ tablespoon of high-quality potato starch into 1 cup of cold water. This mixture can then be used interchangeably with potato boiling water, offering the same tenderizing benefits and ensuring your bread achieves its signature soft texture. Beyond potato starch, the recipe also strategically incorporates shortening, a solid fat known for its unique ability to create an incredibly tender and rich crumb in baked goods. While various other fats could theoretically be substituted, the current synergistic combination of potato starch and shortening delivers such an outstanding and consistent texture that further experimentation hasn’t been deemed necessary, truly perfecting this unique bread.
Perfecting Your Peanut Butter Yeast Bread Loaf: Size and Ingredient Choices
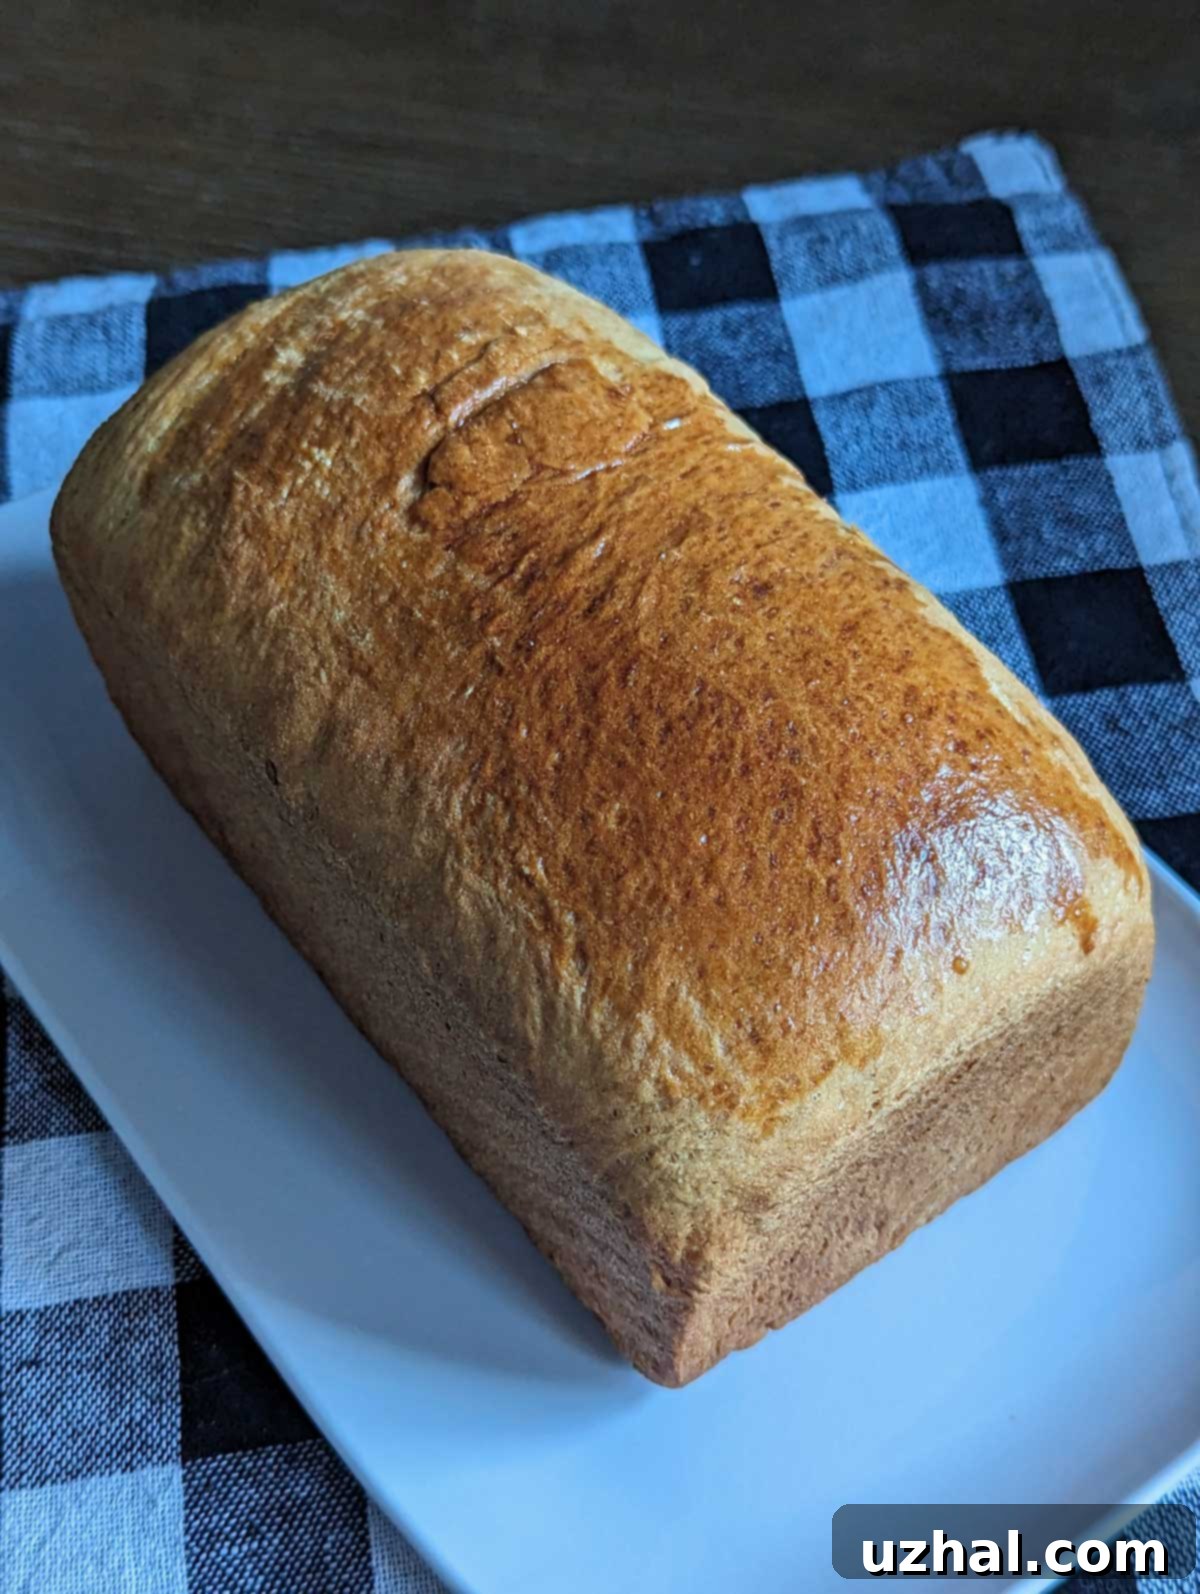
This versatile recipe is thoughtfully designed to yield one standard 8 ½ by 4 ½ inch loaf, making it an ideal size for family enjoyment, a thoughtful gift, or to share with friends. Interestingly, this recipe was originally developed for a larger, double loaf, so rest assured that it scales beautifully if you wish to prepare a more substantial batch. Should you decide to double all the ingredients for a grander loaf of Peanut Butter Yeast Bread, simply use one full large egg, and adjust other liquid measurements proportionally as needed to maintain the desired dough consistency. When making the single loaf as written, with just two tablespoons of beaten egg, you’ll likely find yourself with some egg remaining. Don’t let this precious leftover go to waste! This extra egg can be effortlessly brushed over the top of the loaf just before it goes into the oven. This optional egg wash creates a beautiful, glossy, golden-brown crust and adds a subtle sheen, making for an even more attractive and professional-looking presentation.
The type of peanut butter you choose for this recipe plays a surprisingly significant role in the final flavor profile and overall texture. For this particular bread, the intent is a light, savory peanut butter flavor that complements, rather than overwhelms, the other elements. Therefore, unsweetened peanut butter, made solely from roasted peanuts and a touch of salt, is highly recommended. Brands that contain minimal added sugars, hydrogenated oils, or excessive stabilizers will work best to maintain the intended delicate balance and allow the natural peanut flavor to shine through. However, if your pantry only holds peanut butter with a slight sugar content, fear not; it will still perform admirably, contributing its own unique nuance to the bread, perhaps leaning slightly sweeter. Similarly, whether your preferred peanut butter is salted or unsalted can influence the overall seasoning. Feel free to slightly tweak the added salt in the recipe to ensure your loaf is seasoned to absolute perfection, catering to your personal taste preferences and the specific peanut butter you have on hand.
Tips for Baking the Perfect Peanut Butter Yeast Bread
Mastering the art of yeast bread baking requires a little patience and attention to detail, but the incredible rewards of a homemade loaf are truly worth every step. Here are some essential tips to ensure your Peanut Butter Yeast Bread turns out perfectly soft, fluffy, and delicious every single time:
- Yeast Activation is Key: Ensure your potato water (or the potato starch mixture) is within the ideal temperature range of 125-130°F (52-54°C) when you add the yeast. Water that is too hot will kill the yeast, preventing your bread from rising at all. Conversely, water that is too cold will cause the yeast to activate too slowly or not properly, resulting in a dense, heavy loaf. A reliable kitchen thermometer is an invaluable tool here to guarantee the perfect temperature.
- Accurate Flour Measurement: For consistent and reproducible results, always strive to measure flour by weight using a digital kitchen scale rather than by volume (cups). Different types of flour can vary significantly in density, and various scooping methods can lead to vastly different amounts of flour, directly impacting the dough’s consistency and the final texture of your bread. The recipe provides both cup and precise gram measurements to help you achieve optimal accuracy.
- Kneading for Optimal Elasticity: Proper kneading is an absolutely crucial step for developing the gluten structure in the dough, which gives yeast bread its characteristic chewy texture and structural integrity. Whether you’re using a powerful stand mixer fitted with a dough hook or meticulously kneading by hand, aim for a dough that is smooth, pliable, and wonderfully elastic. You can test for proper gluten development with the “windowpane test”: take a small piece of dough and gently stretch it until it’s thin enough to see light through it without tearing. If it passes, your dough is ready!
- Creating the Ideal Proofing Environment: Yeast thrives in warmth and a slightly humid environment. To encourage an optimal rise, find a draft-free spot that’s comfortably warm. This could be a slightly warmed oven (turned off, with just the light on), a sunny spot near a warm window, or even a dedicated proofing box if you have one. Covering the bowl or loaf pan with plastic wrap is essential to prevent the dough from drying out and forming an undesirable crust, which can inhibit its rise.
- Checking for Doneness: Don’t just rely on visual cues alone to determine if your bread is fully baked. An instant-read thermometer is an excellent tool for checking the internal temperature of your loaf, which should ideally be around 205°F (96°C) for perfectly baked bread. Additionally, a loaf that sounds hollow when gently tapped on the bottom is another reliable indicator of doneness.
- The Importance of Cooling: Resist the tempting urge to slice into your warm bread immediately after it comes out of the oven! Allowing the bread to cool completely on a wire rack is a critical step. This cooling period allows the internal structure of the bread to properly set, prevents a gummy texture, and ensures that all the wonderful flavors fully develop and meld. Patience, in this final step, is truly the key to achieving the perfect slice.
Serving Suggestions for Your Homemade Peanut Butter Yeast Bread
This Peanut Butter Yeast Bread is incredibly versatile and can be enjoyed in a myriad of delicious ways, adapting beautifully to both sweet and savory applications. Its subtle peanut butter flavor makes it a fantastic foundation for a wide range of pairings. For a delightful breakfast or a sophisticated brunch experience, slice it thick, toast it to golden perfection, and slather it generously with a dollop of your favorite fruit jam, marmalade, or a drizzle of local honey. For an extra touch of indulgence, try a thin layer of cream cheese or even a sprinkle of cinnamon sugar. If you’re feeling adventurous and leaning towards savory, consider pairing a toasted slice with a fried egg, a sprinkle of flaky sea salt, and a dash of black pepper for a truly gourmet twist that will surprise and satisfy your palate.
Beyond breakfast, this unique bread excels as a distinctive and flavorful foundation for sandwiches. It complements classic deli fillings like sliced turkey, homemade chicken salad, or thinly sliced ham beautifully, adding an unexpected layer of depth and savory-sweetness. For a more adventurous lunch, consider a spread like creamy hummus, a robust avocado mash, or even a mild cheddar cheese. And of course, a timeless peanut butter and jelly sandwich takes on a whole new dimension of comfort and homemade goodness when crafted with your freshly baked Peanut Butter Yeast Bread. You might even find yourself simply enjoying a slice, lightly buttered, alongside your morning coffee or as a comforting, satisfying snack anytime of day.
Storing Your Homemade Peanut Butter Yeast Bread
To keep your freshly baked Peanut Butter Yeast Bread as fresh and delicious as possible for an extended period, proper storage is essential. Store the cooled loaf at room temperature in an airtight container, a reusable bread bag, or a traditional bread box. It will maintain its best quality, tenderness, and flavor for approximately 3-4 days. For longer-term storage, individual slices can be wrapped securely in plastic wrap and then placed in a freezer-safe bag or container. Frozen slices can be stored for up to 3 months. To enjoy, simply thaw frozen slices at room temperature for a quick and easy treat, or pop them directly into a toaster for a warm, comforting bite in minutes.
- Brown Edge Wafers
- Sweet Potato Bread
- Sweet Potato Pie
- Sweet Potato Pie Bars
- Coconut Milk Chocolate Ice Cream
Peanut Butter Yeast Bread Recipe

Peanut Butter Yeast Bread
Anna
Pin Recipe
Ingredients
- 1 ½ cup water (220 grams)
- 1 large potato or 1 ½ teaspoons potato starch
- 2 tablespoons shortening (24 grams)
- 3 cups all-purpose flour (380-420 grams)
- 2 ¼ teaspoon instant yeast
- 2 tablespoons brown sugar (25 grams)
- 1 teaspoon salt, very scant, so somewhere between ¾ and 1 Morton Kosher**
- 2 tablespoons peanut butter (32 grams)
- 2 tablespoons beaten egg (24 grams)
Instructions
-
Put the potato in a small saucepan and add just enough water to cover. Bring to a boil, then lower heat and boil until potato is tender. Drain potato and save for another use. Reserve any remaining potato water and add enough water to that to make 1 cup. An alternative to this is to just stir together 1 cup cold water and ½ tablespoons potato starch, then heat as directed in next step.
-
Add shortening to potato water and heat until shortening melts. Insert thermometer and let cool to between 125 and 130 degrees F.
-
In the bowl of a stand mixer, combine 1 cup (130 grams) of the flour, the yeast, sugar, and salt. Gradually add the 125-130 degree F water mixture to the flour mixture and stir well until combined. Beat in the beaten egg and peanut butter until smooth. Add another 1 cup of the flour and stir well, then add another ½ cup of flour.
-
Attach the dough hook to the mixer and knead on medium speed for about 8 minutes, or until the dough is smooth, elastic, and pulls away from the sides of the bowl, clinging mostly to the hook. Add only as much extra flour as needed, a tablespoon at a time, to achieve this consistency. I typically use just under 3 cups total.
-
Lightly oil a large bowl. Transfer the kneaded dough to the oiled bowl, turning it once to coat all sides. Cover the bowl tightly with plastic wrap or a clean kitchen towel and let it rise in a warm, draft-free place for approximately 1 hour, or until it has doubled in size.
-
Once risen, gently punch the dough down to release the air. Turn it out onto a lightly floured surface and pat it into a rough rectangle. Tightly roll the rectangle into a cylinder shape. Carefully place the cylinder seam-side down into a greased and floured 8 ½ by 4 ½ inch loaf pan. Return the loaf pan to a warm place and let it rise again for another 45 minutes to 1 hour, or until it has nearly doubled in size and crowned slightly over the pan’s edge.
-
While the bread is undergoing its second rise, preheat your oven to 375 degrees F (190 degrees C). Bake the loaf for about 40 minutes, or until the crust is beautifully browned and the loaf sounds hollow when gently tapped on the bottom. For precise doneness, an internal thermometer inserted into the center of the loaf should read about 205 degrees F (96 degrees C).
-
Once baked, let the bread cool in the pan for about 10 minutes. This allows it to firm up slightly. Then, carefully remove it from the pan and transfer it to a wire rack to cool completely before slicing. This final cooling step is crucial for the bread’s texture and flavor.
