The Ultimate Guide to Perfectly Clumpy & Crispy Homemade Granola: Your New Go-To Recipe
There’s an undeniable magic to homemade granola – the way its aroma fills your kitchen, the satisfying crunch, and the wholesome goodness of ingredients you’ve chosen yourself. Over the years, I’ve refined my granola recipe, chasing that elusive balance of crispy texture and delightful clumps. My previous recipe was good, providing a satisfying crunch, but I craved more of that truly crispy bite, coupled with robust, hearty clusters that make granola so irresistible. I discovered that a slight increase in oil content is the secret weapon for achieving both exceptional crispiness *and* crunchiness. Beyond just the ingredients, the technique is paramount, especially when aiming for those coveted clumps. This updated recipe guarantees a generous amount of gratifying clusters, largely thanks to a clever baking method: covering the granola with foil during the initial bake to prevent over-browning while allowing it to cook thoroughly, and crucially, resisting the urge to stir until the very end, when you gently break it into perfect, bite-sized pieces.
Making your own granola is not just about taste; it’s about control. You dictate the sugar levels, the quality of nuts and seeds, and can easily customize it to suit dietary needs or personal preferences. It’s also incredibly cost-effective compared to store-bought varieties, and the freshness simply can’t be matched. If you’ve ever been disappointed by crumbly, bland, or overly sweet commercial granolas, prepare to embark on a journey to homemade perfection that will change your breakfast routine forever. This recipe combines simplicity with smart baking techniques, ensuring a consistent, delicious result every time.
Jump to Recipe

The Secret to Clumpy and Crispy Granola
Achieving truly clumpy and crispy granola isn’t just about the ingredients; it’s a careful dance between fat, sweeteners, and baking technique. Many recipes yield a loose, crumbly granola, but if you’re like me, you love those satisfying clusters that hold together. The key lies in a few critical steps that elevate this recipe from good to extraordinary.
Firstly, the role of oil is often underestimated. While it seems counterintuitive to add more oil for a “crispy” texture, oil is essential for facilitating even browning and creating that desirable crunch. It coats the oats and nuts, preventing them from drying out completely and instead allowing them to toast to a golden, brittle perfection. This recipe uses a balanced amount of vegetable oil, ensuring excellent crispiness without making the granola greasy.
Secondly, the combination of maple syrup and honey acts as a powerful binding agent. These natural sweeteners caramelize during baking, creating a sticky matrix that glues the oats and nuts together. It’s important to heat them slightly with the brown sugar and oil before mixing with the dry ingredients. This process helps dissolve the sugar, ensuring a more uniform coating and a stronger bond for those precious clumps. The vanilla, added after heating, preserves its delicate aroma, adding another layer of flavor complexity.
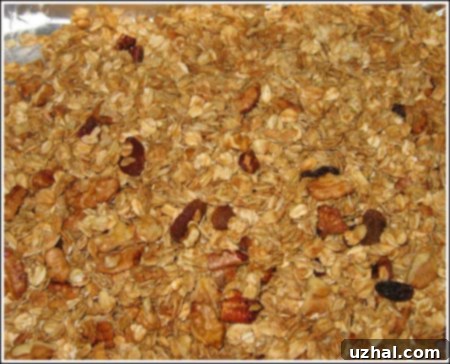
Finally, the baking method itself is the linchpin for clumpy granola. The initial phase of baking, covered loosely with foil, creates a steamy environment that allows the oats and nuts to cook through without immediately browning. This prevents the edges from burning while the center remains raw. More importantly, it keeps the mixture moist enough for the binding agents to work their magic. And here’s the golden rule: **do not stir the granola while it’s baking!** Stirring breaks those nascent bonds, leading to a more scattered, loose product. After an hour under foil, removing it allows the granola to dry out and crisp up, developing that beautiful golden-brown color. Allowing it to cool completely and undisturbed on the baking sheets is paramount; the granola will firm up and become perfectly crispy as it cools, forming large, breakable clusters. Only once it’s entirely cool should you break it into the desired clump sizes.
Packaging and Gifting Your Homemade Granola
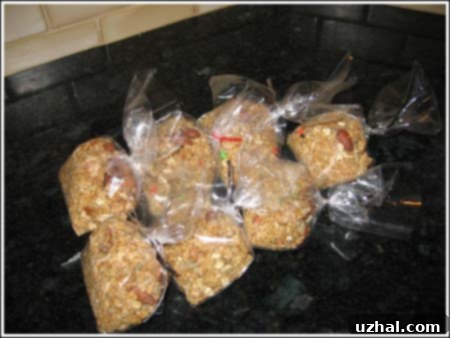
Once you’ve mastered this clumpy granola, you’ll want to share it! Homemade granola makes for a wonderful, thoughtful gift, and there are countless ways to package it beautifully. For my most recent batch, I utilized some charming little goodie bags I found at Michael’s craft store. These small, decorative bags are perfect for individual servings or for sharing with friends and family. They come in various patterns and sizes, allowing for creative presentation.
Another excellent option, especially for larger quantities or for a more classic look, are the tin-tie bags available from suppliers like PaperMart. These bags are specifically designed for food products and offer a secure, resealable closure that helps keep your granola fresh. When selecting any packaging, always pay close attention to the bag sizes and material quality, as they can vary significantly. Consider whether you need food-grade, grease-resistant linings, especially if your granola contains more oil or sticky sweeteners. Small glass jars with airtight lids are also a fantastic, eco-friendly choice that showcases the granola beautifully and can be reused.
For an extra special touch when gifting, you might consider tying a simple ribbon around the bag or jar, attaching a custom label with the recipe name, or even including a small note about the ingredients. This personalizes the gift and adds to the homemade charm. Think about your recipient’s style – rustic twine for a natural look, or a vibrant ribbon for something more festive. Whether for personal enjoyment or as a heartfelt present, proper and appealing packaging enhances the entire experience of your delicious, homemade granola.
Explore More Granola Creations
If you’re now a homemade granola enthusiast, you might enjoy experimenting with different flavors and textures. Here are some related recipes and ideas to inspire your next batch:
- Clumpy Crunchy Granola Without Oil
- Great Granola
- Maple & Honey aka Morey Girls Granola
- Extra Chunky Granola
- Granola Chocolate Chip Cookies
Recipe

Perfectly Clumpy & Crispy Granola
Recipe by Cookie Madness
Pin Recipe
Ingredients
- 3 cups rolled oats (old-fashioned oats, not instant, for the best texture and clumping)
- 1 cup slivered almonds (or whole almonds, roughly chopped for extra crunch)
- 1 cup pecans (halves or roughly chopped for rich, buttery flavor)
- ⅓ cup shredded sweetened coconut (adds a lovely chewiness and natural sweetness)
- ⅓ cup sunflower seeds (for additional texture and healthy fats)
- ½ to ¾ teaspoon salt (enhances all the flavors, don’t skip!)
- 6 tablespoons light brown sugar (provides moisture and depth of flavor, contributing to clumps)
- ¼ cup maple syrup (pure maple syrup for flavor and binding)
- 2 tablespoons honey (adds another layer of sweetness and sticky binding power)
- 1 teaspoon vanilla extract (pure vanilla for warmth and aroma)
- ¼ cup vegetable oil (or another neutral oil like canola, crucial for crispiness)
Instructions
-
Prepare Your Oven and Pans: Preheat your oven to a low 250 degrees F (120 degrees C). This low and slow temperature is key for even cooking and creating the perfect texture. Line two large, rimmed baking sheets (or roasting pans if that’s what you have on hand) with parchment paper. Parchment paper is essential for preventing sticking and aiding in easy cleanup. If you are making a half batch, one cookie sheet will suffice. It is crucial not to overcrowd the pans; ensure the granola has enough space to cook properly, otherwise, it will steam instead of crisp.
-
Combine Dry Ingredients: In a generously sized bowl, gently stir together the rolled oats, slivered almonds, pecans, shredded sweetened coconut, and sunflower seeds. Once these are well combined, add the salt and stir again, ensuring it is evenly dispersed throughout the mixture. This even distribution of salt helps to enhance all the natural flavors in the granola.
-
Prepare and Incorporate Wet Ingredients: In a separate, microwave-safe measuring cup or bowl, combine the light brown sugar, maple syrup, honey, and vegetable oil. Heat this mixture on high in the microwave for approximately 1 minute. The goal is to warm it slightly and help dissolve the brown sugar, making the syrup smoother and more effective as a binder. Stir the mixture thoroughly after heating, then stir in the vanilla extract. Pour this warm, fragrant syrup mixture over your dry oat and nut blend. Stir carefully but thoroughly until all the dry ingredients are evenly coated. Immediately dump the entire oat mixture out onto your two prepared cookie sheets, spreading it as evenly as possible. Lightly press the mixture down with the back of a spoon or your hands to create a thin, closely packed layer. This pressing action is vital for encouraging those delightful clumps to form.
-
Bake to Perfection: Cover both baking sheets loosely with large pieces of aluminum foil. This step creates a humid environment for initial baking and prevents the granola from browning too quickly. Place one pan on the lower oven rack and the other on the upper rack. Bake for 1 hour. Around the 40-minute mark, you’ll likely start to smell the wonderful aroma of granola; this is a good time to check on it. Peek under the foil to ensure it’s not browning excessively, especially the pan on the lower rack, which tends to cook faster. At this point, swap the positions of the pans, moving the upper pan to the lower rack and vice-versa, to ensure even baking. After the full 1 hour, carefully remove the foil from both pans. Continue to bake for another 15 minutes, or until the granola turns a beautiful golden brown and appears crispy. Keep a close eye on it during this final stage to prevent burning. Once golden, remove the pans from the oven and, here’s another crucial step, let the granola cool completely, *undisturbed*, on the baking sheets. Do not touch it or try to break it up while warm. The granola will continue to crisp as it cools, developing its signature crunchy texture. Once it’s completely cool, break the larger, delicious clumps into smaller, more manageable pieces by hand.
-
Important Baking Note: For your very first attempt, especially if you’re new to baking two pans simultaneously, you might consider trying this recipe with just half a batch, baked on the middle rack of your oven. This allows you to observe the cooking process more closely. When baking two pans, there’s always a risk of the pan on the bottom rack cooking faster or burning due to direct heat. Therefore, if you opt for two pans, monitor the bottom pan very carefully and don’t hesitate to swap their positions more frequently if needed to achieve perfectly even results.
Storage and Serving Suggestions
Once your perfectly clumpy and crispy granola has cooled down and been broken into delightful clusters, it’s time to think about storage to maintain its freshness and how to best enjoy it.
Proper Storage for Maximum Freshness:
To keep your granola at its best, store it in an airtight container at room temperature. A glass jar with a tight-fitting lid, a good quality plastic container, or even a heavy-duty ziploc bag will work perfectly. The key is to keep air and moisture out, which can cause the granola to lose its crispness. Stored correctly, your homemade granola will stay fresh and crunchy for up to 2-3 weeks. There’s no need to refrigerate it, as the cold can actually make it go soft.
Creative Ways to Enjoy Your Granola:
This versatile granola is delicious on its own as a quick snack, but it truly shines when paired with other ingredients:
- Classic Breakfast: Serve it with your favorite milk (dairy or non-dairy) for a wholesome and satisfying start to your day.
- Yogurt Parfaits: Layer it with Greek yogurt, fresh berries, and a drizzle of honey for an elegant and nutritious breakfast or snack.
- Topping for Smoothies & Acai Bowls: Add a generous sprinkle over your morning smoothie or acai bowl for an extra layer of crunch and flavor.
- Dessert Topping: Use it to add texture to baked apples, fruit crumbles, or even a scoop of ice cream.
- On the Go: Pack a small portion in a reusable container for a convenient and energizing snack during your busy day.
Optional Add-Ins (After Baking):
While this recipe is fantastic as is, you can always customize it by adding extra ingredients *after* it has cooled to avoid burning or altering their texture. Consider stirring in:
- Dried Fruits: Craisins, raisins, chopped dried apricots, or dates add sweetness and chewiness.
- Chocolate Chips: Dark, milk, or white chocolate chips are a delightful addition for a treat.
- Additional Nuts/Seeds: Walnuts, cashews, pumpkin seeds, or chia seeds for extra nutrition and flavor.
With these storage tips and serving suggestions, your homemade clumpy and crispy granola will be a delightful staple in your kitchen, ready to elevate any meal or snack.
Making your own granola is a deeply rewarding experience, offering not just a delicious and healthy food item, but also the satisfaction of creating something wonderful from scratch. This updated recipe, with its focus on achieving the perfect balance of crispy texture and irresistible clumps, is designed to be your definitive guide. From selecting the right ingredients to mastering the gentle art of baking and cooling, every step is geared towards ensuring a successful and delightful outcome. Enjoy the process, savor the aroma, and delight in the incredible taste of your homemade, perfectly clumpy and crispy granola!
