The Ultimate Guide to Small Batch Homemade Pop Tarts: A Nostalgic & Delicious Journey
For many of us, Pop Tarts evoke a profound sense of childhood nostalgia. They were a quintessential breakfast item, a sugary start to countless mornings, and in my household, they were always toasted. Toasted to perfection, with a slightly warm, gooey filling and a crisp exterior – that was the magic. I firmly believed that anyone who claimed not to enjoy Pop Tarts simply hadn’t experienced them in their ideal, toasted state. My personal hierarchy of flavors was quite specific: Chocolate, followed by Brown Sugar, then Strawberry, Raspberry, and Cherry. My mom, ever the innovator, favored the Dutch Apple variety and would often melt a slice of cheese on top for an added protein boost – a detail I probably didn’t need to share, but it highlights the unique ways these pastries were enjoyed in our home. Given this deep-seated affinity for the store-bought originals, it took me an unusually long time to consider venturing into the world of homemade Pop Tarts. I was convinced that no homemade version could possibly replicate the nostalgic perfection of the “real thing.” Yet, curiosity eventually won out, and I decided to make a small batch, just to see.
Jump to Recipe
Crafting the Perfect Small Batch Homemade Pop Tarts Dough
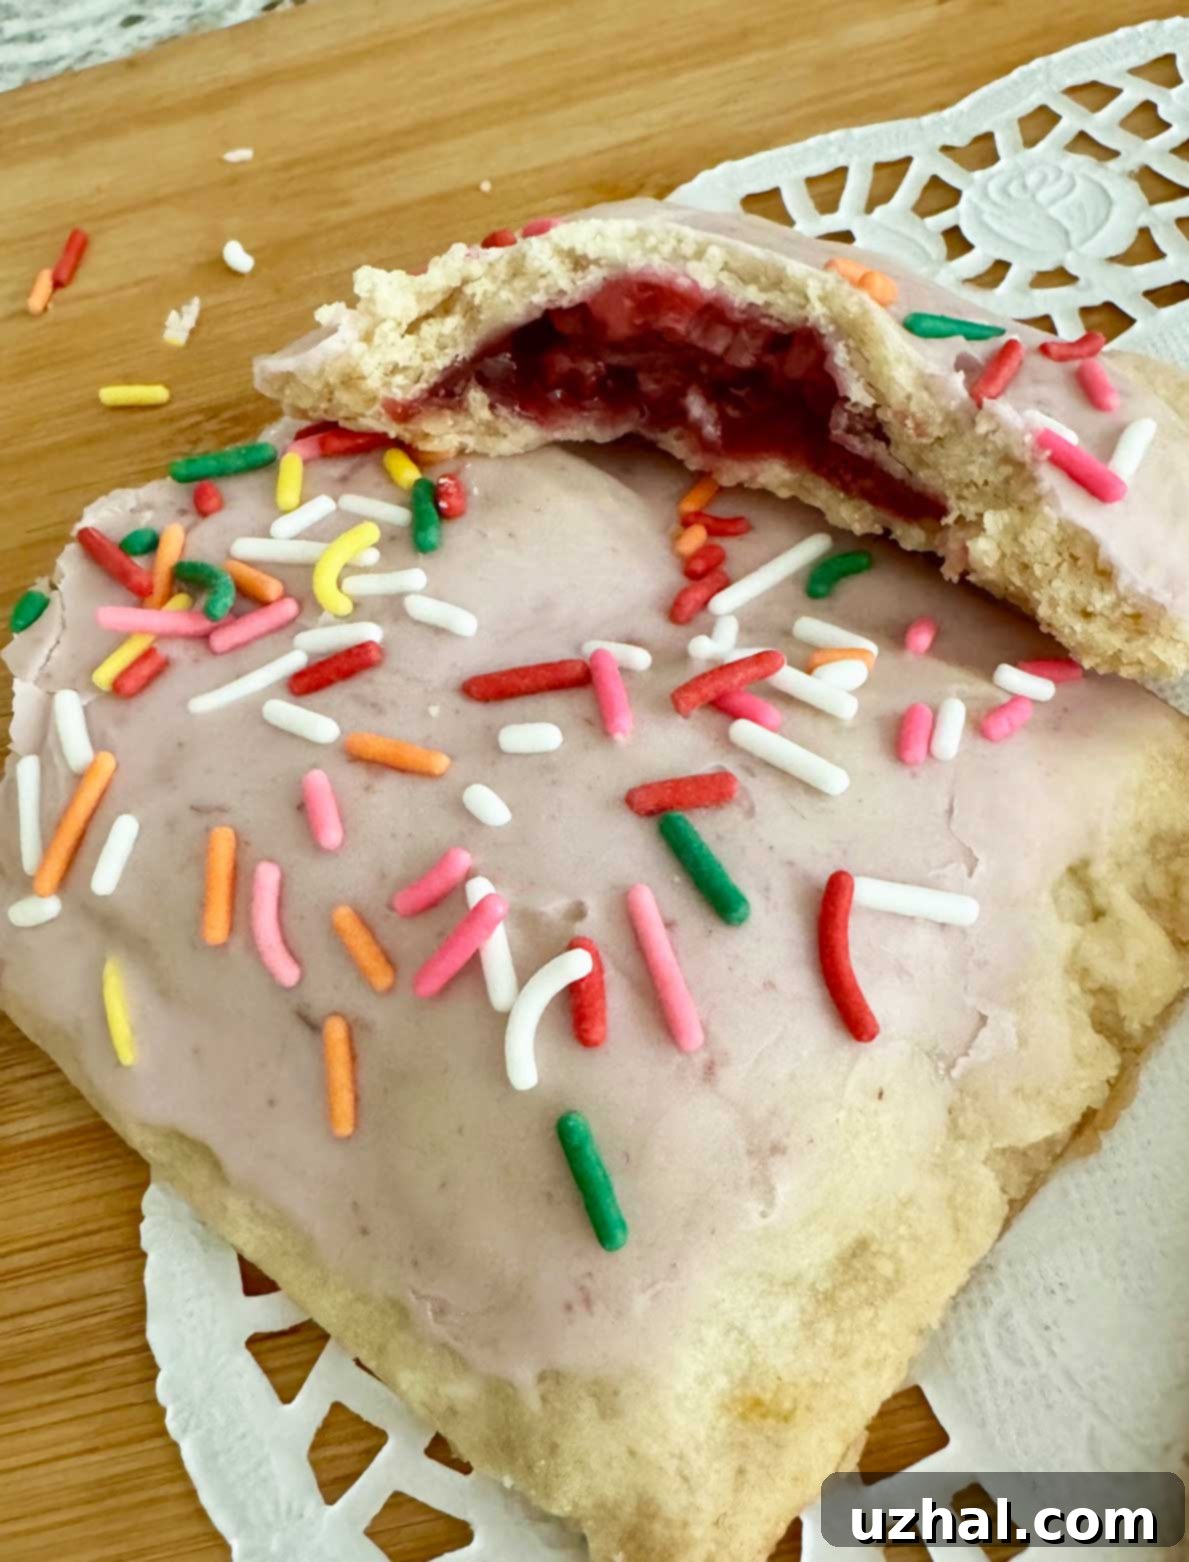
It’s almost embarrassing to admit what finally spurred me to try making Pop Tarts from scratch: the buzz surrounding Taylor Swift. She famously baked them for her boyfriend’s co-workers, leading to Pop Tarts themselves running an ad in the paper, playfully asking for her recipe. I like to imagine she, much like me, started with Stella Parks’ brilliant dough recipe as a foundation and built her own variations from there. And honestly, I can’t recommend her approach enough. Stella’s recipes are consistently excellent, but I was genuinely unprepared for just *how* fantastic these homemade knock-off Pop Tarts would turn out to be. They are truly like the freshest, most vibrant Pop Tarts you’ve ever tasted, a revelation far beyond my initial skepticism. The dough is tender, flaky, and bakes to a beautiful golden brown, providing the perfect canvas for any filling you desire.
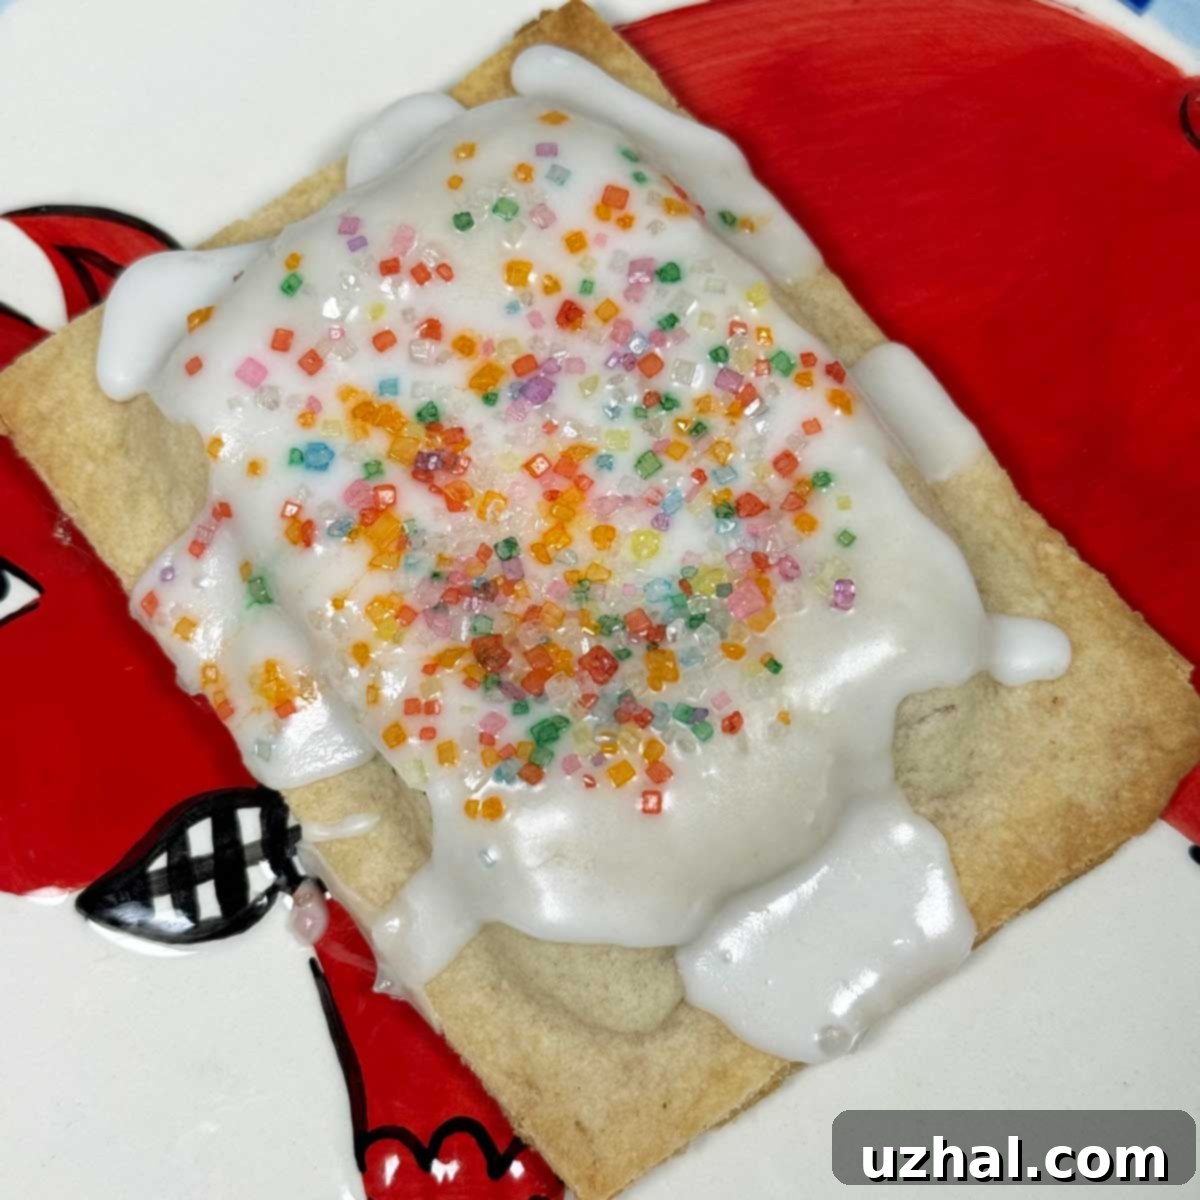
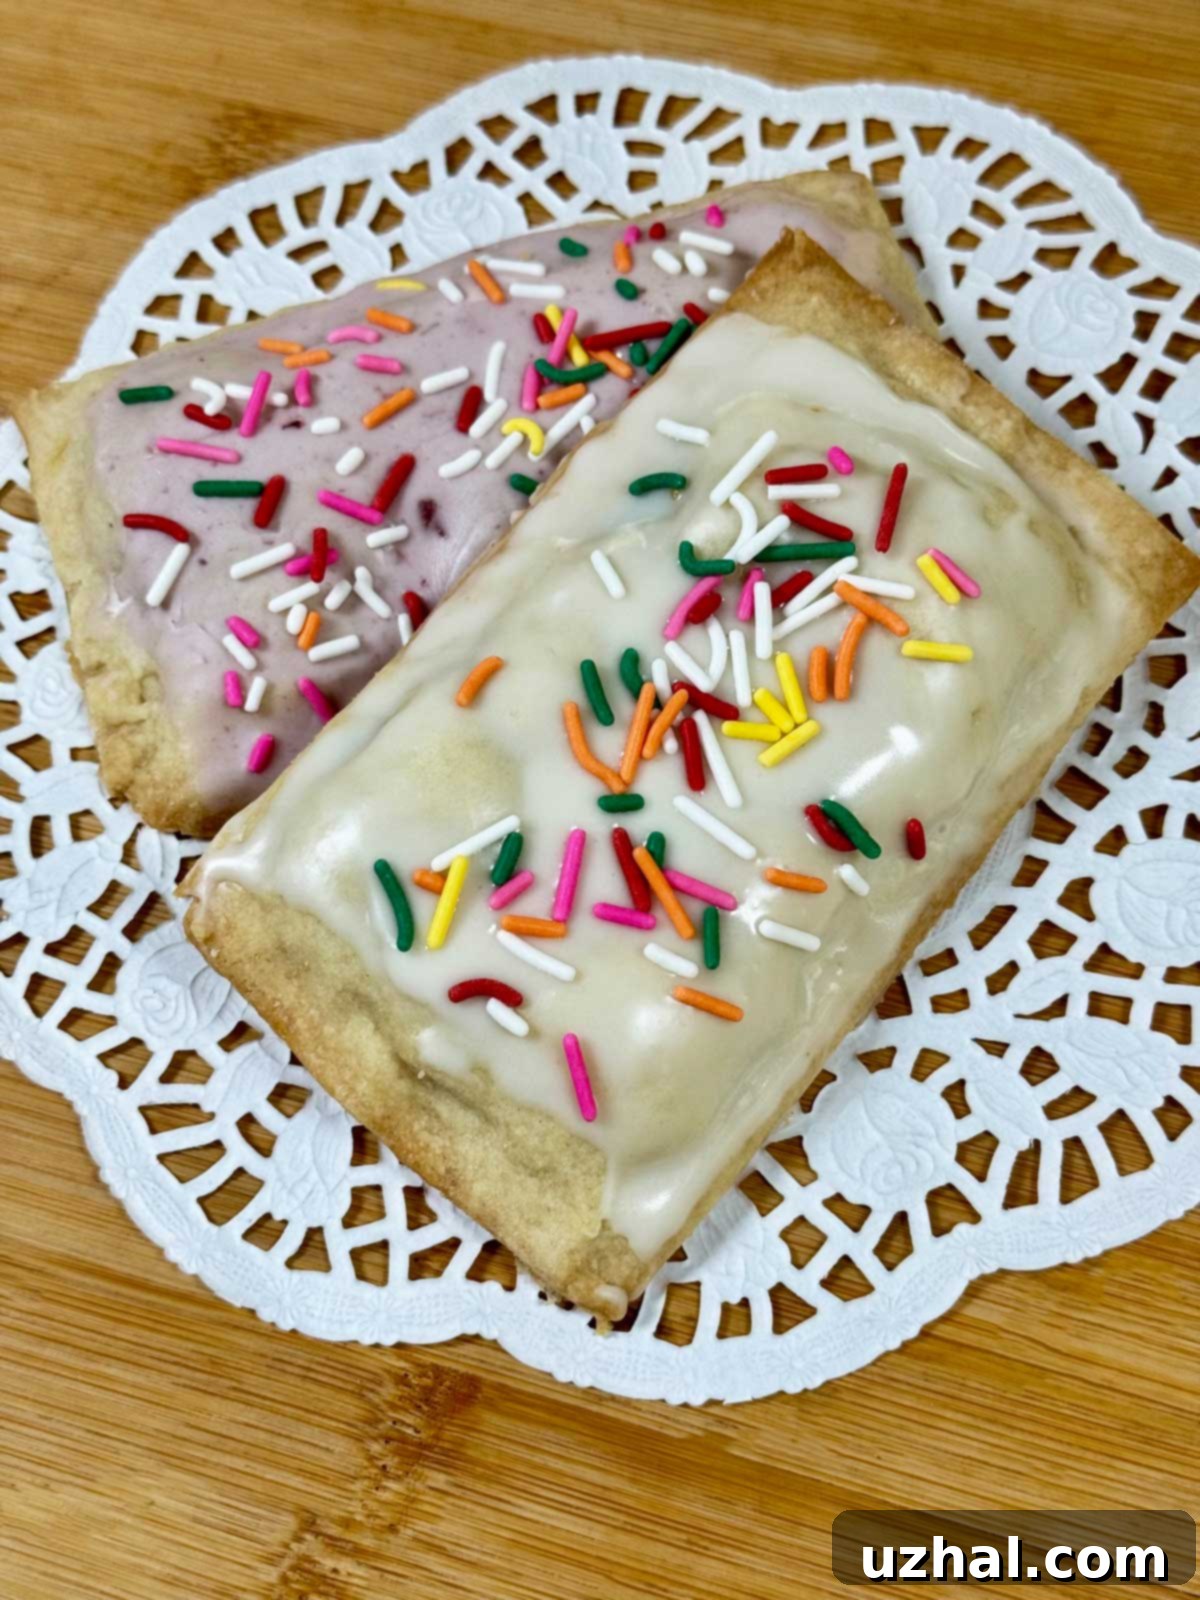
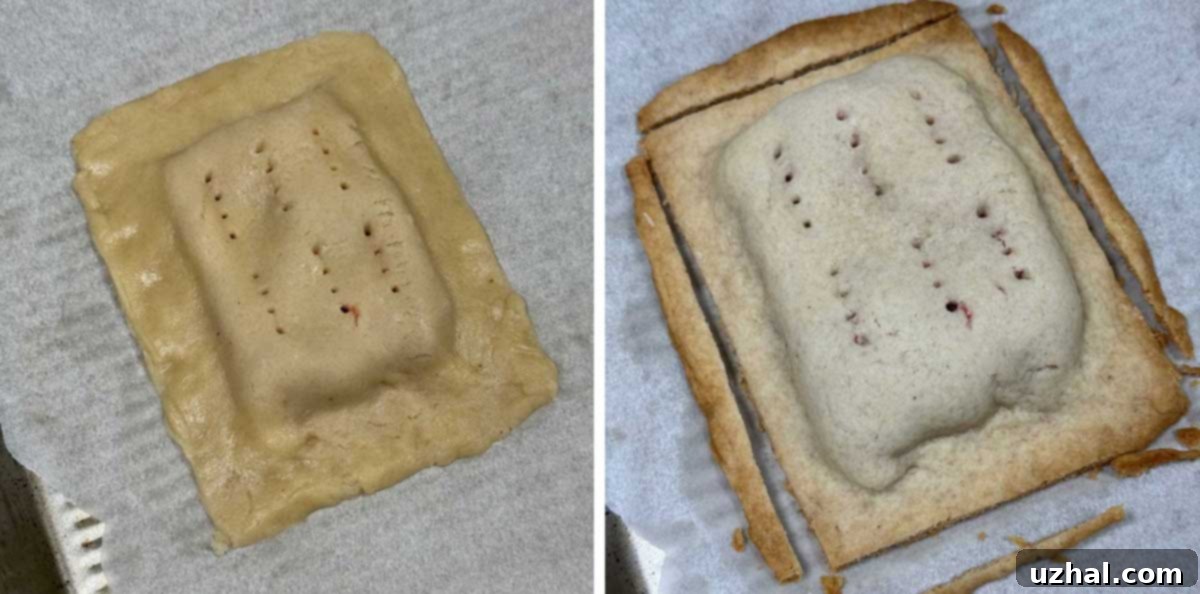
Initially, I didn’t capture many photos of the dough-making process, but I do have a couple of my very first toaster pastries. These early attempts were before I perfected the technique of making the edges wider during assembly and then neatly trimming them after baking, a trick I’ll share later. The difference it makes in achieving that quintessential Pop Tart look is remarkable. Following my successful initial batch, I experimented with a vegan version of these homemade Pop Tarts, using the exact same dough recipe but substituting Miyoko’s plant-based butter for traditional dairy butter. The results were equally delicious, perhaps just a tad less overtly buttery, but still wonderfully flaky and satisfying. This versatility means you can adapt this recipe to various dietary preferences without sacrificing flavor or texture, making these small batch homemade Pop Tarts accessible to even more people.
Unleashing Creativity: Lemon Pop Tarts and Beyond with Flavorful Doughs
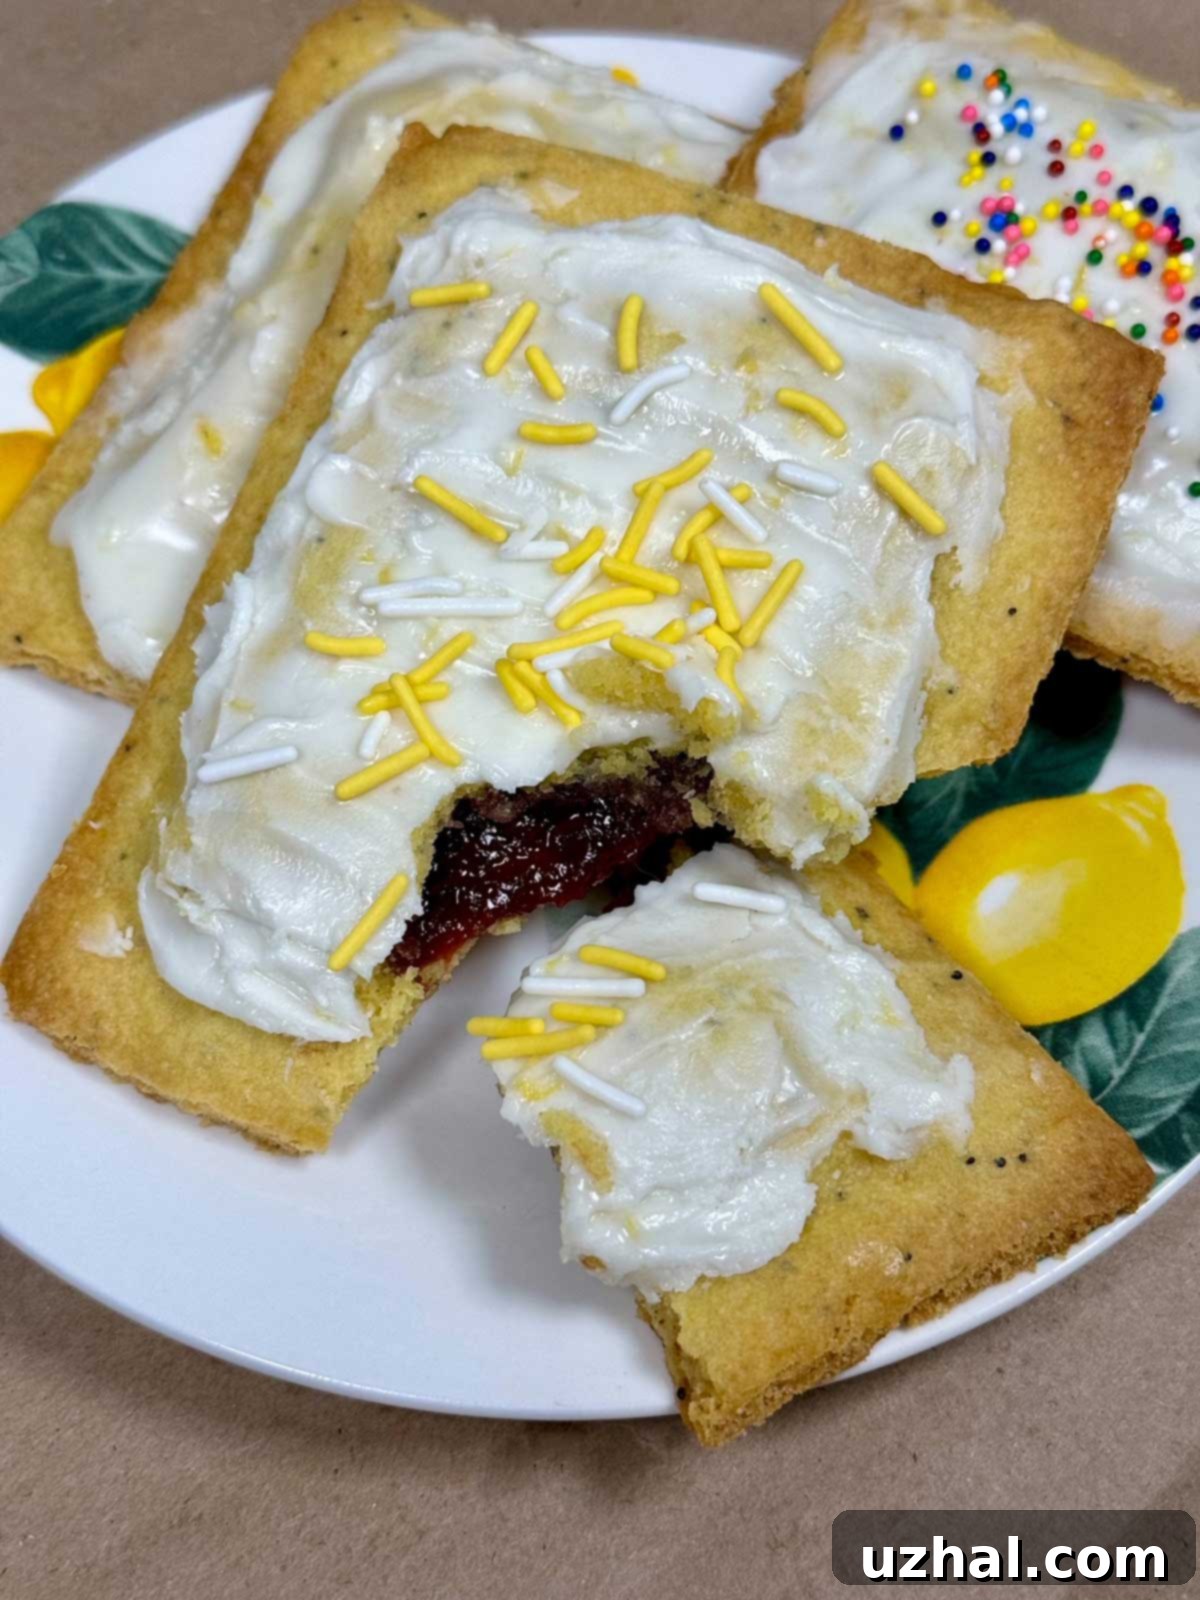
One of the most exciting aspects of making your own Pop Tarts is the endless potential for customization, especially when it comes to flavoring the dough itself. After numerous batches made with a plain, classic dough, I ventured into creating a vibrant lemon poppy seed flavored dough. This was achieved by incorporating ½ teaspoon of fresh lemon zest and approximately ¼ teaspoon of lemon oil directly into the dough mixture. The lemon oil provides an intense, bright citrus note that complements the zest beautifully. A generous sprinkle of poppy seeds adds a delightful textural contrast and visual appeal. For the accompanying icing, I replaced the usual water with fresh lemon juice and added even more lemon zest, amplifying the citrus profile. While I paired this with a sweet raspberry preserves filling, for an all-out lemon experience, you could easily substitute the preserves with a luscious homemade or store-bought lemon curd, creating a truly spectacular tart bursting with sunshine flavor.
But why stop at lemon? The possibilities for dough flavor variations are vast and exciting. Imagine a subtle vanilla bean dough, infused with seeds from a fresh vanilla pod, or a warm cinnamon-spiced dough perfect for apple or brown sugar fillings. For a sophisticated twist, an almond-flavored dough, made with a hint of almond extract, would pair wonderfully with cherry or apricot preserves. You could even experiment with a touch of cocoa powder for a chocolate-infused dough that would be heavenly with a marshmallow or chocolate ganache filling. The key is to think about complementary flavor pairings and to add your chosen flavorings (zest, extracts, spices, fine powders) at the appropriate stage of dough mixing to ensure even distribution and maximum impact. This creative freedom is what truly elevates homemade Pop Tarts above their store-bought counterparts.
The Heart of the Tart: Perfecting Fillings and Icing
Speaking of fillings, one of the most delightful aspects of homemade Pop Tarts is their ability to showcase a variety of preserves, whether they’re lovingly homemade or conveniently store-bought. This recipe is an excellent excuse to use up those jars of jam in your pantry or to highlight the bounty of seasonal fruits. My first successful filling was a cherry preserve mixed with a tablespoon of dried cherries and a single drop of almond extract. The dried cherries intensified the cherry flavor and added a lovely chewiness, while the almond extract provided a subtle, sophisticated complement that truly elevated the tart. This combination worked so exceptionally well that it inspired me to move on to raspberry and then strawberry, both utilizing my homemade preserves, which brought an unparalleled freshness to the pastries.
I also experimented with a classic brown sugar filling, but in an adventurous turn, I added a touch of gochujang sauce. While my initial attempt didn’t quite hit the mark – let’s just say it was an acquired taste! – I’m still captivated by the idea of a spicy brown sugar filling. I envision a refined version where the sweetness of brown sugar is balanced by a subtle warmth, perhaps from a very tiny amount of cayenne pepper or a specific spice blend, rather than a strong chili paste. This ongoing experimentation highlights the joy of home baking: every “failure” is a learning opportunity, guiding you closer to your perfect creation. Other fantastic filling ideas include apple cinnamon (using finely diced apples cooked down with spices), blueberry (with a hint of lemon), chocolate hazelnut spread, or even a cream cheese filling for a cheesecake-like tart. The key is to ensure your filling isn’t too runny, as this can lead to leaks during baking.
Homemade Small Batch Pop Tarts Icing: The Finishing Touch
When it came to the icing for these small batch homemade Pop Tarts, two distinct types proved to be equally effective, each offering a slightly different characteristic. For those desiring stackable, sturdy Pop Tarts, a simple mixture of powdered sugar, a tiny bit of pasteurized egg white (which helps it set firm), and a little flavoring worked perfectly. This icing dries hard, creating a protective, slightly crisp shell over the pastry. However, I also tried my usual opaque icing, which combines powdered sugar with a bit of melted butter, water, and flavoring. This version also hardens up beautifully, offering a slightly richer taste and a wonderfully smooth, glossy finish. Ultimately, you can choose whichever type of icing sounds most appealing to you. The primary goals for either are good flavor and a hard, dry set. But remember, the icing, while delightful, isn’t the true star of the show. You can absolutely leave it off entirely – after all, even commercial Pop Tarts come in unfrosted varieties, proving that the deliciousness lies within the pastry and filling itself.
Customizing your icing is another fun way to personalize your Pop Tarts. For a vibrant pink icing, you can stir in a very tiny amount of berry preserves or a drop of red gel food coloring. If you made the lemon-flavored dough, an ideal lemon icing can be achieved by adding ½ teaspoon of lemon zest and using lemon juice for most, if not all, of the warm water. For a clean, pure white icing, opt for clear vanilla extract. Otherwise, regular vanilla or almond extract works wonders, adding a classic sweetness. Experiment with different extracts like maple, coconut, or even a hint of mint to match your filling and dough flavors, creating a truly bespoke breakfast pastry.
Essential Tips for Flawless Homemade Toaster Pastries
While most crucial details are integrated into the recipe card, there are a few extra tips that can significantly enhance your homemade Pop Tart experience, especially concerning cutting and shaping. I quickly learned that the edges of these homemade pastries tend to brown more rapidly than the centers during baking. To counteract this and achieve a cleaner, more professional look, I discovered that exaggerating the edges a bit – making them wider than they strictly needed to be – and then trimming them neatly *after* baking was the optimal approach. This allows the dough to bake fully without burning the delicate edges, and then you can use a pizza cutter or a sharp knife to create perfectly straight, crisp lines, giving your Pop Tarts a polished finish. The photo below, showcasing the vegan dough, illustrates this wider edge technique perfectly.
Another critical tip for dough preparation revolves around the butter: it needs to be exceptionally soft. Softened butter is essential for achieving the smooth, pliable dough texture that makes these Pop Tarts so delightful. If your butter isn’t soft enough, you’ll struggle to incorporate it evenly, resulting in a crumbly or tough dough. I rely on a clever trick from Bake Smart: stand the stick of butter on one end and microwave it for 6 seconds, then flip it to the other end and microwave for an additional 4 seconds. This method warms the butter just enough to make it perfectly pliable without melting it completely. Additionally, always ensure your workspace is lightly floured when rolling out the dough to prevent sticking, and don’t overwork the dough, as this can develop the gluten too much, leading to a less tender pastry. Chilling the dough before baking is also key; it helps the butter solidify, contributing to a flakier crust and preventing the tarts from spreading too much in the oven.
Crucial Warning: Do Not Warm in a Pop-Up Toaster!
Here’s a critical safety warning that cannot be overstated: the beloved magic of commercial Pop Tarts lies in their specially engineered ability to be safely toasted in a pop-up toaster. These homemade toaster pastries, as delicious as they are, do NOT share this quality. Please, for the safety of your appliance and your kitchen, do not attempt to put these in a standard pop-up toaster. The homemade fillings are much more prone to leaking out when heated rapidly, and the icing will almost certainly melt and drip. Either scenario could damage your toaster, create a fire hazard, or at the very least, make a significant mess. It might be tempting because they look so much like the real thing, but the internal structure and ingredients are different.
Instead, if you wish to warm them, you can gently do so by placing them on a tray in a toaster oven and heating them for a few minutes at around 350°F (175°C), keeping a close eye on them. A conventional oven also works well for reheating. However, we’ve found that these homemade Pop Tarts are often at their absolute best when enjoyed at room temperature, allowing their delicate flavors and textures to shine without the risk of a melty, messy catastrophe.
The Easiest Small Batch Recipe for Homemade Goodness!
Wow, that was quite a journey, but as you can tell, I truly enjoy talking about Pop Tarts – especially the homemade kind! This small batch recipe is designed to be approachable and yields just enough delightful pastries without overwhelming your kitchen or leaving you with too many tempting treats. It’s perfect for a weekend breakfast, a thoughtful gift, or just a little indulgence for yourself and a loved one. The joy of creating these from scratch, customizing every element, is immensely rewarding. Without further ado, here’s the final recipe:
- Easy Caramel Corn
- Football Cake Pops
- Easy Cottage Cheese Muffins
- Pina Colada Popcorn
- Lemon Blueberry Tart
Recipe
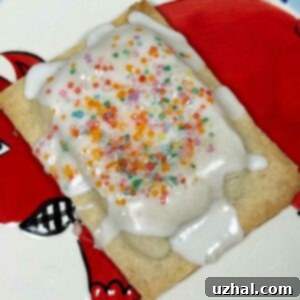
Small Batch Homemade Pop Tarts
Anna
Pin Recipe
Ingredients
Filling
- 3-4 tablespoons cold cherry preserves (or any other flavor you love)
- 1 drop almond extract
- 1 tablespoon dried cherries (optional, but highly recommended for texture and flavor) or other chopped dried fruit
Dough
- 4 tablespoons unsalted butter, very softened (I recommend a good quality salted butter like Land O’Lakes for extra flavor, adjusting salt accordingly) (56 grams)
- ¾ cup all-purpose flour plus a tablespoon for dusting and adjustments (110 grams) plus more as needed
- ¼ teaspoon baking powder
- 1 pinch fine sea salt or up to ¼ teaspoon if using unsalted butter (See Note)
- 1 tablespoon granulated sugar (12 grams)
- 2 tablespoons light corn syrup (36 grams)
Icing and Sprinkles
- 2 teaspoons unsalted butter, melted (8 grams)
- ⅔ cup powdered sugar, sifted (75 grams)
- 1 drop pure vanilla extract (clear if you have it for pure white icing) or almond extract
- 1-2 teaspoons warm water, plus more as needed to reach desired consistency
- Colorful sprinkles, for decoration (optional)
Instructions
Prepare the Filling
-
In a small bowl, combine the cold preserves, dried fruit (if using), and almond extract. Stir thoroughly until all ingredients are well mixed. Set this aside. You can prepare this at the beginning or while the dough is chilling.
Make the Dough
-
In a medium mixing bowl, use a sturdy scraper or spatula to mash the very softened butter until smooth and creamy. Ensure the butter is at room temperature for best results (see tips above for softening).
-
In a separate bowl, whisk together the all-purpose flour, baking powder, salt, and granulated sugar until they are thoroughly and evenly blended. Add this dry mixture to the softened butter and begin to stir until it’s partially combined. At this stage, the mixture will appear thick and somewhat dry.
-
Pour in the corn syrup. Continue to stir, mashing the dough with your scraper, until a soft, smooth, and cohesive dough forms. The dough will transition from dry to wet quite quickly, so you may need to finish mixing and kneading by hand to ensure everything is perfectly incorporated and smooth.
Assembly and Baking
-
Line a baking sheet or a tray that fits into your refrigerator with a sheet of parchment paper. This will make transferring easier.
-
Press the prepared dough into a rough 4-inch square, then lightly dust both sides with a little extra flour. Transfer it to a lightly floured pastry mat or clean counter and roll it out into a rectangle approximately 8 x 9 ½ inches. Precision isn’t paramount here, as you’ll be trimming the edges later. Aim for a dough thickness of about ⅛ of an inch.
-
Using a ruler and a sharp knife or pizza cutter, carefully cut the large rectangle into 6 smaller rectangles, each roughly 4 by a little over 3 inches. This usually involves one cut through the 8-inch side and three even cuts through the 9 ½-inch side.
-
With a thin, flat spatula, gently scoop up three of the dough rectangles and transfer them to the parchment-lined baking sheet, spacing them evenly. Be careful not to distort their shape too much.
-
Spoon about a tablespoon of your prepared filling into the center of each of the three dough rectangles on the baking sheet. Ensure you leave a clear perimeter of about ¾ of an inch around the edges to allow for proper sealing. Working carefully, one tart at a time, gently place a second dough rectangle over the filling. Use your index finger to firmly press down the edges, sealing the filling inside. Aim to make these sealed edges approximately ¾ of an inch wide. They will appear significantly wider than a typical store-bought Pop Tart, but this extra width is intentional for trimming after baking.
-
Once assembled, place the shaped and filled pastries in the refrigerator for at least 30 minutes. This chilling step is crucial for helping the dough maintain its shape and flakiness during baking.
-
While the tarts are chilling, preheat your oven to 350 degrees F (175°C).
-
If you chilled the tarts on a tray that isn’t oven-safe, transfer the parchment paper with the tarts onto a proper baking sheet. If your chilling tray is oven-safe, you can skip this step.
-
Bake on the center oven rack at 350 degrees F for 16 minutes, or until the edges are lightly golden brown and the centers appear set and slightly puffed. Remove from the oven. While still warm, use a pizza cutter or a very sharp knife to carefully trim the edges of each tart, creating neat, clean rectangles. This step improves both appearance and texture. Transfer the parchment with the freshly trimmed tarts to a cooling rack or a cool surface while you prepare the icing.
Prepare and Apply the Icing
-
Prepare the icing only when you are ready to use it, as it will harden quickly. In a microwave-safe 2-cup measure or a small mixing bowl, melt the butter. Add the sifted powdered sugar and stir vigorously until the mixture is dry and crumbly. Next, add a tiny drop of vanilla extract (clear for a pure white icing, or almond extract for a different flavor profile). Even without vanilla, the icing will taste good.
-
Begin adding warm water, starting with just 1 teaspoon, and stir continuously until the icing becomes smooth and thick enough to spread evenly over the pastries. If you prefer a drizzly consistency, continue adding small amounts of liquid until it reaches your desired thinness. Spread or drizzle the icing over the Pop Tarts while they are still slightly warm; this will give the icing a beautiful, glossy sheen. Alternatively, you can wait until they are completely cool for a more opaque finish.
-
Immediately decorate with your chosen sprinkles before the icing has a chance to set and harden.
-
Note about icing variations: For a pretty pink icing, stir in a very tiny bit of berry preserves or a drop of red gel food coloring. For a vibrant lemon icing, incorporate ½ teaspoon of fresh lemon zest and use fresh lemon juice for most, or all, of the warm water in the recipe. This allows for endless customization!
Notes
Lemon Poppy Seed Dough Variation: To infuse your Pop Tarts with a delightful lemon flavor, add ½ teaspoon of fresh lemon zest and a few drops of high-quality lemon oil to the very soft butter before you incorporate the flour mixture. Additionally, stir in about ½ teaspoon of poppy seeds for a lovely textural contrast. Yellow food coloring is an optional addition if you desire a brighter visual appeal to match the lemon flavor.
