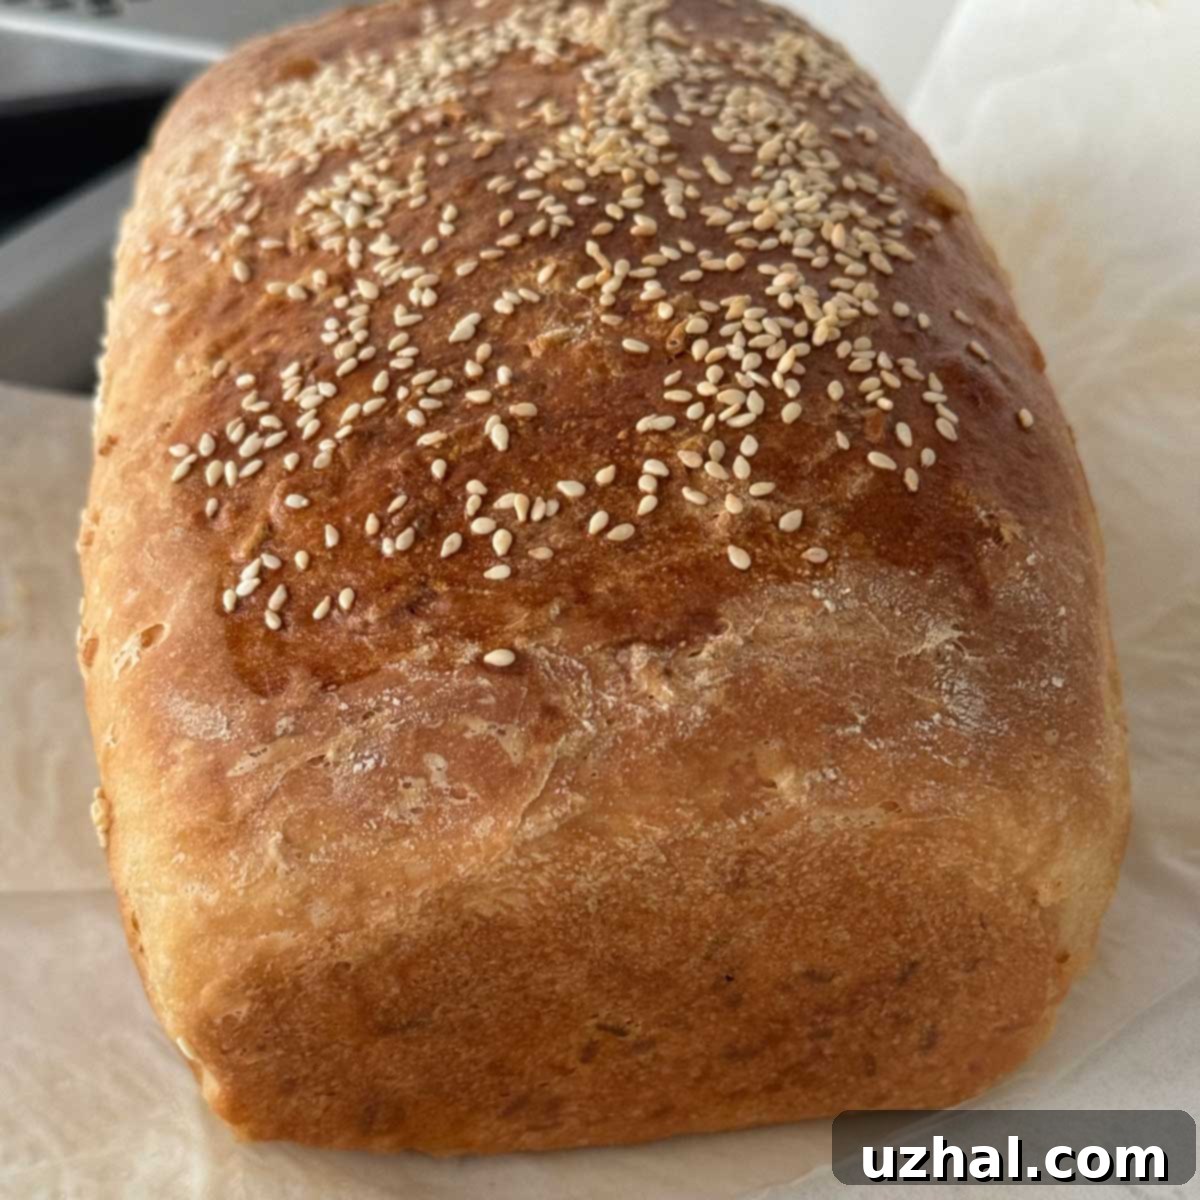
The Ultimate Guide to Homemade Cooked Rice Bread: Fluffy, Flavorful, and Perfect for Sandwiches
Embark on a culinary journey to the mid-19th century, specifically to the historic Lowcountry of South Carolina, where rice was not just a staple side dish but a foundational ingredient in various breads. Cooked rice bread, while less common today, was a testament to the resourcefulness of cooks who utilized the region’s abundant rice crops to create satisfying and innovative baked goods. These ingenious additions allowed them to increase loaf sizes, extend flour supplies, and develop unique textures and flavors. From “Philpy,” made entirely of rice, to delightful mixtures of wheat and rice flours, the diversity was remarkable. This particular recipe offers an exceptional sandwich or toasting bread, skillfully blending the strength of bread flour with the subtle character of cooked Basmati rice.
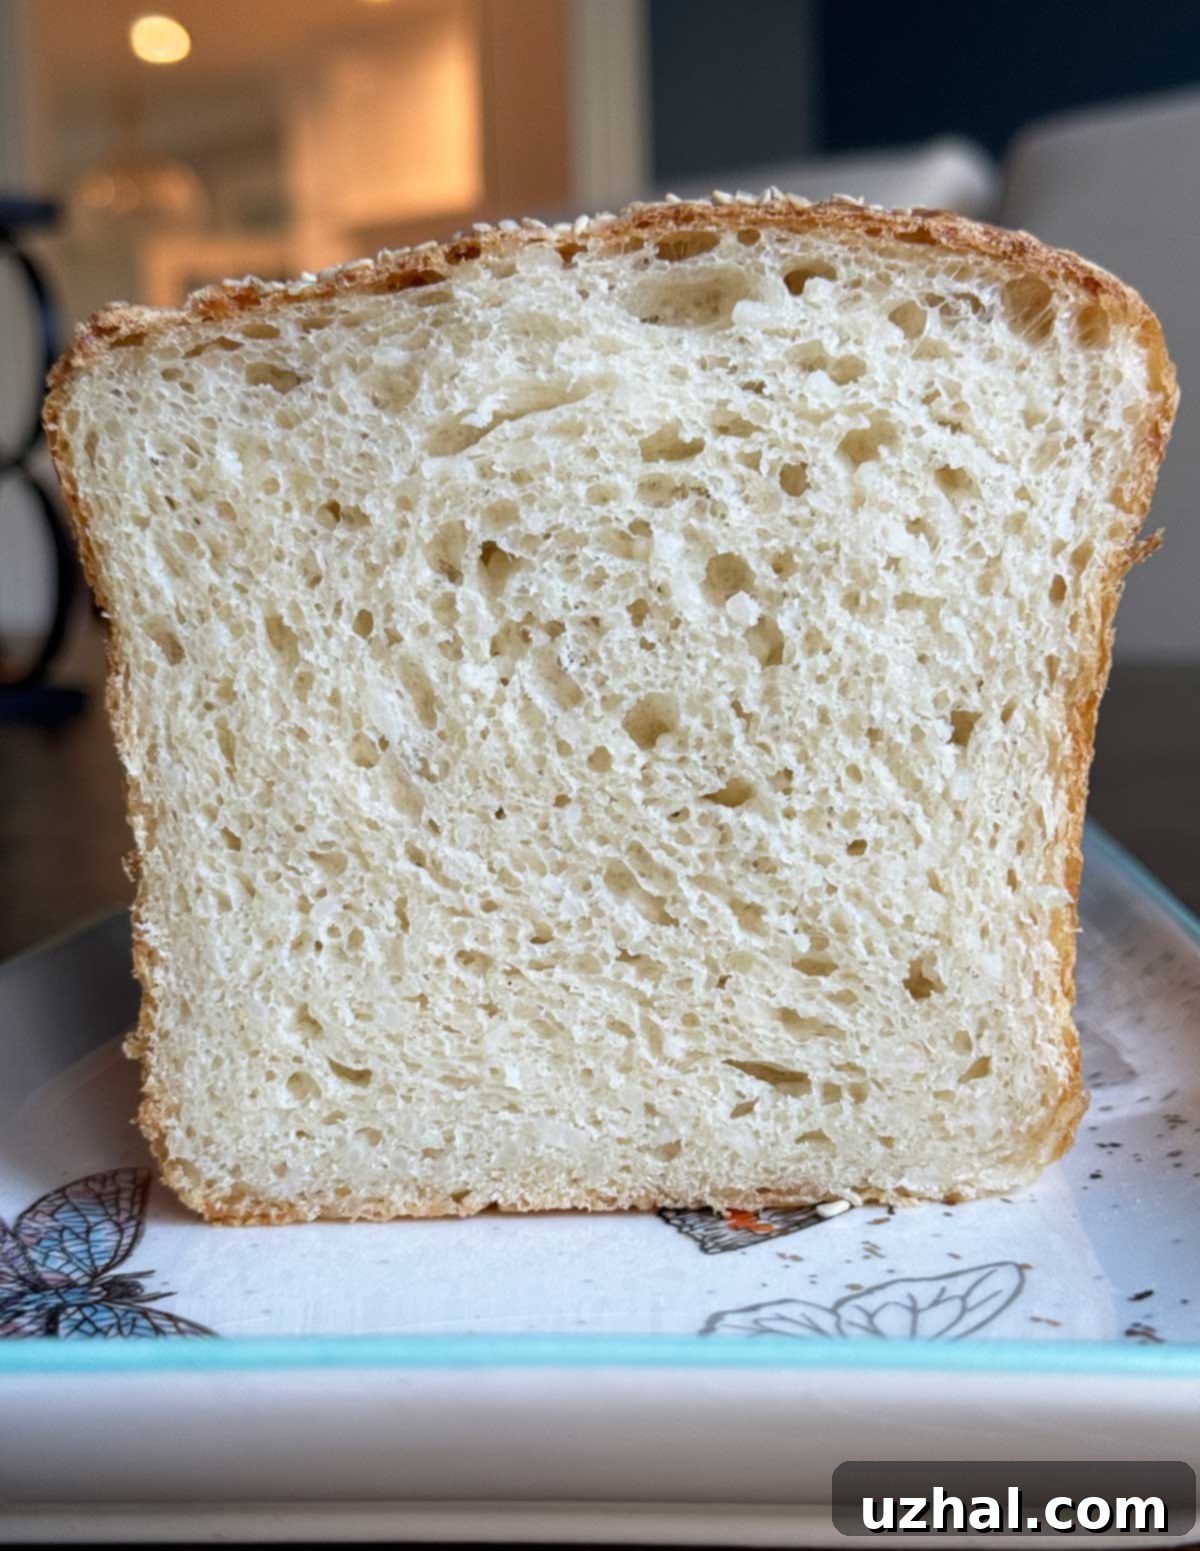
Unveiling the Unique Texture and Flavor of Cooked Rice Bread
The addition of cooked rice is the secret behind this bread’s distinctive texture. It bestows a remarkable chewiness, positioning its mouthfeel somewhere between the soft crumb of a classic white sandwich bread and the robust chew of a rustic French baguette. The individual rice grains are incredibly subtle, almost imperceptible, yet their presence contributes significantly to the bread’s overall structure and delightful bite. Beyond texture, the rice subtly infuses the dough with its own delicate flavor, creating a nuanced taste profile that sets it apart. The inclusion of salted butter further enhances this, adding a rich, savory depth. As a flavorful afterthought, a sprinkle of sesame seeds on top is highly recommended. While optional, these tiny seeds toast beautifully, releasing a nutty aroma and an additional layer of taste that truly elevates the bread, making it even more appealing for sandwiches or simple toast.
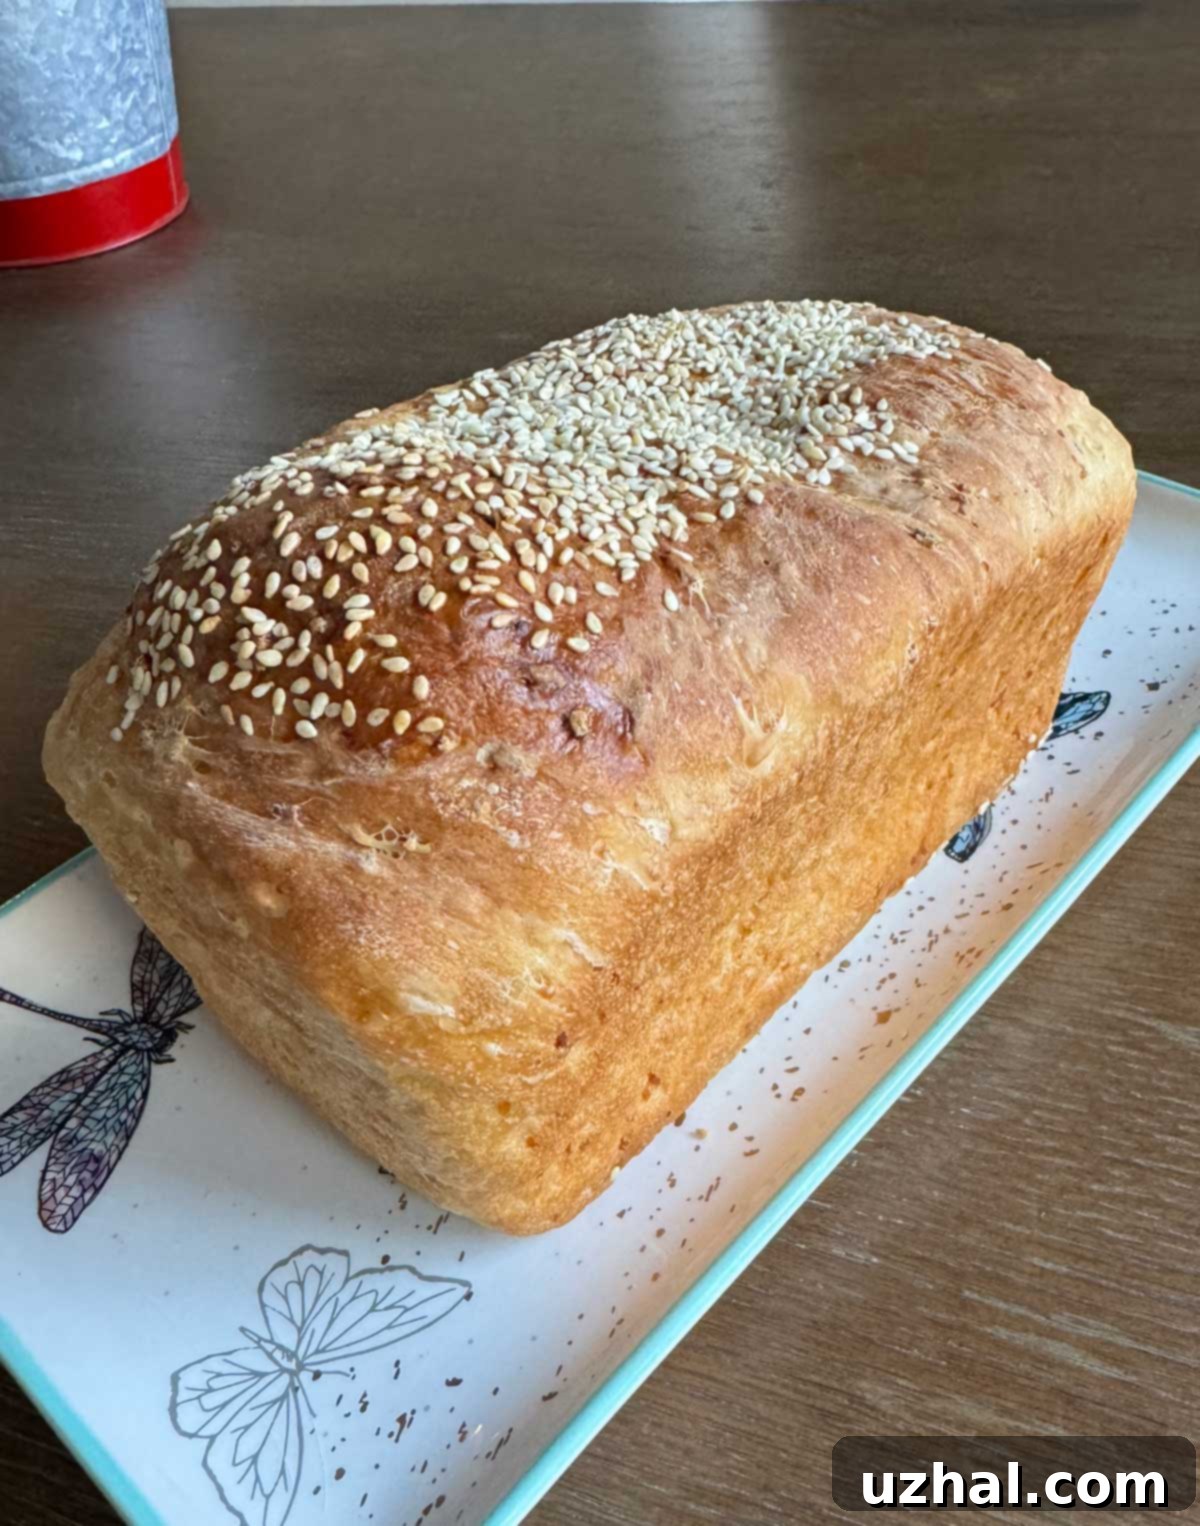
A Nod to Tradition: The Charleston Rice Bread Legacy
This recipe draws profound inspiration from the rich culinary traditions of Charleston, South Carolina, and its renowned Charleston rice bread. Historically, these breads were often crafted using Carolina Gold rice, a heritage grain celebrated for its exceptional flavor and texture. While honoring this heritage, we’ve introduced a few modern twists to cater to contemporary palates and ingredient availability. Our version incorporates butter and sugar, adding a touch of richness and sweetness that complements the rice beautifully. Instead of Carolina Gold, we’ve opted for Basmati rice, a household favorite known for its aromatic qualities and long, slender grains. Through extensive testing, a fascinating discovery emerged: bread made with freshly cooked rice tends to be a little denser and heavier, whereas bread prepared with leftover, slightly drier rice yields a lighter, fluffier loaf. This is because dryer cooked rice efficiently absorbs excess moisture from the dough, preventing it from becoming too dense. Therefore, planning to bake this bread when you have some day-old or leftover rice on hand is highly advantageous for achieving the best possible airy texture.
Choosing the Perfect Loaf Pan for Your Rice Bread
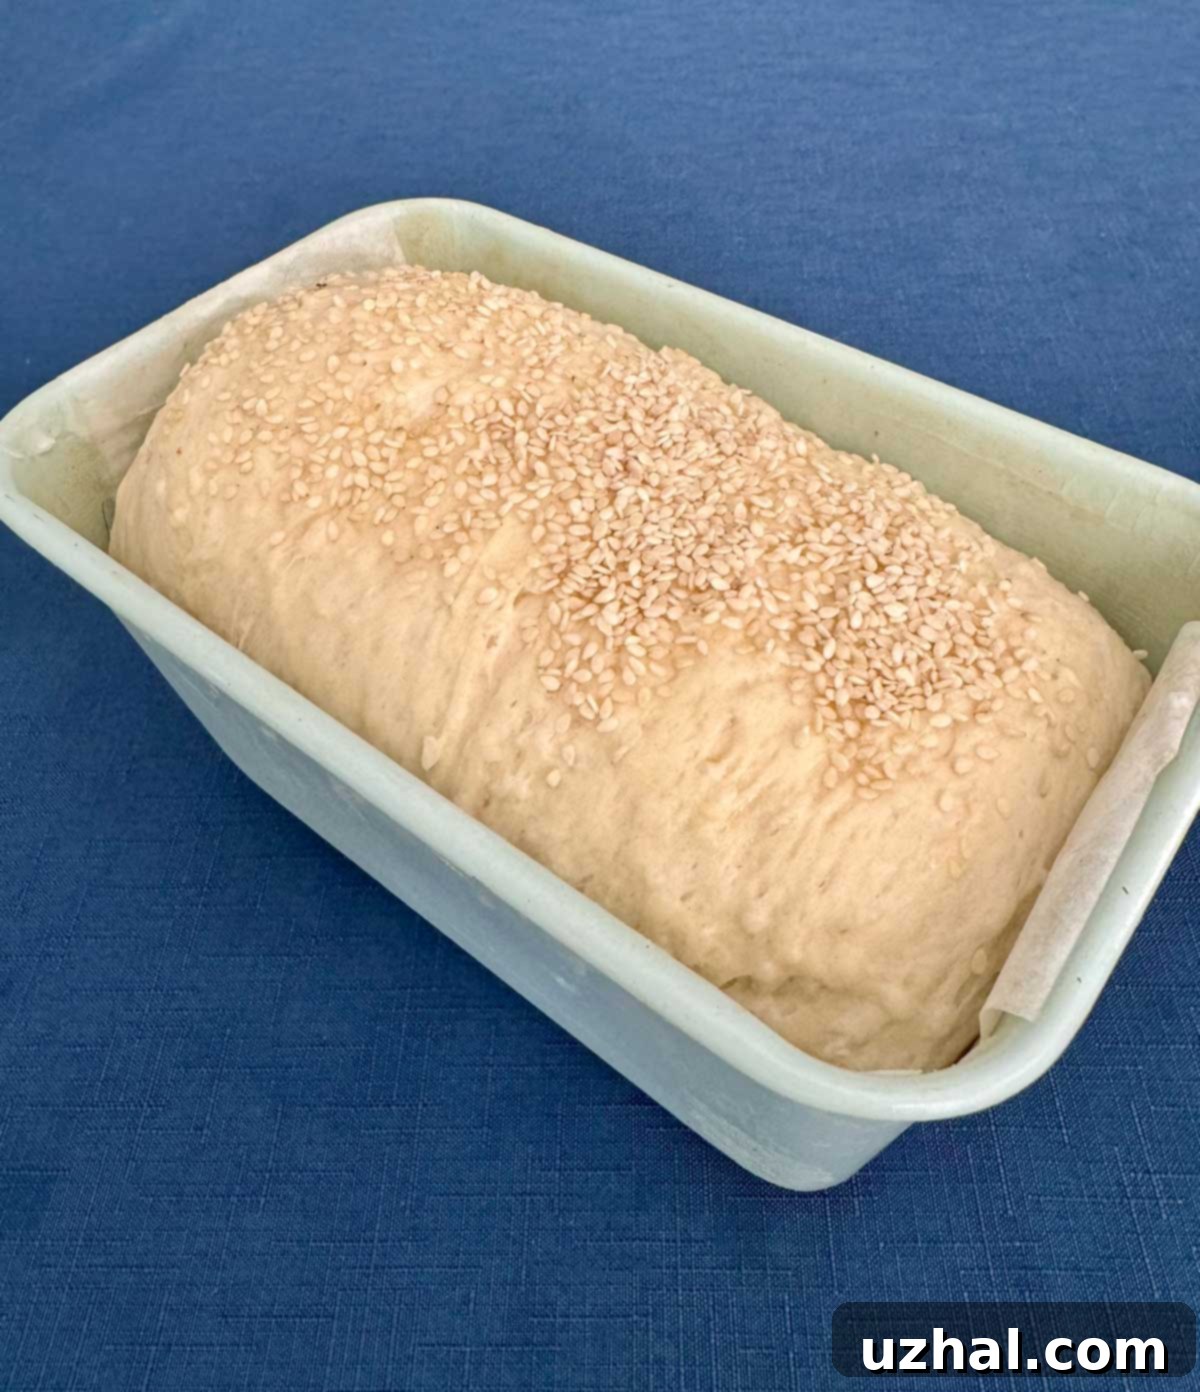
While the dough for this cooked rice bread rises impressively, the inherent characteristics of rice mean it won’t achieve the extreme lightness of a purely white wheat loaf. However, it should absolutely not be overly heavy either. The key to a well-balanced loaf lies partly in your choice of bakeware. For those who appreciate a taller, more elegant slice, a narrow and deep loaf pan or even a Pullman pan is ideal. These pans encourage the dough to rise vertically, resulting in a lofty and visually appealing loaf. The ingredient quantities provided in the standard recipe card are perfectly calibrated for an 8 ½ by 4 ½ inch pan. However, if your preference leans towards larger, heartier slices suitable for substantial sandwiches, you can easily scale up the recipe. By multiplying the ingredients by 1.5, you can achieve a magnificent loaf in a larger 9×5 inch pan. To assist with this, the scaled ingredient amounts are conveniently listed below in the notes section. Below, you can see the dough gracefully rising in a trusty deep loaf pan, similar to the Zyliss deep loaf pan found on Amazon, which is highly recommended for its performance.
Perfectly Cooking Basmati Rice for Your Bread
The recipe calls for a little over a cup of fully cooked rice, and while the exact cooking method isn’t strictly critical because the rice will be thoroughly mashed into the dough, consistency and moisture content do matter. Our preferred method for preparing Basmati rice for this recipe is the “pasta method.” This involves boiling approximately 7 cups of water, adding a teaspoon of salt, and then introducing one cup of Basmati rice. The rice is then allowed to cook vigorously for precisely 12 minutes. Following this, it’s meticulously drained, returned to the warm pan, and covered to steam for about 3 minutes. Finally, a gentle fluffing with a fork separates the grains, ensuring a light texture. This technique consistently yields perfectly cooked, distinct Basmati grains that are neither mushy nor undercooked, making them ideal for incorporation into bread dough. It’s particularly effective for long-grain Basmati but may not work as well for short-grain or parboiled varieties, which require different cooking approaches. Feel free to use your favorite, tried-and-true rice cooking method if it consistently produces well-cooked, separate grains. An excellent alternative, and my second favorite, is using an Instant Pot, which offers consistent results with minimal fuss.
Understanding Flour and Other Key Ingredients
For the success of this cooked rice bread, the choice of flour is paramount. We have exclusively tested this recipe with bread flour, and for good reason. The high protein content in bread flour is crucial for developing robust gluten, which provides the necessary structural support for a loaf that contains a significant amount of rice. This gluten network helps trap the gases produced by the yeast, resulting in a lighter crumb and a well-formed loaf. Brands like King Arthur and Bob’s Artisan bread flours have consistently delivered excellent results. While it might be tempting to substitute with all-purpose flour, we haven’t tested this and anticipate that it wouldn’t yield comparable results due to its lower protein content, which would struggle to provide sufficient structure alongside the added bulk of the rice.
Another essential ingredient contributing to the bread’s delightful richness is butter. Our test loaves were made with Land O’ Lakes butter, but this recipe is wonderfully versatile and can easily be adapted for vegan dietary preferences. Dairy-free alternatives such as Earth Balance, Miyoko’s Kitchen butter, or even coconut oil can be successfully substituted without compromising the integrity of the bread. While we envision a potentially richer version incorporating eggs and milk powder in future experiments, the current formulation is intentionally crafted to be both dairy and egg-free, offering a delicious option for a wider range of dietary needs.
Stand Mixer or Bread Maker: Optimizing Your Kneading Process
Given the somewhat sticky nature of this dough, preparing cooked rice bread is most efficiently accomplished using a stand mixer equipped with a dough hook. The mixer’s consistent and powerful kneading action develops the gluten effectively without requiring additional flour, which can inadvertently lead to a denser loaf. Attempting to knead this dough by hand often results in a constant battle with stickiness, prompting bakers to add more and more flour to prevent it from adhering to their hands and the work surface. While hand-kneading is certainly possible, be prepared for a slightly less airy and potentially shorter loaf as a consequence of the increased flour incorporation. As for bread machines, while I personally do not own one to test, many bread machine models are capable of handling sticky doughs. It’s an intriguing possibility, and perhaps fellow baking enthusiast Sue will offer her insights on making this delightful bread in a bread maker in the future!
Tailoring Your Loaf: 9×5 Inch Measurements for Larger Slices
Achieving the “perfect” loaf size can be a personal quest, and for this cooked rice bread, the ideal dimensions often depend on how you plan to enjoy it. While I frequently gravitate towards smaller, taller, and narrower loaves for their elegant appearance and controlled portions, the larger 9×5 inch pan undeniably excels when you desire bigger, wider, and more robust slices—perfect for constructing epic sandwiches. For those who prefer this more substantial option, here are the precise measurements for scaling the recipe to fit a 9×5 inch loaf pan. The printable recipe card, as of now, provides the measurements specifically for an 8 ½ by 4 ½ inch regular or deep loaf pan, offering flexibility to suit your baking preferences.
- 1 heaping cup of cooked day old Basmati rice (approximately 5 ½ to 6 oz or 155-170 grams)
- 3 ¾ cups bread flour (525 grams)
- 3 tablespoons granulated sugar (36 grams)
- 1 tablespoon of instant yeast (SAF gold label is recommended for active fermentation)
- 1 ½ cups warm water (ideally 130 degrees F)
- 2 teaspoons fine sea salt (ensure even distribution)
- 3 tablespoons softened salted butter (42 grams) or a suitable dairy-free alternative
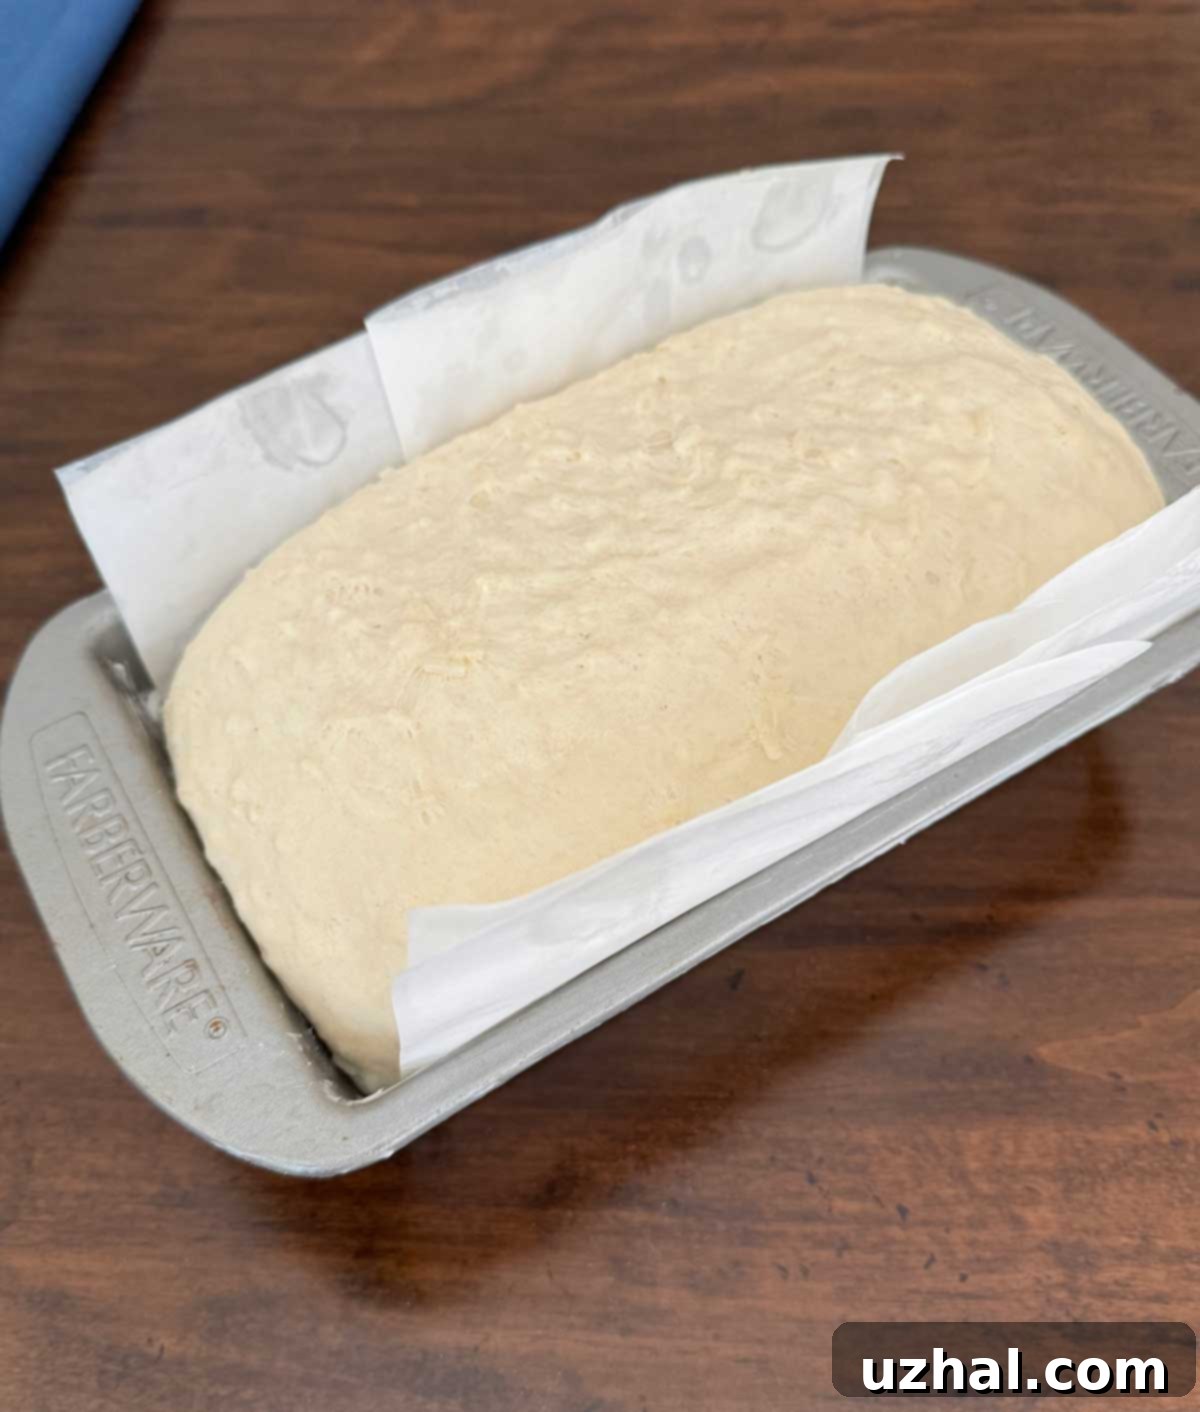
When using a 9×5 inch pan, especially if its sides are not particularly high, a clever trick to encourage an impressive rise and prevent spillover is to line the pan with folded parchment paper. This provides the rising dough with additional vertical structure to cling to, promoting a taller loaf. While its exact impact can vary, it’s a worthwhile technique. Below, you can observe how the dough looked in the larger pan with the parchment paper support just before it was placed in the oven, demonstrating the visual preparation for a grander loaf.
This cooked rice bread is not just a recipe; it’s a delightful exploration of texture, flavor, and history. Whether you’re making it for everyday sandwiches, a special brunch, or simply to enjoy with a smear of butter, its unique character and heartwarming appeal are sure to make it a cherished addition to your baking repertoire.
- Gluten-Free Charleston Chewies
- Charleston Cream Cheese Almond Muffins
- Maple Rice Krispies Treats
- Deep Dish Brownies
- Marshmallow and Rice Krispies Topped Brownies
Recipe
White Rice Sandwich Bread
AnnaIngredients
- 1 cup cooked white Basmati rice, warm (approx. 140 grams, preferably day-old for a lighter loaf)
- 2 ½ cups bread flour, divided (280 grams for initial mix, 70 grams for gradual addition)
- 2 tablespoons granulated sugar (20 grams)
- 2 teaspoons instant yeast (SAF gold label recommended)
- 1 cup very warm water (130 degrees F / 54 degrees C)
- 1 ¼ teaspoons fine sea salt (a generous 1 ¼ tsp, closer to 1 ⅓ tsp)
- 2 tablespoons softened salted butter or dairy-free alternative (28 grams)
- 1 tablespoon sesame seeds (optional) (plus beaten egg or aquafaba for sticking, if desired)
Instructions
- Lightly grease an 8 ½ by 4 ½ inch loaf pan. For a taller loaf, a deep loaf pan with 4-inch high sides or a Pullman pan is highly recommended.
- In the bowl of a stand mixer, combine the warm cooked rice, 2 cups of the bread flour (280 grams), instant yeast, and sugar. Pour in ¾ cup of the warm water and stir thoroughly by hand until all ingredients are well blended. Next, add the salt and the softened butter. Continue to mix by hand, gradually incorporating the remaining ¼ cup of warm water until you achieve an overly sticky, shaggy dough consistency.
- Attach the dough hook to your stand mixer and begin kneading the dough on low to medium speed. After the first minute or so, pause the mixer and use a rubber spatula to scrape down the sides of the bowl, ensuring all ingredients are incorporated. Resume kneading, and gradually add the remaining ½ cup of bread flour, two tablespoons at a time, allowing each addition to mix in before adding more. Periodically stop to scrape the dough from the sides of the bowl as it kneads. The dough will transition between feeling stiff and slack, but as the gluten develops, it will begin to pull away from the bowl. Continue kneading until all the additional flour has been incorporated, and the dough, though still sticky, exhibits a noticeable elasticity and a slight snap when scraped from the bowl. This entire kneading process should take approximately 8 minutes.
- Generously grease a large clean bowl with oil or more softened butter; cooking spray is also an acceptable alternative. Transfer the kneaded dough to this greased bowl, turning it to ensure it’s completely coated with the fat. Cover the bowl tightly with plastic wrap or a damp towel and allow the dough to rise in a warm, draft-free spot for 1 hour, or until it has almost doubled in bulk.
- Gently turn the risen dough out onto a lightly floured pastry mat or clean counter. Press the dough into a rectangular shape. Then, starting from one of the longer sides, tightly roll the dough downward into a cylinder, tucking in the corners as you roll and gently pressing out any large air pockets. Lightly bounce the cylinder a few times to evenly distribute the air within the dough. Carefully transfer the shaped dough into the prepared, greased loaf pan. Cover the pan loosely with greased plastic wrap and let it rise for a second time in a warm place for another hour, or until it has risen beautifully above the rim of the pan. Towards the end of this second rise, if desired, you can brush the top of the loaf with a little beaten egg wash (for a golden crust) or aquafaba (for a dairy-free option) and sprinkle with sesame seeds for added flavor and visual appeal.
- While the bread is undergoing its second rise, preheat your oven to 375 degrees F (190 degrees C).
- Bake the bread for approximately 45 to 50 minutes, or until the crust is golden brown and the internal temperature reaches 200-210 degrees F (93-99 degrees C) when measured with an instant-read thermometer. Once baked, remove the pan from the oven and let the bread cool in the pan for about 5 to 10 minutes. Then, carefully turn it out onto a wire rack to cool completely. At this stage, it might feel a bit heavier than anticipated, but resisting the urge to slice it too early is key. Allow it to cool completely, as this allows the crumb to set properly, resulting in a cleaner slice and better texture. For perfect sandwich slices, if your loaf turns out exceptionally fluffy, chilling it briefly can make it firmer and easier to slice neatly. However, in most cases, it will be firm enough to slice beautifully once cooled to room temperature.
Notes
Scaled Measurements for a 9×5 inch Loaf
- 1 heaping cup of cooked day-old Basmati rice (approx. 5 ½ to 6 oz or 155-170 grams)
- 3 ¾ cups bread flour (525 grams)
- 3 tablespoons granulated sugar (36 grams)
- 1 tablespoon of instant yeast (SAF gold label)
- 1 ½ cups very warm water (130 degrees F / 54 degrees C)
- 2 teaspoons fine sea salt
- 3 tablespoons softened salted butter (42 grams) or dairy-free alternative
