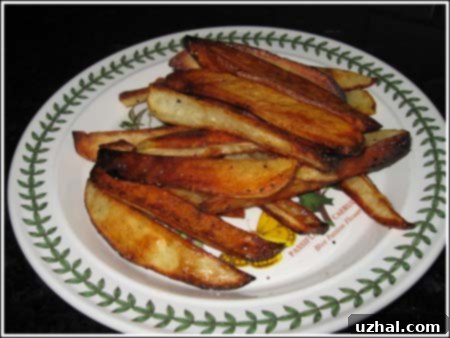
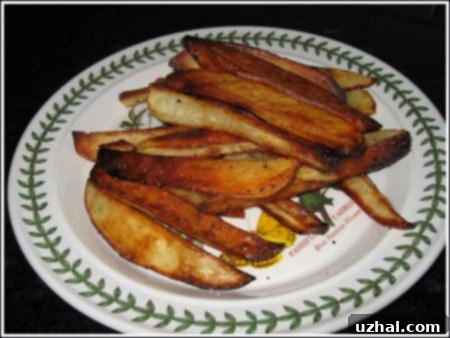
Best Crispy Oven Fries: The Ultimate Guide to Perfectly Baked Potatoes
Craving perfectly golden, irresistibly crispy fries without the fuss and grease of deep-frying? Look no further than the humble oven. While air fryers offer a quick solution, there’s a timeless method that consistently delivers superior texture and flavor: the “Best Oven Fries” recipe, originally perfected by Julia Davison for Cooks Illustrated in their Jan-Feb 2004 issue. This iconic recipe isn’t just about throwing potatoes into an oven; it’s a meticulously crafted approach backed by scientific principles, ensuring every bite is a revelation. Forget soggy, pale imitations – this guide will walk you through creating oven fries that rival your favorite restaurant’s deep-fried versions, all with a simple, straightforward process.

Why Choose Oven Fries? The Benefits of Baking
Deep-fried French fries are undeniably delicious, but they come with a significant amount of oil, calories, and cleanup. Oven fries, on the other hand, offer a healthier, more convenient alternative without compromising on that coveted crispy exterior and fluffy interior. This specific Cooks Illustrated method takes it a step further, addressing common pitfalls like uneven cooking and lack of crispness, transforming humble potatoes into a side dish (or main!) that will impress. It’s an ideal choice for a family meal, a quick snack, or a healthier option for your fry cravings.
The Science Behind the Perfect Oven Fry
What makes this recipe stand out? It’s a combination of clever techniques designed to optimize potato texture and browning:
- Soaking in Hot Water: This crucial step helps remove excess surface starch, which can lead to a gummy texture. Hot water also kick-starts the cooking process slightly, ensuring a more even cook from the inside out and promoting better browning.
- Thorough Drying: Moisture is the enemy of crispiness. By patting the potatoes completely dry, you ensure the oil can adhere properly and create that desirable crunchy crust, rather than steaming the potatoes.
- Covered Initial Bake: This phase creates a steamy environment, effectively par-cooking the potatoes through without burning the exterior. This ensures the insides are tender before the crisping process begins.
- Salted Oil: Not only does this season the fries from the start, but it also creates a non-stick barrier, preventing the potatoes from adhering to the baking sheet and allowing for easy flipping and even browning.
- High Heat: A blazing hot oven (475°F / 245°C) is essential for achieving that golden-brown, crispy exterior quickly once the foil is removed.
Ingredients for Your Best Oven Fries
Simplicity is key, but quality ingredients make all the difference.
- 3 (8 oz) Russet Potatoes, Peeled: Russet potatoes are the star for fries due to their high starch content and low moisture. This combination results in a fluffy interior and an extra-crispy exterior once cooked. While other potatoes can be used, Russets yield the most authentic “fry” texture. Peeling is optional for a more rustic look, but it often leads to a cleaner finish.
- 5 tablespoons Vegetable Oil or Peanut Oil: A high smoke point oil is crucial here. Vegetable oil, canola oil, or peanut oil are excellent choices as they can withstand the high oven temperature without burning or imparting off-flavors. Olive oil has a lower smoke point and isn’t recommended for this high-heat method.
- Salt and Ground Black Pepper: Essential seasonings. While the recipe specifies amounts for the oil, having extra on hand for post-bake seasoning is always a good idea. Consider using fine sea salt for a more even distribution.
Equipment You’ll Need
Gathering your tools before you start ensures a smooth cooking process:
- Large Mixing Bowl: For soaking and tossing potatoes.
- 12×18 inch Heavy Duty Rimmed Baking Sheet: A large, sturdy baking sheet with a rim is vital. The heavy duty nature helps distribute heat evenly, and the rim prevents oil or potatoes from sliding off. Avoid using dark, thin baking sheets as they can cause uneven browning or burning.
- Aluminum Foil: For the initial covered baking phase. Ensure it’s large enough to tightly seal your baking sheet.
- Paper Towels: Essential for thoroughly drying the potato wedges. Have a generous stack ready.
- Spatula: A sturdy metal spatula is best for scraping and flipping the potatoes without tearing them apart.
- Sharp Knife: For safely and uniformly cutting the potatoes.
- Vegetable Peeler: If you choose to peel your potatoes.
Step-by-Step Instructions: Mastering the Perfect Oven Fries
Follow these detailed steps to achieve oven fry perfection:
1. Prepare Your Oven and Baking Sheet
Adjust oven rack to the lowest position. Preheat oven to 475 degrees F (245 degrees C). Positioning the rack on the lowest setting ensures that the bottom of your baking sheet receives direct, intense heat, which is critical for crisping the fries from underneath. A thoroughly preheated oven is non-negotiable for success; allow it at least 20-30 minutes to reach and stabilize at this high temperature.
2. Prepare the Potatoes
Cut each potato into about 10-12 equal size wedges. Soak potato wedges in a large bowl of hot tap water for 10 minutes. Uniformity is key here. Aim for wedges of similar size to ensure they cook at the same rate. Too thick, and they’ll be raw inside; too thin, and they’ll burn. The hot tap water soak is not just for cleaning; it actively draws out surface starches, leading to a crispier texture and preventing the fries from sticking together. It also begins the cooking process slightly, contributing to that desirable fluffy interior.
3. Prepare the Baking Sheet with Seasoned Oil
Pour 4 tablespoons of the oil into a 12×18 inch heavy duty rimmed baking sheet. Sprinkle ¾ teaspoon salt and ¼ teaspoon pepper over the oil; swirl it around. This step is ingenious! By seasoning the oil directly on the hot baking sheet, you create a flavorful, non-stick base. The salt helps prevent the potatoes from adhering to the pan, while the pre-heated oil ensures immediate crisping contact when the potatoes are added. Make sure the oil is evenly distributed across the entire surface.
4. Dry the Potatoes Thoroughly
Drain the potato wedges and pat them dry on a layer of paper towels. Remove as much moisture as possible. This is perhaps the most critical step for achieving true crispiness. Any residual moisture will steam the potatoes instead of frying them in the oven, resulting in a soggy texture. Don’t rush this; take your time to blot every wedge dry. You might need several layers of paper towels.
5. Toss and Arrange Potatoes
Wipe out the bowl you used for soaking and return potato slices to bowl. Toss potatoes with remaining 1 tablespoon of oil. Lay potatoes in pan with salted oil. A fresh, clean bowl ensures no extra moisture is reintroduced. Tossing the thoroughly dried potatoes with the last tablespoon of oil provides an even, light coating, further enhancing browning and crispness. When arranging them on the baking sheet, ensure they are in a single layer and not overcrowded. Air circulation is vital for crisping, so give each wedge a little breathing room.
6. Initial Covered Bake
Cover pan tightly with aluminum foil and bake for 5 minutes. This short, covered bake uses the moisture from the potatoes themselves to create steam. This gentle steaming effectively cooks the potatoes through from the inside, ensuring they become tender without developing a crust too quickly. The tight seal is important to trap the steam.
7. Uncovered Bake and Flipping
Remove foil and continue to bake until golden – 15-20 minutes (check at 15). Rotate pan halfway through. Using a spatula, scrape potato wedges up off pan and flip them over. Bake another 5 to 15 minutes or until potatoes are golden brown all over. Once the foil is removed, the real crisping begins. The high heat of the oven and the pre-heated oil will start to brown and crisp the exteriors. Rotating the pan ensures even heat exposure, as ovens often have hot spots. Flipping each wedge is crucial for achieving that beautiful, all-around golden-brown crispness. Don’t be shy about scraping them; the salted oil helps, but a good spatula ensures they release cleanly. Monitor closely during this final stage, as cooking times can vary based on potato thickness and oven calibration.
8. Drain and Season
Lay fries on a big stack of paper towels to drain. Add extra salt if desired. Transferring the hot fries directly to paper towels immediately after baking helps absorb any excess oil, preventing them from becoming greasy. A final sprinkle of salt, while they’re still hot, ensures the seasoning adheres perfectly and brings out their full flavor. Freshly ground pepper or other spices can also be added at this stage.
This recipe makes about 3 servings (or 4 small servings), perfect for a side dish or a satisfying snack.
Tips for Achieving the Best Oven Fries Every Time
Even with a stellar recipe, a few expert tips can elevate your oven fry game:
- Don’t Skimp on Drying: We cannot stress this enough. The dryer the potatoes, the crispier the fries. If you have time, you can even let them air dry on a rack for 30 minutes after patting dry.
- Avoid Overcrowding: Give your fries space! If you’re making a larger batch, use two baking sheets. Overcrowding lowers the pan temperature and leads to steaming instead of crisping.
- Use a Metal Spatula: A sturdy metal spatula is your best friend for scraping the fries off the pan and flipping them without breaking.
- Season Generously: Salt not only enhances flavor but also helps draw out moisture. Don’t be afraid to add a little extra after they come out of the oven.
- High-Quality Baking Sheet: A heavy-gauge, light-colored baking sheet will conduct heat more evenly than a thin, dark one, reducing the risk of burning.
- Don’t Peek Too Much: Opening the oven door frequently releases heat, extending cooking time and potentially impacting crispness.
Delicious Variations and Serving Suggestions
Once you’ve mastered the basic recipe, feel free to experiment!
- Garlic Parmesan Fries: Toss the finished fries with a tablespoon of minced fresh garlic and a quarter cup of grated Parmesan cheese.
- Spicy Chili Fries: Add a pinch of cayenne pepper or chili powder to the oil mixture before baking.
- Herb Fries: Toss with dried rosemary, thyme, or oregano after baking for an aromatic twist.
- Sweet Potato Fries: While the method is similar, sweet potatoes have different sugar content, so keep a closer eye on them to prevent burning. They may require slightly less cooking time.
- Dipping Sauces: Serve your crispy oven fries with classic ketchup, a tangy aioli, sriracha mayo, barbecue sauce, or even a creamy homemade ranch dressing.
- Pairing: Oven fries are the perfect accompaniment to burgers, grilled chicken, steak, fish and chips, or as a standalone snack with your favorite dip.
Conclusion: Your Journey to Perfect Homemade Oven Fries
Creating the best crispy oven fries at home is a rewarding culinary endeavor that proves you don’t need a deep fryer for incredible results. By following this precise, scientifically-backed method from Cooks Illustrated, you’ll consistently achieve fries that are beautifully golden, wonderfully crispy on the outside, and delightfully fluffy on the inside. This recipe transforms a simple potato into an unforgettable side dish, offering a healthier, less messy, and equally delicious alternative to traditional deep-fried versions. So, preheat your oven, grab those Russets, and prepare to enjoy the ultimate homemade oven fries!
