The Ultimate Creamy Vanilla Bean Banana Pudding Recipe: A Southern Classic Made Special
There’s a special kind of magic that happens when a classic dessert is elevated with a simple yet profound ingredient like vanilla bean. For me, that magic is found in this incredible Vanilla Bean Banana Pudding. While only one in three of us in my household typically gravitates towards bananas, this particular recipe changes everything. When I know company is coming over, this luxurious, creamy banana pudding is the first dish I plan for the menu. It’s not just “good”; it’s extraordinary, turning even banana skeptics into devotees. While you can certainly make a standard vanilla-flavored banana pudding, incorporating real vanilla bean or a high-quality vanilla paste truly transforms this dessert into something unforgettable, adding a depth of flavor and beautiful visual specks that hint at its homemade goodness.

Banana pudding holds a cherished place in Southern culinary traditions. It’s more than just a dessert; it’s a symbol of comfort, hospitality, and a taste of home. From family gatherings to church potlucks, a classic banana pudding is always a welcomed sight. This particular recipe takes that beloved tradition and infuses it with an elegant twist, ensuring every spoonful is an experience of rich, creamy vanilla bliss paired with the familiar sweetness of ripe bananas and tender Nilla wafers. It’s a dessert that feels both nostalgic and gourmet, making it perfect for any occasion, from a casual weeknight treat to an impressive holiday spread.
What sets this vanilla bean banana pudding apart is the thoughtful use of real vanilla. Unlike imitation vanilla or even some extracts, a vanilla bean offers a complex, aromatic profile with subtle floral and woody notes that simply can’t be replicated. Those tiny, dark specks you see throughout the pudding aren’t just for show; they signify an authentic, profound vanilla flavor that deepens the overall taste of the custard, making it incredibly rich and satisfying. This isn’t just banana pudding; it’s a testament to how simple, quality ingredients can elevate a familiar favorite to new heights.
Vanilla Bean Banana Pudding: The Whipped Cream Difference
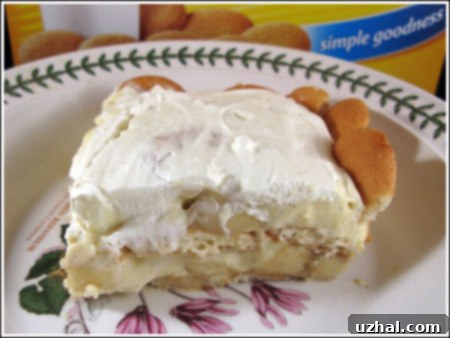
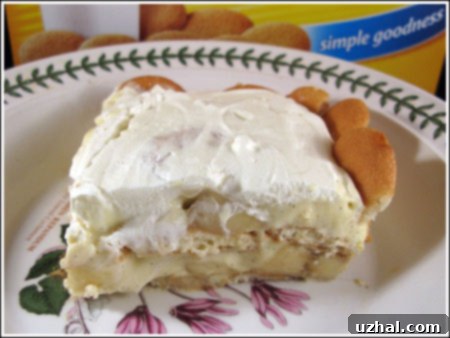
This exquisite vanilla bean banana pudding recipe comes from the esteemed Southern food writer, James Villas. While many classic banana pudding recipes, particularly the one often found on the Nilla wafers box, feature a traditional meringue topping, Villas’s version opts for a generous dollop of freshly whipped cream. This substitution is a game-changer, lending a lighter, airier, and even creamier texture to the dessert. Meringue can be delicate to make and sometimes prone to weeping, but whipped cream offers a simpler, more robust, and equally delicious finish that many find preferable.
The choice between meringue and whipped cream often comes down to personal preference and desired texture. A meringue topping provides a sweet, slightly crisp layer with a toasted marshmallow-like appeal, particularly if browned. However, whipped cream offers a smooth, cool contrast to the warm, comforting flavors of the pudding and bananas. It also tends to be quicker and easier to prepare, making this recipe a fantastic option for those who want a show-stopping dessert without the fuss of baking a meringue. Plus, the subtle sweetness of homemade whipped cream, often lightly sweetened with powdered sugar, perfectly complements the rich vanilla custard and sweet bananas.
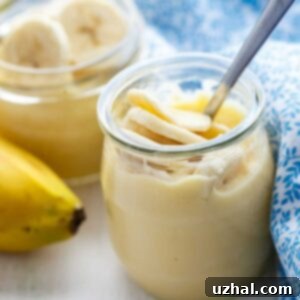
Beyond the recipe itself, the presentation of this vanilla bean banana pudding is incredibly versatile. I typically assemble it in a large casserole dish, allowing for easy scooping and a beautiful layered reveal. However, for individual portions or a more elegant presentation, I often build this delightful dessert in single-serving jars or even repurposed glass yogurt containers. These individual servings are not only charming but also perfect for grab-and-go desserts, picnics, or when you want to offer guests their own personal indulgence. The layers of golden Nilla wafers, ripe banana slices, creamy vanilla bean pudding, and fluffy whipped cream look absolutely stunning in clear glass, making it an impressive centerpiece for any dessert table.
Mastering the Steps for Making the Best Vanilla Bean Banana Pudding
To ensure you can recreate this incredible dessert with ease, I’ve compiled the essential steps into a straightforward, printable recipe card below. But first, here’s a detailed breakdown of each stage, offering tips and insights to help you achieve the perfect creamy vanilla bean banana pudding every time. Understanding the “why” behind each step can make all the difference in your culinary success, transforming a recipe into a truly intuitive cooking experience.
- Infusing the Milk with Vanilla: The first crucial step involves heating the milk and infusing it with the precious vanilla bean scrapings. I find the microwave to be a convenient tool for this, allowing for quick and controlled heating. Alternatively, you can gently heat the milk in a saucepan over the stove. The goal here is to scald the milk – bring it just to the point of steaming, but not a rolling boil – which helps to extract maximum flavor from the vanilla bean. If you’re using vanilla bean paste or extract, you can generally skip this initial infusion step as their flavors are already developed and will be added later. This step is purely about deepening that authentic vanilla essence right from the base.
- Preparing the Eggs: Have your beaten egg yolks ready in a bowl before you begin cooking the custard. This foresight is key for smooth execution. When working with hot liquids and eggs, tempering the yolks is essential to prevent them from scrambling. Having them prepared and easily accessible allows for quick and efficient incorporation into the hot milk mixture, ensuring a velvety smooth custard.
- Creating the Custard Base: In a sturdy saucepan, combine your flour, granulated sugar, and salt. Whisk these dry ingredients together thoroughly to eliminate any lumps. Then, gradually whisk in the warm, vanilla-infused milk. Place the saucepan over medium heat, continuing to whisk constantly. This continuous whisking is vital; it prevents the mixture from sticking to the bottom, ensures even cooking, and helps the starch in the flour to thicken smoothly, resulting in a perfectly smooth and rich custard. Whisk until the mixture begins to visibly thicken and coats the back of a spoon.
- Ensuring Silky Smoothness: Once the custard has thickened, continue whisking for another minute or so. This additional whisking helps to cook out any residual raw flour taste and further refines the texture, making the pudding incredibly smooth and luxurious. You’ll notice the custard becoming even silkier, a sign that it’s reaching its optimal consistency. This usually isn’t a problem if you whisk diligently from the start.
- Cooling and Final Vanilla Touches: Remove the thickened pudding from the heat and let it cool slightly. This brief cooling period prevents the added vanilla extract (if using) from evaporating its delicate aromatic compounds too quickly. If you opted out of the initial vanilla bean infusion or used paste, this is the moment to stir in your vanilla extract or paste for a final boost of flavor. Transfer the pudding to a clean bowl and allow it to cool completely to room temperature. This is crucial before folding in the whipped cream, as hot pudding will melt the delicate cream.
- Lightening with Whipped Cream: Whip 1 cup of cold heavy whipping cream until it forms stiff peaks. You’ll likely end up with a bit more than 2 cups of whipped cream. While you can use a store-bought whipped topping like Cool Whip, be aware that it might make the pudding slightly sweeter, which isn’t necessarily a bad thing, just a difference in taste and texture. Once your homemade pudding is cooled, gently fold half of the freshly whipped cream (or Cool Whip) into the pudding mixture. This step lightens the custard, making it even fluffier and more delightful, creating that perfect airy-yet-creamy texture that defines a great banana pudding.
- Layering for Perfection: Now for the assembly! Line the bottom of your chosen casserole dish with a single layer of Nilla wafers. If you’re using individual jars, place one or two wafers at the bottom of each container. Next, slice your ripe bananas and arrange a generous layer over the Nilla wafers. The bananas should be firm but sweet, avoiding overly soft or bruised ones. Spoon half of your lightened pudding mixture evenly over the bananas. Repeat this layering process: Nilla wafers, then banana slices, then the remaining pudding mixture. Ensure an even distribution for a balanced bite every time.
- The Sweet Whipped Topping: Take the remaining whipped cream and sweeten it to your taste with powdered sugar. Start with 2 tablespoons and add more if you prefer a sweeter topping. Once sweetened, spread or pipe this fluffy cream over the top layer of pudding. For an extra touch of visual appeal and texture, you can break a few extra Nilla wafers in half and arrange them around the perimeter, creating a charming border.
- Chill for Flavor Development: This step is non-negotiable for the best results. Chill your banana pudding in the refrigerator for at least a few hours, or ideally, until it’s thoroughly set and perfectly cold. This chilling time allows all the flavors to meld beautifully, the Nilla wafers to soften to an ideal cake-like consistency, and the pudding to firm up to a delectable, scoopable texture. Patience is rewarded with an infinitely more delicious dessert.
Recipe

Vanilla Bean Banana Pudding
Anna
Pin Recipe
Ingredients
- 1 whole vanilla bean or omit and use vanilla bean paste
- 2 cups whole milk
- ⅓ cup all purpose flour
- ½ cup granulated sugar
- ¼ teaspoon salt
- 3 large egg yolks beaten
- 1 teaspoon vanilla extract
- 1 cup heavy whipping cream or 1 tub Cool Whip
- 2-4 tablespoons powdered sugar (optional, for topping)
- 12 oz package Nilla Wafers
- 5 large ripe bananas sliced
Instructions
-
Carefully slice the vanilla bean lengthwise and scrape out the fragrant seeds. Place these vanilla bean scrapings into a large, heat-safe glass measuring cup (2-cup capacity works well). Add the whole milk to the cup. Microwave for 2 to 3 minutes until the milk is scalded (steaming hot, but not boiling). Keep a close eye on it to prevent boiling over. If you are using vanilla bean paste, you can skip this scalding step and add the paste directly with the vanilla extract later.
-
Crack the eggs and separate the yolks. Place the beaten egg yolks in a separate small bowl and set them next to your cooking area, ready for tempering.
-
In a heavy-bottomed saucepan, whisk together the all-purpose flour, granulated sugar, and salt until well combined and lump-free. Gradually whisk the warm, vanilla-infused milk into the dry ingredients in the saucepan. Place the saucepan over medium heat, continuing to whisk constantly. Continue whisking as the mixture heats up and thickens. Once it’s very hot and slightly thickened, whisk about ¼ cup of this hot milk mixture into your beaten egg yolks. This step is crucial for tempering the eggs. Then, slowly pour the tempered egg yolk mixture back into the saucepan, whisking continuously. Continue whisking over medium heat until the pudding mixture becomes very thick and coats the back of a spoon, which typically takes only one to two minutes.
-
Remove the saucepan from the heat and allow the pudding to cool slightly. Stir in the vanilla extract. Pour the pudding into a clean bowl and let it cool completely to room temperature. This is an important step as folding whipped cream into hot pudding will cause it to melt.
-
In a separate bowl, beat the cold heavy whipping cream until stiff peaks form. If you’re using a tub of Cool Whip, simply open it. Gently fold half of the whipped cream (or Cool Whip) into the cooled vanilla pudding mixture until just combined, lightening its texture.
-
Begin assembling your banana pudding. Line the bottom of your serving dish (a casserole dish works well) with a single layer of Nilla wafers. If you’re making individual servings in jars, place one or two wafers at the bottom of each jar. Slice your ripe bananas into even rounds and arrange them over the Nilla wafers, covering the entire layer. Spoon half of the lightened vanilla pudding mixture evenly over the banana slices. Repeat these layers: add another layer of Nilla wafers, then more sliced bananas, and finally, top with the remaining pudding mixture.
-
Sweeten the remaining whipped cream with powdered sugar to your desired taste (start with 2 tablespoons and add more if needed). Gently spoon or pipe this sweetened whipped cream over the top layer of the pudding, spreading it evenly to cover. For a classic look, break a few extra Nilla wafers in half and arrange them attractively around the perimeter of the dish.
-
Cover the pudding and chill in the refrigerator for at least a few hours, or preferably overnight, until thoroughly set and cold. This allows the flavors to meld beautifully and the wafers to soften to a delightful cake-like texture. Serve chilled and enjoy!
Tips for the Perfect Pudding Every Time
- Choose the Right Bananas: For the best flavor and texture, select bananas that are ripe but still firm. They should have a few brown spots but not be overly mushy. Overripe bananas can become too sweet and watery in the pudding.
- Prevent Browning: Bananas, unfortunately, brown quickly when exposed to air. To minimize this, you can lightly toss your sliced bananas with a tiny amount of lemon juice or a fruit protector, though often the rapid layering into the pudding can be enough to protect them for a day or two.
- Make Ahead: This banana pudding is an excellent make-ahead dessert! In fact, it tastes even better the next day as the flavors have more time to meld and the wafers soften beautifully. Prepare it the evening before your gathering for a stress-free dessert.
- Storage: Store any leftover banana pudding tightly covered in the refrigerator for up to 3-4 days. The bananas may continue to soften and brown slightly over time, but the flavor will remain delightful.
Variations to Explore
While this vanilla bean banana pudding recipe is perfect as is, you can always customize it to suit your preferences:
- Cookie Alternatives: If Nilla wafers aren’t your favorite, consider using shortbread cookies, graham crackers, or even gingersnaps for a spiced twist.
- Add-ins: For an extra layer of flavor, consider sprinkling a pinch of cinnamon or nutmeg into the pudding custard while it’s cooking. A drizzle of caramel or a scattering of toasted pecans on top could also be delicious additions.
- Individual Desserts: As mentioned, serving this pudding in individual jars or glasses makes for an elegant presentation and easy portion control.
There’s something incredibly satisfying about creating a homemade dessert that everyone raves about, and this Vanilla Bean Banana Pudding consistently delivers that experience. The depth of flavor from the real vanilla bean, combined with the creamy texture and sweet layers, truly makes it a standout. Whether you’re a long-time banana pudding enthusiast or looking to introduce someone to its charm, this recipe is sure to become a cherished favorite in your kitchen. Don’t be shy – give it a try for your next family meal or special occasion, and prepare for endless compliments!
