Maida Heatter’s September 7th Cake: A Decadent Labor of Love Worth Every Effort
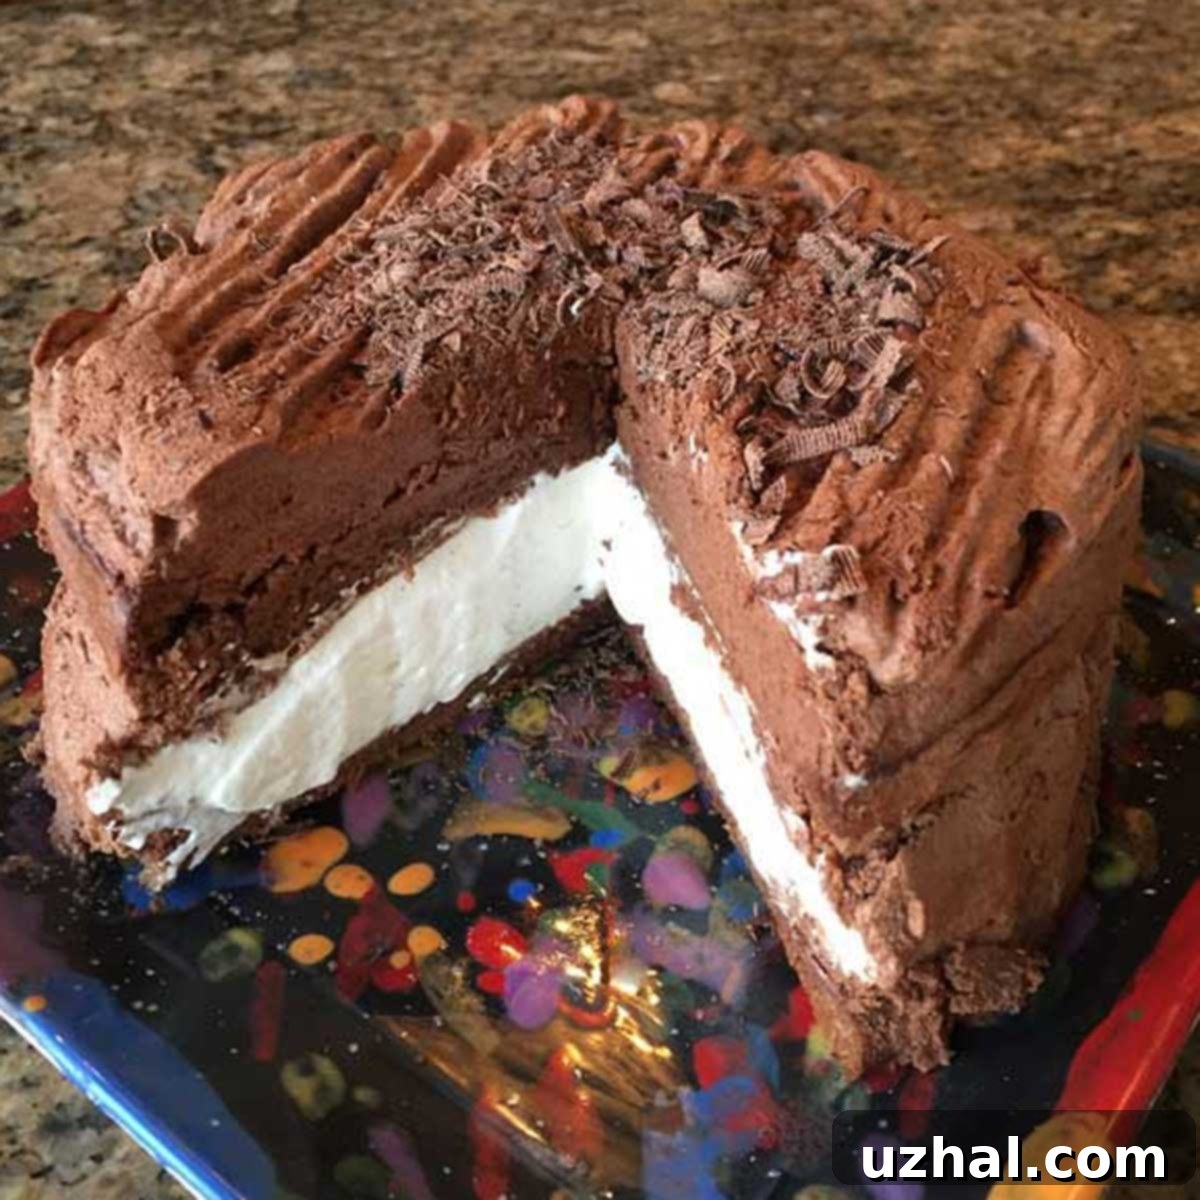
Maida Heatter’s September 7th Cake holds a very special, perhaps even contradictory, place in my heart. It is, without a doubt, my absolute favorite cake – a masterpiece of light texture, luxurious whipped cream, and rich chocolate. Yet, it’s also a formidable baking project, one that tests patience, technique, and your kitchen’s supply of clean bowls. This isn’t a quick weeknight dessert; it’s an event, a culinary marathon that, despite its demanding nature, rewards you with an unparalleled taste experience. Every time I embark on making this cake, I’m reminded of its glorious outcome and the journey of meticulous whipping and careful construction it entails. Its reputation as a truly special occasion cake is well-deserved, promising an indulgence that lingers in memory long after the last slice is gone.
The Whipping Marathon: A Symphony of Mixers and Meticulousness
If you’re considering baking Maida Heatter’s September 7th Cake, prepare for a workout – both for your arms (if you’re brave enough to go manual) and your stand mixer. This recipe is an intensive masterclass in whipping, demanding careful attention to aeration and texture at multiple stages. We start by whipping egg yolks until they are pale, thick, and form a beautiful ribbon, signifying proper emulsification and volume. Then, we move to egg whites, transforming them into soft, ethereal peaks that provide the delicate lift for the cake layers. But the whipping doesn’t stop there. The cake’s dreamy, cloud-like filling and its luscious, light-as-air chocolate frosting both rely on perfectly whipped heavy cream.
This isn’t just a matter of throwing everything into a bowl; each stage requires precision, a keen eye for subtle textural changes, and often, fresh, clean equipment. With multiple mixers whirring (or a single one working overtime, requiring bowl changes and meticulous cleaning between stages), my kitchen often turns into a noisy, bustling bakery. It’s truly a project that demands your full attention, a perfect distraction when you need to focus on something else entirely – perhaps, as I sometimes joke, to temporarily drown out the ambient noise of a busy day!
Beyond the mixers, this cake is an enthusiastic accumulator of dirty dishes. Every component, from the delicate cake batter to the rich chocolate ganache and various whipped cream preparations, necessitates its own bowl, spatula, and whisk. If you happen to enjoy the meditative rhythm of washing dishes, then Maida Heatter’s September 7th Cake might just be your new favorite therapeutic baking session. You’ll find yourself washing, rinsing, and drying as each stage progresses, ensuring you have clean equipment ready for the next crucial step. It’s a small price to pay, perhaps, for such culinary bliss, but definitely a factor to consider before you begin. Embrace the process, and the mountain of dishes will seem a minor hurdle on the path to this extraordinary dessert.
The Essential Chill: A Test of Refrigerator Real Estate
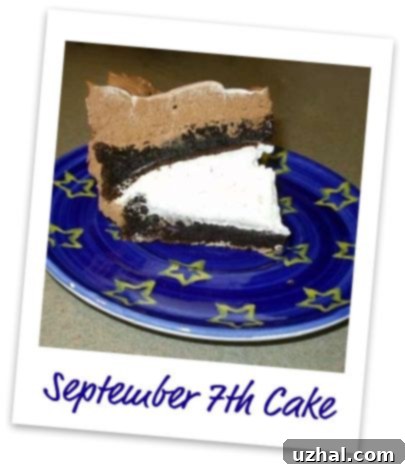
And then there’s the chilling. Given the generous amounts of fresh whipped cream integrated into both the vanilla filling and the decadent chocolate frosting, this cake absolutely *must* be kept thoroughly chilled. This isn’t merely a suggestion; it’s a critical instruction to maintain its structural integrity, prevent premature collapse, and ensure its exquisite, melt-in-your-mouth texture. This means you’ll need ample refrigerator space – perhaps even a spare fridge in the garage if your main one is packed with groceries! The cake needs a good 6 hours, or ideally overnight, to set properly, allowing the flavors to meld and the whipped components to firm up beautifully. This extended chilling time is not a passive waiting period; it’s an active stage where the cake matures, its complex flavors deepen, and its delicate structure stabilizes.
Serving it cold is non-negotiable for the optimal experience. When perfectly chilled, each slice of Maida Heatter’s September 7th Cake is crisp on the outside (from the chocolate) yet perfectly firm, cool, and incredibly creamy on the inside. While this extended chilling time adds to the overall project duration, it’s essential for savoring the cake exactly as Maida Heatter intended. Plan your baking schedule accordingly to allow for this crucial resting period, ensuring your patience is rewarded with every sublime forkful.
The Unforgettable Taste: Why This Indulgence is Worth Every Effort
Despite the demands of its preparation, my affection for this cake remains boundless. The first time I encountered it was at a restaurant, and I was instantly captivated. It was unlike any cake I had tasted before – incredibly light, airy, and delicately crumbly, yet profoundly creamy and moist. The chocolate frosting, despite its ethereal texture, was remarkably rich and deeply chocolaty, a perfect counterpoint to the delicate cake layers and the vanilla-infused, subtly sweetened whipped cream filling. That initial bite was an epiphany, a moment when I knew I had to recreate that magic in my own kitchen, no matter the challenge. It’s a cake that transcends the ordinary, offering a sophisticated balance of flavors and textures that truly makes it a showstopper for any special occasion or a delightful personal treat.
Each component plays a vital role in this symphony of taste: the almost meringue-like lightness of the cocoa-infused cake, the delicate freshness of the vanilla whipped cream, and the intense, yet smooth, richness of the chocolate frosting. When these elements come together, they create a harmonious dessert that feels both celebratory and comforting. The slight bitterness of the cocoa perfectly balances the sweetness, and the varying textures keep every bite interesting. It’s an experience, not just a dessert, and one that consistently reminds me why I return to this challenging but ultimately rewarding recipe.
Maida Heatter’s Enduring Legacy and the Cake’s Sweet Origin
My quest for the recipe naturally led me to Maida Heatter, often hailed as “The Queen of Desserts.” A legendary American pastry chef and cookbook author, Heatter was renowned for her meticulously tested, impeccably detailed, and flawlessly reliable recipes. Her contributions to baking are immense, with her cookbooks becoming staples in countless kitchens. This particular cake, the September 7th Cake, holds a special significance as she created it for her own birthday, which falls on September 7th. It’s a testament to her genius that she could craft such a complex yet harmonious dessert for her personal celebration, a true labor of love from the master baker herself. Since discovering its origin and delving into Maida Heatter’s philosophy, I’ve made the cake many times – or, more accurately, “relatively many” times.
Its richness and the slight expense of its high-quality ingredients mean it’s typically reserved for very special occasions, spreading my baking endeavors out over the years. This infrequent practice, unfortunately, means I haven’t quite mastered every nuance, particularly the delicate art of the chocolate frosting. Each time, it feels like I’m learning anew, striving for that elusive perfection that Maida Heatter herself achieved so effortlessly. But even with slight imperfections, the cake remains extraordinary, a true testament to the brilliance of its creator.
Mastering the Maida Heatter September 7th Cake Frosting: Avoiding the Curdled Look
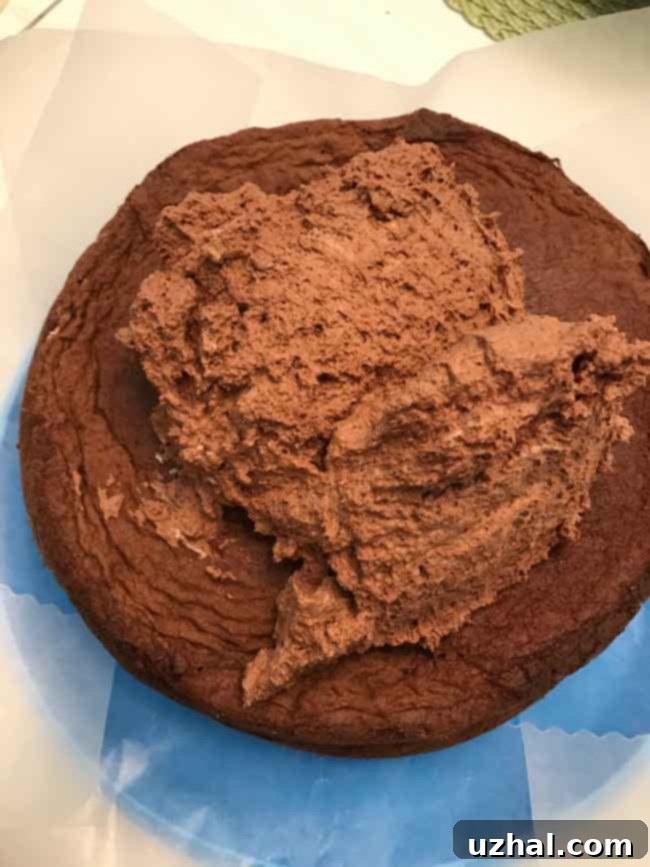
The chocolate frosting is, without a doubt, the trickiest part of this magnificent cake, and often the make-or-break element for its aesthetic appeal. It is incredibly easy to over-whip the cream, transforming what should be a smooth, velvety chocolate cloud into a grainy, separated, and less appealing texture, commonly referred to as “curdled.” The key, as Maida Heatter herself advises with her characteristic precision, is to whip the cream only until it “holds a soft shape.” This is a crucial instruction that many bakers, myself included, often misinterpret or push too far in the pursuit of greater volume.
What does “holds a soft shape” truly mean? You want a cream that is light and airy, but still fluid enough to gently fold into the melted chocolate mixture without separating. The peaks formed when you lift the whisk should be soft and gently curl over, rather than standing rigidly upright. If the peaks are stiff and sharp, you’ve gone too far, and the cream’s emulsion will break when combined with the chocolate. The image below, sadly, serves as a visual reminder of one such instance where I over-whipped the cream. It’s a common mistake, but an important one to learn from.
To avoid this common pitfall, pay extremely close attention to the texture of the cream as you whip it. Stop your mixer frequently and lift the whisk: if the cream forms gentle peaks that softly curl over, it’s perfect. If the peaks are rigid and stand straight up, you’ve gone too far. Furthermore, ensuring your melted chocolate mixture is completely cooled to room temperature before combining it with the whipped cream is equally vital. Introducing warm chocolate to cold whipped cream is a recipe for disaster. Once both components are at the correct consistency and temperature, the process of folding them together also requires a gentle hand. Gradually incorporate half of the softly whipped cream into the chocolate, then gently fold that mixture back into the remaining cream. This careful approach ensures a smooth, seamless, and utterly delicious chocolate frosting that beautifully complements the delicate cake.
Essential Baking Tips and Tricks for September 7th Cake Success
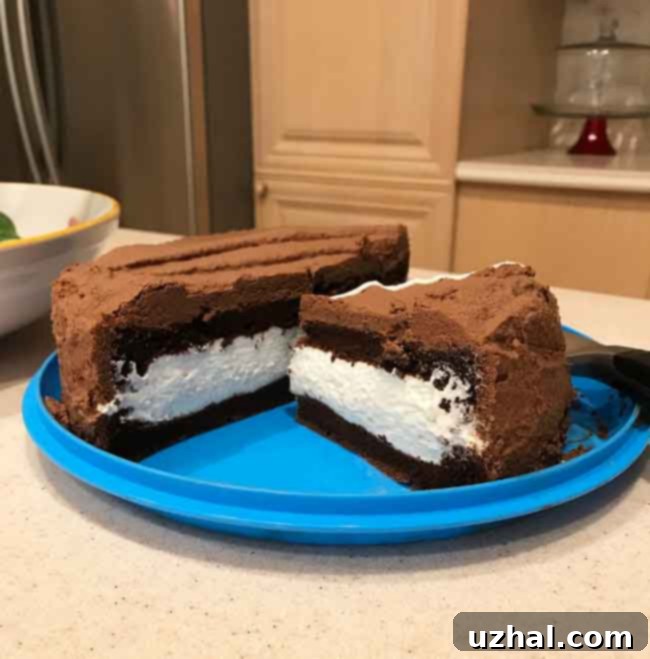
I hope you’re enjoying the candid, unvarnished photography featured here. These images were often taken in the thick of a baking frenzy, with imperfect lighting and a focus on capturing the process and demonstrating key elements, rather than achieving magazine-perfect shots. But they serve an important purpose: to illustrate crucial stages and possibilities with this recipe. For instance, the image below showcases a successful 6-inch adaptation of this cake, made by simply halving all the ingredients. While the full-size 9-inch cake is magnificent for entertaining a crowd, making a smaller version is an excellent way to practice the intricate steps, especially the delicate cake layers and the challenging frosting, without committing to an enormous batch of ingredients. It’s a perfect option for a smaller gathering or when you just want a taste of this extraordinary dessert without the full commitment.
Another common concern for first-time bakers of this cake is the appearance of the layers fresh out of the oven. After baking beautifully, the cake layers are notorious for collapsing slightly and looking somewhat “pathetic” or uneven as they cool. Do not despair! This is entirely normal and expected for this specific type of delicate, airy cake, which relies heavily on whipped eggs for its structure rather than traditional leavening agents. Maida Heatter herself addresses this in her original recipe, reassuring bakers not to worry. These slight imperfections will be expertly hidden and smoothed over by the generous vanilla cream filling and the rich chocolate frosting, transforming into a perfectly elegant and visually stunning dessert once assembled and chilled.
If you’re eager to try your hand at this iconic recipe, you can find it meticulously detailed in Maida Heatter’s Book of Great Chocolate Desserts. This cookbook is a treasure trove for any serious baker, and her September 7th Cake is undoubtedly one of its crowning jewels, a testament to her unmatched skill and dedication. Alternatively, a quick and resourceful search online might reveal versions of the recipe posted verbatim, allowing you to access it readily. Whichever route you choose, preparing this cake is an experience that not only results in an extraordinary dessert but also connects you to a rich tradition of classic American baking, guided by one of its most celebrated figures.
Making Maida Heatter’s September 7th Cake Gluten-Free: An Inclusive Indulgence
For those with dietary restrictions or specific preferences, it’s wonderful to know that Maida Heatter’s September 7th Cake can be easily adapted to be a delightful gluten-free dessert. The unique nature of this cake, which primarily relies on meticulously whipped eggs for its structure and incredibly light texture, means it inherently uses a minimal amount of flour. Therefore, the only modification needed to make this recipe completely gluten-free is to use a high-quality, reliable gluten-free flour blend when dusting the prepared cake pans. This simple swap in the pan preparation ensures that the cake layers do not stick without introducing any gluten. Additionally, ensure all other ingredients, such as cocoa powder, vanilla extract, and any other flavorings, are also certified gluten-free to maintain the integrity of the adaptation.
This simple adjustment allows everyone to enjoy the exquisite taste and sophisticated texture of this truly special cake, making it an inclusive option for your next celebration, holiday, or any occasion where a show-stopping dessert is desired. You won’t compromise on flavor or texture; the gluten-free version maintains all the magic of Maida Heatter’s original creation, proving that dietary needs don’t have to limit culinary excellence.
- Birthday Cake Sugar Cookie Bars
- Six Inch White Cake aka Birthday Cake
- Crispy Oatmeal Bars
- Six Inch Birthday Cake for Lizzie
- Chocolate Pecan Pie Biscotti with Bourbon
The Full Recipe: Maida Heatter’s September 7th Cake
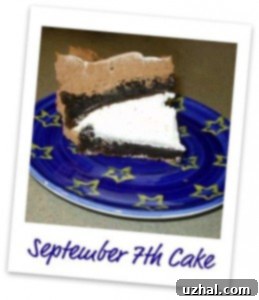
September 7th Cake
Anna
Pin Recipe
Ingredients
Cake:
- 6 extra-large eggs OR 7 large separated (192 grams of whites) You need yolks too, I just don’t have a weight for them yet.
- ¾ cup sugar (150 grams)
- ¼ cup unsweetened cocoa powder plus 1 tablespoon
- ¼ teaspoon salt
Filling:
- ¾ teaspoon gelatin
- 1 ½ tablespoons cold water
- 1 ½ cups heavy whipping cream
- ⅓ cup powdered sugar
- ¾ teaspoon vanilla
Chocolate Frosting
- 8 ounces semisweet chocolate. chopped (230 grams)
- 2 ounces unsalted butter (56 grams)
- 1 tablespoon instant coffee powder or use 1-2 teaspoons of espresso powder
- ¼ cup boiling water
- 2 cups heavy whipping cream
- ¼ cup powdered sugar
- 1 teaspoon vanilla extract
Instructions
-
Preheat your oven to 375°F (190°C). Prepare two 9×2 inch round cake pans by greasing them thoroughly, then lining the bottoms with rounds of parchment or wax paper. Grease the paper as well, and lightly dust the insides of the pans with flour. This meticulous preparation is crucial for easy release of the delicate cake layers.
-
Using the whisk attachment of a stand mixer, or a handheld mixer, beat the egg yolks on high speed for approximately 5 minutes until they become very light in color and thick. Gradually add half of the sugar and continue to beat for another 5 minutes. The mixture should be very thick and form a wide, distinct ribbon when the beaters are lifted. Gently fold in the cocoa powder until just blended, making sure to scrape down the sides of the bowl to ensure even incorporation.
-
In a separate, very clean mixing bowl (or using a clean bowl with your stand mixer’s whisk attachment), beat the egg whites and salt until they hold soft, pillowy peaks. Gradually add the remaining sugar in small additions, continuing to beat until the whites are glossy and hold medium-soft peaks. Carefully fold about half of the whipped egg whites into the chocolate-yolk mixture to lighten it. Then, gently fold this chocolate mixture into the remaining egg whites until just combined, being careful not to deflate the airy batter. Divide the batter evenly between the prepared pans; if you have a kitchen scale, aim for a little over 8 ounces of batter in each for perfectly balanced layers.
-
Bake the cake layers in the lower third of your preheated oven for about 30 minutes. The cakes are done when they spring back lightly when gently pressed with a fingertip and begin to pull away from the sides of the pan. Once baked, loosen the warm cakes from the pans with a thin knife, remove the paper lining, and then invert them again to allow the layers to cool right side up on a wire rack. Don’t be concerned if they buckle or sink slightly; this is characteristic of this delicate cake and will be masked by the filling and frosting.
-
To prepare for assembly, place four 10×3 inch pieces of wax paper or parchment around the edges of your cake plate or serving platter. Carefully place the first cooled cake layer upside down on the platter, ensuring the edges of the cake lightly touch the paper pieces, while the paper still extends beyond the cake for easy removal later.
Filling
-
In a small, heatproof cup, sprinkle the gelatin evenly over the cold water. Allow it to stand for 5 minutes to fully bloom and soften. Then, place the cup in a skillet filled with about an inch of hot (not boiling) water. This gentle heat will help the gelatin dissolve completely without clumping. Remove the cup from the hot water once dissolved and set it aside to cool slightly.
-
Reserve 3 tablespoons of the cold heavy cream. Pour the remaining cream into a clean mixing bowl. Add the powdered sugar and vanilla extract to the cream. Whip the cream only until it achieves a soft shape – it should be light and billowy, but not stiff. Quickly stir the reserved cold cream into the dissolved gelatin mixture, then immediately pour this gelatin-cream mixture into the softly whipped cream. Continue whipping just until the cream holds a firm, yet still smooth, shape. Spread this delightful cream filling evenly over the bottom cake layer. Carefully place the second cake layer on top. Refrigerate the cake while you prepare the chocolate frosting.
Chocolate Frosting
-
Combine the chopped semisweet chocolate, unsalted butter, and the instant coffee powder (which has been dissolved in boiling water) in a saucepan set over very low heat. Stir occasionally until the chocolate and butter are completely melted and the mixture is smooth. Alternatively, you can melt this mixture in a microwave-safe bowl at 50% power, stirring every 30 seconds, until smooth. Crucially, allow this chocolate mixture to cool completely to room temperature before proceeding. This step is vital to prevent curdling when combined with the whipped cream.
-
In a clean mixing bowl, beat the 2 cups of heavy whipping cream, ¼ cup of powdered sugar, and 1 teaspoon of vanilla extract together. Whip only until the mixture thickens slightly and holds a soft shape – this is the most critical step for the frosting’s texture. Over-whipping here will result in a stiff, curdled, and less appealing frosting. Gently fold half of this softly whipped cream into the cooled chocolate mixture until just combined. Then, carefully fold the chocolate-cream mixture back into the remaining whipped cream. This gradual folding ensures a light, airy, and uniform frosting. Use as much of the icing as needed to fill any hollows on the sides of the cake and then generously smooth the frosting all over the top and sides. Carefully pull away the parchment paper pieces from under the cake.
-
Refrigerate the completed cake for at least 6 hours, or ideally overnight, to allow it to set and for the flavors to fully develop. Serve this magnificent September 7th Cake cold. For clean, elegant slices without squashing the delicate layers, insert the point of a sharp knife into the center of the cake, then use a gentle up-and-down sawing motion as you cut each slice.
Notes
Remember that precision and patience are key throughout this recipe. Weighing ingredients, especially egg whites, can contribute significantly to consistent results. Take your time, enjoy the process, and you’ll be rewarded with a truly unforgettable dessert that will impress all who taste it.
