Dr. Michael’s Yeasted Cornbread: The Ultimate Fluffy Sandwich Loaf with a Hint of Cornmeal
There’s something uniquely satisfying about a versatile homemade bread, and Dr. Michael’s Yeasted Cornbread perfectly fits that description. This isn’t your typical crumbly, quick-rise cornbread; instead, it’s a wonderfully soft and fluffy sandwich bread, imbued with a subtle yet distinct cornmeal flavor. Its journey to becoming a staple in our kitchen is a story of rediscovery. I initially stumbled upon this fantastic recipe on Allrecipes.com years ago, baked it, and distinctly remember enjoying it. However, with countless bread recipes vying for attention, it regrettably faded into the background.
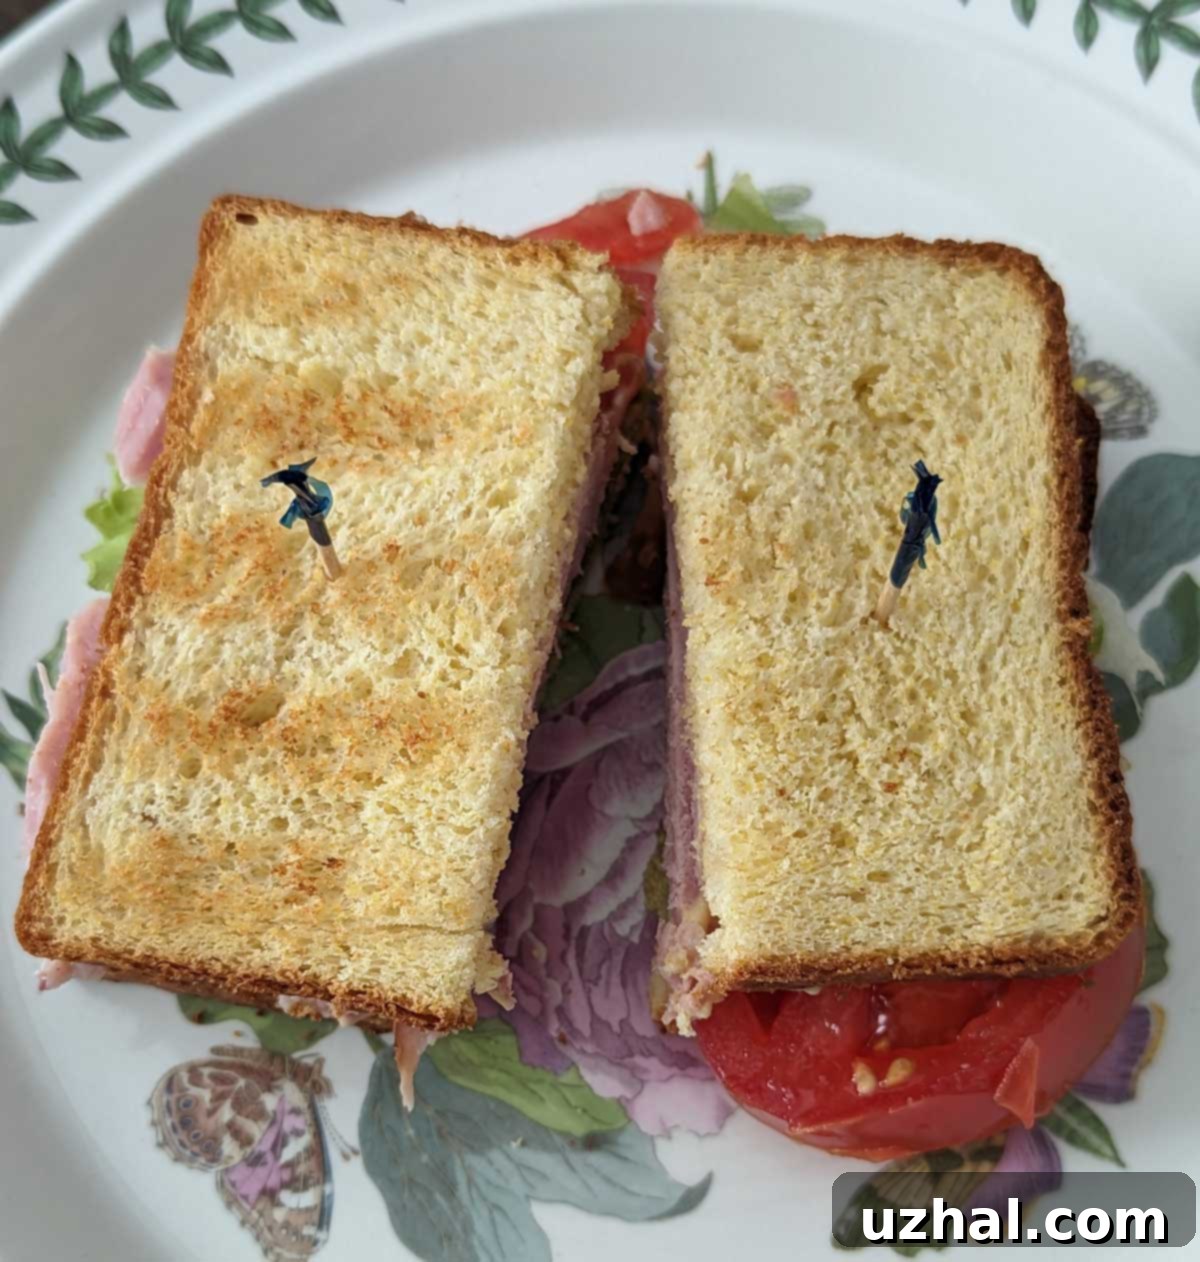
For a period, this delightful loaf was lost to the culinary shuffle. It was one of those recipes you try once, love, and then, amidst the excitement of new baking adventures, simply forget. Then, a few years later, a craving for something different for our ham sandwiches led me to revisit it. That second bake was a revelation! The light texture and delicate corn flavor proved to be an absolutely perfect pairing for hearty fillings. Since then, it’s been a regular on our baking rotation, made repeatedly, and most recently, perfected in a Pullman pan for those perfectly squared-off slices. This sustained affection confirms its status as a tried and true favorite, not just for Dr. Michael, but for our household too.
I recall an instance where I baked this yeasted cornbread in my trusty cast iron loaf pan. It was a fun way to connect it visually with the broader “cornbread in cast iron” theme, even though this particular bread is fundamentally different from traditional skillet cornbread. It’s important to clarify: Dr. Michael’s Yeasted Corn Bread should not be confused with the dense, often sweet, Southern-style quickbread that many associate with the term “cornbread.” While both share cornmeal as a key ingredient, their textures, leavening agents, and applications are worlds apart. This loaf is all about that soft, pillowy crumb perfect for sandwiches, a direct result of the yeast.
What Exactly Is Yeasted Cornbread?
Many people hear “cornbread” and immediately picture a dense, crumbly, and often savory or slightly sweet quickbread. Yeasted cornbread, however, is a fascinating departure from that. It’s a true bread, leavened with yeast, resulting in a texture that is light, airy, and fluffy, much like a classic white sandwich bread. The key difference lies in the addition of cornmeal, which imparts a subtle, earthy sweetness and a beautiful visual texture with its golden flecks. Unlike traditional cornbread which relies on baking powder or soda for its lift and typically has a coarser texture, this yeasted version develops its structure and soft crumb through gluten development and yeast fermentation.
The original recipe for Dr. Michael’s Yeasted Cornbread was actually developed for a bread machine, which highlights its focus on ease and a consistent, tender crumb. However, I’ve found that preparing it the conventional way, using a stand mixer with a dough hook, yields equally fantastic, if not superior, results. The hands-on approach allows for better control over the dough’s development. When adapting it for a stand mixer, I also discovered that I could achieve the desired consistency with approximately ½ cup less flour than the original recipe called for, demonstrating the flexibility of this recipe and the importance of feeling the dough as you work. This adjustment ensures a dough that is hydrated just right, leading to a softer, more extensible crumb.
Choosing Your Cornmeal and Other Essential Ingredient Notes
The choice of ingredients, especially the cornmeal, plays a significant role in the final texture and flavor of your yeasted cornbread. Since first publishing this recipe, I’ve experimented with various types of cornmeal, each contributing its unique characteristics. For instance, I’ve used Head Stone Ground Coarse Cornmeal, which offers a slightly more rustic texture and pronounced corn flavor due to its larger grind. This can be wonderful if you enjoy a bit more bite in your bread. However, it can be easily substituted with finer cornmeal varieties like Quaker or Martha White, which I’ve also successfully incorporated. Finer cornmeal will result in a smoother, more uniform crumb, blending seamlessly into the bread structure while still providing that essential corn flavor. The beauty is in its versatility – choose what you prefer or have on hand!
When it comes to flour, I highly recommend using bread flour. Bread flour has a higher protein content compared to all-purpose (AP) flour, which means it develops stronger gluten. This strength is crucial for trapping the gases produced by the yeast, allowing the bread to rise beautifully and develop that desirable chewy yet tender texture typical of excellent sandwich loaves. While AP flour would likely work, you might notice a slight difference in the bread’s structure and elasticity. For the fat component, I’ve thoroughly tested this recipe with shortening, oil, and butter. Each offers a different nuance. Shortening or oil will produce a very soft loaf with a neutral flavor, allowing the cornmeal to shine. However, my most recent and hands-down favorite version uses butter. Butter not only adds incredible richness and a golden hue to the crumb but also imbues the bread with a complex, delectable flavor that truly elevates it, making it even more irresistible for any sandwich.
Baking in a Pullman Pan for Perfectly Uniform Slices
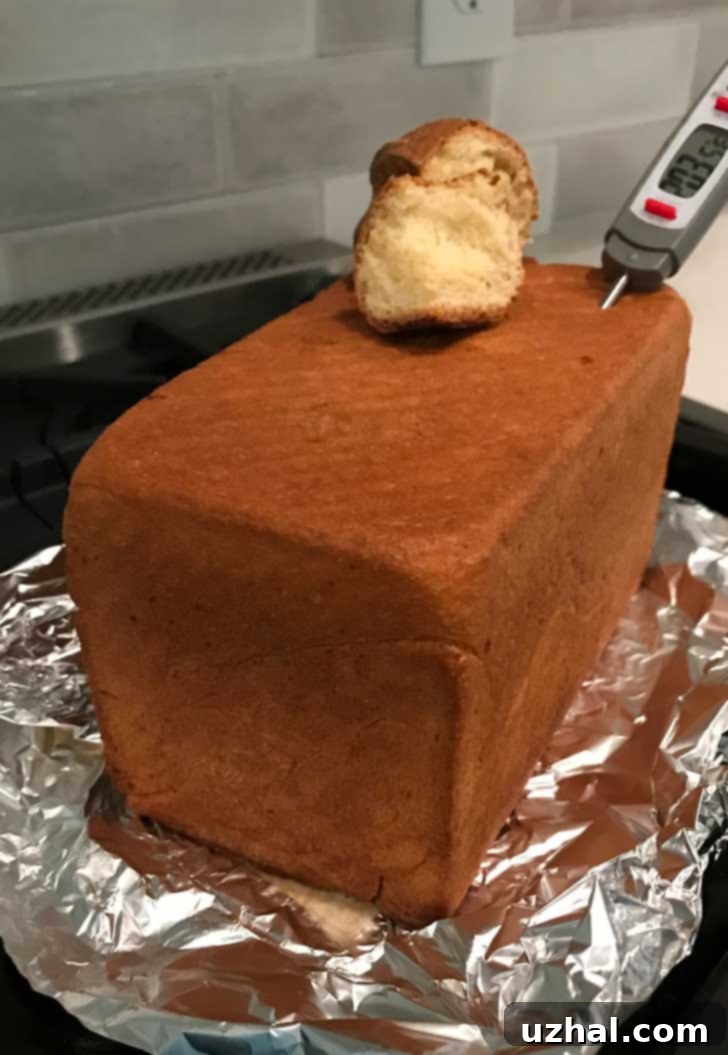
If you’re a serious sandwich bread enthusiast or simply appreciate a perfectly uniform slice, making this yeasted cornbread in a Pullman pan is an absolute game-changer. A Pullman pan, also known as a pain de mie pan, is a rectangular lidded loaf pan designed to produce bread with a dense, fine crumb and square slices, ideal for sandwiches. Mine is a 1-pound Pullman pan, and I’ve found that this recipe’s dough is almost the perfect quantity for it. To achieve that signature square shape and avoid overcrowding, I typically reserve about 100 grams of the dough. This extra dough isn’t wasted; I bake it alongside the main loaf as a delightful little dinner roll, offering a bonus treat. The Pullman loaf, with its enclosed baking environment, usually takes about 38 minutes to bake to a beautiful golden perfection, yielding consistently shaped, crustless-on-top slices that are a dream for any sandwich creation.

A Pro Tip for Effortless Slicing
For those who frequently bake homemade sandwich bread, this tip might already be part of your repertoire, but it’s a game-changer for newcomers: chilling your loaf makes slicing it infinitely easier and cleaner. Freshly baked bread, especially soft loaves like this yeasted cornbread, can be notoriously difficult to slice thinly and evenly. The internal structure is still quite soft and pliable, making it prone to squishing or tearing under the knife. Allowing the loaf to cool completely at room temperature is the first crucial step to prevent steam from condensing and making the bread gummy. Once cooled, transferring the loaf to the refrigerator for a few hours (typically 2-4 hours, or even overnight) firms up the crumb significantly.
This firming effect is due to the retrogradation of starch molecules. As the bread cools, the gelatinized starches begin to recrystallize, giving the crumb more structure and stability. When chilled, the bread holds its shape much better, allowing your knife to glide through it, creating perfect, intact slices ideal for sandwiches. However, it’s a delicate balance; too much time in the refrigerator (e.g., several days without proper wrapping) can begin to dry out the loaf, making it stale. So, aim for a quick chill just long enough to firm it up for slicing, then wrap it well for storage at room temperature or freeze it for longer preservation. This simple step will transform your bread-slicing experience from a potential frustration to a satisfying task, ensuring every sandwich starts with a beautifully cut piece of homemade goodness.
More Delicious Cornbread Recipes to Explore
- Small Batch Cast Iron Skillet Cornbread
- Chipotle Bacon Cornbread
- Sweet Corn Bread (Reduced Fat)
- Silver Palate Cornbread
- Mexican Cornbread
Recipe: Dr. Michael’s Yeasted Cornbread
Get ready to bake a unique and incredibly versatile loaf that will elevate your sandwich game! This yeasted cornbread is surprisingly easy to make and delivers a soft, fluffy texture with a delicate cornmeal flavor that is truly addictive. Follow these steps to create your own perfect homemade sandwich bread.

Dr. Michael’s Yeasted Cornbread
Anna
Pin Recipe
Ingredients
- 1 cup milk (230 grams, warmed to 110-115°F for yeast activation)
- 2 ¼ teaspoons quick rising yeast (one standard packet)
- 3 cups bread flour (390 grams) plus ½ cup (65 grams) if needed (bread flour is recommended for best texture, but AP flour can be used)
- ½ cup cornmeal (60 grams, fine or coarse grind, based on preference)
- 1 ¼ teaspoons salt
- 3 tablespoons granulated sugar (40 grams, adds sweetness and aids yeast activity)
- 3 tablespoons shortening or oil OR 2 tablespoons butter (36 grams shortening or 28 grams butter; butter is highly recommended for flavor)
- 1 large egg, room temperature (for richness and structure)
- 2 tablespoons water (optional, for adjusting dough consistency) (I didn’t use in my version, often unnecessary with stand mixer)
Instructions
-
Warm the milk to approximately 110-115 degrees Fahrenheit (43-46°C). This temperature is crucial for activating the yeast without killing it. Carefully pour the warmed milk into the bowl of your stand mixer. Sprinkle the quick-rising yeast over the milk and stir gently to dissolve. Allow this mixture to sit undisturbed for about 5-10 minutes until it becomes foamy and bubbly, indicating that the yeast is active and healthy (this process is called “proofing”). Once proofed, add 3 cups of the bread flour (390 grams) along with all the remaining ingredients: cornmeal, salt, granulated sugar, your chosen fat (shortening, oil, or butter), and the room temperature egg. Keep the reserved ½ cup of flour nearby, as you may need it for minor adjustments during kneading.
-
Using a sturdy spoon or the paddle attachment of your stand mixer, stir all the ingredients together until they form a thick, shaggy dough. At this stage, the dough will likely be quite sticky, but don’t worry, the kneading process will transform it.
-
Switch to the dough hook attachment on your stand mixer. Knead the dough on medium-low speed for approximately 8 minutes, or until the dough becomes smooth, elastic, and pulls away cleanly from the sides of the bowl. It should gather around the dough hook and leave the bowl relatively clean. If the dough appears too sticky and continuously clings to the sides of the bowl, add the reserved ½ cup of flour gradually, one tablespoon at a time, allowing each addition to be fully incorporated before adding more. The goal is a dough that is soft but not overly sticky.
-
Once kneaded, transfer the dough to a lightly oiled bowl. Turn the dough over a few times to ensure it is evenly coated with oil, which prevents it from sticking and drying out during the rise. Cover the bowl tightly with plastic wrap or a clean kitchen towel. Place the covered bowl in a warm, draft-free place (such as a slightly warmed oven or near a sunny window) and let the dough rise for about 1 to 1.5 hours, or until it has visibly doubled in size. This first rise allows the yeast to work its magic, developing flavor and volume.
-
Gently “punch down” the risen dough to release the accumulated gases. This redistributes the yeast and prepares the dough for shaping. Lightly flour your work surface and shape the dough into a neat cylinder or log, ensuring it’s evenly sized to fit your loaf pan. Carefully place the shaped dough into a well-greased or buttered 9×5 inch loaf pan (or your Pullman pan, adjusting dough amount as needed). Cover the pan again and let the dough rise for a second time in a warm place for approximately 30-45 minutes, or until it has risen about 1 inch above the rim of the pan. This second rise contributes to the final airy texture.
-
While the bread is undergoing its second rise, preheat your oven to 375 degrees Fahrenheit (190°C). Bake the loaf for 30 to 38 minutes. The bread is ready when the crust is golden brown and, if tapped on the bottom, the loaf sounds hollow. For absolute certainty, an instant-read thermometer inserted into the center of the loaf should register an internal temperature of around 203°F (95°C). Immediately remove the bread from the pan and transfer it to a wire rack to cool completely. Allowing it to cool fully is essential for a good crumb structure and to prevent it from becoming gummy when sliced. For easier, cleaner slicing, consider chilling the cooled loaf in the refrigerator for a few hours before cutting.
