Homemade Orange Creamsicle Fudge: A Perfected Recipe for Creamy, Zesty Sweetness
There’s a certain magic in homemade fudge, a nostalgic pull that transports you back to simpler times and comforting flavors. For me, that magic crystallized years ago with a quest for “orange creamsicle fudge.” The vibrant, citrusy tang of orange perfectly balanced with the smooth, sweet embrace of vanilla is an iconic flavor combination. My initial inspiration came from a charming store in Fredericksburg, TX, where I first encountered this delightful treat. My stepmother, a true connoisseur of this specific flavor profile, became my muse, driving my determination to recreate that irresistible experience in my own kitchen.
My first attempt involved a recipe I found online, which, to be frank, was a bit of a puzzle. It lacked clarity and precision, but despite the challenges, the resulting orange fudge was a hit with my stepmother. Encouraged by its success, I rewrote the recipe, streamlining it slightly, and shared it with the online community on Recipezaar. The feedback was mixed; some raved about its unique taste, while others found it overly sweet. This constructive criticism became the catalyst for a new mission: to refine the recipe, making it not only easier to follow but also achieving that elusive balance of sweetness and flavor that defines the perfect fudge.
This journey of culinary refinement has led me to this improved version. Today, I’m thrilled to share a recipe that is clearer, less sweet, and boasts a superior, creamier texture. I’ve tweaked the technique, focusing on precision and simplicity, resulting in a fudge that is truly a cut above the original. It’s wonderfully smooth, melts in your mouth, and carries just the right level of sweetness to let the orange and vanilla notes sing. This is more than just a recipe; it’s the culmination of a passion project, and I can’t wait to share this new and improved version with my stepmom, especially during the festive holiday season.
Crafting homemade fudge, especially one with such a distinct flavor, is a rewarding experience. While the process requires attention to detail, particularly regarding temperature, the outcome is well worth the effort. In my initial tests, I found that taking the mixture off the heat at 240°F left a slight brown film on the pan, even though the fudge itself didn’t taste burnt. After careful consideration and subsequent trials, I’ve adjusted the target temperature to a solid 235°F. This subtle change ensures a flawless result, preventing any discoloration and guaranteeing the purest flavor. Below, I’ll guide you through each step, making the process as straightforward as possible.
Essential Equipment for Perfect Orange Creamsicle Fudge
Before you begin, gathering your tools is crucial for a smooth fudge-making process. Here’s what you’ll need:
- 9-inch Square Baking Pan: The standard size for this recipe.
- Aluminum Foil: For easy removal of the fudge.
- Cooking Spray: To prevent sticking.
- Large Heatproof Mixing Bowl: To combine the hot sugar mixture with the marshmallow creme and white chips.
- Heavy-Bottomed Saucepan: Essential for even heat distribution when cooking the sugar mixture, preventing scorching.
- Candy Thermometer: Absolutely non-negotiable for accurate temperature readings. This is the secret to perfect fudge consistency.
- Wooden Spoon or Heatproof Spatula: For stirring and beating.
- Measuring Cups and Spoons: For precise ingredient measurements.
- Large Knife: For scoring and cutting the fudge into neat squares.
Step-by-Step Visual Guide to Making Orange Creamsicle Fudge
1. Prepare Your Pan and Gather Ingredients
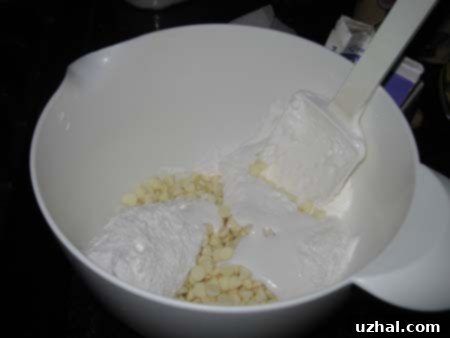
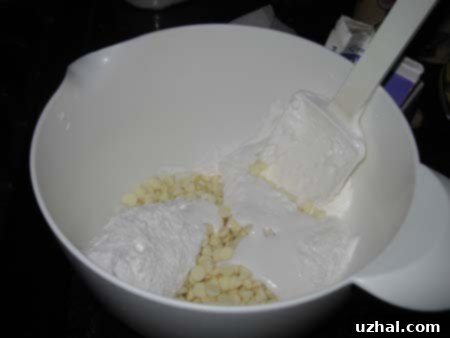
The first step is all about preparation. Line a 9-inch square pan with aluminum foil, ensuring that the foil extends over the edges to create convenient “handles.” This will make lifting the set fudge out of the pan incredibly easy. Lightly spray the foil with cooking spray to prevent any sticking. In a large, heatproof mixing bowl, combine your marshmallow chips and marshmallow creme. Having these ready is key, as you’ll be pouring a hot mixture over them very quickly.
2. Cook the Sugar, Cream, and Butter Mixture
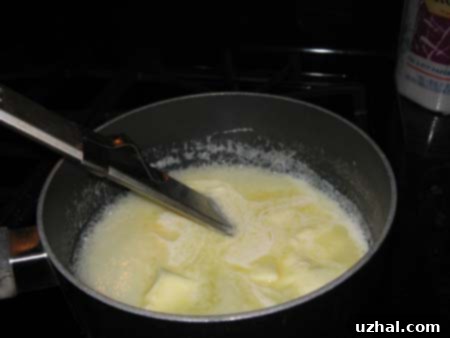
Next, in a heavy-bottomed saucepan, combine the sugar, heavy cream, and butter. Place the saucepan over medium heat. Stir the mixture gently once or twice initially to help the butter melt and the sugar dissolve. Once it starts to simmer, avoid constant stirring. The goal here is to let the mixture come to a boil and reach a specific temperature. Attach your candy thermometer to the side of the pan, making sure the tip doesn’t touch the bottom. This is where precision is paramount.
3. Reaching the Perfect Temperature
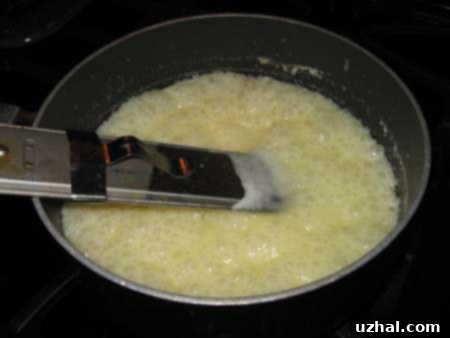
Continue to cook the mixture, monitoring the candy thermometer carefully. The target temperature for perfectly creamy fudge is 235°F (113°C). This stage, often referred to as the “soft-ball” stage, is crucial for the fudge’s final texture. When the mixture reaches a good, solid 235°F, it will appear thick and glossy, similar to the image below. This is your cue to act swiftly.
4. Combine and Flavor the Fudge Base
Immediately remove the saucepan from the heat once it hits 235°F. Pour the hot cream mixture directly into the large mixing bowl containing the marshmallow creme and white chips. Don’t delay! Beat the mixture a few times with a sturdy wooden spoon. The heat from the sugar mixture will melt the chips and marshmallow creme, creating a smooth, luscious base. Now, quickly scoop out exactly 1 cup of this mixture and set it aside in a smaller, separate bowl. This will be your vanilla swirl. To the larger bowl, add the orange extract and a few drops of red and yellow food coloring. Stir vigorously and quickly until the mixture in the large bowl achieves a uniform orange hue.
5. Pour, Swirl, and Set
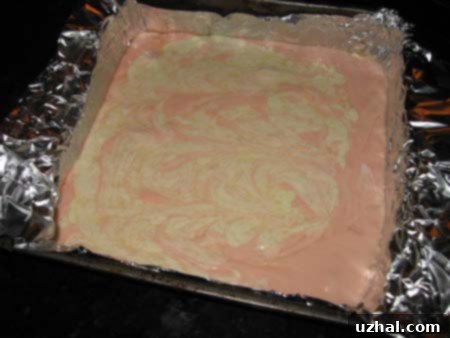
Working quickly is key! Pour the vibrant orange mixture into your prepared 9-inch pan, spreading it evenly. Then, gently pour the reserved white (vanilla) mixture over the orange layer. To create that beautiful creamsicle swirl effect, take a knife and drag it through both layers, moving in a wavy or zigzag pattern. Don’t overmix, as you want distinct swirls of orange and white. In my early attempts, I sometimes found the coloring to be a bit off, resulting in a pinker hue or a slightly grainy look on top. Don’t worry if it’s not perfect initially; fudge often smooths out as it sets.
6. A Quick Aesthetic Fix (Optional)
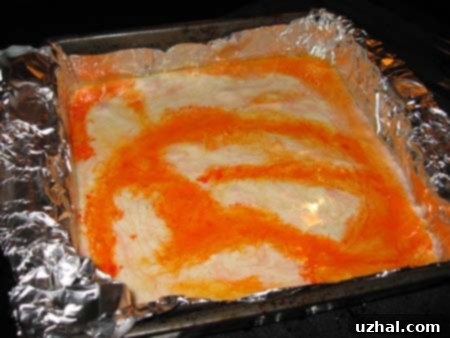
If, like me, you find the initial appearance to be a bit less vibrant than desired, or if you want to ensure everyone knows it’s orange and not, say, cherry, a quick fix is simple. While the fudge is still slightly warm, you can brush a tiny amount of orange food coloring over the top. This enhances the visual appeal and clearly communicates the delicious orange flavor within. Even if it looks “ugly” at first, the setting process often works wonders, smoothing out imperfections.
7. Cool, Chill, and Enjoy!
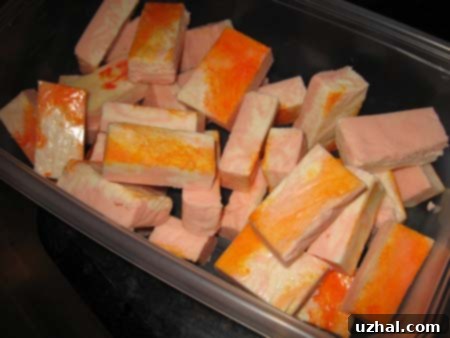
Allow the fudge to cool at room temperature for about 40 minutes, or until it’s no longer warm to the touch. This gradual cooling helps achieve the perfect creamy texture. Once cooled, transfer the pan to the refrigerator and chill for at least one hour, or until the fudge is completely set and firm. The chilling process is vital for easy cutting. Once set, use the foil handles to carefully lift the fudge out of the pan. Place it on a cutting board and, using a large, sharp knife, score it into beautiful, ready-to-serve squares. And just like that, you’ll have a batch of incredible, homemade Orange Creamsicle Fudge!
Tips for Fudge-Making Success
- Accurate Thermometer: Invest in a reliable candy thermometer. Calibrate it by placing it in boiling water (it should read 212°F or 100°C at sea level). If it reads differently, adjust your target temperature accordingly.
- Don’t Scrape the Sides: When cooking the sugar mixture, try to avoid scraping down the sides of the pan once it begins boiling. Sugar crystals on the sides can cause the entire batch to crystallize and become grainy.
- Work Quickly: Fudge making is a fast-paced process once the sugar mixture reaches temperature. Have all your ingredients measured and ready to go.
- Quality Ingredients: Using good quality heavy cream and fresh butter can make a noticeable difference in flavor and texture.
- Humidity Matters: Fudge can be sensitive to humidity. On very humid days, it might take longer to set or remain slightly softer.
- Storage: Store homemade fudge in an airtight container at room temperature for up to two weeks, or in the refrigerator for longer freshness. You can also freeze it for up to 3 months.
Variations to Try
While the classic Orange Creamsicle Fudge is undeniably delicious, don’t hesitate to experiment with variations:
- Lemon Creamsicle: Swap orange extract for lemon extract and yellow food coloring for a zesty lemon twist.
- Lime Creamsicle: Use lime extract and green food coloring for a refreshing lime version.
- Extra Zest: For an even more intense citrus flavor, add 1-2 teaspoons of finely grated orange zest along with the orange extract.
- Chocolate Swirl: For a decadent twist, melt a small amount of dark chocolate and swirl it into the fudge alongside the white vanilla mixture.
- Toppings: Before the fudge fully sets, sprinkle with white chocolate shavings, festive sprinkles, or even a light drizzle of melted white chocolate for extra appeal.
Troubleshooting Common Fudge Issues
- Fudge is too soft/doesn’t set: This usually means the sugar mixture didn’t reach the correct temperature (235°F). It might also be due to high humidity.
- Fudge is grainy/sugary: This happens when sugar crystals form in the mixture. It can be caused by stirring too much during the boiling phase, not wiping down the sides of the pan, or incorrect cooling.
- Fudge is too hard/crumbly: The mixture was likely cooked to too high a temperature, past the soft-ball stage.
The Complete Orange Creamsicle Fudge Recipe
Here’s the refined recipe for your delicious homemade Orange Creamsicle Fudge.
Ingredients:
- 7 ounces marshmallow creme (1 standard jar)
- 12 ounces white chocolate chips (1 standard bag)
- 1 cup granulated sugar
- ⅔ cup heavy cream
- 12 tablespoons (1 ½ sticks) unsalted butter, cut into pieces
- 3 teaspoons orange extract
- A few drops of red and yellow food coloring (to achieve desired orange hue)
Instructions:
- Prepare Pan: Line a 9-inch square baking pan with aluminum foil, allowing excess foil to hang over the sides for easy lifting. Lightly spray the foil with cooking spray.
- Prepare Mixing Bowl: In a large, heatproof mixing bowl, combine the marshmallow creme and white chocolate chips. Set aside.
- Cook Sugar Mixture: In a heavy-bottomed saucepan, combine the sugar, heavy cream, and butter. Place over medium heat. Stir once or twice until the butter melts and the sugar begins to dissolve. Attach a candy thermometer to the side of the pan, ensuring it doesn’t touch the bottom.
- Reach Temperature: Cook the mixture, without stirring constantly, until it reaches a solid 235°F (113°C) on the candy thermometer. This is the soft-ball stage.
- Combine & Divide: Immediately remove the saucepan from the heat. Pour the hot sugar mixture directly over the marshmallow creme and white chips in the large mixing bowl. Beat a few times with a wooden spoon until most chips are melted and combined.
- Create Swirl Base: Quickly scoop out exactly 1 cup of this white fudge mixture and transfer it to a separate, smaller bowl. Set aside.
- Color Orange Fudge: To the remaining fudge mixture in the large bowl, add the orange extract and a few drops of red and yellow food coloring. Stir vigorously until a uniform orange color is achieved.
- Assemble Fudge: Pour the orange fudge mixture into the prepared pan, spreading it evenly. Then, pour the reserved white fudge mixture over the orange layer.
- Swirl: Using a knife or a skewer, gently drag it through both layers to create beautiful swirls. Avoid overmixing.
- Cool & Chill: Let the fudge cool at room temperature for approximately 40 minutes, or until it is no longer warm. Then, transfer the pan to the refrigerator and chill for at least 1 hour, or until completely set and firm.
- Cut & Serve: Once set, use the foil handles to lift the fudge from the pan. Place on a cutting board and, using a large, sharp knife, cut into desired squares. Enjoy!
I genuinely hope you enjoy this perfected Orange Creamsicle Fudge recipe as much as I do. The balance of creamy texture and vibrant flavor makes it an irresistible treat, perfect for gifting, sharing, or simply indulging yourself. Please feel free to leave a comment and let me know how it turns out for you. Your feedback is always appreciated!
FYI: For those interested in making homemade marshmallow fluff, there’s a highly rated recipe for Marshmallow Fluff on Recipezaar. While I haven’t personally tried it for this specific recipe, it’s a great option if you have the ingredients on hand and enjoy making components from scratch.
