Indulge in Homemade Salted Caramel Chips Biscotti: A Delectable Crunchy-Chewy Treat
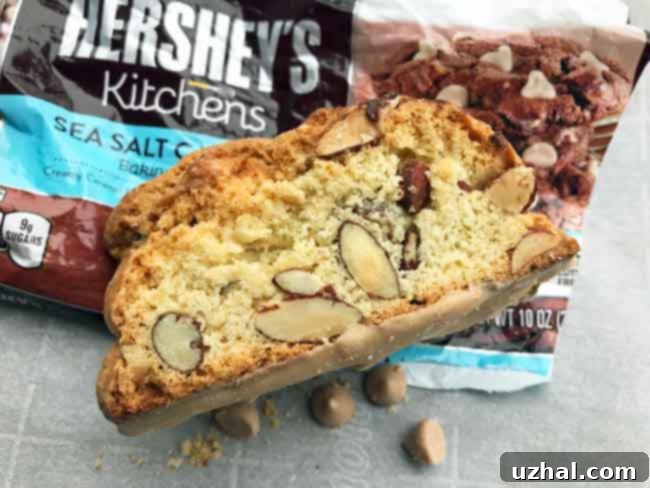
There’s something uniquely satisfying about a homemade biscotti, and while I don’t have just one single favorite recipe, this Salted Caramel Chips Biscotti holds a very special place among the best! As the name implies, it’s a delightful biscotti recipe featuring a generous dipping or drizzling of melted Hershey’s Salted Caramel Chips. The inspiration behind this particular creation was a potent craving for a treat that offered both sweet and salty notes—a truly irresistible combination. This desire coincided perfectly with needing to use up some Hershey’s Salted Caramel Chips I had on hand. These delightful chips aren’t always readily available on grocery store shelves, so whenever I spot them, I make sure to stock up and keep them in my pantry for such moments of inspiration. While other brands might offer caramel-flavored chips, I must confess (and I assure you this isn’t a sponsored post!) that Hershey’s are my personal preference due to their consistent quality and distinct flavor. Just to clarify for those unfamiliar, these are caramel *flavored* chips, not actual sticky caramel bits. They have a texture more akin to white chocolate chips, but with that distinctive, delicious salty burnt sugar flavor that sets them apart and makes them perfect for this recipe.
Jump to Recipe

Biscotti, meaning “twice-baked” in Italian, are traditionally known for their dry, crunchy texture, making them ideal for dipping into coffee, tea, or even sweet wine like Vin Santo. This recipe embraces that traditional crunch while introducing a modern, comforting twist with the addition of salted caramel. It transforms a classic Italian cookie into a uniquely American-inspired treat that’s both familiar and exciting. The beauty of baking biscotti at home lies in the control you have over the ingredients and the precise texture you desire. It’s a forgiving process that yields impressive results, perfect for sharing with friends and family, or simply enjoying during a quiet moment with your favorite hot beverage.
Key Ingredients for the Perfect Biscotti
Crafting these delicious Caramel Chips Biscotti relies on a thoughtful blend of pantry staples and a couple of distinct specialty items, notably a chosen liqueur and, of course, the star of the show: the caramel chips themselves. The foundational ingredients include all-purpose flour, baking powder for lift, a pinch of salt to balance the sweetness, granulated sugar, rich unsalted butter, and large eggs to bind everything together. These components establish the essential structure and sweet base of our biscotti, creating a canvas for the more intricate flavors.
For the liqueur, brandy is often my go-to choice, lending a sophisticated depth that complements the other flavors beautifully. However, if brandy isn’t available or you prefer a different profile, there’s ample room for creativity. Irish Cream can introduce a creamy, slightly nutty note, Frangelico brings a delightful hazelnut essence, and Crème de Cacao offers a subtle chocolate undertone. For those preferring a non-alcoholic alternative, orange juice works wonderfully, adding a bright, citrusy counterpoint to the rich caramel. The liqueur not only enhances the overall flavor profile but also contributes to the biscotti’s tender crumb and helps it achieve that perfect “crunchy yet almost soft” texture.
To further elevate the flavor, both almond extract and vanilla extract are infused into the dough. The almond extract provides a distinct, nutty aroma and taste that pairs exceptionally well with caramel, while the vanilla adds a warm, classic sweetness that ties all the flavors together. The toasted and chopped whole almonds are another crucial element, offering a satisfying crunch in every bite and adding an extra layer of nutty depth and aroma. Toasting the almonds beforehand intensifies their flavor, making them even more impactful. However, as delightful as these elements are, the true highlight remains the icing—a simple yet luxurious coating of the melted Hershey’s salted caramel chips, which transforms these biscotti from excellent to extraordinary, infusing them with that signature milky, salty, burnt sugar essence.

The Unique Texture and Flavor Profile
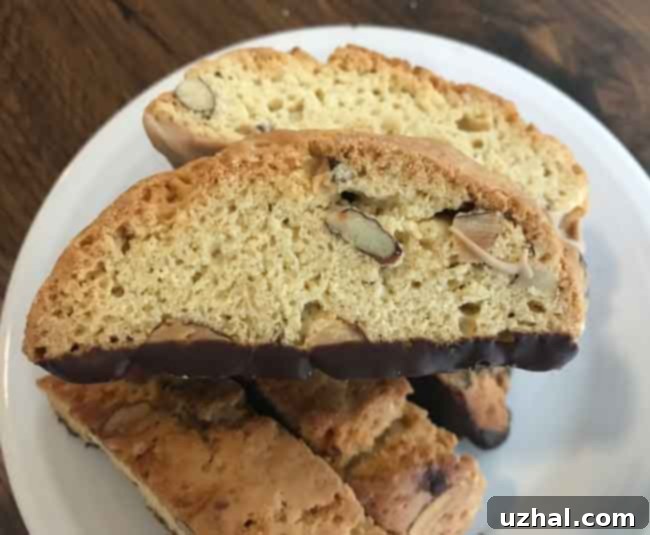
The texture of these Salted Caramel Chips Biscotti is truly a highlight, reminiscent of some of the finest biscotti we savored during a trip to Tuscany, yet with its own comforting twist. When you take a bite, you’ll immediately experience a delightful contrast: a firm, satisfying crunch that gives way to an almost soft, crumbly interior. This exquisite balance ensures a pleasurable mouthfeel without the fear of encountering a rock-hard cookie. It’s this unique consistency that makes them absolutely perfect for dipping into a warm cup of coffee, a comforting tea, or even hot chocolate, as they absorb just enough liquid without disintegrating. While traditional biscotti are often enjoyed with Vin Santo, I’m not entirely sure how well the rich, milky caramel flavor of these particular chips would meld with the sweet dessert wine; they are perhaps best suited for more robust hot beverages.
In terms of flavor, your palate will first detect the warm, familiar notes of vanilla beautifully complemented by a pronounced almond essence. This nutty foundation is then gloriously enhanced by the melted caramel chips, which introduce their signature milky, salty, and distinctly burnt sugar flavor. This interplay of sweet, nutty, and salty creates a complex and incredibly addictive taste experience. The subtle saltiness of the caramel chips perfectly cuts through the sweetness, preventing the biscotti from being overly cloying and encouraging you to reach for just one more. The careful balance of ingredients and the double-baking process are key to achieving this harmonious blend of texture and flavor.
Effortless Dough Preparation for Perfect Biscotti
Making the dough for these delectable Hershey’s Salted Caramel Chips Biscotti is surprisingly straightforward, even for novice bakers. The process begins with combining your dry ingredients: measure out the all-purpose flour, baking powder, and salt into a medium bowl, then give them a good stir to ensure they are thoroughly mixed. This step is crucial for even leavening throughout the biscotti. Once combined, set this dry mixture aside.
In a separate, larger mixing bowl, the wet ingredients come together. Here, you’ll gently stir together the granulated sugar, the silky melted unsalted butter, the two large eggs, your chosen alcohol (such as brandy or an alternative liqueur), and both the almond and vanilla extracts. Whisk these ingredients until they are well incorporated and smooth, forming a fragrant liquid base. The melted butter adds richness and tenderness, while the eggs provide structure and moisture. The extracts infuse the dough with the core flavor profiles that will shine through in the final product.
Next, gradually add the reserved flour mixture to the wet ingredients, stirring until just combined. Be careful not to overmix, as this can lead to tough biscotti. Once the flour is incorporated, gently stir in the toasted and chopped whole almonds. At this stage, you should have a soft, pliable dough. Its softness is key to achieving a tender crumb in the baked biscotti. To make the dough easier to handle and prevent it from being too sticky during shaping, cover the bowl with plastic wrap and chill it in the refrigerator for approximately 30 minutes. This chilling period allows the flour to fully hydrate and the butter to firm up slightly, resulting in a more manageable consistency for forming the logs.
Mastering the Double Bake: Shaping and Baking Techniques
The characteristic crunch of biscotti comes from its unique double-baking process. Once your dough is perfectly chilled and ready, preheat your oven to 350°F (175°C) and prepare a baking sheet, ideally lined with parchment paper for easy release. Lightly dampen your hands—this will prevent the dough from sticking—and divide the dough into two equal portions. Carefully shape each portion into an 8×2 inch log. It’s important to keep the logs relatively uniform in size for consistent baking. Place them on the prepared baking sheet, ensuring they are about 5 inches apart; while biscotti dough doesn’t spread extensively, a little space allows for even heat circulation. The initial bake is crucial for setting the shape and creating a firm foundation.
Place the logs in the preheated oven and bake for approximately 30 minutes, or until they turn a beautiful light golden brown and feel firm to the touch. This first bake cooks the logs through and gives them their initial structure. After the first bake, remove the loaves from the oven and carefully transfer them to a wire rack to cool for about 30 minutes. This cooling period is vital; trying to slice the hot loaves will result in crumbling. While 30 minutes is ideal, I often find that 15-20 minutes is sufficient for handling if you’re eager to proceed.
Once cooled sufficiently, it’s time for the crucial slicing step. Using a sharp serrated knife, carefully slice the loaves into ¾-inch thick pieces. For those who prefer a crisper, more traditional biscotti, thinner slices are recommended, as they will dry out more effectively during the second bake. A thinner blade on your knife will also help achieve cleaner cuts. After slicing, reduce the oven temperature to a lower 300°F (150°C). Arrange the sliced biscotti pieces upright on the baking sheet, giving them a little space. Return them to the oven for an additional 20-30 minutes, baking “low and slow.” This second bake is what truly dries out the biscotti, transforming them into their signature crunchy texture. Keep a close eye on them during this stage; you want them to be dry and crisp, but not overly browned. Once they reach your desired level of crispness, remove them from the oven.

The Grand Finale: Cooling, Dipping, and Drizzling
Once your freshly twice-baked biscotti emerge from the oven, the final, crucial step is to let them cool completely on a wire rack. This allows them to fully crisp up and ensures that the caramel topping will set properly. Rushing this stage can lead to a sticky mess, so patience is key!
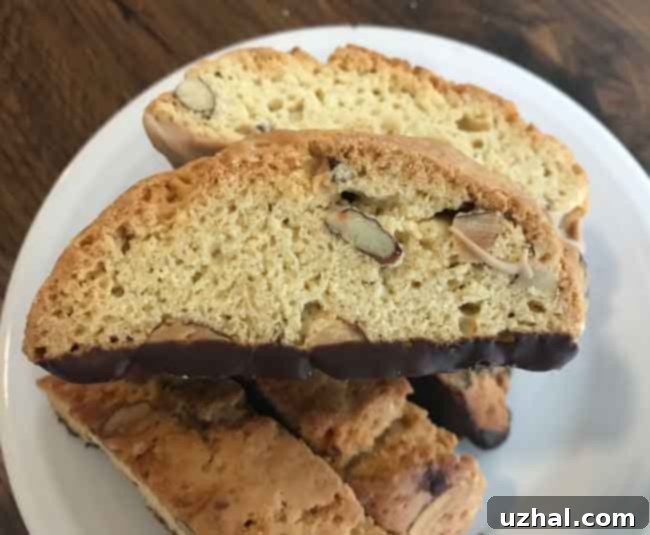
To finish these irresistible treats, it’s time for the star ingredient: the Hershey’s salted caramel chips. To melt them, place the chips in a microwave-safe bowl. Heat them in the microwave at 50% power, stirring thoroughly every 30 to 45 seconds. This gentle melting process prevents the chips from seizing or burning, ensuring a smooth, spreadable consistency. Continue until the chips are entirely melted and glossy. You have a couple of delightful options for applying this luscious caramel. You can choose to dip the bottom of each biscotti into the melted caramel, creating a generous, flat layer of sweet-and-salty goodness. After dipping, stand them on a cutting board or small tray lined with parchment paper. Alternatively, for a more delicate touch or if you prefer less caramel, you can simply drizzle the melted chips artfully over the tops of the biscotti.
Whichever method you choose, allow the caramel to set completely before serving. This usually takes about 15-30 minutes at room temperature, or you can expedite the process by chilling them briefly in the refrigerator. Once set, the caramel will be firm and easy to handle, preventing sticky fingers. As mentioned earlier, these biscotti tend to be a bit shorter and “stubbier” than some traditional long, slender varieties, giving them a charming, rustic appeal. The almond extract provides a robust almond flavor, which I personally adore. If you find strong almond notes aren’t your preference, you can easily adjust this by swapping out some of the almond extract for an additional amount of vanilla extract to achieve a milder taste.
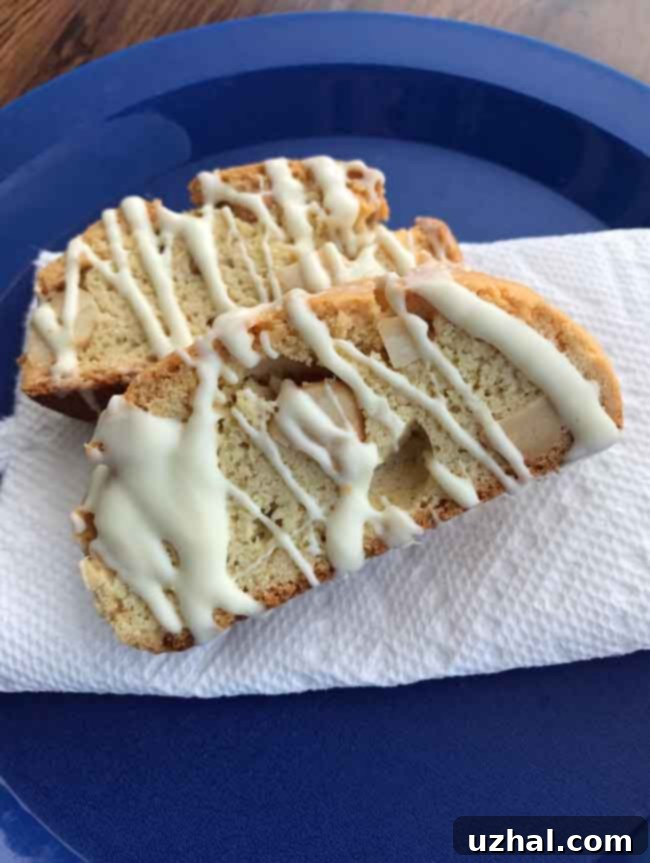
Beyond the classic salted caramel, these biscotti are incredibly versatile. In a recent update, I even experimented with a version using macadamia nuts instead of almonds and drizzled the finished cookies with luscious white chocolate, creating another fantastic flavor profile. This showcases how easily you can customize this recipe to suit your own taste preferences or explore new culinary adventures. Feel free to experiment with different nuts, extracts, or even alternative dipping chocolates!
Storage and Serving Suggestions
To maintain their optimal crunch and freshness, store your Salted Caramel Chips Biscotti in an airtight container at room temperature. They will remain fresh and delightful for up to two weeks, making them an excellent make-ahead treat for entertaining or enjoying throughout the week. If you plan to store them for longer, they can also be frozen for up to two months. Simply place them in a freezer-safe bag or container, separating layers with parchment paper. Thaw at room temperature before serving.
These biscotti are undeniably best when paired with your favorite hot beverage. A robust cup of coffee or a comforting mug of tea perfectly complements their crunchy texture and rich flavors. They also make a sophisticated accompaniment to a scoop of vanilla bean ice cream, crumbling a piece over the top for an added layer of texture and taste. Beyond personal enjoyment, homemade biscotti make thoughtful and impressive gifts. Package a few in a decorative bag or tin, and you have a delicious, personal present for holidays, birthdays, or just because.
Tips for Success and Customization
To ensure your biscotti turn out perfectly every time, here are a few additional tips:
- **Don’t Overmix:** Overmixing the dough can develop the gluten too much, leading to tough biscotti. Mix until just combined.
- **Consistent Log Size:** Aim for uniformly sized logs in the first bake. This ensures they bake evenly and slice cleanly.
- **Sharp Serrated Knife:** A good quality serrated knife is your best friend for slicing the partially baked logs without crumbling.
- **The Second Bake is Key:** Don’t skip or rush the second bake. This is where the biscotti achieve their characteristic crispness. If they still feel a little soft after cooling, you can always pop them back in for a few more minutes at a low temperature.
- **Caramel Melting:** Be patient with melting the caramel chips. Low power and frequent stirring prevent scorching and ensure a smooth consistency.
Beyond the macadamia and white chocolate variation, consider these ideas for customizing your next batch:
- **Citrus Zest:** Add orange or lemon zest to the dough for a bright, aromatic twist.
- **Spices:** A pinch of cinnamon or cardamom would beautifully complement the almond and caramel flavors.
- **Other Nuts:** Pecans, walnuts, or pistachios could replace the almonds for different nutty profiles.
- **Chocolate Drizzle:** Instead of caramel, or in addition to it, a dark chocolate drizzle would be divine.
With these tips and ideas, you’re all set to create a truly memorable batch of Salted Caramel Chips Biscotti, a delightful treat that perfectly balances tradition with a touch of modern indulgence.
- Double Chocolate Biscotti Recipe
- Salted Brownies
- Dipped Molasses Cookies
- Small Batch Butterscotch Whole Wheat Biscotti
- Small Batch Cinnamon Butterscotch Biscotti
Recipe

Print Recipe
Melted Caramel Chips Biscotti
Ingredients
- 2 cups minus 2 tablespoons all-purpose flour 240 grams
- 1 teaspoon baking powder
- ¼ teaspoon salt plus a pinch
- ⅔ cup sugar 135 grams
- 6 tablespoons unsalted butter melted (84 grams)
- 2 large eggs
- 2 tablespoons brandy or other type of alcohol
- 1 ½ teaspoons almond extract
- ¾ teaspoon vanilla extract
- ⅓ cup whole almonds toasted and chopped
- 1 cup Hershey’s caramel chips
Instructions
-
Stir together flour, baking powder, and salt. Set aside.
-
In a mixing bowl, stir together sugar, melted butter, eggs, alcohol and extracts.
-
Add flour mixture to egg mixture and stir, then stir in almonds to make a soft dough.
-
Cover bowl and chill for 30 minutes.
-
Preheat oven to 350°F with rack in middle.
-
Dampen hands and shape into two logs each about 8 inches long and 2 inches wide. The logs will not spread much.
-
Bake for 30 minutes. Transfer loaves to a rack and let cool for 30 minutes ( I usually just do this for 15).
-
Cut loaves into ¾-inch slices with a serrated knife (the thinner the blade, the better).
-
Reduce heat to 300 degrees F.
-
Stand the biscotti on a clean baking sheet and bake for about 30 minutes. Transfer to rack to cool completely.
-
Melt the caramel chips in the microwave using 50% power and stirring every 30 to 45 seconds. Spread melted caramel over bottom of biscotti, then stand them on a cutting board or small tray lined with parchment. Chill until the caramel chips set, then lift from parchment. Alternatively, you can just drizzle the melted chips over the biscotti.
