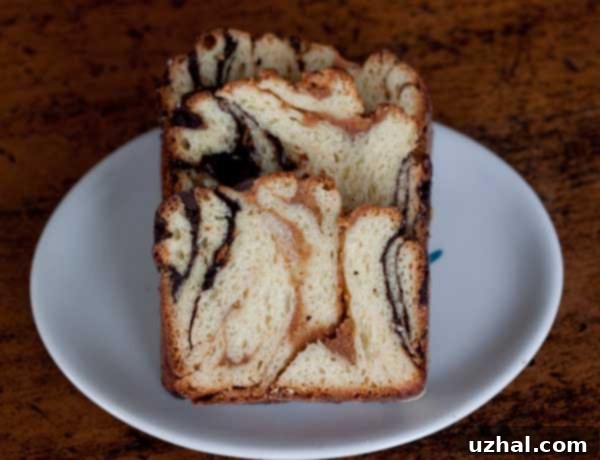
Decadent Chocolate Peanut Butter Babka: The Ultimate Swirled Bread Recipe
Imagine a culinary masterpiece where the rich, comforting embrace of chocolate meets the nutty, irresistible allure of peanut butter, all swirled within a tender, brioche-like bread. This isn’t just a dream; it’s the reality of our latest creation: the Chocolate Peanut Butter Babka. For years, I’ve been on a quest to perfect the art of babka baking, a journey fueled by a nostalgic yearning for all the delicious babka I missed in my younger years. While time travel remains elusive, the joy of recreating and innovating this beloved European sweet bread is a wonderful substitute. This particular recipe takes the classic chocolate babka and elevates it to new heights with delightful ribbons of creamy peanut butter woven throughout its soft, fluffy interior, promising an unforgettable experience with every slice. Prepare to embark on a baking adventure that will fill your home with an intoxicating aroma and your palate with unparalleled flavor.
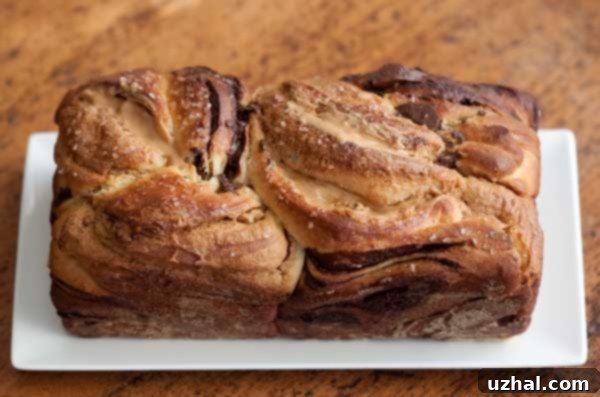
The Secret to a Perfect Peanut Butter Swirl: Mixing Peanut Butter with Sugar and Butter
One of the initial challenges I faced when developing a peanut butter babka was ensuring the filling maintained its integrity during the baking process. Peanut butter, by nature, can be quite oily, and my primary concern was that it would simply melt and be absorbed by the delicate babka dough, leaving behind little trace of its distinct flavor and visual appeal. I needed a strategy to prevent this delightful filling from disappearing into the bread. Drawing upon various baking experiences and tricks for working with high-fat fillings, I discovered a simple yet highly effective solution: combining the peanut butter with a precise ratio of granulated sugar and softened unsalted butter.
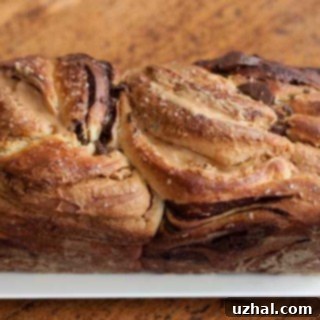
This ingenious mixture acts as a stabilizer for the peanut butter. The sugar crystals, when combined with the fats in both the peanut butter and butter, create a slightly thicker, more stable emulsion. This prevents the peanut butter’s natural oils from excessively bleeding into the dough as it bakes and expands in the oven. The added butter also helps to bind the mixture, contributing to a richer texture and ensuring the peanut butter layer holds its shape, resulting in those beautiful, distinct swirls you crave. As you can clearly see in the baked babka, this method worked wonderfully, yielding a filling that stands out both in taste and appearance, making each slice a true visual and gastronomic delight. This technique is crucial for achieving the signature swirled look and robust peanut butter flavor throughout your homemade babka, ensuring every bite is as intended.
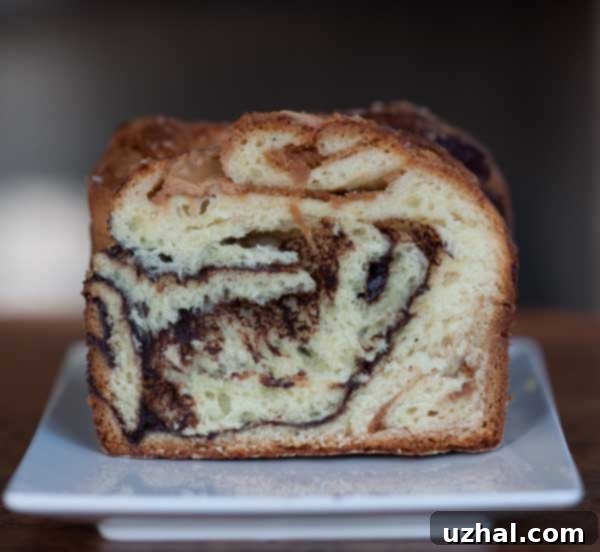
Unlocking the Perfect Rise: The Power of Quick Rise Yeast
A successful babka relies heavily on a magnificent rise, contributing to its signature airy and soft texture. For this Chocolate Peanut Butter Babka, I specifically recommend using quick rising yeast. Over the years, I’ve experimented with various types of yeast, and for a lighter, higher rising babka, quick rise yeasts consistently deliver superior results. Brands like Rapid Rise are excellent choices, but I’ve also had exceptional success with Red Star’s “Platinum” yeast. This particular type of yeast is formulated to provide a robust and consistent rise, which is paramount for achieving the desired volume and crumb structure in a rich dough like babka.
Unlike traditional active dry yeast, quick rise yeast (also commonly known as instant yeast) does not require proofing in warm water before being added to the dry ingredients. Its finer granules and specific formulation allow it to activate more rapidly and vigorously, leading to a quicker first rise and an impressive oven spring. This means your babka will rise beautifully not only during the initial proofing but also significantly expand while baking, resulting in a tall, majestic loaf with an incredibly tender interior. When baking babka, where you’re working with a substantial amount of butter and eggs, having a powerful and reliable yeast is key to ensuring the dough achieves its full potential and provides that delightful, soft texture.
Using the right yeast simplifies the baking process and boosts your confidence in achieving a show-stopping babka. It reduces the overall proofing time, allowing you to enjoy your freshly baked treat sooner without compromising on quality or texture. This babka, thanks to the quick rise yeast, truly rises quite a bit as it bakes, creating an enviable height and an irresistible softness that will have everyone reaching for another slice. Ensuring your yeast is fresh and your milk is at the correct temperature (around 120°F / 49°C, but no more than 125°F / 52°C) are critical steps for maximizing its performance and achieving that sought-after fluffy babka texture.
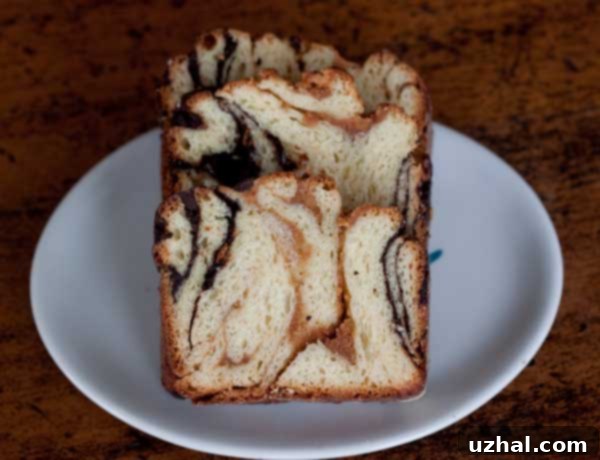
Mastering the Dough and Shaping: Chocolate Peanut Butter Babka Rolling and Assembling
The journey to a perfect Chocolate Peanut Butter Babka includes mastering the dough itself, from its initial mix to its final delicate shaping. For the kneading process, I wholeheartedly recommend using a stand mixer equipped with a dough hook. While I appreciate the hands-on feel of a handheld mixer for some tasks, a stand mixer is truly indispensable, especially when dealing with enriched, sticky doughs like this babka recipe. Attempting to knead such a soft and sticky dough by hand often leads to frustration, requiring the addition of excessive amounts of flour, which can ultimately toughen the final product and diminish its tender quality. The stand mixer provides consistent, thorough kneading that builds gluten structure without overworking the dough or making it dense.
Initially, this babka dough will feel very soft and quite sticky, almost challenging to handle. This is perfectly normal for a rich, buttery dough. However, with the consistent and efficient action of a stand mixer, over about 5 minutes, it transforms into a smooth, elastic, and much more manageable consistency. Don’t be alarmed if it doesn’t completely pull away from the sides of the bowl; its inherent softness is part of what makes babka so delicious. The key is to scrape down the sides of the bowl occasionally to ensure even kneading and full ingredient incorporation. Once kneaded, and after it has had its first rise and a light coating of oil, you’ll find it surprisingly easy to work with—almost a pleasure to handle, despite its initial stickiness.
One of the most satisfying aspects of this dough is its pliability. When it’s ready for assembly, and you’ve patted it out into a large rectangular shape, you might not even need a rolling pin. The dough is so cooperative that you can often simply pat it down with your fingers to achieve the desired 9×16 inch dimensions. This ease of handling is crucial for the next steps: spreading the luscious chocolate and peanut butter fillings, then carefully rolling and shaping the babka into its distinctive twisted form. The gentle nature of the dough, coupled with its slight stickiness (which helps the fillings adhere without slipping), makes for an enjoyable and less intimidating baking experience, even for those new to babka. The result is a beautifully swirled loaf that is as impressive to look at as it is to eat, showcasing the layers of rich chocolate and creamy peanut butter perfectly intertwined.
Essential Tips for a Perfect Chocolate Peanut Butter Babka
Baking a babka is a rewarding experience, and a few key tips can help ensure your Chocolate Peanut Butter Babka turns out perfectly every time. First, temperature control is vital. Ensure your milk is warm but not hot (around 120°F / 49°C, no higher than 125°F / 52°C) to properly activate the quick-rise yeast without killing it. For the butter, make sure it’s genuinely softened, not melted, for the dough, and truly softened for the peanut butter filling to achieve the right consistency. Chilling the filled dough rolls in the freezer for about 20 minutes is a non-negotiable step. This firming period makes the dough much easier to handle and cut, preventing the chocolate and peanut butter fillings from oozing out and allowing for those beautiful, clean swirls when you twist the strands.
When it comes to the chocolate filling, while chopped chocolate bars can work, I’ve consistently found that high-quality bittersweet chocolate chips (like Ghirardelli 60%) combined with sugar and butter tend to create a more stable filling that doesn’t thin out or seep into the dough as readily. This helps maintain distinct chocolate layers throughout the babka. Don’t be afraid of the sticky dough; it’s designed to be soft for a tender crumb. Resist the urge to add too much extra flour during kneading or handling, as this will lead to a dry, dense babka. A light dusting on your work surface is usually sufficient when shaping, along with lightly oiled hands.
Finally, proper rising is crucial for the babka’s iconic texture. Let the dough rise in a warm, draft-free place until doubled in bulk. This might take 40 minutes to an hour with quick-rise yeast, but always go by appearance rather than strict time, as environmental factors can vary. For the final rise in the loaf pan, allow it a full hour. The babka should look puffy and nearly fill the pan before baking. Baking until an internal thermometer inserted into the center of the loaf reads 205°F (96°C) ensures it’s cooked through without being overbaked, which can result in a dry crumb. If the top starts to brown too quickly, you can loosely tent it with aluminum foil. Remember, patience is a virtue—let it cool slightly in the pan before carefully removing it, and for the best texture and handling, consider freezing it briefly after it cools completely, then thawing it when ready to serve. These small details will make a significant difference in the outcome of your homemade Chocolate Peanut Butter Babka, turning a good loaf into a spectacular one.
Babka Variations and Serving Suggestions
While this Chocolate Peanut Butter Babka is a showstopper on its own, the world of babka offers endless possibilities for customization, allowing you to explore different flavor profiles and textures. If you’re a fan of other nut-chocolate combinations, consider trying a Chocolate Hazelnut Babka with Nutella for a rich, creamy alternative that brings a different kind of nutty sweetness. For traditionalists who love the classics, a classic Chocolate Babka remains a timeless choice, whether baked as mini loaves for individual servings or a regular-sized one to share. Exploring Green’s Babka from Brooklyn offers a taste of a renowned bakery’s take on this beloved bread, or even a Chocolate Babka Made With Crescent Dough for a simpler approach when time is of the essence. And if you love the peanut butter swirl but prefer the comforting chewiness of brownies, definitely check out these Peanut Butter Swirl Brownies.
This Chocolate Peanut Butter Babka is incredibly versatile when it comes to serving. It makes an exquisite breakfast pastry, perfect with a steaming cup of coffee or tea to start your day on a sweet note. Its rich flavors also make it an ideal dessert, perhaps warmed slightly and served à la mode with a scoop of vanilla bean ice cream or a dollop of fresh whipped cream for an extra touch of indulgence. It’s also a wonderful treat for brunch gatherings, holiday tables, or any time you want to impress guests with a homemade baked good that looks and tastes extraordinary. The unique combination of sweet chocolate and savory, nutty peanut butter creates a balanced flavor profile that appeals to almost everyone, making it a crowd-pleaser for any occasion.
Storage and Freezing Your Babka
One of the best qualities of babka is how well it stores, and this Chocolate Peanut Butter Babka is no exception, making it perfect for preparing ahead or savoring over several days. Once completely cooled, wrap the loaf tightly in plastic wrap to keep it fresh and moist at room temperature for up to 2-3 days. If you live in a humid environment or wish to extend its shelf life further, refrigeration is an option, though it can sometimes alter the texture slightly.
For longer storage, babka freezes exceptionally well. I often find that the loaf is even easier to handle and slice after it has been cooled, frozen, and then thawed. To freeze, ensure the babka is entirely cool to prevent condensation and ice crystals. Then, wrap it tightly in several layers of plastic wrap, followed by a layer of heavy-duty aluminum foil to protect it from freezer burn. It can be stored in the freezer for up to 2-3 months without significant loss of quality. To enjoy, simply thaw the wrapped babka at room temperature for several hours or overnight. For a warm, fresh-from-the-oven experience, you can gently reheat thawed slices in a microwave for 15-30 seconds or in a low oven (around 300°F / 150°C) for 10-15 minutes, until warmed through. This preparation and storage flexibility ensures you can always have a delicious Chocolate Peanut Butter Babka on hand.
Recipe
Chocolate Peanut Butter Babka
Cookie Madness
Pin Recipe
Ingredients
- 1 ¾ cups bread flour (approx. 8 ½ ounces) plus additional for dusting
- ¼ cup granulated sugar (1.75 oz)
- ½ packet (1 ⅛ teaspoon) fast rising yeast or “Platinum” yeast
- ⅜ teaspoon salt
- ¼ cup plus 2 tablespoons very warm milk (approx. 120°F / 49°C, no more than 125°F)
- 1 large egg
- 1 egg yolk
- 1 teaspoon vanilla extract
- 5 tablespoons unsalted butter softened, cut into small pieces
Peanut Butter Filling
- ⅓ cup creamy peanut butter (80 grams)
- 2 teaspoons unsalted butter softened
- 1 tablespoon granulated sugar
Chocolate Filling
- 2 oz bittersweet chocolate chips (about ⅔ cup 60% bittersweet, Ghirardelli works exceptionally well for consistent results)
- 4 teaspoons unsalted butter
- 1 tablespoon granulated sugar (superfine or “Baker’s Sugar” is recommended for best texture)
- Optional: Egg wash (a little egg mixed with milk) and sparkly coarse sugar for topping
Instructions
-
In the bowl of your stand mixer fitted with the paddle attachment, combine the bread flour, granulated sugar, fast rising yeast, and salt. Whisk briefly to ensure everything is evenly distributed.
-
Pour in the warm milk and stir on low speed until the dry ingredients are just moistened. Then, add the large egg, egg yolk, and vanilla extract. Continue mixing until all ingredients are well blended and a shaggy dough forms. Gradually add the softened butter, one chunk at a time, mixing thoroughly after each addition. Scrape down the sides of the bowl with a rubber scraper as needed to incorporate everything.
-
Switch the paddle attachment to the dough hook. Knead the dough on medium-low speed for approximately 5 minutes. This dough will be quite sticky and soft; it may not fully pull away from the sides of the bowl, but it should develop elasticity. Periodically stop the mixer to push the dough off the sides of the bowl and back into the center with your scraper to ensure even kneading. The goal is elasticity, not a completely dry or firm dough.
-
Lightly grease a clean bowl with oil. Scrape the sticky babka dough into the greased bowl and roll the dough around to ensure it’s coated with a thin layer of oil. Cover the bowl tightly with plastic wrap to prevent a skin from forming. Place it in a warm, draft-free spot and let it rise until it has visibly doubled in bulk. With fast-rising yeast, this typically takes about 40 minutes to an hour, depending on your room temperature.
-
While the dough is nearing the end of its first rise, prepare both the delicious peanut butter and chocolate filling mixtures. This ensures they are ready to go as soon as the dough is.
-
For the Peanut Butter Filling: In a small bowl, thoroughly mix together the creamy peanut butter, softened unsalted butter, and granulated sugar until well combined and smooth. Set this mixture aside.
-
For the Chocolate Filling: In a microwave-safe bowl, combine the bittersweet chocolate chips and unsalted butter. Melt them together in the microwave using 50% power, stirring diligently every 30 seconds, until the mixture is smooth and fully melted. Be careful not to overheat the chocolate. Stir in the granulated sugar until it’s fully dissolved and the mixture is glossy. Allow it to cool slightly, but keep it spreadable.
-
Lightly dust a clean work surface with flour. Gently transfer the risen babka dough onto the floured surface. Using your hands, pat and gently stretch the dough into a large rectangle, approximately 9×16 inches. The dough should be slick and easy to work with due to the oil; a rolling pin might not even be necessary, but you can use one with a sheet of parchment paper over the dough if preferred, to ensure an even thickness. I typically find my fingers sufficient for this soft dough.
-
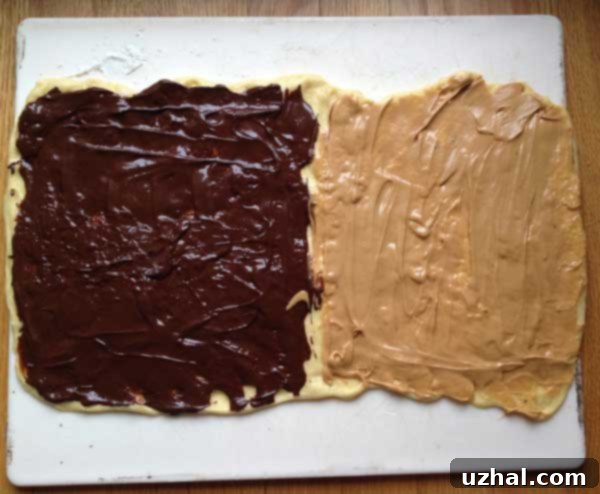
Visually divide the rectangle lengthwise into two equal halves. Spread the melted chocolate mixture evenly over one half of the dough. Then, spread the prepared peanut butter mixture evenly over the second half of the dough, ensuring both fillings cover their respective sections well.
-
Now, score the rectangle vertically down the center, effectively creating two sections, each roughly 9 inches tall and 8 inches wide. Starting from the bottom (the 8-inch side), tightly roll each of these two sections into a distinct jelly roll (cylinder shape). You should now have two long cylinders, each approximately 8 inches in length. Carefully transfer these rolls onto a parchment-lined baking tray or a plate that will fit into your freezer. Freeze them for about 20 minutes to allow the chocolate filling to set and firm up, which is crucial for neat shaping.
-
While the dough is chilling, prepare your loaf pan. Thoroughly grease an 8 ½ by 4 ½ inch or a 9×5 inch loaf pan. Line the pan lengthwise with a strip of parchment paper, allowing some overhang on the longer sides to act as “handles” later. Lightly dust the greased and lined sides of the pan with a little flour, shaking out any excess.
-
Remove the chilled dough rolls from the freezer. Using a sharp knife, cut each roll cross-wise in half, so you now have four shorter cylinders. Next, take each of these four cylinders and carefully split them lengthwise down the center using your knife. This will give you a total of 8 individual strands, each revealing the beautiful swirled filling.
-
To create the signature babka twists, take one split chocolate strand and one split peanut butter strand. Gently twist one over the other, creating a two-toned twisted rope. The chocolate strands might be a bit stiff from the freezer, so work gently. Lay this stubby little twist cross-wise into the prepared loaf pan. Repeat this process with the remaining split dough strands. In the end, you should have four distinct, stubby twisted ropes sitting side-by-side across the entire loaf pan. Gently push them together if there are gaps, but don’t worry about them being perfectly meshed at this stage; they will seamlessly come together as they rise and bake.
-
Cover the loaf pan loosely with plastic wrap or a clean kitchen towel. Allow the babka loaf to rise in a warm place for about an hour, or until it looks visibly puffy and has expanded considerably.
-
Preheat your oven to 350°F (175°C). If you desire a golden, shiny crust, prepare an egg wash by whisking a little egg with a splash of milk. Gently brush the tops of the risen babka loaves with this egg mixture. For an added touch of sparkle and crunch, you can sprinkle a little coarse sugar over the top before baking.
-
Bake in the preheated 350°F (175°C) oven for approximately 45 minutes. To ensure the babka is fully cooked, insert an instant-read thermometer into the center of the loaf; it should read 205°F (96°C). If the top starts to brown too quickly, you can loosely tent it with aluminum foil.
-
Once baked, let the babka cool in the pan for about 15-20 minutes. Then, very carefully remove the loaf from the pan by lifting it with the parchment paper overhang. Transfer it to a wire rack and let it cool completely before slicing. For optimal handling and easier slicing, especially with the rich fillings, you can wrap the completely cooled loaf in plastic wrap and freeze it. Once frozen and thawed, I find the texture and cutting experience to be even better.
Notes
** Chocolate Filling Preference: For the chocolate filling, I’ve consistently found that Ghirardelli 60% bittersweet chips, when mixed with sugar and butter as instructed, create a superior filling. This combination melts smoothly and sets well, significantly reducing the likelihood of the chocolate seeping or thinning out into the dough, which can sometimes happen with chopped chocolate bars. However, if using a high-quality chopped chocolate bar is your preference, it will still yield a delicious result.
** Loaf Pan Size: This recipe is flexible and works well in both an 8 ½ by 4 ½ inch loaf pan and a standard 9×5 inch loaf pan. The smaller pan will result in a slightly taller, more domed babka, while the larger pan will produce a slightly wider loaf with a more even top. Choose the size that best fits your preference or what you have available.
- Chocolate Hazelnut Babka with Nutella
- Chocolate Babka Mini Loaves or Regular
- Green’s Babka from Brooklyn
- Chocolate Babka Made With Crescent Dough
- Peanut Butter Swirl Brownies
