Mastering Southern Style Pecan Pralines: A Foolproof Recipe for Melt-in-Your-Mouth Perfection
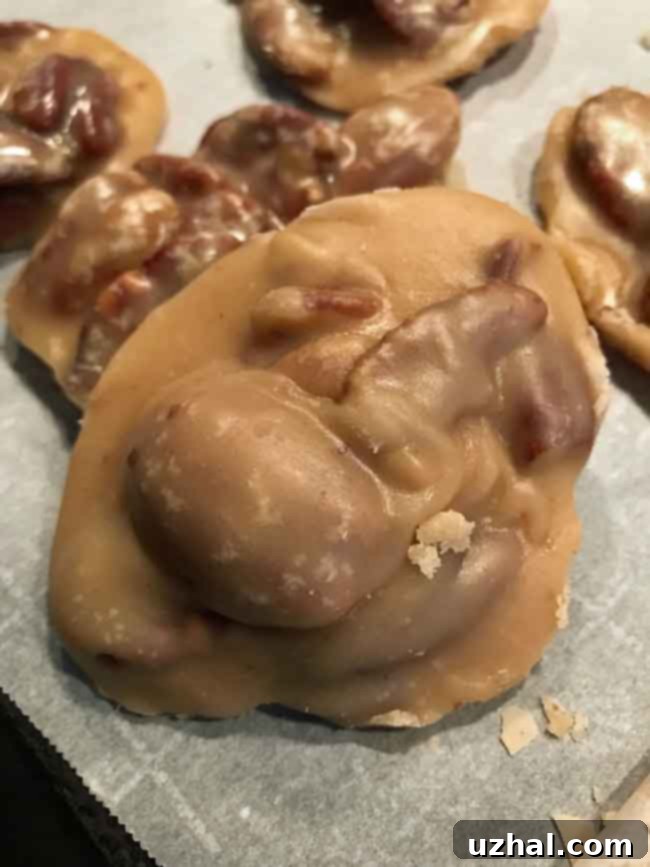
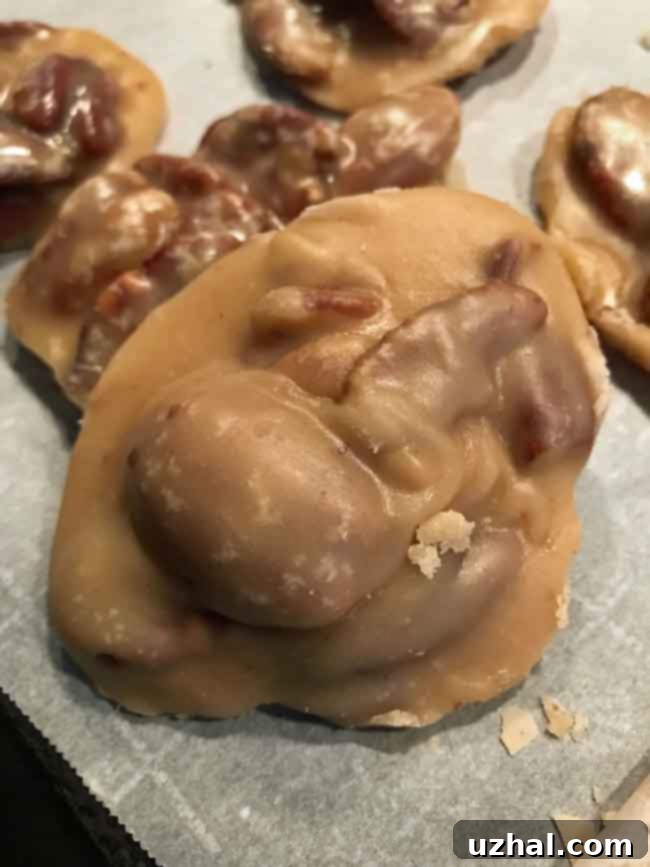
For years, I found myself adrift in a sea of pecan praline recipes, much like I confidently navigate the waters of making almond toffee. The quest for the perfect praline, however, proved to be a far more elusive journey. I yearned for a confectionery masterpiece that was firm yet offered a satisfying snap, melted divinely on the tongue, and possessed a rich, creamy dairy flavor. Crucially, it had to be a recipe that consistently delivered these results, batch after delectable batch. After much experimentation and culinary dedication, I can finally declare that the search is over. I believe I have discovered, and perfected, the ultimate Southern pecan praline recipe.

This exceptional recipe originates from the culinary genius of Emeril Lagasse, a chef renowned for his expertise in crafting authentic Southern dishes. His original creation is a five-star favorite for good reason. However, even brilliance can be refined! I’ve made several strategic adjustments to elevate these pralines to what I consider true perfection. These enhancements include a generous increase in the amount of pecans, the addition of pure vanilla extract for an extra layer of flavor, and a slight alteration to the cooking temperature, removing the candy from heat around 235-236°F instead of the higher 238-240°F range. Furthermore, I’ve incorporated a crucial step: toasting the pecans and then gently tossing them with a hint of butter and a pinch of salt. This small but significant detail dramatically amplifies their nutty flavor and adds an irresistible savory counterpoint to the sweetness, creating a depth that truly sets these pralines apart.

Essential Tips for Crafting Perfect Pecan Pralines
Making homemade pralines, while rewarding, requires precision and a few insider tricks to ensure a successful outcome. Here are some invaluable tips I’ve gathered and perfected along my journey to praline mastery:
- Choose the Right Pan Size: The saucepan you use is more critical than you might imagine. I highly recommend a 3-quart saucepan, like my trusty The Green Pan, which excels for candy making. Using a larger pan can cause the sugar mixture to boil too rapidly, leading to improper setting or crystallization. Conversely, a smaller pan will slow the boiling process excessively and can lead to burning. Sticking to the 3-quart size ensures optimal heat distribution and temperature control for this particular recipe. The ideal pan allows the mixture to heat evenly and consistently, which is key for candy success.
- Prevent Sugar Crystallization: One of the most common pitfalls in candy making is sugar crystallization, where sugar crystals form on the sides of the pan and can trigger a chain reaction, ruining the entire batch. To prevent this, always ensure the sides of your pan and any stirring utensils are meticulously clean. A nonstick pan, such as “The Green Pan,” can also be a game-changer in this regard, as its smooth surface naturally discourages crystal adhesion. After adding the sugar and water, if you notice any sugar crystals splattered on the pan’s interior walls, gently wipe them down with a damp pastry brush or paper towel before the mixture begins to boil.
- Always Toast Your Pecans: This step is non-negotiable for superior flavor. I’ve conducted side-by-side comparisons of pralines made with toasted versus untoasted pecans, and the toasted ones win every single time. Toasting brings out the nuts’ inherent oils, intensifying their nutty aroma and flavor profile. The subtle addition of butter and a pinch of salt after toasting further enhances their richness, providing a depth of flavor that complements the sweet praline base beautifully. This simple step elevates the praline from good to extraordinary.
- Master Temperature Control (Patience is Key!): Do not rush the heating process. Allow the sugar mixture’s temperature to rise slowly and steadily. While constant stirring is not necessary in the initial stages (it can actually encourage crystallization), occasional gentle stirring helps prevent scorching at the bottom of the pan. Once the mixture reaches a gentle simmer, maintain a low to medium boil, ensuring the temperature continues its gradual ascent. This patient approach is vital for achieving the correct soft ball stage, which is the foundation of a perfectly textured praline.
- Use a Wooden Spoon for Stirring: A wooden spoon is ideal for stirring praline mixture. Its non-reactive surface is gentle on the sugar, and its sturdy nature provides good control as the mixture thickens. Be patient during the final stirring stage after removing the pan from heat. It might seem initially loose, but if you’ve correctly cooked it to the soft ball stage, it will absolutely begin to thicken. Continue stirring until the mixture is cohesive enough that it doesn’t spread excessively when dropped from the spoon. This consistency indicates it’s ready to be portioned.
- Precise Temperature for Removal: The exact temperature at which you remove the praline mixture from the heat is critical for its final texture. I typically aim for 235-236°F, understanding that there’s a phenomenon called “carry-over cooking” where the temperature can rise slightly even after being removed from the heat source. However, candy making can be influenced by variables such as your specific pot, the ambient humidity, and even altitude. If your pralines consistently come out too soft at 235-236°F, don’t hesitate to experiment with a slightly higher temperature, such as 238°F or even 240°F, on your next attempt. The goal is a praline that sets firmly but remains wonderfully melt-in-your-mouth.
- Invest in a Reliable Candy Thermometer: A quality candy thermometer is an indispensable tool for consistent praline making. I personally favor a deep-fry candy thermometer because it allows me to observe the temperature’s gradual increase, providing better control. While instant-read thermometers are popular for their speed, I find the steady visual feedback of a deep-fry thermometer more reassuring for candy projects. Ensuring your thermometer is calibrated correctly is also vital; you can test it in boiling water (which should read 212°F at sea level).
- Don’t Be Afraid to Experiment: While this recipe is incredibly reliable, cooking is an art. Feel free to adjust the amount of vanilla or the type of pecans if you have a preference. Should you discover any additional tips or tricks that enhance your praline-making experience, please do share them! I’m always eager to learn and incorporate new insights into this delightful craft.
Exploring Other Praline Adventures (and Why My Adaptation Stands Out)
While I’ve found my ultimate praline recipe, my journey involved trying various other approaches, each offering unique insights and learning experiences. Here’s a brief look at some of the alternative recipes I’ve recently explored:
Marshmallow Pralines
These were an interesting departure from traditional pralines. I attempted to make them in a 3-quart pan, which proved to be an oversight, as the melted marshmallows expanded considerably and threatened to boil over. The cooking process felt interminable, and the setting time was equally lengthy, requiring immense patience. While the resulting texture was certainly unique, I ultimately concluded that marshmallows are better suited for other culinary applications. It was a fun experiment, but these didn’t quite achieve the classic praline texture I was seeking.
Pralines from Allrecipes.com
Marketed as replicating the famous pralines found in Savannah, Georgia, I made this version using evaporated milk. They turned out pretty good, offering a decent texture and flavor. However, upon reflection, I believe that for my personal preference, using half & half or heavy cream instead of evaporated milk would yield an even richer, more luxurious praline. The extra fat from the cream would beautifully cut through the sweetness, providing a more balanced and indulgent taste experience, aligning more closely with my ideal dairy flavor profile.
Dinner at Tiffany’s Pralines
These pralines were indeed very good in terms of flavor, but they presented a notable challenge in terms of setting. They remained quite soft and took an unusually long time to firm up. My conclusion was that I likely removed them from the heat a few degrees too early. Had I cooked them to a higher temperature, perhaps 238°F or even 240°F, they would likely have achieved the desired firm-but-snappy consistency. This experience further underscored the critical importance of precise temperature monitoring and understanding its impact on the final texture of the candy.
Vegan Pralines from Spruce Eats
I was pleasantly surprised by these vegan pralines! As someone who often uses plant-based alternatives, I opted for my go-to Country Crock Plant Butter and almond milk. The result was genuinely delicious and remarkably close to traditional pralines in terms of flavor and texture. This recipe proves that even without dairy, it’s possible to create a satisfying and authentic praline experience, making it an excellent option for those with dietary restrictions or preferences.
Recipe

Southern Style Pecan Pralines
Pin Recipe
Ingredients
- 1 ⅔ cup pecan halves, plus 1 teaspoon butter and a pinch of salt for tossing
- 4 tablespoons unsalted butter (60 grams), cut into chunks
- ½ cup heavy cream or half & half
- 1 cup granulated sugar (200 grams)
- ½ cup light brown sugar (100 grams)
- 2 tablespoons water
- ¼ teaspoon salt
- 1 teaspoon pure vanilla extract
Instructions
-
Prepare your working surface by lining a baking sheet or any flat, clean surface with parchment paper. This will be where your finished pralines will set.
-
Spread the pecan halves evenly on a rimmed baking sheet. Bake in a preheated oven at 375°F (190°C) for approximately 7 minutes, or until you notice their natural oils starting to release and a fragrant, nutty aroma fills your kitchen. Immediately remove them from the oven and, while still warm, toss them gently with about 1 teaspoon of butter and a light sprinkling of salt. Set the pecans aside and allow them to cool completely.
-
In a 3-quart saucepan, melt the 4 tablespoons of unsalted butter until it’s about halfway liquefied. Then, pour in the ½ cup of heavy cream or half & half. Continue heating the butter and cream mixture just long enough for the butter to fully melt and combine. Remove the pan from the heat. Off the heat, add both the granulated sugar and light brown sugar, along with the 2 tablespoons of water. Stir the mixture thoroughly until all the ingredients are uniformly blended and smooth. If any sugar crystals have splashed onto the inside walls of the pan during this process, carefully wipe them clean with a damp cloth or pastry brush. Also, ensure your stirring spoon is clean.
-
Return the saucepan to the stove over medium heat. Insert a deep-fry candy thermometer directly into the center of the sugar mixture, ensuring it doesn’t touch the bottom of the pan. Heat the candy, stirring only occasionally to prevent burning, until it reaches a precise temperature of 235°F to 236°F (113°C – 114°C), which is the soft ball stage. Resist the urge to stir constantly at first. Allow the mixture to warm up and gently begin simmering, then let it simmer or low boil with the temperature rising slowly and steadily. This crucial stage should typically take between 10 to 12 minutes.
-
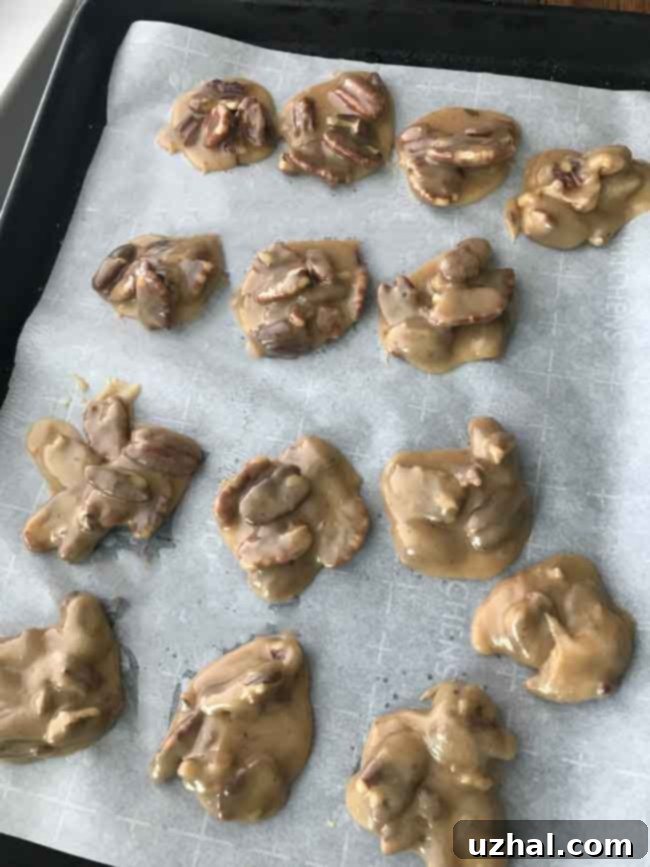
Once the desired temperature is reached, immediately remove the pan from the heat. Quickly add the ¼ teaspoon of salt, 1 teaspoon of vanilla extract, and your cooled, toasted pecans to the hot mixture. Using a sturdy wooden spoon, stir vigorously for several minutes. At first, the mixture may appear quite loose and perhaps even discouragingly thin. However, if you cooked it correctly to the soft ball stage, it will miraculously begin to thicken as you continue to stir. Keep stirring until the mixture becomes sufficiently thick that it holds its shape relatively well and doesn’t spread excessively when dropped from the spoon. Once this consistency is achieved, work quickly to drop large spoonfuls of the praline mixture onto the prepared parchment paper.
-
Allow the freshly dropped pralines to cool and set completely at room temperature. Once firm, gently peel them off the parchment paper. Store them in an airtight container to maintain their freshness and delightful texture.
Notes
Achieving Soft Ball Stage: My recommendation is to remove the pan from the heat at 235°F or 236°F (113-114°C). Keep in mind that candy mixtures often experience a slight temperature increase due to residual heat, even after being taken off the stove. This is known as “carry-over cooking.” However, numerous factors can influence the precise setting point, including the specific characteristics of your cookware, how quickly the temperature was raised, and even atmospheric conditions like humidity. If, after your first attempt, you find that your pralines don’t set firmly enough when removed at 235°F or 236°F, consider trying a slightly higher temperature, such as 238°F or 240°F (114-116°C), for your next batch. Adjusting this point by just a few degrees can make all the difference in achieving that perfect, classic praline snap.
