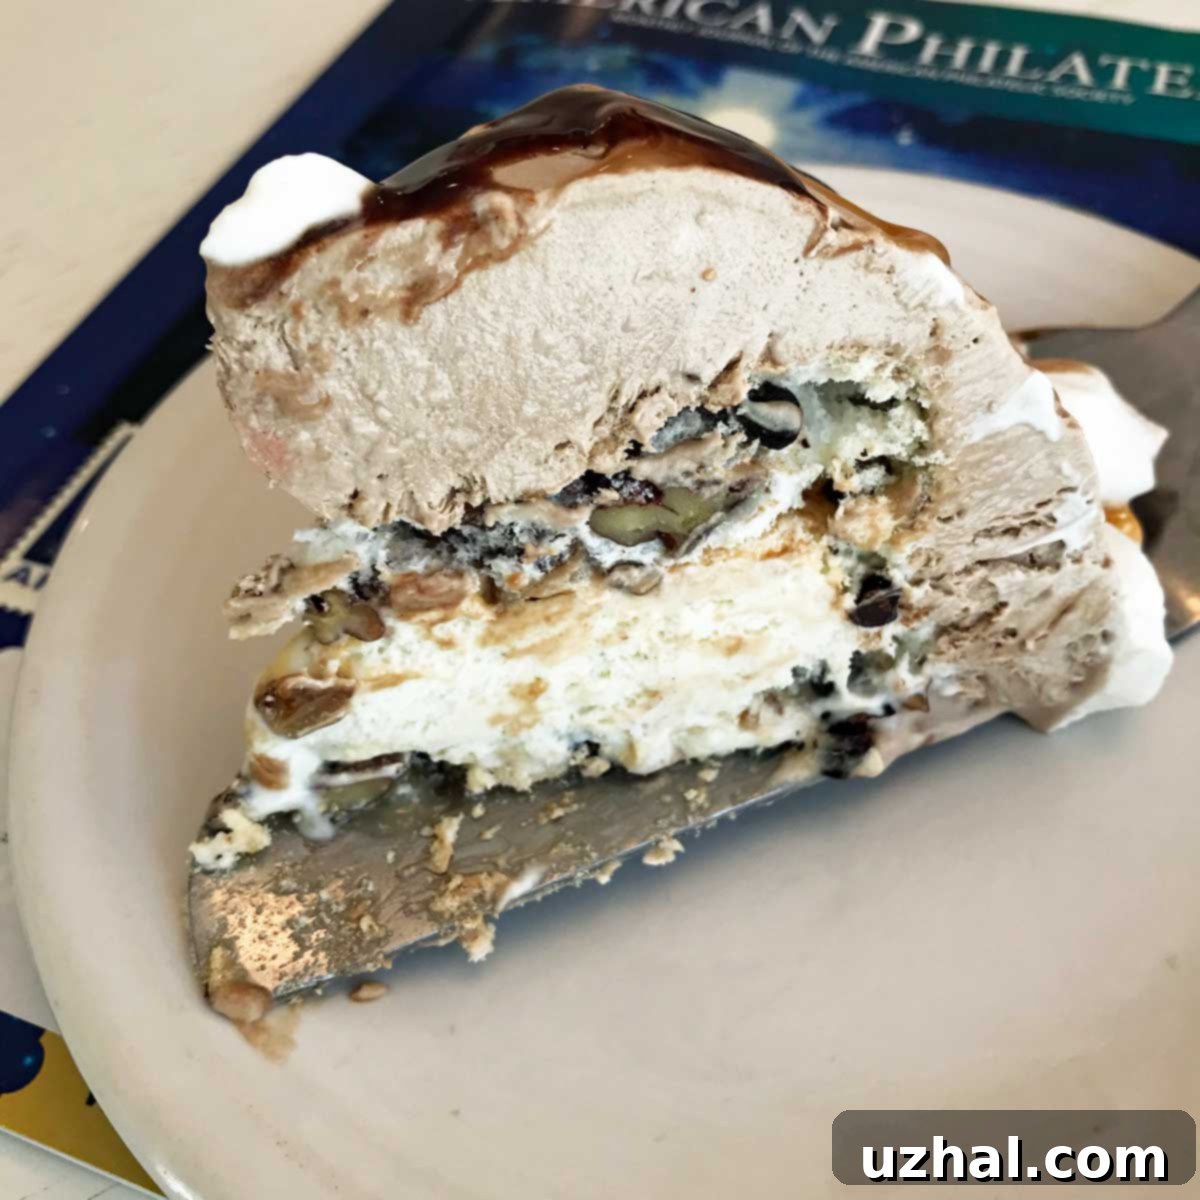
Danish Frozen Chocolate Torte: A Heavenly, Easy-to-Make Dessert Recipe for Any Occasion
Lately, I’ve found myself daydreaming about destinations near and far, from the rugged beauty of Scotland to the vibrant streets of Singapore, the geysers of Iceland, and the historical grandeur of Germany. Denmark, a country celebrated for its rich history, picturesque landscapes, and delectable pastries, also features prominently on my extensive travel wish list. It’s a place that often inspires thoughts of cozy comfort and culinary delights, which is exactly what came to mind when I recently stumbled upon an extraordinary dessert recipe: the Danish Frozen Chocolate Torte. This isn’t just any dessert; it’s a testament to simple ingredients coming together to create something truly magical, a sweet escape that transports you straight to a charming Danish café, even if you’re just in your own kitchen. Its elegant appearance belies its straightforward preparation, making it a perfect choice for both novice bakers and seasoned dessert enthusiasts looking for an impressive yet accessible treat. The unique combination of textures and flavors in this torte promises a memorable culinary experience, blending the familiar comfort of chocolate with the sophisticated crispness of meringue and the coolness of ice cream.
This exquisite dessert is a beloved adaptation from one of my most cherished cookbooks, The Junior League of Palo Alto Private Collection. Within its pages, this masterpiece is simply titled “Frozen Chocolate Torte,” but it’s more affectionately known by the Junior League members as “Inge-Lise’s Dessert.” Their description paints a vivid picture: “a heavenly confection created by a member of our community who honors her Danish heritage by being a superb cook.” Such a glowing endorsement, highlighting both its divine taste and cultural authenticity, makes it virtually impossible to resist trying. It speaks volumes about the quality and heritage of this recipe, promising a dessert experience that is both elegant and deeply satisfying. Inge-Lise’s dedication to her Danish roots shines through in this creation, offering a taste of authentic European dessert tradition. This torte truly embodies the spirit of Danish hygge – a feeling of comfort, coziness, and contentment – through its delightful layers and rich flavors, making it more than just a dessert; it’s an experience.
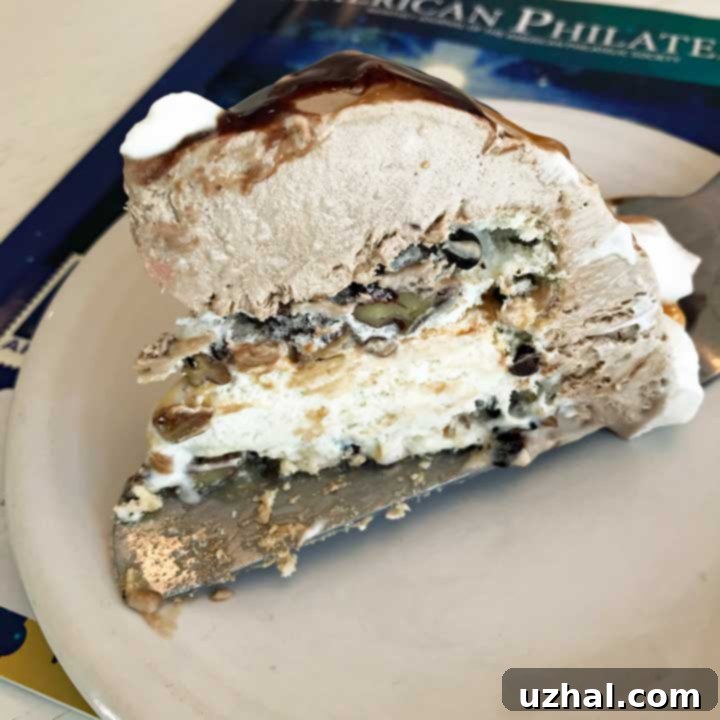
One of the most appealing aspects of the Danish Frozen Chocolate Torte is that, despite its sophisticated sound and luxurious taste, it primarily relies on readily available pantry staples. Forget obscure ingredients or complicated techniques; this dessert comes together with basic items like egg whites, sugar, crunchy pecans, creamy ice cream, rich whipped cream, and luscious chocolate syrup. It’s truly a testament to how humble ingredients can transform into something truly extraordinary with a little care and creativity. The beauty of this recipe lies in its simplicity and accessibility, making it a fantastic option for impromptu gatherings or when you want to impress without extensive effort. The combination of textures—the crisp, airy meringue, the smooth and cool ice cream, and the velvety, airy chocolate whipped cream—creates a symphony in every bite. It playfully reminds me of Luby’s Butternut Brownie Pie, but this Danish delight elevates the chocolate experience to a new level, offering a more refined yet equally comforting indulgence, all without the need for graham crackers or a pie crust.
However, I must confess that as I embarked on making Inge-Lise’s cherished recipe, I couldn’t resist putting my own spin on it. A good recipe is often a springboard for culinary creativity, and I believe Inge-Lise herself wouldn’t mind a few personal touches that aim to enhance the experience, perhaps even adding to its appeal. My minor adjustments involved a delightful swap: instead of chocolate ice cream throughout, I opted for a creamy vanilla ice cream as the central layer. This choice provides a beautiful, classic contrast to the rich chocolate flavors of the meringue and whipped cream, allowing each component to shine. Furthermore, I decided to envelop the entire torte in a generous blanket of chocolate whipped cream, rather than just spooning it on top of each layer. This ensures every slice is equally decadent, visually stunning, and uniformly covered in a luscious chocolatey cloud. My version also resulted in a slightly smaller torte, making it perfect for intimate gatherings or when you desire a more manageable serving size without compromising on flavor or elegance. These adjustments, I believe, make the torte even more approachable and satisfying for modern palates while still honoring its traditional Danish roots.
Crafting the Perfect Meringue Layers for Your Frozen Chocolate Torte
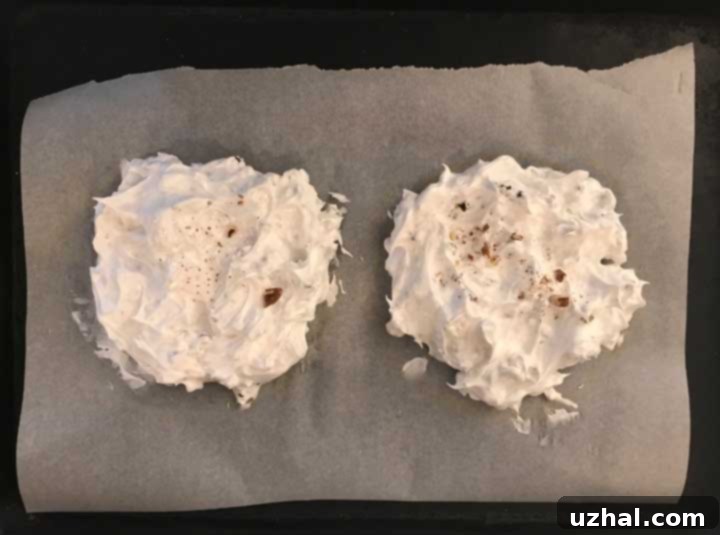
The foundation of this incredible Danish Frozen Chocolate Torte lies in its perfectly baked meringues. They are surprisingly easy to make and offer that delightful crisp-chewy texture that elevates the entire dessert, providing a wonderful textural contrast to the creamy fillings. To begin, you’ll whip up a batch of meringue using three large egg whites, a touch of cream of tartar for crucial stability, and granulated sugar. The key to successful, high-volume meringues is gradually adding the sugar, about a tablespoon at a time, while continuously beating the egg whites with an electric mixer until they form stiff, glossy peaks. This slow incorporation allows the sugar to fully dissolve, preventing a grainy texture and creating a stable, airy foam that will hold its shape beautifully during baking. For added texture and a nutty flavor that pairs wonderfully with chocolate, finely chopped pecans are then gently folded into the mixture. If you’re feeling extra indulgent or want to boost the chocolate flavor in the meringue itself, a sprinkle of mini chocolate chips can also be folded in, adding an extra layer of chocolatey goodness. As you can see in the accompanying photo, the meringue is carefully spread into two distinct 6-inch circles on parchment paper-lined baking sheet. Don’t worry if you have some meringue mixture left over after forming your main torte layers; it’s a fantastic opportunity to create delightful bonus meringue cookies. These smaller, bite-sized treats are excellent for sampling, using as a charming garnish, or simply enjoying on their own.
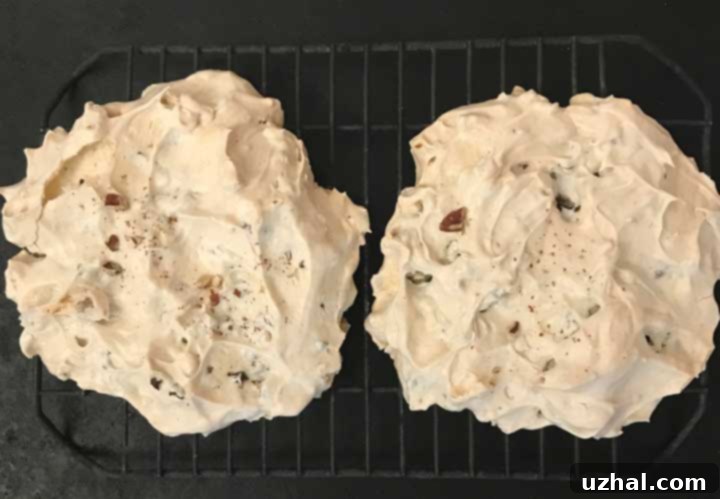
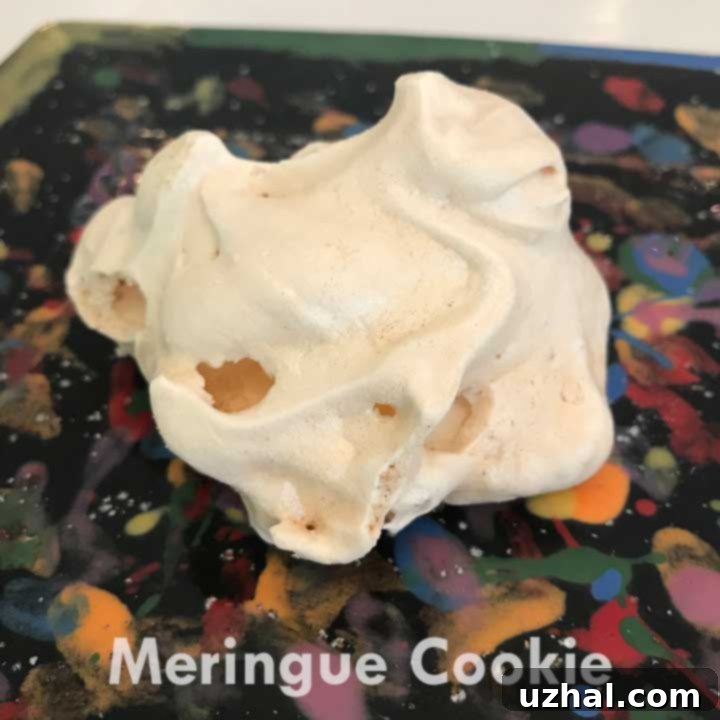
Once your meringue circles are formed and ready, they embark on a gentle baking journey. They are baked at a low temperature of 275°F (135°C) for approximately 45 minutes. This slow and steady baking process is critical, as it helps to dry out the meringues from the inside out, creating that signature crisp exterior while maintaining a slightly chewy, marshmallow-like interior. This low temperature prevents them from browning too quickly, ensuring a delicate, pale finish. After the initial baking time, the oven is turned off completely, but the meringues are left to rest inside the closed oven for an additional 45 minutes to an hour. This crucial resting period allows them to cool down slowly and thoroughly dry, preventing them from cracking, collapsing, or becoming sticky and soft once exposed to room air. As pictured, alongside the two large meringue circles, I also baked four or five smaller, cookie-sized meringues from the leftover mixture. These mini meringues were an absolute revelation – surprisingly delicious and perfectly crisp, proving just how versatile this base recipe is. I can confidently say that this meringue recipe is fantastic on its own, making it ideal for crafting standalone meringue cookies, perhaps dusted with cocoa powder, piped into festive shapes, or dipped in melted chocolate for a simple yet elegant treat. They offer a delightful crunch and melt-in-your-mouth sweetness that is truly addictive.
Assembling Your Danish Frozen Chocolate Torte: Layers of Delight
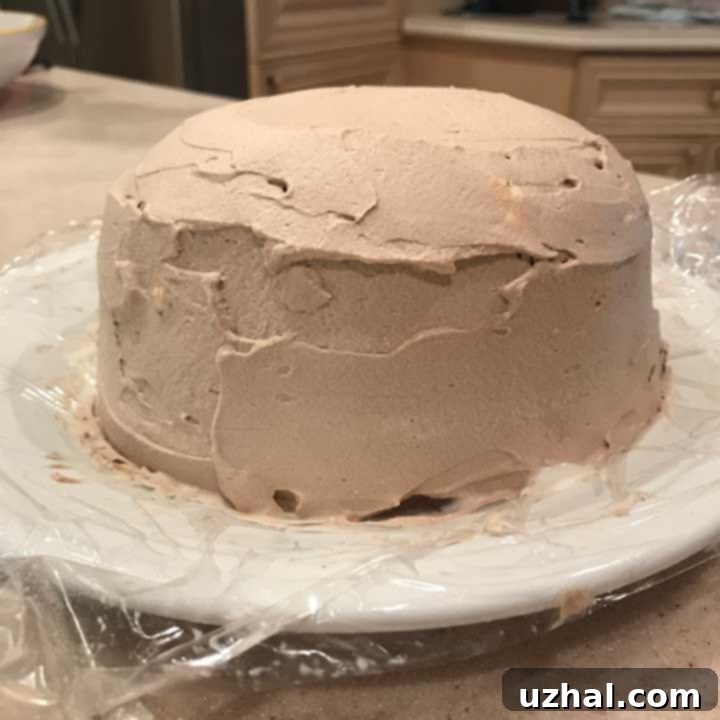
Once your beautiful meringue layers have completely cooled and achieved their crisp perfection, the real fun begins: assembling your Danish Frozen Chocolate Torte! This is where the magic truly comes together as simple components are transformed into a multi-textured dessert. First, ensure your favorite premium vanilla ice cream is softened just enough to be spreadable but not melted into a liquid puddle. This semi-soft consistency makes it incredibly easy to create an even, uniform layer without damaging the delicate, yet surprisingly resilient, meringues. Gently spread the softened vanilla ice cream evenly over one of the large meringue discs. You’ll be delighted to find that, thanks to the inclusion of crunchy chopped pecans, these meringue layers are surprisingly robust and hold up well to the spreading process, offering more stability than their airy appearance might suggest. Next, carefully place the second meringue disc directly on top of the ice cream layer, creating a delightful and visually appealing sandwich. This forms the core of your frozen torte, a balance of crisp and creamy textures. This entire assembly is then covered with a generous, decadent layer of chocolate-flavored whipped cream. This luxurious cream is easily made by whipping fresh, cold heavy cream to stiff peaks and then gently folding in rich chocolate syrup, creating an airy, chocolaty cloud that perfectly complements the crisp meringue and cool ice cream. The chocolate whipped cream not only adds a burst of flavor but also creates a beautiful, seamless finish for the torte.
Freezing and Finishing Touches for a Spectacular Dessert
After your torte is beautifully encased in its chocolate whipped cream, it’s time for its final transformation in the freezer. This crucial step allows all the layers to firm up, meld their distinct flavors harmoniously, and become a perfectly sliceable, delightful frozen treat. Carefully wrap the entire torte, initially somewhat loosely, in plastic wrap, then place it back into the freezer. This initial loose wrapping helps prevent the whipped cream from getting squashed or sticking to the wrap before it has a chance to set. After about 40 minutes, check to see if the whipped cream has firmed up enough to hold its shape; once it has, you can re-wrap it tightly, ensuring no air can get in, to protect it from freezer burn and maintain its freshness. For best results, allow the torte to freeze for at least 8 hours, or ideally, overnight. This extended freezing time ensures every component is perfectly set and ready for serving, creating a cohesive and satisfying dessert experience.
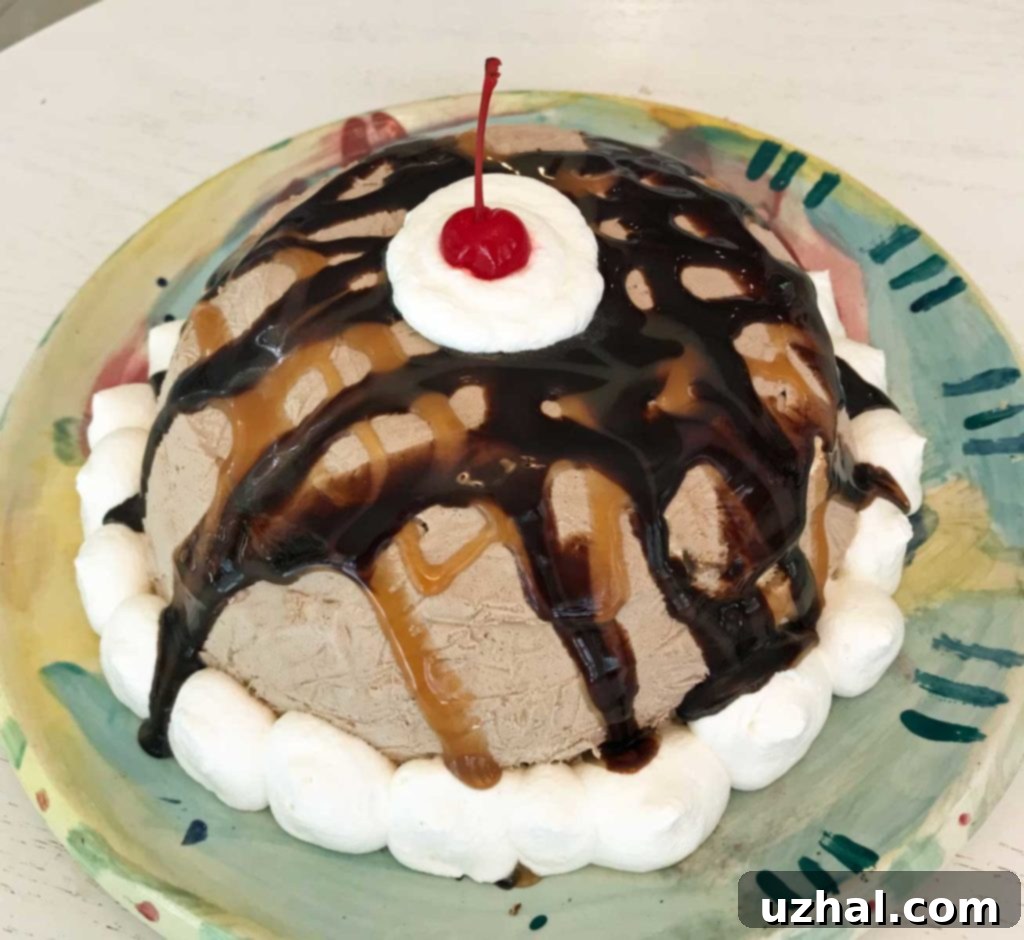
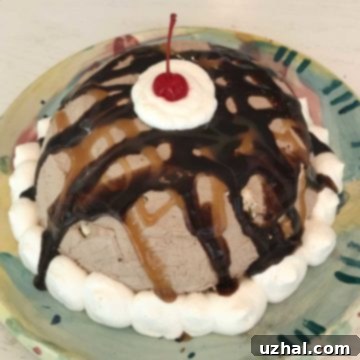
When it’s time to serve this show-stopping dessert, you can truly let your creativity shine with the garnishes. Before bringing it to the table, consider whipping up some fresh vanilla-flavored whipped cream, sweetened to your liking with a touch of sugar and vanilla extract. This bright, contrasting cream can be piped elegantly around the edges of the torte, creating a beautiful border, or dolloped artfully on top of each individual slice for an extra touch of indulgence. Then, grab your favorite flavored syrups – a generous drizzle of classic chocolate syrup is a must for any chocolate lover, and a touch of golden caramel syrup can add another layer of sophisticated sweetness and visual appeal. Don’t forget the pecans; a sprinkle of extra chopped pecans adds a satisfying crunch and visual appeal, reiterating the nutty notes in the meringue. For an extra touch of indulgence, consider adding mini chocolate chips or delicate chocolate shavings to the top. These finishing touches not only enhance the visual appeal, making your torte truly photo-worthy, but also add delightful bursts of flavor and texture, making each serving a truly unforgettable experience. This Danish Frozen Chocolate Torte is perfect for dinner parties, special celebrations, or simply as a luxurious treat to brighten any day, promising smiles and satisfied palates.
Recipe: Danish Frozen Chocolate Torte
Danish Frozen Chocolate Torte
Pin Recipe
Ingredients
For the Meringues:
- 3 large egg whites
- ½ teaspoon cream of tartar
- ¾ cup granulated sugar
- ½ teaspoon vanilla extract
- ¾ cup pecans finely chopped
For the Filling and Frosting:
- 2 cups premium vanilla ice cream softened to spreadable consistency
- 2 cups heavy whipping cream very cold, divided for chocolate & vanilla whipped cream
- 3 tablespoons chocolate syrup plus more for garnish
- 1 teaspoon vanilla extract for vanilla whipped cream
- 3 tablespoons granulated sugar for vanilla whipped cream, or to taste
For Garnish (Optional):
- Extra chocolate syrup
- Caramel syrup
- Chopped pecans
- Mini chocolate chips or chocolate shavings
Instructions
Prepare the Meringues:
-
Preheat your oven to a low temperature of 275 degrees F (135°C). This gentle heat is crucial for slowly drying the meringues and preventing them from browning too quickly, ensuring a delicate, crisp texture.
-
Prepare a large, rimmed baking sheet by lining it with parchment paper. Using a pencil, draw or trace two 6-inch circles onto the parchment. A 6-inch cake pan or springform pan bottom works perfectly as a template for these circles. Remember to flip the parchment paper over so the pencil marks are on the underside, preventing any lead from transferring to your delicious meringues.
-
In a very clean, dry mixing bowl (preferably glass or metal, as plastic can retain grease and hinder whipping), beat the egg whites with an electric mixer on medium speed until they are frothy, resembling soap suds. At this point, add the cream of tartar, which helps to stabilize the egg whites and increase their volume, and continue beating until they become foamy. Then, very gradually add the granulated sugar, about a tablespoon at a time, while continuing to beat on high speed. It’s important to add the sugar slowly to allow it to fully dissolve, creating a smooth and stable meringue. Continue beating until the egg whites are very stiff, glossy, and form firm peaks that hold their shape proudly when the beaters are lifted. Gently fold in the vanilla extract and the finely chopped pecans until just combined, being careful not to deflate the airy meringue mixture.
-
Spoon enough of the meringue mixture into the two drawn circles on your prepared parchment paper to create two uniform 6-inch discs, each about one inch thick. Spread the meringue evenly within the circles. You will likely use a little more than three-quarters of the meringue mixture for these two main layers. With any leftover meringue, spoon small dollops or free-form shapes around the unused edges of the baking sheet to create delightful meringue cookies. These make excellent little testers or charming extra treats!
-
Bake the meringue circles (and any cookies) in the preheated oven for 45 minutes. After this time, turn off the oven completely but do not open the door. Allow the meringues to remain in the closed oven for an additional 45 minutes to an hour. This crucial slow cooling and drying step results in perfectly crisp, non-sticky meringues that will maintain their integrity in the frozen torte.
-
Once the resting time is complete, carefully remove the meringues from the oven and let them cool completely on the baking sheet while you prepare the remaining components. They should cool relatively quickly, given the slow cooling process they just underwent in the oven.
Assemble the Torte:
-
While the meringues are cooling, remove the vanilla ice cream from the freezer and let it soften at room temperature for about 10-15 minutes until it’s easily spreadable but still holds its shape. Evenly spread the softened ice cream over one of the cooled meringue layers. The pecan-studded meringues are quite sturdy, so you can gently press the ice cream into place without fear of breakage. Carefully place the second meringue layer directly on top of the ice cream, creating a delightful frozen sandwich.
-
In a separate clean, cold bowl, whip 1 cup of the cold heavy whipping cream until stiff peaks form. Gently fold in 3 tablespoons of chocolate syrup until well combined and the cream is uniformly chocolate-flavored and airy. Retrieve your ice cream and meringue cake from the freezer. Using an offset spatula or a butter knife, carefully cover the entire cake – both the top and sides – with the luscious chocolate whipped cream, ensuring an even and attractive coating. Wrap the torte loosely in plastic wrap initially to allow the cream to set without smudging, then return it to the freezer. After about 40 minutes, once the cream has firmed up slightly, re-wrap it tightly to prevent freezer burn and chill overnight, or for at least 6 to 8 hours, until completely solid and ready for slicing.
Serve and Garnish:
-
Before serving, if you wish to refine the appearance or add a contrasting flavor, prepare a fresh batch of vanilla whipped cream. Whip the remaining 1 cup of cold heavy cream with 3 tablespoons of granulated sugar and 1 teaspoon of vanilla extract until stiff peaks form. This fresh, white cream can be piped elegantly around the edges of the torte, creating a beautiful border, or used to touch up any imperfections in the chocolate whipped cream. Alternatively, for a quick and easy option, a dollop of good quality store-bought whipped topping (like Cool Whip) works well here.
-
For a stunning presentation and an extra layer of flavor, generously drizzle additional chocolate syrup and, if desired, some rich caramel syrup over the top of the torte. Garnish with a sprinkle of extra chopped pecans for crunch, mini chocolate chips, or delicate chocolate shavings to truly elevate its visual appeal. Allow the torte to sit at room temperature for 5-10 minutes before slicing, which will make it much easier to cut through the frozen layers. Cut into elegant wedges and serve immediately to enjoy this delightful Danish Frozen Chocolate Torte!
Notes
