The Ultimate Guide to Perfect Overnight Yeast Waffles: Crispy, Flavorful, and Effortlessly Delicious
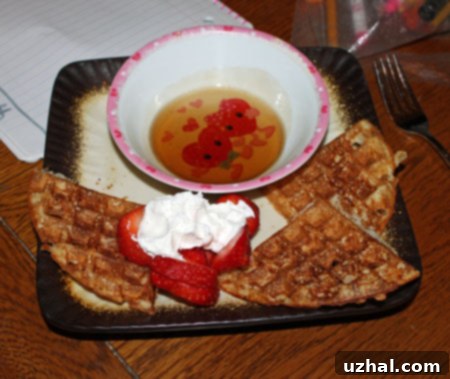
There’s nothing quite like waking up to the aroma of freshly made waffles, especially when the hard work was done the night before! This comprehensive guide dives deep into the world of make-ahead yeast waffle batter, a truly revolutionary concept for anyone who cherishes a delicious breakfast without the morning rush. While I don’t make waffles as frequently as some, the experience of discovering and perfecting these overnight waffles with their unique, extra-crispy texture and wonderfully deep flavor has been a game-changer. I vividly remember these as being exceptionally good, offering a crispy exterior and a delightful yeasty tang that elevates them above standard batters. For me, when the craving for waffles strikes, these make-ahead beauties, alongside my beloved Malted Waffles, are always at the top of the list. They promise a luxurious breakfast experience with minimal morning effort, making them ideal for leisurely weekends or even a special weekday treat. The convenience of preparing the batter the evening before allows for a relaxed morning, where all that’s left to do is fire up the waffle iron and enjoy.
Why Choose Overnight Waffles? The Magic of Yeast
The concept of overnight waffles, also fondly known as yeasted waffles or make-ahead waffles, centers around one brilliant ingredient: yeast. This isn’t just a convenience hack; it’s a fundamental aspect that transforms the entire waffle experience. By allowing the yeast to ferment the batter slowly in the refrigerator overnight, several magical things happen. Firstly, the yeast works its wonders, developing complex flavors that simply can’t be achieved with instant batters. This slow fermentation process imparts a subtle, sourdough-like tang and a richness that makes these waffles incredibly addictive. Secondly, the yeast helps to tenderize the flour, resulting in a lighter, airier waffle interior, while simultaneously contributing to an unbelievably crispy exterior when cooked. The subtle bubbles created by the yeast activity also contribute to a delicate texture that is both satisfying and incredibly light.
Beyond the enhanced flavor and texture, the primary appeal of overnight waffles lies in their unparalleled convenience. Imagine waking up on a busy weekday or a relaxed Sunday morning, knowing that the bulk of your breakfast preparation is already complete. There’s no frantic measuring or mixing ingredients while half-asleep. Instead, you simply pull a bowl of perfectly proofed batter from the fridge, give it a quick whisk with a few final additions, and immediately start cooking. This foresight transforms chaotic mornings into calm, enjoyable breakfast rituals. It’s especially perfect for entertaining, as you can spend more time with your guests and less time slaving over the stove. For anyone seeking to elevate their breakfast game and streamline their morning routine, embracing the make-ahead yeast waffle batter is an absolute must.
Unveiling the Make-Ahead Waffle Batter With Yeast
My journey into the world of make-ahead waffle batter began with a quest for a truly exceptional waffle—one that boasted incredible crispiness and a deep, satisfying flavor. The discovery of a recipe utilizing yeast and an overnight chill immediately piqued my interest. The idea that a simple preparation the evening before could yield such remarkable results was enticing. This recipe promised not just convenience but a superior product, and it certainly delivered. The batter itself is surprisingly straightforward to prepare, requiring only a few common pantry staples. The real secret, however, is the patience to let the yeast work its slow magic overnight. This resting period is not merely for convenience; it’s an essential step in developing the unique characteristics that set these waffles apart.
Crafting Your Batter: A Step-by-Step Guide
Creating this make-ahead waffle batter is a simple process that sets the stage for a delightful breakfast. The initial steps involve combining the basic ingredients and allowing the yeast to begin its work. Don’t be alarmed by the batter’s initial consistency or the strong yeasty smell; these are completely normal and part of the process that gives these waffles their unique character. Precision in temperature and measuring will ensure optimal results, leading to that coveted crispy, flavorful waffle.
Activating the Yeast for Optimal Rise
The first crucial step is to activate your dry yeast. In a glass measuring cup or a small bowl, combine one packet of active dry yeast (approximately 2 ¼ teaspoons) with ½ cup of warm water. The water temperature is key here; it should be between 105°F and 115°F (40°C to 46°C). Water that’s too hot will kill the yeast, while water that’s too cold won’t activate it effectively. Let this mixture stand for about 5 minutes. During this time, the yeast will “bloom,” meaning it will dissolve and become frothy on the surface, indicating that it’s active and ready to work its magic. This blooming process is vital for ensuring your waffles achieve the perfect rise and texture.
Mixing the Wet and Dry Ingredients
Once your yeast is active, it’s time to assemble the rest of the batter. In a large mixing bowl, combine the yeast mixture with 2 cups of warm milk (again, 105°F to 115°F), ½ cup of melted butter or margarine (114 grams), 1 teaspoon of sugar, and 1 teaspoon of salt. Stir these wet ingredients gently until they are well combined. Next, gradually add 2 cups of all-purpose flour (270 grams) to the mixture, stirring until the batter is smooth and no lumps remain. It’s important not to overmix at this stage, as excessive stirring can develop the gluten too much, leading to tougher waffles. Just mix until everything is incorporated. The batter will be quite thin at this point, but this is exactly how it should be. The thin consistency is part of what contributes to the eventual crispiness of the waffles.
The Overnight Chill: Patience is Key
After mixing, cover your bowl tightly with plastic wrap and transfer it to the refrigerator. This is where the magic truly happens. Allow the batter to chill for a minimum of 8 hours, or ideally overnight (up to 12-18 hours). This extended chilling period allows the yeast to slowly ferment, developing those incredible complex flavors that define these waffles. You’ll notice the batter will become very thin and develop a distinct, pleasant yeasty smell—both signs that the fermentation is working perfectly. Don’t be alarmed by the thinness; it’s a characteristic feature of this recipe that ensures extreme crispiness. The next morning, just before you’re ready to cook, whisk in 2 large eggs and ¼ teaspoon of baking soda into the chilled batter. The baking soda provides a final lift and reacts with the acidity developed by the yeast, ensuring your waffles are light and airy.
The Art of Waffle Making: Tips for Perfection
With your make-ahead batter perfectly prepared, the actual cooking process is remarkably simple, but a few tips can ensure absolute perfection. Due to the batter’s thin consistency, it’s advisable to pour it slowly onto your waffle iron. This prevents any overflowing and ensures an even spread across the plates. The thinness of the batter is intentional, as it contributes significantly to the final crisp texture of the waffles. You’ll find that these waffles achieve a remarkable crispness that’s hard to replicate with other batters, a direct benefit of the yeast and the specific ingredient ratios.
Regarding greasing the waffle maker, my experience has shown that it’s often unnecessary for this particular recipe. The generous amount of butter in the batter typically provides enough fat to prevent sticking, especially if you have a good quality non-stick waffle iron. However, if your waffle maker tends to stick or if you prefer an extra layer of protection, a light brushing of oil or butter before the first waffle can’t hurt. Follow your manufacturer’s directions for preheating and cooking times, but generally, cook until the steam subsides and the waffles are deeply golden brown and crispy. The result will be thin, wonderfully flavorful waffles with that satisfying yeasty taste – a true testament to the overnight preparation.

A Family Favorite (Even for the Picky Eaters!)
Even in a household where breakfast enthusiasm can vary, these overnight waffles often manage to steal the show. I recall young Fuzz, ever the discerning critic when it came to weekday mornings, would sometimes only manage a portion of her waffle. However, the unique texture and inviting aroma of these particular waffles always seemed to draw her in, even for just a few bites. There’s something inherently special about them that makes them more appealing than a standard pancake or cereal. Perhaps it’s the alluring crispiness that gives way to a tender interior, or the subtle, comforting yeasty flavor that truly makes them stand out. It transforms breakfast from a routine into a small, delightful occasion, even on the busiest of days.
And it’s not just the human members of our family who appreciate a good waffle! Our furry companions often have a keen sense for deliciousness, and in our home, Lizzie certainly makes her appreciation known. Her bright eyes and attentive posture at the breakfast table, especially when waffles are involved, are always a source of amusement and affection. It’s those small, shared moments around the breakfast table, whether with family or beloved pets, that truly make a meal memorable. These waffles, with their irresistible charm, often become the centerpiece of such joyful, simple moments.
Batch Cooking and Freezing for Future Feasts
One of the most practical aspects of this make-ahead waffle batter is the ability to cook an entire batch and freeze the leftovers for future enjoyment. This is a fantastic strategy for meal prepping and ensuring you always have a delicious, homemade breakfast option readily available. After baking all the batter, allow the waffles to cool completely on a wire rack. This is a crucial step to prevent sogginess when freezing. Once cooled, stack the waffles with sheets of parchment paper or wax paper in between each one to prevent them from sticking together. Then, place the stack into a freezer-safe bag or airtight container and freeze them. This method ensures that they stay fresh and retain their quality for weeks, or even months.
When you’re ready to enjoy a quick breakfast, simply grab a few frozen waffles from the freezer. The best way to reheat them and bring back that glorious crispiness is in a toaster, toaster oven, or even a conventional oven. Avoid the microwave, as it will make them soft and chewy rather than crispy. A few minutes in the toaster, on a medium setting, or about 5-10 minutes in a preheated oven (around 350°F / 175°C) will revive them to their original crispy perfection. This convenience means you can enjoy the exquisite taste and texture of homemade yeast waffles any day of the week, even when time is tight, making your mornings smoother and much more delicious. It truly makes the effort of preparing a larger batch worthwhile.
Waffle Maker Wisdom: My Trusted Cuisinart
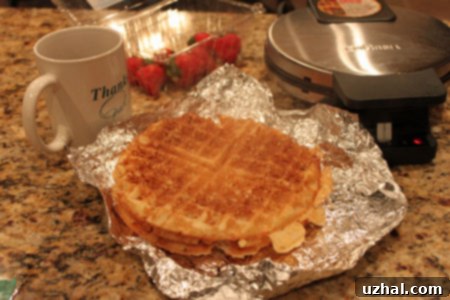
Choosing the right waffle maker can significantly impact the quality of your homemade waffles, and after many years of dedicated use, I can confidently recommend the Cuisinart waffle maker. The one pictured in these very photos has been a faithful companion in my kitchen for a long time, consistently delivering excellent results. Its reliability and ease of use are truly commendable, especially when dealing with a unique batter like this make-ahead yeast version. A good waffle maker should heat evenly and have effective non-stick plates, and the Cuisinart model excels in both these areas.
For these particular waffles, which are thin and aim for maximum crispiness, a waffle maker that produces consistent heat is essential. The Cuisinart I use achieves that perfect golden-brown crispness without burning. It also tends to handle the thinner batter well, preventing leaks and ensuring that each waffle is cooked thoroughly. If you are in the market for a new waffle maker that will reliably churn out perfect crispy waffles, whether it’s for this recipe or any other, I highly suggest considering a Cuisinart model. Its durability and performance have certainly earned my trust over the years. You can often find great deals and options, like the one I use, on Amazon.
Recipe: The Perfect Make-Ahead Waffle Batter

Make-Ahead Waffle Batter
Anna
Pin Recipe
Ingredients
- 1 packet active dry yeast (2 ¼ teaspoons)
- ½ cup warm water(105° to 115°F / 40° to 46°C)
- 2 cups warm milk (105° to 115°F / 40° to 46°C – 440 ml)
- ½ cup butter or margarine (114 grams), melted
- 1 teaspoon sugar
- 1 teaspoon salt
- 2 cups all-purpose flour (270 grams)
- 2 large eggs
- ¼ teaspoon baking soda
Instructions
-
In a glass measuring cup or small bowl, combine the active dry yeast and ½ cup warm water; let stand for 5 minutes until frothy.
-
In a large mixing bowl, combine the activated yeast mixture, warm milk, melted butter or margarine, sugar, and salt. Stir gently. Add the all-purpose flour, stirring just until smooth. Cover the bowl tightly with plastic wrap and chill in the refrigerator for at least 8 hours, or preferably overnight (up to 12-18 hours). The next morning, whisk in the eggs and baking soda thoroughly into the batter.
-
Heat your waffle iron according to the manufacturer’s directions. For optimal crispiness and to prevent overflow due to the thin batter, pour approximately ⅓ cup of batter per waffle slowly onto the hot iron. Cook until golden brown and crispy. This recipe yields about 12 waffles, but the exact number may vary depending on the size of your waffle maker. Serve immediately with your favorite toppings.
Final Thoughts on Your Overnight Waffle Journey
Embarking on the journey of making overnight yeast waffles is more than just trying a new recipe; it’s an investment in countless future mornings filled with ease and delight. The minimal effort required the night before pays dividends in the form of rich, complex flavors, an unparalleled crispy texture, and the sheer joy of a stress-free breakfast. These waffles offer a depth of character that truly sets them apart, making them a memorable treat for any occasion, from simple family breakfasts to elegant brunches. The yeast-infused batter, allowed to ferment slowly overnight, is the secret weapon behind their incredible appeal, yielding a product that is both wonderfully tender on the inside and satisfyingly crisp on the outside.
Whether you’re a seasoned baker or new to the world of yeasted goods, this make-ahead waffle batter is designed for success. Its forgiving nature and the glorious results it produces make it a staple in my own repertoire, and I highly encourage you to give it a try. While my Malted Waffles also hold a special place in my heart for their distinct flavor, there’s something uniquely rewarding about the convenience and deliciousness of these overnight wonders. So, plan ahead, mix up a batch tonight, and look forward to waking up to the enticing aroma of the best crispy, flavorful waffles you’ve ever made. Your taste buds, and your future self, will thank you for it!
