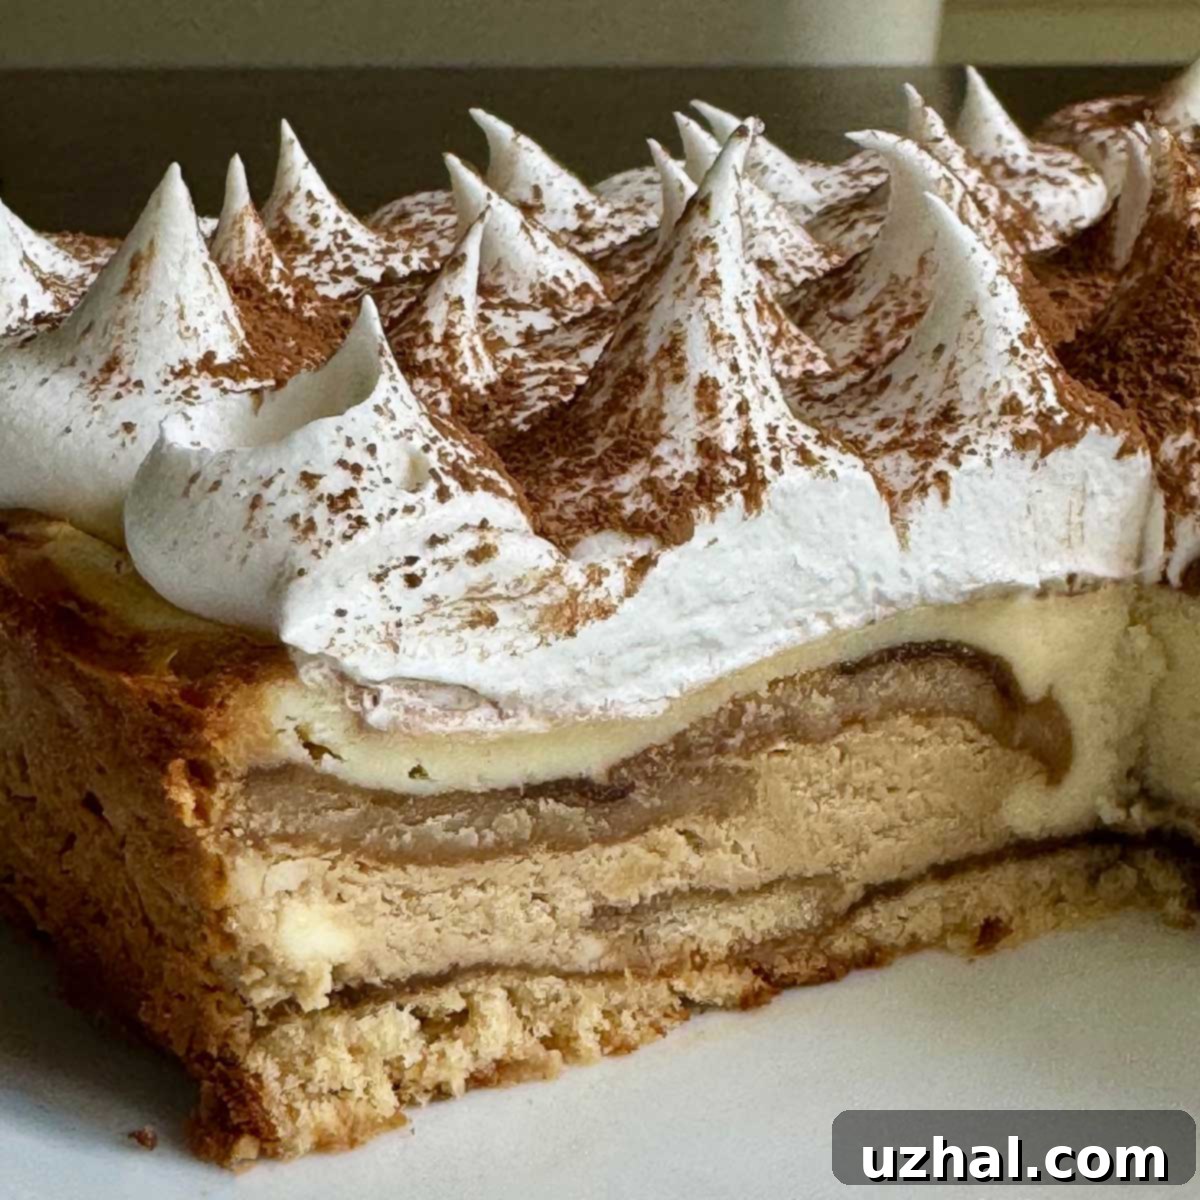
Easy 9×13 Tiramisu Cheesecake Recipe: A Crowd-Pleasing Dessert Classic
Step back in time to the early 2000s with this incredibly easy and delicious Tiramisu Cheesecake recipe, a true gem from my recipe archives. This recipe perfectly embodies the era when brands like Kraft aimed to make elegant desserts, especially cheesecake, more accessible to home bakers. Forget the intimidating springform pans and fussy water baths; this cheesecake is designed for simplicity, baked right in a standard 9×13 inch pan. It’s a no-fuss solution that delivers big on flavor and convenience, making it ideal for gatherings, holidays, or any time you need a crowd-pleasing dessert without the stress.
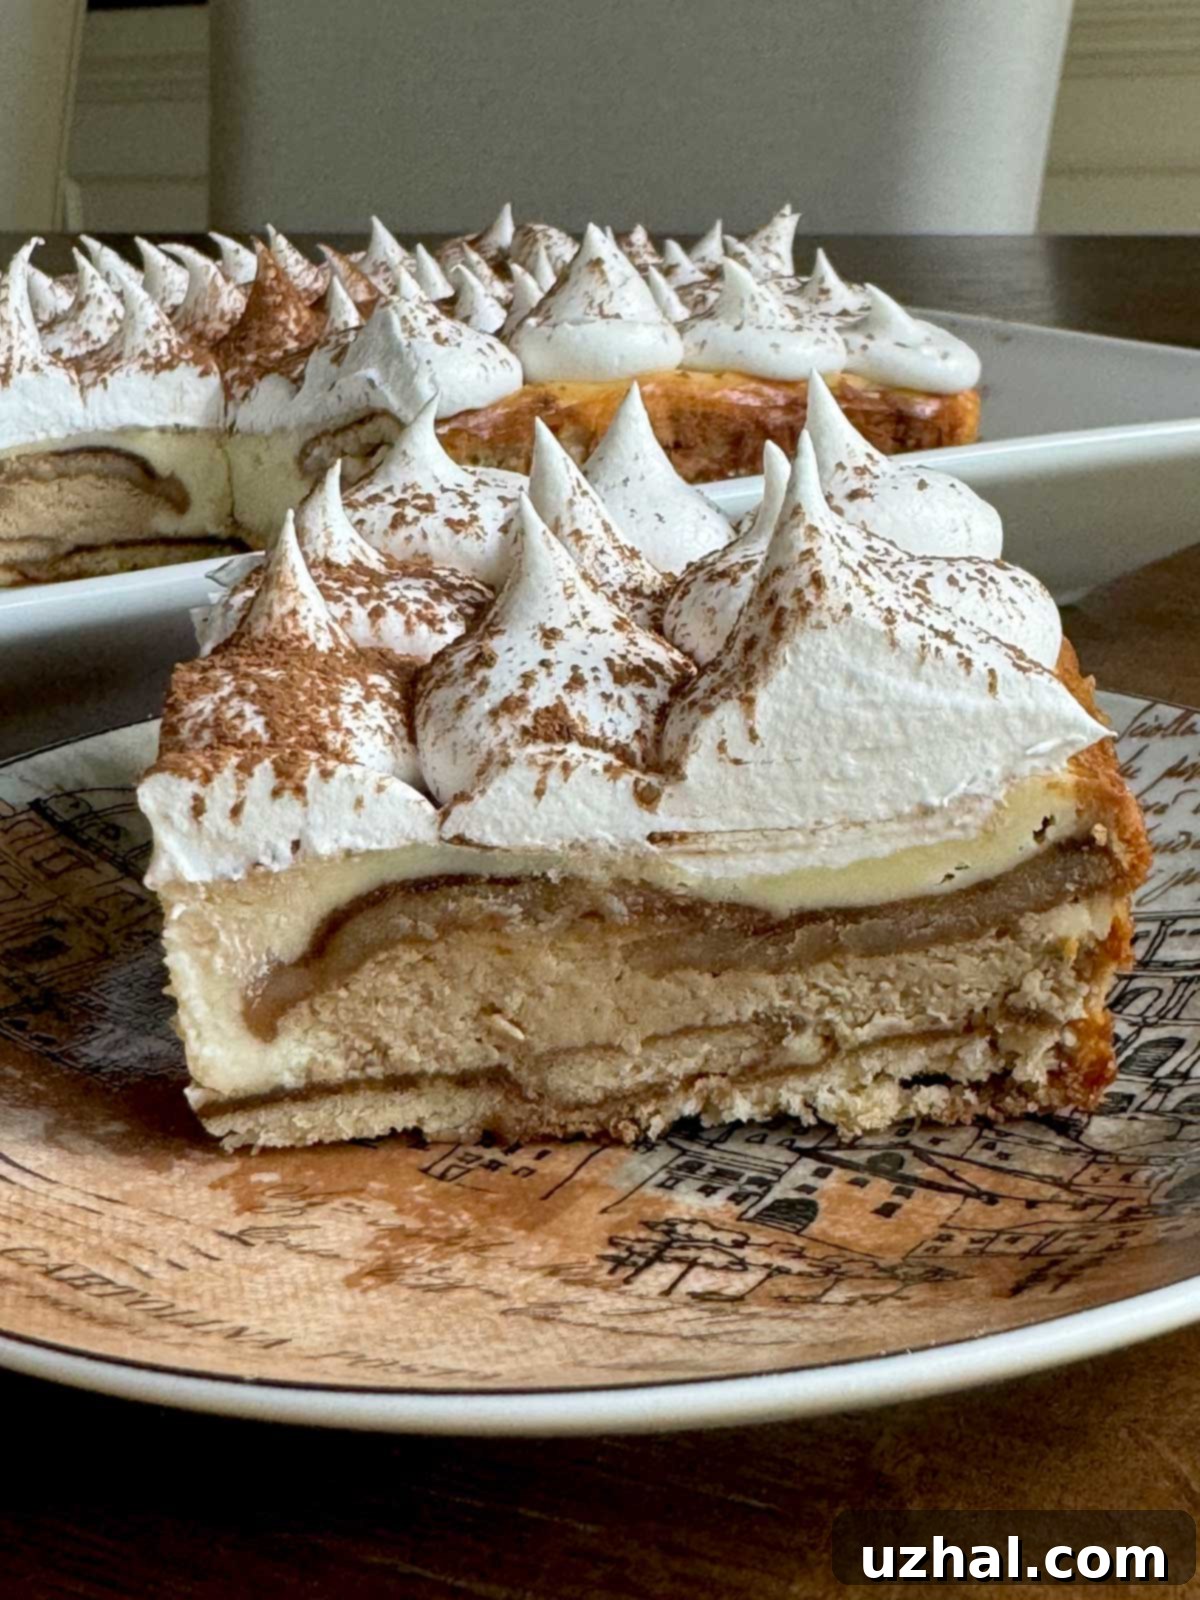
This particular recipe, I recall, was likely featured in Kraft’s Food & Family magazine, celebrated as a “bake-and-share” concept. The focus was less on avant-garde culinary trends, like a Basque Cheesecake’s dramatic char or Dubai Chocolate’s viral appeal, and more on straightforward preparation, easy portability, and serving a large group with minimal effort. This philosophy makes it an absolutely perfect dessert for occasions like Memorial Day, summer potlucks, family reunions, or any event where you want to impress without being stuck in the kitchen for hours. Its nostalgic charm, combined with its practicality, ensures it’s always a hit.
Mastering the Tiramisu Cheesecake in a 9×13 Pan
This Tiramisu Cheesecake is a delightful, no-brainer dessert that you can effortlessly prepare a day in advance, allowing flavors to meld beautifully and freeing up your event day. Instead of the traditional ladyfingers found in classic tiramisu, this recipe cleverly uses humble Nilla Wafers for both the base and a crucial middle layer. These vanilla-flavored cookies are lightly brushed with a very strong coffee mixture, infusing them with that signature tiramisu essence. What follows are two distinct layers of velvety cheesecake batter: a rich coffee-flavored layer first, topped by a smoother, delicate vanilla layer. The combination creates a beautifully balanced dessert that’s both familiar and exciting.
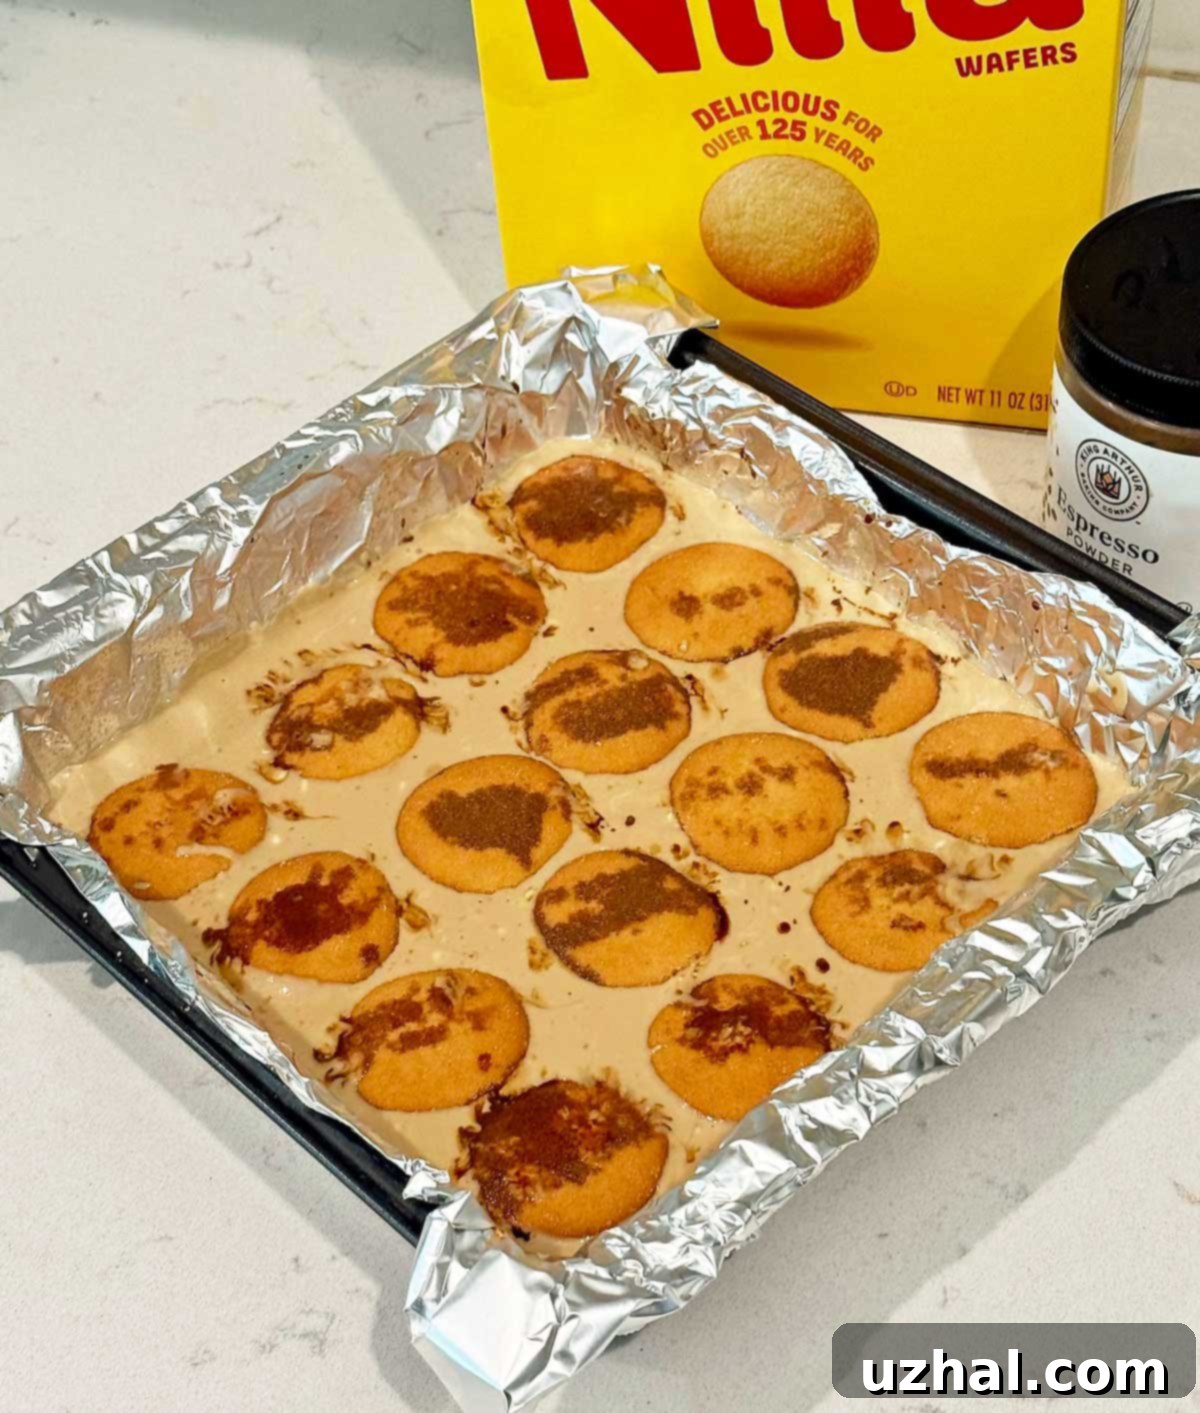
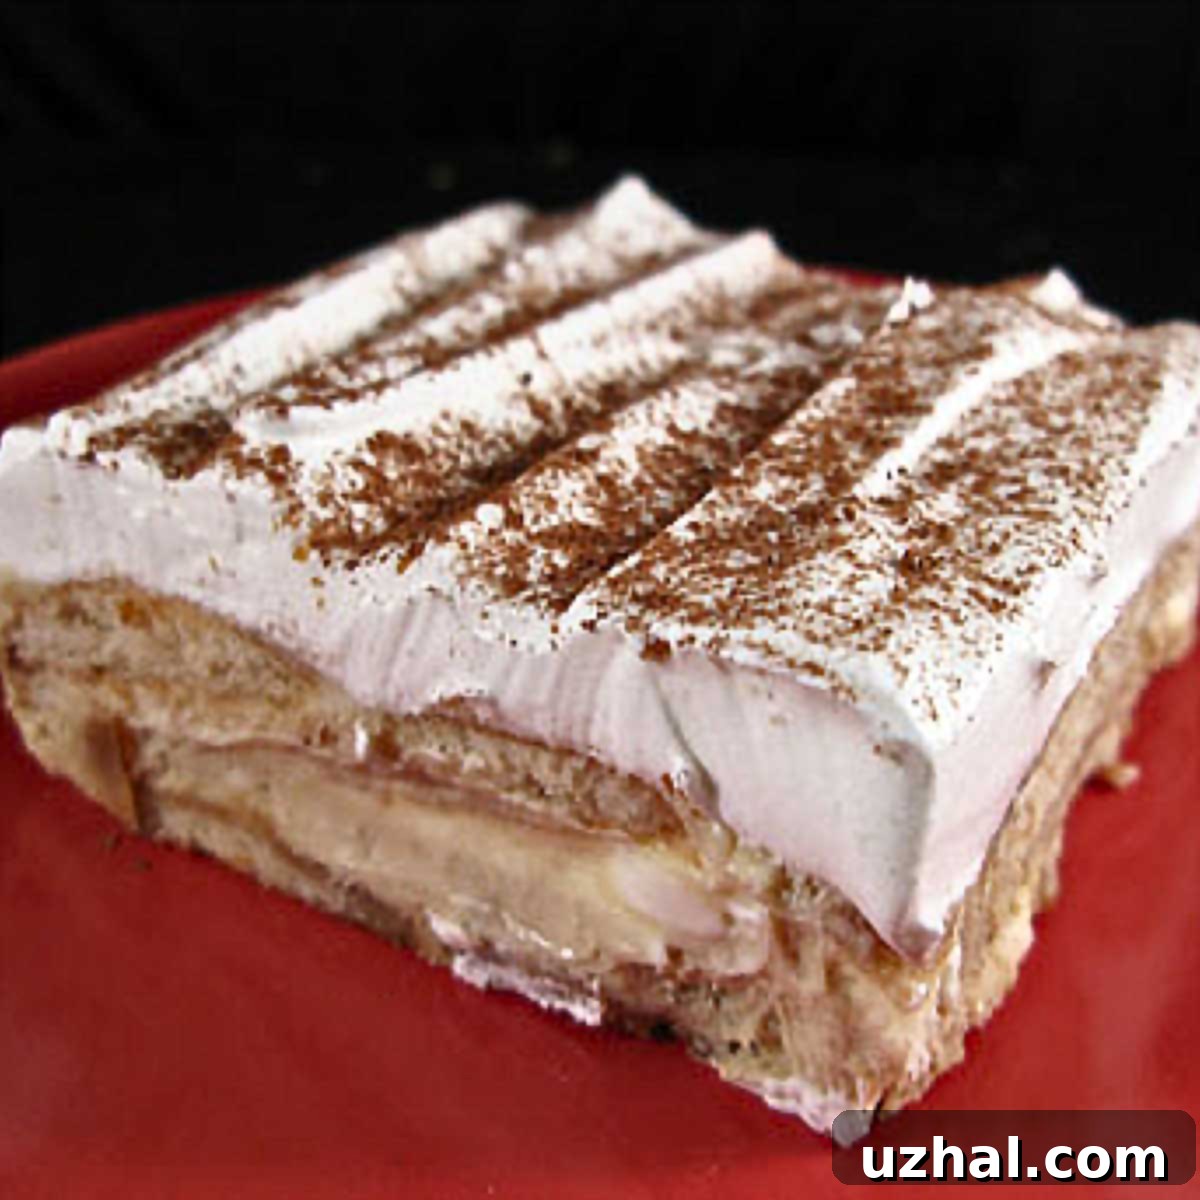
The image below captures a moment midway through the assembly process, showcasing the second layer of coffee-brushed Nilla Wafers nestled atop the coffee-flavored cream cheese layer. After this photo was taken, the thinner vanilla cheesecake batter was carefully poured over the top, completing the layered structure before baking. As the cheesecake bakes, the cookies settle and slightly shift, contributing to the charming, rustic strata visible in the final slice, as seen in the first photo. This layered approach not only looks impressive but ensures every bite offers a delightful mix of coffee-infused cookie and creamy cheesecake.
Scaling Your Cheesecake: 9×13 vs. Smaller Square Pan Options
The original recipe, and the detailed version provided in the recipe card below, is perfectly sized for a 9×13 inch pan. This generous dimension is ideal for feeding a larger crowd, catering to many friends, family members, or guests at any celebration. However, we understand that not every occasion calls for such a large quantity. For those times when you’re serving a more intimate group, perhaps up to six people, this recipe is wonderfully adaptable.
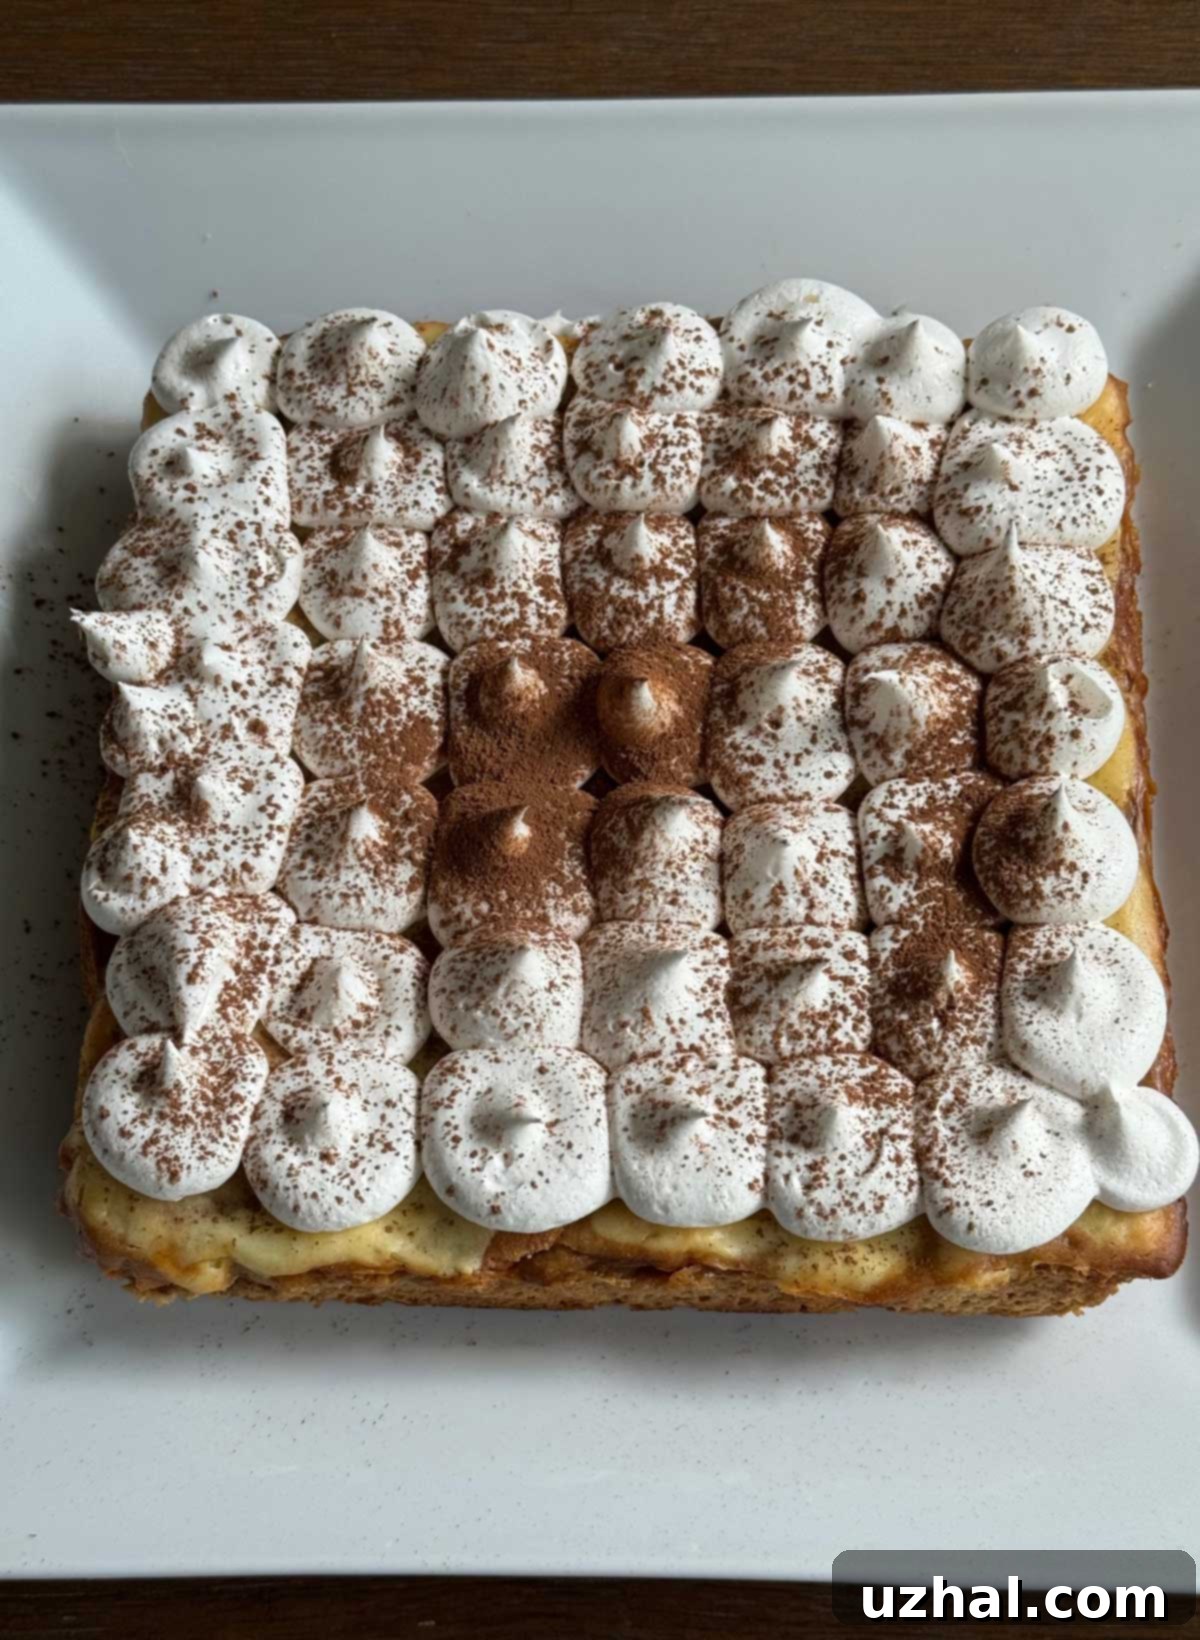
I recently prepared a smaller batch for ourselves, halving the ingredients and baking it in an 8-inch square metal pan. The result was equally delightful and perfectly portioned for fewer servings. The photograph below shows the complete 8-inch cheesecake, beautifully topped with whipped cream and a dusting of cocoa powder. While the 9×13 inch pan is certainly a showstopper for big gatherings, the 8-inch square version still provides a substantial and satisfying dessert. This flexibility means you can easily adjust the recipe to suit your needs, whether you’re hosting a grand party or enjoying a quiet evening at home. Remember, regardless of the size, the core flavors and ease of preparation remain consistent, delivering a consistently delicious Tiramisu Cheesecake experience.
Essential Tips & Tricks for Your Tiramisu Cheesecake Success
Achieving the perfect Tiramisu Cheesecake is simple with a few helpful tips. These notes are designed to guide you through the process, ensuring a smooth baking experience and a delicious outcome. Should any questions arise during your baking adventure, please don’t hesitate to ask!
- Pan Choice Matters: I recommend using a metal baking pan rather than a glass dish for this recipe. Metal pans conduct heat more efficiently and evenly, which is crucial for cheesecakes. If you must use a glass dish, be aware that you may need to slightly adjust your baking temperature (often lowering it by 25°F) or extend the baking time. My tests have exclusively been with metal pans, so keep an eye on your cheesecake if using glass.
- Coffee Power: The recipe calls for instant coffee crystals for the authentic tiramisu flavor. If you’re considering using instant espresso powder for a bolder taste, remember that it’s significantly more potent. You’ll only need half the amount of espresso powder compared to instant coffee. Even with a reduced quantity, espresso powder will yield a much stronger coffee flavor. For a balanced and approachable taste, it’s generally best to stick with instant coffee crystals as directed in the recipe.
- Brushing Nilla Wafers: This step can be a little delicate! The Nilla Wafers tend to float or shift when brushed with the coffee mixture. To minimize movement, try to anchor them gently with a few broken cookie pieces if necessary. Instead of dousing the wafers, use a pastry brush to lightly dab and coat them with the coffee. The goal is to moisten them and impart flavor, not to make them soggy.
- Soft Cream Cheese is Key: For a lump-free, silky smooth cheesecake batter, ensure your cream cheese is very soft and at room temperature. This is perhaps the most critical tip for cheesecake making. When making a half batch, like I did, you might even get away with just stirring the batter by hand without an electric mixer if the cream cheese is soft enough. However, for the full 9×13 inch batch, using an electric mixer will undoubtedly make the blending process much easier and more efficient, guaranteeing a perfectly smooth consistency.
- Perfect Toppings and Garnishes: Once chilled, your Tiramisu Cheesecake is ready for its grand finale! The whipped topping can be spread smoothly over the entire surface for a classic look, or you can get creative by piping it out with a round tip, as I did, for an elegant finish. To elevate the tiramisu theme, consider adding a sprinkle of cocoa powder, miniature chocolate curls, or even a few chocolate-covered espresso beans for an extra caffeine kick and textural contrast (though the cheesecake already has plenty of coffee flavor!). A drizzle of caramel sauce or chocolate syrup before serving would also add a lovely touch of sweetness and visual appeal.
The Perfect Make-Ahead Dessert for Busy Hosts
One of the standout advantages of this 9×13 Tiramisu Cheesecake is its incredible suitability as a make-ahead dessert. In today’s fast-paced world, finding recipes that allow you to prepare components or even the entire dish in advance is invaluable, especially when hosting or contributing to a potluck. This cheesecake can be baked and chilled completely a day before your event, meaning you can focus on other preparations or simply relax when your guests arrive. The overnight chilling period isn’t just for convenience; it’s essential for the cheesecake’s structure to set perfectly and for all the rich, coffee-infused flavors to fully develop and meld. This makes for a more flavorful and stable dessert that’s easy to slice and serve. Imagine the relief of having a show-stopping dessert ready to go, requiring only a quick topping and dusting of cocoa powder right before serving.
Ingredients Spotlight: Crafting the Classic Tiramisu Cheesecake Flavors
Each ingredient in this Tiramisu Cheesecake recipe plays a vital role in creating its iconic flavor and smooth texture. The use of **Nilla Wafers** is a clever substitution for traditional ladyfingers, providing a sturdy, yet delicate, base and middle layer that readily absorbs the coffee essence without becoming overly soggy. **Cream cheese**, the star of any cheesecake, brings a rich, tangy, and undeniably creamy body to the dessert. Paired with **sugar**, it creates the perfect level of sweetness, balancing the tanginess. **Sour cream** is crucial for adding moisture, a subtle tang, and contributing to the cheesecake’s signature smooth, velvety texture. **Coffee powder** (or espresso powder) is the heart of the tiramisu component, infusing layers with its robust aroma and flavor. **Eggs** act as a binding agent, providing structure and richness to the cheesecake as it bakes. Finally, the generous topping of **whipped cream** (or Cool Whip) offers a light, airy contrast to the dense cheesecake, while a dusting of **unsweetened cocoa powder** adds a hint of bitterness and an elegant finish, completing the classic tiramisu aesthetic. Together, these ingredients combine to create an accessible yet sophisticated dessert that celebrates convenience without compromising on taste.
More Delicious Recipes You Might Love
- Strawberry Pie
- Strawberry Cake With Pudding Frosting
- White Chocolate Strawberry Tiramisu
- Tiramisu Cake
- Reduced Calorie Tiramisu
Recipe
Classic 9×13 Inch Tiramisu Cheesecake (Easy & Crowd-Pleasing)
Anna
Pin Recipe
Ingredients
- 1 box Nilla Wafers (12 oz) or about 44 cookies
- 5 teaspoons instant coffee granules or 2½ teaspoons instant espresso powder, divided
- 3 tablespoons hot water divided
- 4 (8-oz) packages cream cheese, softened
- 1 cup granulated sugar
- 1 cup sour cream, at room temperature
- 1 ½ teaspoons vanilla extract
- 4 large eggs, at room temperature
- 3 cups Cool Whip or other whipped topping, thawed
- 2 tablespoons unsweetened cocoa powder, for dusting
Instructions
-
Preheat your oven to 325°F (160°C). Line a 9×13 inch baking pan with aluminum foil, ensuring the ends of the foil extend over the sides of the pan to create handles. Lightly spray the bottom of the pan with cooking spray to prevent sticking.
-
Carefully arrange half of the Nilla Wafers (approximately 44 cookies) in a single layer on the bottom of your prepared pan. They don’t need to be perfectly aligned, but aim for even coverage.
-
In a small bowl, dissolve 2 teaspoons of instant coffee granules (or 1 teaspoon of espresso powder) in 2 tablespoons of hot water. Use a pastry brush to gently dab this strong coffee mixture onto the Nilla Wafers. Be mindful not to completely soak them; just aim to moisten them enough to impart the coffee flavor. Use about half of this coffee mixture for this layer of wafers. Reserve the remaining half of the coffee mixture for the second layer of wafers.
-
In a large mixing bowl, using an electric mixer on medium speed (or a sturdy whisk if your cream cheese is very soft), beat the softened cream cheese and granulated sugar together until the mixture is completely smooth and well blended, with no lumps. Stir in the sour cream and vanilla extract until just combined.
-
Add the large eggs, one at a time, mixing on low speed after each addition. Mix only until each egg is just blended into the batter; avoid overmixing.
-
In a separate small bowl, dissolve the remaining 3 teaspoons of instant coffee granules (or 1½ teaspoons of espresso powder) in the remaining 1 tablespoon of hot water. Set aside.
-
Measure out about 3½ cups (approximately 14 oz) of the plain cheesecake batter into a medium bowl. Stir in the dissolved coffee mixture from the previous step until evenly incorporated. This will be your coffee-flavored layer.
-
Pour the coffee-flavored cheesecake batter evenly over the first layer of Nilla Wafers in the baking pan. Then, arrange the remaining Nilla Wafers over the coffee layer. Brush these wafers with the reserved dissolved coffee mixture. Finally, pour the remaining plain vanilla cheesecake batter over the second layer of wafers, spreading it gently to cover completely.
-
Bake for 45 minutes, or until the center of the cheesecake is almost set (it will still have a slight jiggle). Turn off the oven, crack the door open slightly, and let the cheesecake cool in the oven for about an hour. Remove from the oven and cool completely to room temperature on a wire rack. Once at room temperature, refrigerate the cheesecake for at least 3 hours, or preferably overnight, to allow it to set fully. Use the foil handles to carefully lift the chilled cheesecake from the pan. Spread or pipe the thawed whipped topping evenly over the top and generously dust with unsweetened cocoa powder.
-
Optional: For an extra touch of indulgence, consider drizzling chocolate syrup, caramel sauce, or garnishing with chocolate-covered espresso beans just before serving.
