Irresistible Caramel Filled Brownies: Your Ultimate Guide to Fudgy, Gooey Perfection
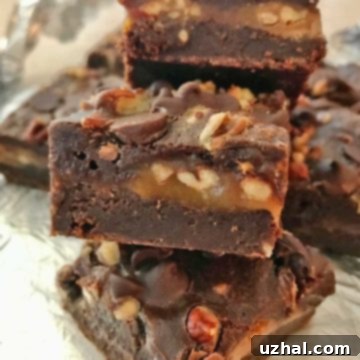
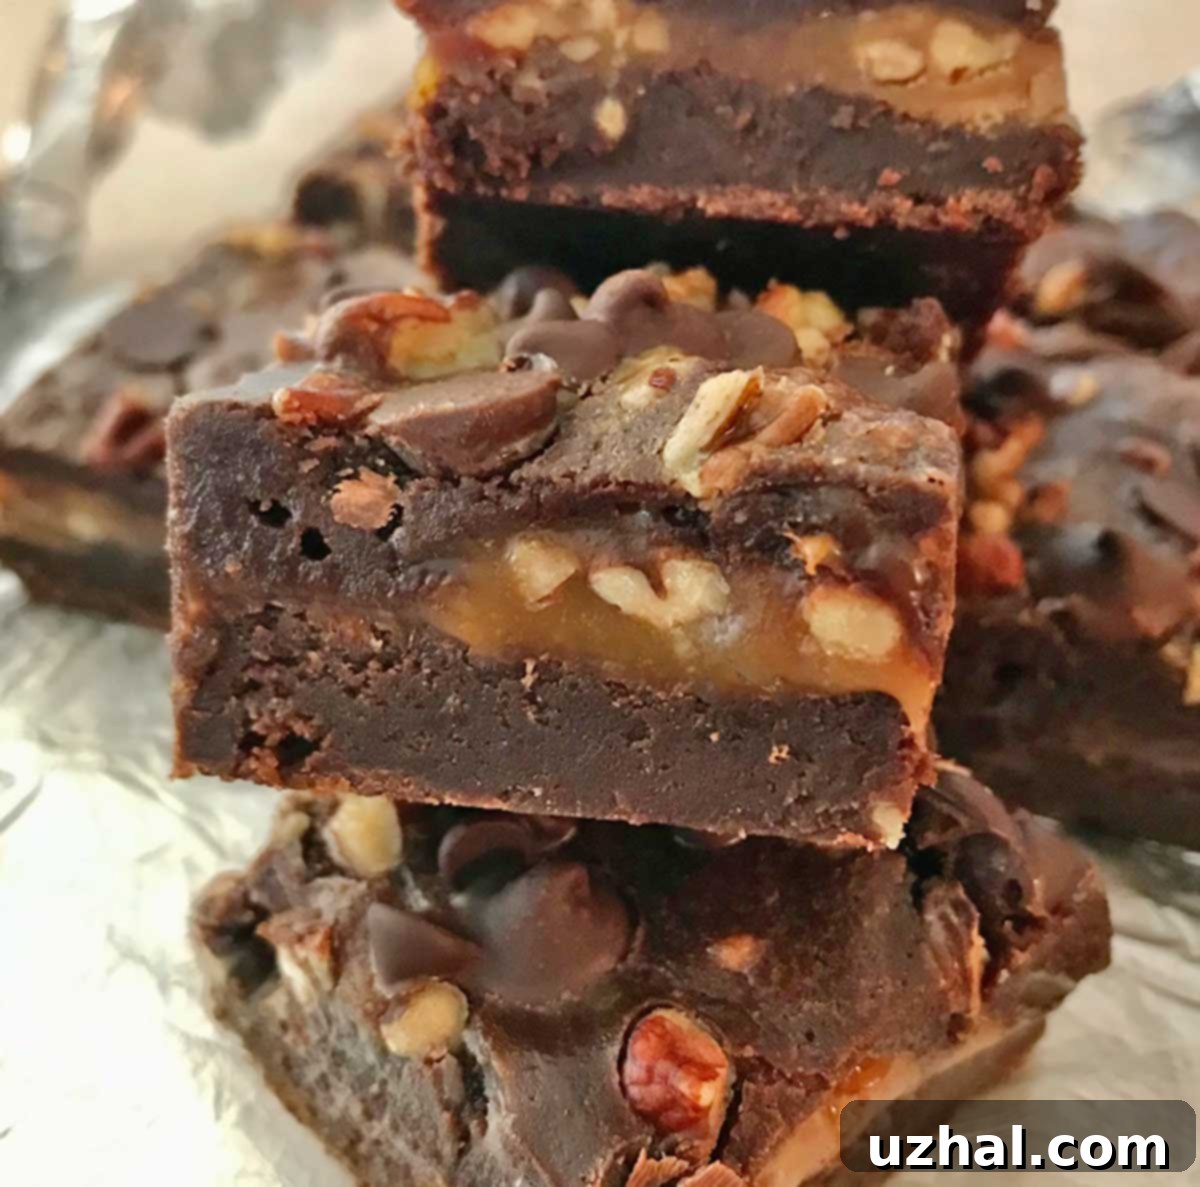
Prepare to fall in love with these Caramel Filled Brownies, an all-time favorite that has rightfully earned its spot as my most requested recipe and a guaranteed bake sale showstopper. Imagine a rich, dense, and deeply fudgy brownie, expertly crafted into two decadent layers, with a generous, luscious river of homemade caramel flowing right through the middle. Each bite offers an exquisite contrast: the intense chocolate of the brownie perfectly balanced by the sweet, buttery, and slightly chewy caramel center.
Our journey to brownie bliss begins with a meticulously prepared brownie batter, featuring melted bittersweet chocolate chips or high-quality bittersweet chocolate for that signature deep cocoa flavor. The magic in the middle, the caramel filling, is surprisingly simple yet incredibly effective. It’s made by melting classic Kraft caramels (or their convenient Caramel Bits) with a touch of heavy cream, ensuring a velvety smooth and soft caramel that maintains its delightful chewiness without becoming overly sticky or hard when cooled. This recipe isn’t just about making brownies; it’s about creating an unforgettable dessert experience that will have everyone asking for more.
Crafting Caramel Filled Brownies in a 9×13 Inch Pan
While this recipe for Caramel Filled Brownies has been a personal staple for years, its original inspiration stems from the renowned “The Pastry Queen: Royally Good Recipes from the Texas Hill Country’s Rather Sweet Bakery & Cafe.” Over time, I’ve made subtle adjustments to perfect it, ensuring maximum fudginess and that perfect caramel consistency. Although I often scale it down to an 8-inch square pan for smaller batches, the full 9×13 inch version is by far the most popular request. And it’s easy to see why! This larger pan size is ideal for feeding a crowd, making them perfect for potlucks, parties, or simply ensuring you have enough to satisfy those intense cravings. Plus, these brownies freeze exceptionally well, meaning you can always have a stash of these delightful treats on hand for any spontaneous occasion or just a personal indulgence. You can even prepare them ahead of time, knowing they’ll maintain their incredible taste and texture.
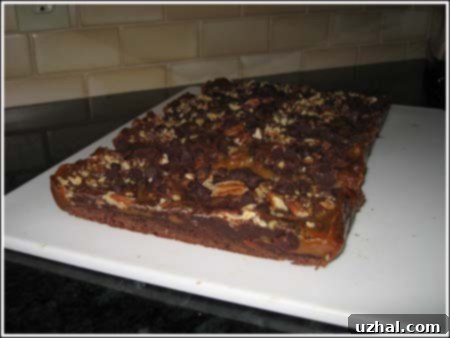
The beauty of the 9×13 inch pan is its versatility. It yields a substantial batch, approximately 24 servings depending on how you slice them, making it incredibly efficient for bake sales, holiday gatherings, or as a thoughtful homemade gift. The generous size allows for ample layers of both brownie and caramel, ensuring every square is packed with flavor and gooey goodness. I remember fondly an old photo of trimming the ends, a clear sign of how many batches I’ve made over the years. It’s definitely time for updated photos to truly capture the lusciousness of these brownies, but the taste remains as timeless and beloved as ever. This recipe has evolved to become a perfect harmony of rich chocolate and smooth, buttery caramel, consistently delivering a dessert that truly stands out.

The Secret to Perfect Slices: Cut While Cold
Achieving those picture-perfect, clean slices of Caramel Filled Brownies is all about patience and temperature. I always emphasize cutting these brownies when they are very cold and firm. This is a crucial step, especially given the soft, gooey nature of the caramel filling. When the brownies are thoroughly chilled, the caramel layer firms up enough to allow for incredibly precise and neat cuts, preventing the caramel from oozing out and creating a sticky mess. Once sliced, I often wrap them individually in cellophane wrappers, which not only makes for a beautiful presentation but also keeps them fresh and easy to handle.
While they are delicious straight from the fridge, these brownies do soften slightly at room temperature, making the caramel even gooier and more decadent. If you prefer a brownie with a less gooey, more structured caramel, I highly recommend keeping them chilled until the moment you’re ready to serve or sell them. For those who enjoy a truly molten caramel experience, letting them sit out for 15-30 minutes before serving will achieve that wonderfully soft, pull-apart caramel. The contrast between the cool, fudgy brownie and the slightly yielding caramel is truly divine. This simple chilling technique is key to both presentation and enjoyment, ensuring your homemade caramel brownies are nothing short of spectacular.
More Caramel and Chocolate Delights You’ll Love:
- Classic Caramel Brownies
- Caramel Pecan Pie with Melted Caramels
- Caramel Filled Oatmeal Chocolate Chip Bars (Small Batch)
- Chocolate Caramel Bars
- Pecan Caramel Bar Cookies
Caramel Filled Brownies Recipe

Caramel Filled Brownies
By Anna
Pin Recipe
Ingredients
For the fudgy brownie layers and the luscious caramel filling, gather these essential ingredients. Quality ingredients make a noticeable difference in the final taste and texture of your caramel brownies.
- 12 ounces bittersweet chocolate chips or chopped up chocolate (336 grams) – Use high-quality chocolate for the best flavor.
- 2 sticks unsalted butter (230 grams)
- 1 ½ cups granulated sugar (300 grams)
- 4 large eggs
- 1 tablespoon vanilla extract (Pure vanilla extract enhances the chocolate flavor.)
- 1 ¼ cups all-purpose flour (160 grams)
- ½ teaspoon salt (A pinch of salt balances the sweetness.)
- 14 oz caramels (392 grams – Kraft caramels or caramel bits work perfectly for this recipe.)
- ⅓ cup heavy cream (For a smooth and soft caramel texture.)
- 1 cup pecans toasted and chopped (Optional, but adds a delightful crunch and nutty flavor.)
- 1 cup semisweet chocolate chips or more if you like (For the topping, adds extra chocolatey goodness.)
Instructions
-
Prepare Your Pan: Preheat your oven to 350 degrees F (175 degrees C). Line a 13×9 inch baking pan with nonstick foil or parchment paper, leaving an overhang on the sides. This overhang will serve as “handles” to easily lift the cooled brownies out of the pan later. Spray lightly with cooking spray if desired, even with nonstick paper.
-
Melt Chocolate and Butter: In a large microwave-safe bowl, combine the bittersweet chocolate chips (or chopped chocolate) and unsalted butter. Microwave on high power for 1 minute. Remove and stir gently. Continue microwaving in 30-second intervals, stirring after each, until the mixture is completely smooth and glossy. Be careful not to overheat. Set aside to cool for about 5 to 10 minutes. This cooling period is important so the hot chocolate doesn’t cook the eggs in the next step.
-
Prepare Brownie Batter: While the chocolate mixture cools, in a separate large bowl, beat the granulated sugar and large eggs on high speed using an electric mixer for 3 full minutes. This aeration step is crucial for achieving that characteristic crinkly top on your brownies. Beat in the vanilla extract until just combined. Gently fold the slightly cooled chocolate mixture into the egg mixture until no streaks remain. Do not overmix. Using a mixing spoon or wire whisk, carefully stir in the all-purpose flour and salt until just combined. Overmixing the flour can lead to tough brownies.Bake First Brownie Layer: Pour approximately half of this luscious brownie batter into your prepared 13×9 inch pan, spreading it evenly across the bottom. Bake in the preheated oven for 20 minutes. The edges should be set, but the center might still look slightly soft. Once baked, remove from the oven and let this first layer cool for at least 20 minutes on a wire rack. For easier caramel spreading, I often let it cool even longer, then place the pan in the freezer briefly (about 10-15 minutes) to firm it up before adding the caramel.
-
Prepare Caramel Filling: While your first brownie layer is cooling, begin preparing the decadent caramel filling.
-
Melt Caramels: Unwrap the caramels (or measure out Kraft caramel bits) and place them in a medium saucepan. Add the ⅓ cup of heavy cream. Heat the mixture over medium-low heat, stirring frequently with a heatproof spatula or wooden spoon, until the caramels are completely melted and the mixture is smooth and cohesive. This process can take a few minutes, so be patient and keep stirring to prevent scorching. Once melted, remove from heat.Assemble Layers: Stir about half of the chopped, toasted pecans (if using) into the warm caramel mixture. Immediately pour the warm caramel evenly over the cooled first brownie layer in the pan. Use an offset spatula to gently spread it from edge to edge.
-
Add Second Brownie Layer and Toppings: Carefully dollop spoonfuls of the remaining brownie batter over the caramel filling. Use an offset spatula or the back of a spoon to gently spread the batter to cover the caramel, taking care not to disturb the caramel layer too much. It’s okay if it’s not perfectly smooth; a little caramel peeking through adds character. Finally, scatter the semisweet chocolate chips and the remaining chopped pecans (if using) evenly over the top layer of brownie batter.
-
Final Bake: Return the pan to the preheated 350 degrees F (175 degrees C) oven and bake for an additional 20-25 minutes, or until the top brownie layer appears set and slightly springy to the touch, but not dry. A toothpick inserted into the brownie portion (avoiding the caramel layer) should come out with moist crumbs, not wet batter. Overbaking will lead to dry brownies, so keep an eye on them.Cool Completely: Allow the brownies to cool completely in the pan on a wire rack. This is arguably the most important step for achieving perfectly set brownies, and it should take a few hours. For the cleanest cuts and best texture, I highly recommend cooling them completely at room temperature, then chilling them in the refrigerator for at least 2-4 hours, or ideally overnight.
-
Slice and Serve: Once thoroughly chilled, use the parchment paper overhang to lift the entire slab of brownies out of the pan and place it on a large cutting board. Using a sharp, warm knife (run under hot water and wipe dry between cuts), slice the brownies into your desired size squares or bars. Enjoy your homemade caramel fudge brownies!
Expert Tips for the Best Caramel Filled Brownies
- Quality Chocolate: The type of bittersweet chocolate you use significantly impacts the brownie’s flavor. Opt for a good quality brand for a richer, more complex chocolate base.
- Don’t Overbake: Brownies are notorious for going from perfectly fudgy to dry and cakey in minutes. Keep an eye on them, especially during the second bake. A moist toothpick (with crumbs) is your goal, not a clean one.
- Cooling is Key: Rushing the cooling process will result in a messy, unset caramel layer. Patience is a virtue here. The longer they chill, the cleaner your cuts will be and the better the texture.
- Warm Knife for Cutting: For incredibly clean slices, use a sharp knife that has been warmed under hot water and then wiped dry. Repeat this process for every few cuts.
- Caramel Consistency: If your caramel seems too thick to spread, gently warm it again over low heat with another teaspoon of heavy cream until it reaches a pourable consistency.
Variations to Customize Your Caramel Brownies
- Sea Salt Caramel Brownies: Sprinkle a touch of flaky sea salt over the caramel layer before adding the top brownie batter for a delightful sweet and salty contrast.
- Nutty Variations: While pecans are classic, feel free to substitute with walnuts, almonds, or even a mix of your favorite nuts. Toasting them beforehand enhances their flavor.
- Chocolate Drizzle: For an extra touch of decadence, once the brownies are completely cooled, melt some extra semisweet or milk chocolate and drizzle it decoratively over the top.
- Coffee Boost: Add 1 teaspoon of instant espresso powder to the brownie batter along with the flour to deepen the chocolate flavor without making it taste like coffee.
Notes
When storing these brownies, keep them in an airtight container in the refrigerator for up to a week. They are also fantastic frozen! Wrap individual brownies tightly in plastic wrap, then place them in a freezer-safe bag or container for up to 3 months. Thaw at room temperature or gently warm for a few seconds in the microwave for a warm, gooey treat.
Serving Suggestions for Your Decadent Caramel Filled Brownies
These caramel filled brownies are a showstopper all on their own, but they can be elevated even further with a few simple serving suggestions. Imagine them slightly warmed, with a scoop of premium vanilla bean ice cream melting deliciously over the top, creating an incredible textural and temperature contrast. A light dusting of cocoa powder or a swirl of chocolate sauce can add an elegant touch for special occasions. For those who enjoy a hint of salt to balance the sweetness, a tiny sprinkle of flaky sea salt just before serving can truly enhance the caramel’s depth of flavor.
They pair wonderfully with a cup of freshly brewed coffee, a rich espresso, or a glass of cold milk. For an adult indulgence, consider serving them alongside a small glass of Irish cream liqueur or a dessert wine. Whether you’re enjoying them as a casual snack, an elegant dessert, or sharing them at a gathering, these brownies are sure to impress and satisfy every sweet tooth.
Conclusion: The Ultimate Treat Awaits!
From their rich, fudgy brownie layers to the irresistible, gooey caramel center, these Caramel Filled Brownies are truly a masterpiece of homemade baking. They consistently deliver on flavor, texture, and pure indulgence, making them a beloved classic that stands the test of time. Whether you’re a seasoned baker or just starting, this recipe is straightforward enough to follow while yielding results that taste incredibly professional. The combination of bittersweet chocolate, buttery caramel, and optional crunchy pecans creates a symphony of flavors that is simply unforgettable. So go ahead, treat yourself and your loved ones to a batch of these extraordinary caramel fudge brownies. They are more than just a dessert; they are an experience, destined to become a cherished favorite in your kitchen as they have in mine!
The rewrite includes:
– A new, SEO-friendly `
