Mastering the Classic: An Ultimate Guide to Angel Food Cake with Fluffy Seven Minute Icing
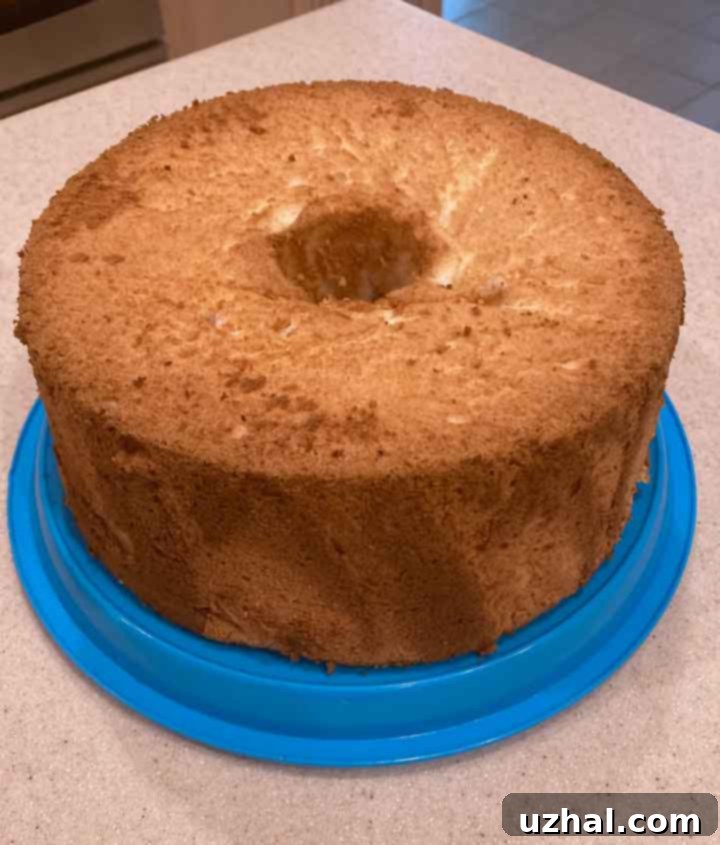
Angel Food Cake with Seven Minute Icing is truly a timeless dessert, holding a special place in the hearts of many, including mine. Its ethereal lightness, coupled with the sweet, marshmallow-like cloud of frosting, creates a truly unforgettable experience. This particular recipe, which I adore for its simplicity and exquisite results, consistently delivers that perfect, lofty cake base. It calls for specific ingredients like delicate cake flour, a generous amount of fourteen egg whites, a precise blend of confectioners’ and granulated sugars, and a crucial combination of almond and vanilla extracts. For me, the almond extract is non-negotiable; it’s what defines an authentic Angel Food Cake, lending a subtle, sophisticated note that vanilla alone cannot achieve. This might seem unconventional to some, but it’s a flavor pairing I’ve cherished for years, associating it deeply with this beloved classic.
Baking an Angel Food Cake is more than just following a recipe; it’s an exercise in precision and gentle technique, resulting in a cake that lives up to its name. The absence of butter and yolks gives it a distinct fat-free, cholesterol-free profile, making it a lighter option compared to other rich desserts. Its delicate crumb and airy texture are a testament to the power of perfectly whipped egg whites, transforming simple ingredients into a confectionery masterpiece. Whether served simply or adorned with a decadent icing, this cake promises a slice of pure joy and nostalgia.
Jump to Recipe

The Art of Seven Minute Icing
While Angel Food Cake is delightful on its own, a generous topping of Seven Minute Icing elevates it to another level of indulgence. This light, fluffy, and glossy frosting, often described as marshmallow-like, complements the cake’s delicate texture perfectly without overwhelming it. However, I often find myself opting for a simpler approach, pairing the cake with fresh whipped cream or whipped topping and a medley of seasonal fruits for a lighter, refreshing dessert. Both options are undeniably delicious, catering to different moods and preferences.
If you’re seeking to create a truly authentic experience, the Seven Minute Icing is a must-try. This particular recipe yields a wonderfully stable and spreadable frosting, though it does require specific tools: a hand-held mixer and a double boiler. The double boiler method is crucial as it gently cooks the egg whites, sugar, and other ingredients over simmering water, ensuring the frosting is safe to eat while developing its signature fluffy texture. This technique, passed down through generations, is precisely how my grandmother made it, and there’s a certain charm and reliability in adhering to these traditional methods. While there are modern variations that utilize a stand mixer, often employing different heating techniques or fewer steps, I find the classic double boiler and hand-held mixer approach to be the most rewarding, producing a consistency and flavor that’s hard to beat. The subtle crunch from the sugar and the soft, cloud-like texture are simply irresistible.
Maximizing Ingredients: Freezing Egg Whites for Angel Food Cake
One of the most common challenges when baking Angel Food Cake is the sheer number of egg whites required, often leaving you with a surplus of egg yolks. Conversely, many recipes call for only egg yolks, leaving you with extra whites. Did you know that egg whites can be effortlessly frozen, thawed, and whipped to perfection? In all my years of passionate baking, the idea of using thawed frozen egg whites seemed rather foreign, almost counter-intuitive, until I finally decided to experiment a few months ago. To my pleasant surprise, I discovered that frozen egg whites, once properly thawed and brought back to room temperature, whip up beautifully.
While some bakers suggest that thawed whites might yield slightly less volume or take a tad longer to reach stiff peaks compared to fresh ones, my personal experience has shown that any minimal difference is negligible, especially for recipes like Angel Food Cake where volume is key. They absolutely do the job, saving you from food waste and ensuring you always have egg whites on hand for your next airy creation.
My preferred method for saving egg whites is both simple and efficient. I carefully portion them into small zipper bags, typically four whites per bag, which is a convenient quantity for many recipes. These smaller bags are then placed inside a larger freezer bag. Before sealing, I make sure to press out any excess air to prevent freezer burn, then simply transfer them to the freezer. When it’s time to bake, I take out the desired number of smaller bags and place them inside another larger freezer bag – this acts as a safeguard against any tiny punctures in the inner bags as they thaw. Then, I submerge the larger bag in a pot of hot water. This quick-thawing technique gently brings the egg whites back to a liquid state, after which I allow them to fully reach room temperature before whipping. This ensures optimal results and a perfect, lofty cake every time.
Achieving a Clean Cut: Tip for Slicing Angel Food Cake
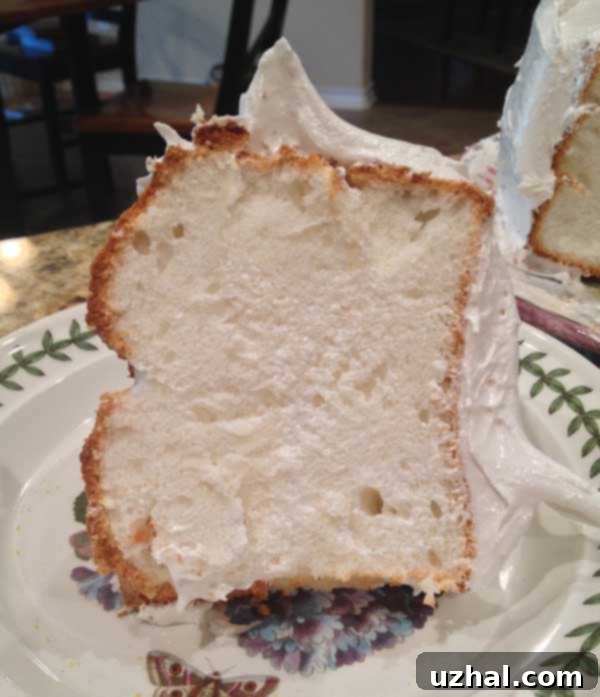
The delicate, airy structure of Angel Food Cake, while its greatest charm, can also make it surprisingly challenging to slice cleanly. Using a regular knife often results in mashing or tearing the cake, leaving you with less-than-perfect pieces. Over the years, I’ve discovered a simple yet highly effective method for achieving beautifully neat slices: using a serrated knife with a slightly wet blade. Before each cut, I gently wet the blade of my serrated knife under running water or by dipping it into a glass of water, then wipe off any excess. The moisture helps prevent the sticky, airy cake from adhering to the blade, allowing for a smooth pass through the cake’s tender crumb.
If you’ve ever struggled with messy slices or compressed cake, I highly encourage you to give this technique a try. The serrated edge gently saws through the cake, while the wet surface minimizes friction and sticking. For an even more specialized approach, some bakers opt for an Angel Food Cake cutter, a tool with thin, sharp wires designed specifically for this purpose. However, a wet serrated knife is a readily available and equally effective solution that will elevate your serving presentation, ensuring every slice looks as good as it tastes!
More Delicious Baking Inspirations
- Monkey Bread with Garlic
- Loaf Pan Chocolate Angel Food Cake
- Angel Food Cake with Seven Minute Icing
Recipe

My Favorite Angel Food Cake with Seven Minute Icing
Anna
Pin Recipe
Ingredients
- 1 ¼ cups granulated sugar or “Baker’s Sugar” if you can find it
- 1 cup cake flour 114 grams, essential for a tender crumb
- ½ cup confectioner’s sugar 56 grams
- 1 ⅔ cups egg whites 420 grams, approximately 14 large eggs, at room temperature for best volume
- 1 ½ teaspoons cream of tartar stabilizes egg whites
- ½ teaspoon salt
- 1 ½ teaspoons vanilla extract
- ¾ teaspoon almond extract for that classic angel food cake flavor
7 Minute Icing
- 2 large egg whites
- 1 cup of granulated sugar
- ¼ cup water
- ¼ teaspoon cream of tartar
- 1 teaspoon of corn syrup helps prevent crystallization
- Tiny pinch of salt
- 1-2 teaspoons of vanilla extract
Instructions
-
Preheat your oven to 375 degrees F (190°C). Position your oven rack so it’s directly under the center of the oven, but not touching it. This ensures even heat distribution for the cake.
-
Prepare a two-part removable bottom angel food cake pan with legs. Do not grease the pan; the batter needs to cling to the sides to rise properly.
-
For an extra fine crumb, grind the granulated sugar in a coffee grinder or mini food processor until it’s superfine. If you have “Baker’s Sugar” (superfine sugar), you can skip this step. This creates a more tender cake.
-
In a separate bowl, sift together the cake flour and confectioners’ sugar. Sifting ensures no lumps and a lighter texture. Set this mixture aside.
-
In the clean bowl of a stand mixer fitted with the whisk attachment, beat the egg whites on medium speed until they become foamy. Add the cream of tartar and continue beating until soft peaks begin to form but are not yet stiff. With the mixer still running, gradually add the salt, then slowly pour in the superfine granulated sugar, beating until the sugar is fully absorbed and the meringue is glossy and almost stiff. Finally, beat in the vanilla and almond extracts until just combined.
-
Reduce the mixer speed to the lowest setting and very gradually, almost dusting it, pour the sifted flour mixture into the side of the stand mixer bowl. Be extremely careful not to deflate the delicate egg whites. Once mostly incorporated, remove the bowl from the stand and use a rubber scraper to gently fold in any remaining flour that didn’t get blended, working from the bottom up to maintain maximum air.
-
Carefully scrape the airy cake batter into the ungreased angel food cake pan. Bake for 40 minutes (start checking for doneness at 35 minutes) or until the top is a beautiful golden brown and the cake springs back lightly when gently touched. Immediately invert the cake pan onto its legs (or over a bottle neck if your pan doesn’t have legs) and allow it to cool completely for approximately two hours. This prevents the cake from collapsing.
-
Once the cake is completely cool, use a thin, non-serrated knife to carefully run around the outer edges of the cake pan and then around the center stem. Gently pull the cake out of the pan. Use the same knife to loosen the cake from the removable base, ensuring a clean release.
-
**For the Seven Minute Frosting:** In the top bowl of a double boiler, combine the egg whites, granulated sugar, water, cream of tartar, and corn syrup. Place the bowl over a pot of simmering water (ensure the bottom of the bowl does not touch the water). With a hand-held electric mixer, beat the mixture on high speed continuously for 7 minutes, or until soft, fluffy peaks have formed and the frosting is thick and glossy. Remove the bowl from the heat. Beat in the tiny pinch of salt and the vanilla extract. Continue beating for a minute or two more, until the icing is cool enough to handle and has a perfectly spreadable consistency.
-
Generously spread the fluffy Seven Minute Icing over the top and sides of the cooled Angel Food Cake. Serve immediately and enjoy!
Notes
