Easy Red Velvet Cupcakes: Your Go-To Recipe for Flawless Homemade Delights
Every baker, amateur or experienced, seeks that one perfect recipe – a true keeper that consistently delivers exceptional results. For me, when it comes to classic American desserts, that quest led to “The Great Red Velvet Purge of 2023.” It was a necessary but bittersweet process where I meticulously sifted through countless red velvet cake and cupcake recipes accumulated over the years. The sheer volume of variations, each with its subtle differences, had become overwhelming, making it frustrating to pinpoint the absolute best. Saying goodbye to beloved posts and once-favorite formulas was tough, but curating a refined collection was essential for both my sanity and for providing truly outstanding recipes to you. Amidst this culinary culling, one recipe unequivocally made the cut: these Easy Red Velvet Cupcakes. They stand out as a beacon of simplicity, reliability, and exquisite flavor, earning their permanent place in my baking repertoire. If you’ve been searching for a straightforward yet incredibly delicious red velvet cupcake recipe, your journey ends here.

Adapted From Martha Stewart: A Legacy of Baking Excellence
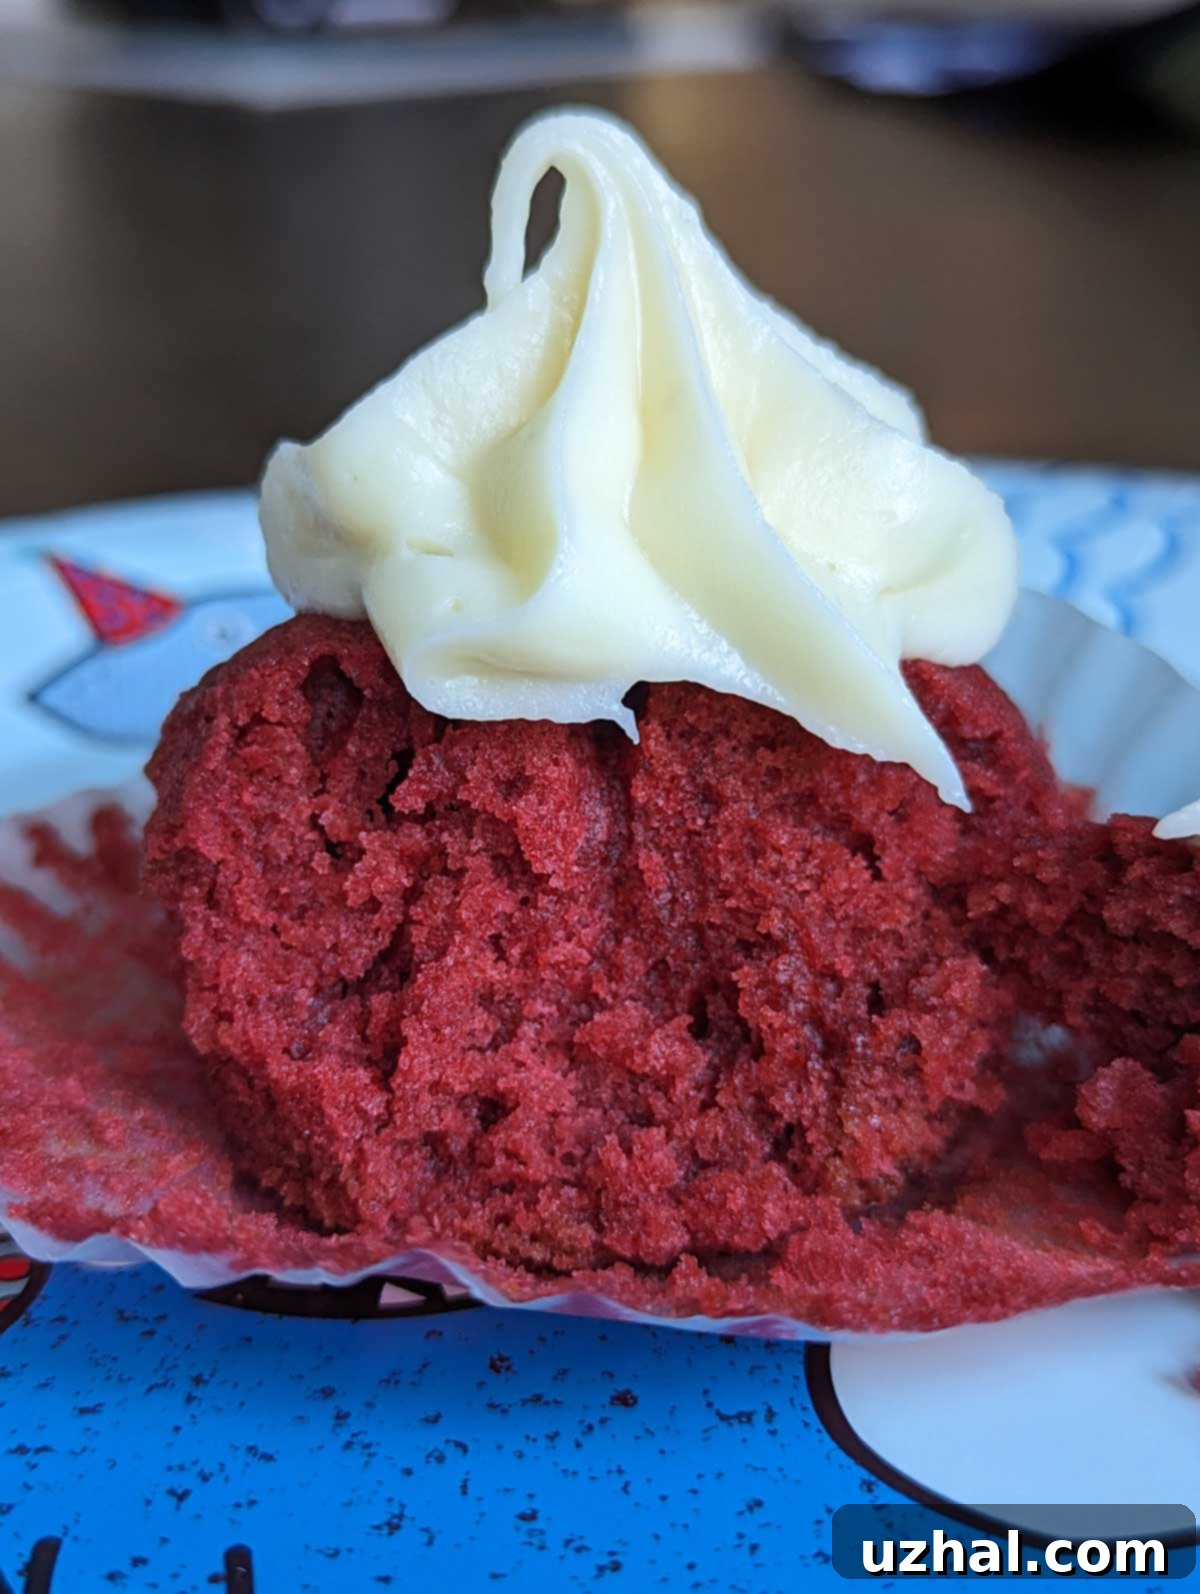
This phenomenal recipe for Easy Red Velvet Cupcakes is a carefully adapted version of an original from the renowned Martha Stewart. What makes this particular iteration so remarkable is its elegant simplicity combined with its ability to produce cupcakes that strike the ideal balance: they are not overtly chocolaty, yet still possess that signature hint of cocoa that defines a true red velvet. Many red velvet recipes can lean too heavily into the chocolate, overshadowing the delicate “velvet” texture and subtle tang. This adaptation, however, gets it just right. It’s an oil-rich recipe, which is characteristic of traditional red velvet cakes and cupcakes. The generous amount of oil contributes significantly to the incredibly moist and tender crumb that makes these cupcakes so irresistible. For an added layer of complexity and richness in flavor, you have the option to use a combination of vegetable oil and melted butter. While butter undeniably imparts a wonderful, nuanced taste, rest assured that these cupcakes remain absolutely delicious and perfectly moist even if you opt for 100% vegetable oil. This flexibility ensures that you can achieve fantastic results regardless of your pantry staples or dietary preferences.

Essential Red Velvet Cupcake Notes & Baking Tips
Understanding a few key details can elevate your baking experience from good to absolutely perfect. This recipe is designed to yield 12 standard-sized cupcakes. However, the exact number can vary depending on the specific cupcake liners you choose. Many grocery store liners are considered “normal” size, but there are also slightly larger varieties available, often found online or in specialty baking stores. I personally prefer a slightly larger cupcake wrapper, typically measuring 2 inches at the base and 1 ¾ inches high. These fit perfectly into standard muffin tins but accommodate a bit more batter, resulting in a more substantial and satisfying cupcake. If you opt for these larger wrappers, you’ll find that you get fewer cupcakes from a single batch, and they will likely require a slightly longer baking time to ensure they are cooked through and have that perfect springy texture. Always use paper liners to prevent sticking and make for easy removal. Fill each liner approximately two-thirds full to allow for proper rising without overflowing, which helps achieve that classic domed top. Keep an eye on your cupcakes towards the end of the baking time and test for doneness by gently pressing the top – if it springs back, they’re ready!
The Perfect Companion: Cream Cheese Icing
When it comes to frosting red velvet, there are truly only two contenders in my book that do this classic dessert justice: Cream Cheese or Ermine (also known as boiled milk frosting). While Ermine frosting offers a unique, old-fashioned silky texture, for red velvet cupcakes, a rich and tangy cream cheese frosting is often the preferred choice, and for good reason. This particular cream cheese frosting recipe is a standout. It features a slightly higher proportion of butter compared to many other cream cheese frostings, which is a deliberate choice for several reasons. This increased butter content makes the frosting remarkably more stable, allowing it to hold its shape beautifully, even in warmer conditions. Furthermore, it contributes to a wonderfully fluffy texture that melts in your mouth without being overly dense or sweet. This stability and fluffiness also mean it pipes exceptionally well, allowing you to create stunning decorative swirls or elegant mounds on top of your cooled cupcakes. To ensure the smoothest, most luxurious frosting, always start with softened butter and cream cheese, and make sure your powdered sugar is sifted to prevent any lumps. The creamy tang of this frosting is the ultimate complement to the subtle chocolate and vibrant red of the cupcakes, creating a harmonious flavor profile that is truly irresistible.
Detailed Red Velvet Cupcake Ingredient Notes
Even for an “easy” recipe, having a deeper understanding of your ingredients can make all the difference in achieving perfect results. Based on countless batches of these cupcakes, here are some expanded insights into the key ingredients:
Flour Type: The Foundation of Texture
The type of flour you use significantly impacts the final texture of your cupcakes. You can successfully use either cake flour or all-purpose flour, provided that the total amount weighs 150 grams. This emphasis on weight is crucial because all-purpose flour and cake flour have different densities; a cup of cake flour weighs less than a cup of all-purpose flour. If you don’t have a kitchen scale – which I highly recommend for precise baking – and are using all-purpose flour, an approximate volumetric conversion is to use 1 cup plus an additional tablespoon of flour. This measurement should closely equate to 150 grams. When working with all-purpose flour, it is critically important not to overbeat the batter after adding the flour. Overmixing develops the gluten in the flour, leading to a tougher, chewier cupcake rather than the desired tender “velvet” crumb. If you’re mixing by hand, this is less of a concern, as it’s harder to overmix. However, if using an electric mixer, ensure you mix on the lowest speed possible and only until the flour is just incorporated, then stop.
Cocoa Powder: The Subtle Chocolate Heartbeat
For the cocoa powder, always opt for natural (non-Dutch processed) cocoa powder for this recipe. There are two primary reasons for this. Firstly, natural cocoa powder is acidic, and this acidity plays a vital role in the leavening process, reacting with the baking soda to help the cupcakes rise properly. While this is somewhat of a scientific guess in this specific recipe’s balance, it’s a general principle in red velvet baking. More importantly, the flavor profile of natural cocoa powder is much closer to what’s traditionally found in authentic red velvet recipes. It provides a lighter, more delicate chocolate note that doesn’t overpower the other flavors. Secondly, natural cocoa powder has a lighter color compared to its Dutch-processed counterpart. Using Dutch-processed cocoa, which is alkalized and darker, can dull or “muck up” the vibrant red hue you’re aiming for, resulting in a brownish-red cupcake instead of a true red velvet.
Buttermilk: The Secret to Tang and Tenderness
Buttermilk is a cornerstone ingredient in red velvet, contributing essential moisture, a characteristic tangy flavor, and acidity vital for the leavening process. You can use regular liquid buttermilk or the equivalent amount of powdered buttermilk reconstituted with water. If using powdered buttermilk, carefully check the label of your chosen brand, as the powder-to-water ratio can vary. For instance, Bob’s Red Mill powdered buttermilk typically recommends about 3 ½ teaspoons of powder for slightly less than 4 ounces of water to make ½ cup. My preferred method is to add the buttermilk powder directly to the dry ingredients and then incorporate the corresponding amount of water with the other liquid ingredients. This ensures even distribution. If you don’t have buttermilk on hand, you can create a reasonable substitute by adding 1 tablespoon of white vinegar or lemon juice to a liquid measuring cup, then filling the rest of the way to ½ cup with regular milk. Let it sit for 5-10 minutes until it slightly curdles before using.
Red Gel or Liquid Color: Achieving the Signature Hue
The iconic red color is undeniably a defining feature of red velvet cupcakes. The market now offers a wide array of red food colorings with varying brands and viscosities. For the most vibrant and concentrated color without altering the batter’s consistency too much, I highly recommend using a high-quality red gel paste or concentrated liquid food coloring. Simply squeeze in drops until you achieve that beautiful, deep red hue that is synonymous with red velvet. If you’re using a more common grocery store liquid food coloring, such as McCormick, you might find that as little as 2 teaspoons will suffice. However, be cautious not to continuously add more liquid coloring in pursuit of a richer red, as this can thin out the batter too much, affecting the texture of your cupcakes. Gel pastes or highly concentrated liquid colors are superior for achieving a deep, vivid red with minimal impact on consistency. While liquid food coloring is acceptable, gels or pastes offer the best results for that show-stopping color.
Tips for Baking and Storing Perfect Red Velvet Cupcakes
Beyond the ingredients, a few general baking practices can ensure your red velvet cupcakes turn out flawlessly every time:
- Room Temperature Ingredients: Ensure your egg, buttermilk, butter (if using), and cream cheese are at room temperature. This allows them to emulsify better, creating a smoother batter and a more uniform, tender crumb in the cupcakes and a lump-free, fluffy frosting.
- Don’t Overmix: As mentioned with flour, overmixing is the enemy of a tender crumb. Mix wet ingredients until just combined and dry ingredients until just incorporated. A few lumps in the batter are preferable to an overmixed, tough cupcake.
- Preheat Oven Properly: Always preheat your oven fully before placing the cupcakes inside. An accurately preheated oven ensures even baking and proper rising. Consider investing in an oven thermometer to verify your oven’s true temperature, as many can be inaccurate.
- Cool Completely: Allow the cupcakes to cool completely on a wire rack before frosting. Frosting warm cupcakes will cause the frosting to melt and slide off, creating a messy result. Patience is key!
- Storage: Once frosted, red velvet cupcakes with cream cheese icing should be stored in an airtight container in the refrigerator due to the dairy in the frosting. They will stay fresh for 2-3 days. Bring them to room temperature for about 30 minutes before serving for the best flavor and texture. Unfrosted cupcakes can be stored at room temperature in an airtight container for up to 2 days, or frozen for up to 3 months.
The Allure of Red Velvet: A Brief History
The origin of red velvet cake is steeped in culinary lore, with several theories attempting to explain its iconic color and distinct flavor. Some trace it back to the Victorian era, where non-Dutch processed cocoa powder reacted with acidic ingredients like buttermilk and vinegar, causing a reddish-brown hue (the “velvet” name came from the fine, soft crumb). Others point to the Great Depression when bakers used beet juice or boiled beets to enhance the color and retain moisture in cakes. Regardless of its exact origins, red velvet truly soared to popularity in the mid-20th century, particularly in the Southern United States. It’s not just a chocolate cake; it’s a unique blend of subtle cocoa, tangy buttermilk, and a visually striking red hue, always perfectly crowned with a rich, white cream cheese frosting. It’s a dessert that evokes nostalgia, celebration, and a touch of elegance, making it a timeless favorite for any occasion.
More Delicious Red Velvet Recipes
If you’ve fallen in love with these easy red velvet cupcakes and are eager to explore more red velvet delights, be sure to check out these other fantastic recipes from my collection:
- Red Velvet Cheesecake Cups
- Red Velvet Biscotti
- Easiest Red Velvet Cake
- Red Velvet Cookies
Easy Red Velvet Cupcakes Recipe

Easy Red Velvet Cupcakes
Anna
Pin Recipe
Ingredients
- 1 ¼ cups cake flour or 1 cup all-purpose flour plus 1 Tablespoon extra flour (total 150 grams)
- 1 tablespoon unsweetened natural cocoa powder (5 grams, NOT Dutch process)
- ½ teaspoon salt
- ¾ cup granulated sugar (150 grams)
- ¾ cup vegetable oil or a mix of 6 Tbsp melted butter and 6 Tbsp oil
- 1 large egg (at room temperature)
- ½ teaspoon vanilla extract
- ½ teaspoon red gel paste or desired amount for red color
- ½ cup buttermilk (114 grams)
- 1 teaspoon white vinegar
- ½ teaspoon baking soda
Cream Cheese Icing
- 4 oz unsalted butter, softened (plus a pinch of salt if using unsalted butter)
- 6 oz cream cheese, softened
- 2 cups powdered sugar, sifted
- 2 teaspoons vanilla extract (add a little more if you desire a stronger vanilla flavor)
- 1-2 teaspoons lemon juice (optional, for added tanginess)
Instructions
-
Preheat your oven to 350 degrees F (180 C). Line a 12-cup muffin tin with paper cupcake liners.
-
In a medium bowl, sift together the flour, salt, and cocoa powder. Set this dry mixture aside.
-
Using a hand-held electric mixer or a whisk, beat the granulated sugar, vegetable oil (or oil/butter mixture), large egg, and vanilla extract together for approximately 2 minutes, or until the mixture appears pale and light. Incorporate the red gel food coloring until the desired vibrant red hue is achieved.
-
Gradually add the sifted flour mixture and the buttermilk to the wet batter, alternating between the two and stirring gently by hand. Begin and end with the flour mixture to ensure everything is well combined without overmixing.
-
In a separate small cup, combine the white vinegar and baking soda. The mixture will foam up significantly; this is a normal chemical reaction. Immediately stir this foamy mixture into the cupcake batter.
-
Evenly divide the prepared batter among the 12 cupcake liners, filling each about two-thirds full. Bake on the center rack of your preheated oven for 20 minutes, or until the cakes spring back gently when lightly touched. Remove from oven and let cool completely on a wire rack before frosting.
-
For the Cream Cheese Icing: In a clean mixing bowl, beat the softened butter and cream cheese together until smooth and creamy. Gradually add the sifted powdered sugar, beating until the frosting is light and fluffy. Finally, beat in the vanilla extract and lemon juice (if using) until fully incorporated and the icing reaches your desired consistency and flavor.
Recipe Notes
Cocoa Powder Choice: Use natural unsweetened cocoa powder. Its acidity aids leavening and its lighter color won’t darken the red hue of your cupcakes, preserving the authentic red velvet look and flavor.
Buttermilk Options: Liquid buttermilk is ideal. If using powdered buttermilk (like Bob’s Red Mill: 3 ½ tsp powder to just under 4 oz water for ½ cup), add powder to dry ingredients and water to wet. A quick substitute for ½ cup buttermilk is ½ cup milk with 1 tbsp vinegar/lemon juice, let sit 5-10 min.
Red Food Coloring: Gel paste provides the best vibrant red without altering batter consistency. Liquid food coloring can work (approx. 2 tsp McCormick type), but adding too much can thin the batter. Add drops until desired color is achieved.
