Homemade Peanut Butter Tandy Cake Bars: Recreating a Beloved Classic Snack
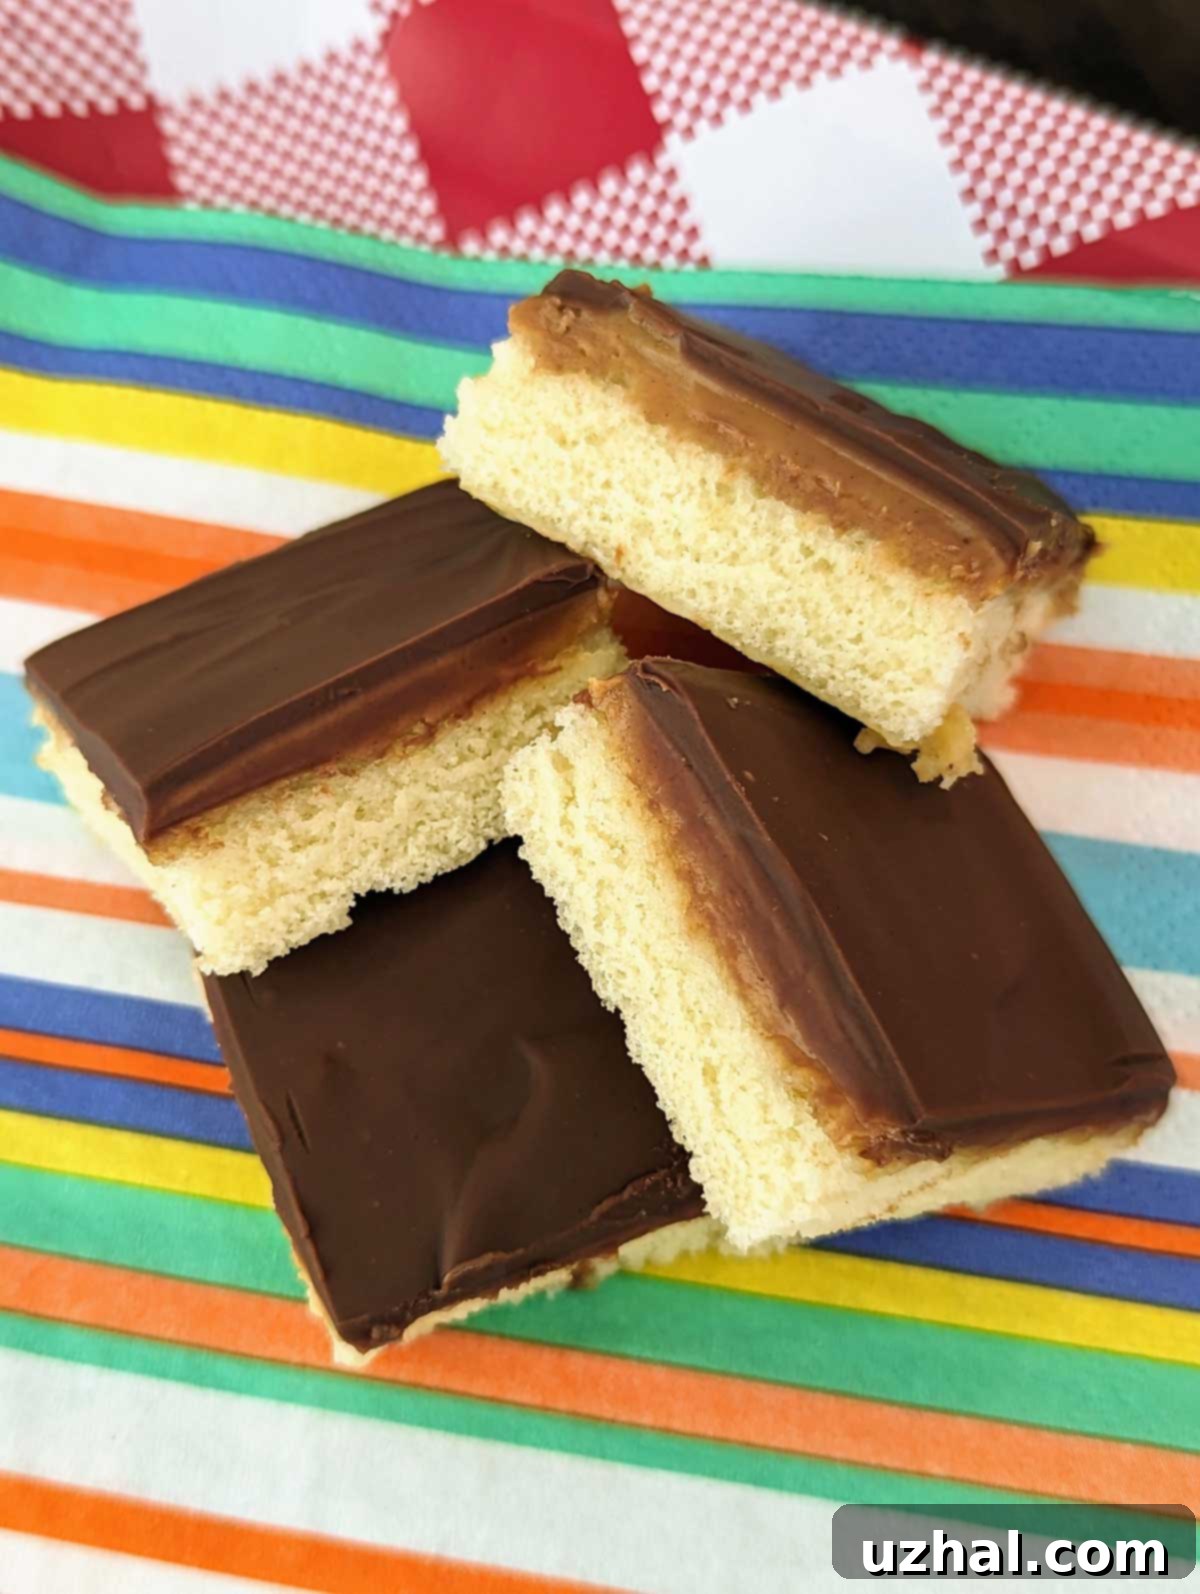
The quest to recreate beloved childhood treats at home is a delightful culinary journey, and few snack cakes evoke as much nostalgia as Tastykake’s Kandy Kakes. This particular recipe for Homemade Tandy Cake Bars was a wonderful recommendation from my friend, Louise, who had the good fortune of growing up right in “Tastykake country.” For her, these iconic treats, originally known as Tandy Kakes and later renamed Kandy Kakes, were a staple. They are famously characterized by their small cake base, a luscious layer of icing, and a rich chocolate coating. This homemade version specifically aims to capture the magic of the ever-popular Peanut Butter Kandy Kakes, offering a taste of that classic combination right from your kitchen.

While the authentic Tastykake Kandy Kakes boast a distinct, often round shape, this homemade rendition takes the form of convenient bars, designed to deliver a strikingly similar flavor experience. Full disclosure, I wouldn’t personally know how close it is to the original from childhood memory. My own formative years were spent amidst the sugary landscapes of “Little Debbie country,” or perhaps Hostess or Lance! Tastykakes simply weren’t on my radar as a kid, and by the time I encountered them, my snack cake consumption had significantly waned. However, having since tried the real deal (more on that later!), I can confidently say this recipe holds its own as a delicious and satisfying treat. It’s a wonderful way to bring that iconic peanut butter and chocolate flavor combination into your home, perfect for a nostalgic trip down memory lane or simply a delightful new dessert.
Crafting Your Own Peanut Butter Kandy Kakes: A Step-by-Step Guide
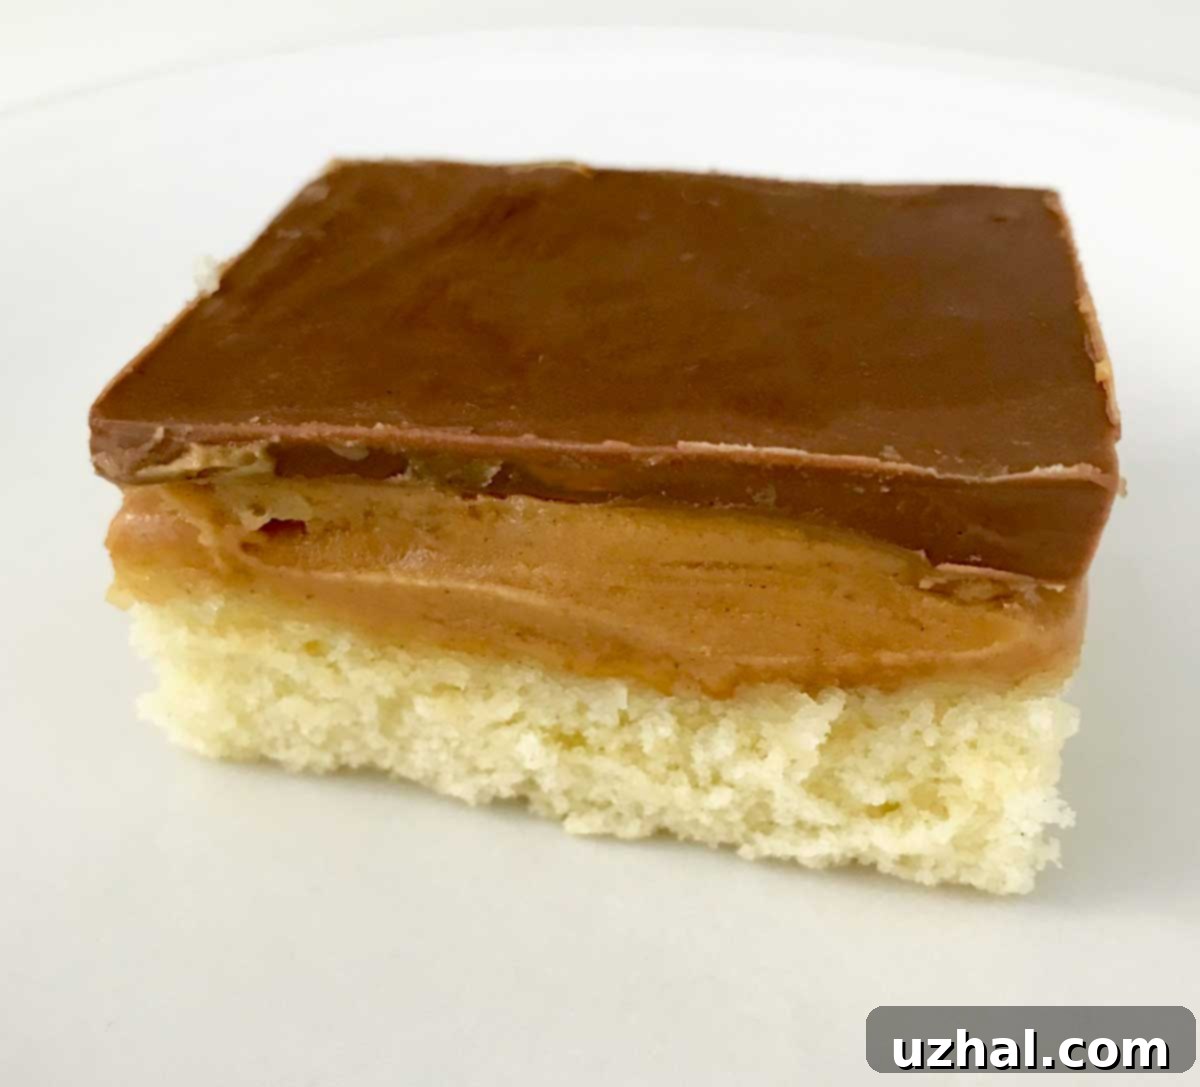
The creation of these delightful Tandy Cake Bars begins with a foundation that is crucial for their signature texture: a thin, yet sturdy, sponge cake. This cake layer provides the perfect backbone, ensuring the bars are substantial enough to hold the subsequent toppings without being overly dense or crumbly. The delicate crumb of the sponge cake offers a subtle sweetness and a tender bite, preparing the palate for the rich flavors that follow. Achieving this ideal consistency involves careful mixing and precise baking, resulting in a cake that is both airy and firm.
Once the sponge cake is baked to perfection and has had a moment to cool, the next exciting layer is added: a generous spread of peanut butter. This is where the classic “Peanut Butter Kandy Kake” flavor truly shines. While the original inspiration suggests creamy peanut butter for aesthetic and textural harmony, I’ve found that crunchy peanut butter works surprisingly well too, adding an interesting textural contrast. The key is to achieve an even layer that melds seamlessly with the cake. The warmth of the freshly baked cake helps the peanut butter soften slightly, making it easier to spread from edge to edge. This sweet and savory layer is undoubtedly the heart of these homemade snack cakes.
The grand finale to these delectable bars is a decadent blanket of milk chocolate. This final layer encapsulates the peanut butter and cake, creating that signature enrobed effect. Pouring melted milk chocolate over the chilled peanut butter layer ensures a smooth, even coating that sets beautifully. The choice of milk chocolate is essential here, as its sweetness and creamy texture perfectly complement the peanut butter and the light sponge cake, echoing the flavor profile of the original Kandy Kakes. The visual appeal of the glistening chocolate shell is just as enticing as its taste, promising a delightful treat with every bite.
Making these mock Tandy Cake Bars is an incredibly enjoyable experience, from mixing the batter to carefully spreading each layer. The contrasting textures of the soft cake, the creamy (or crunchy!) peanut butter, and the crisp milk chocolate coating create a harmonious balance that is truly satisfying. My sincere thanks go to Louise for introducing me to this wonderful recipe! It’s a testament to how food can connect us and spark creativity in the kitchen. A quick search online will reveal various takes on this classic, but this particular method, as I first made it, remains my steadfast favorite. I genuinely wouldn’t change a single step; it delivers consistently delicious results that are sure to please any peanut butter and chocolate lover.
From Homemade Knock-Off to Authentic Taste: My Kandy Kakes Journey
For years, my experience with Kandy Kakes was limited to this homemade rendition, a delicious homage to a treat I hadn’t truly known. However, about a year ago, serendipity struck! My family and I relocated, finding ourselves squarely in the heart of “Tastykake country.” Suddenly, the legendary snack cakes that had only existed as an elusive concept were readily available on every supermarket shelf. This was a moment of culinary revelation, and naturally, I seized the opportunity to finally purchase a box of authentic Tastykake Kandy Kakes. Oh, my goodness, they were every bit as good as I had imagined, and more!
With all due respect to the Little Debbie treats of my youth, Kandy Kakes are truly exceptional in the world of snack cakes. Their appeal lies in a perfect symphony of textures and flavors that is hard to beat. I meticulously deconstructed one (or “gutted” it, as I like to say) to truly appreciate its composition. The peanut butter layer within a genuine Kandy Kake is remarkably soft and smooth, almost melting in your mouth, contributing a richness that elevates the entire experience. Furthermore, the chocolate coating isn’t just a generic shell; it possesses a distinct, satisfying flavor, confirming that quality ingredients make all the difference. And the cake itself? Velvety soft, with a delightful crumbly tenderness that provides the ideal foundation for the decadent layers above.
Having now experienced the authentic Kandy Kake, my mind is already buzzing with new possibilities for my homemade version. The original Kandy Kakes are often small, round delights, and I’m eager to try replicating that shape. My plan is to cut rounds from a sheet of my delicious sponge cake, artfully layer on that creamy peanut butter, and then coat each individual cake in a luscious chocolate shell. This approach would not only capture the visual essence of the classic but also allow for more delicate, bite-sized portions. The process of dipping individual cakes in chocolate requires a bit more finesse, but the reward of a perfectly enrobed, round Kandy Kake is certainly worth the effort. Stay tuned for updates on this exciting new baking adventure!
The Convenience of Small Batch Tandy Cake Bars
While the original recipe yields a generous batch perfect for sharing or larger gatherings, I’ve recently discovered the immense satisfaction and practicality of making these Tandy Cake Bars in smaller quantities. For those times when a full tray is simply too much, or when you crave a fresh, warm treat without the commitment of a large bake, small-batch baking is a game-changer. My trusty little ⅛ sheet pan has become an indispensable tool for this purpose. It’s an ideal size for individual desserts or for quickly whipping up a modest portion of your favorite baked goods, preventing waste and ensuring every bite is as fresh as possible.
To create a small batch version of these delightful bars, the process is straightforward: simply quarter the original recipe. This means dividing each ingredient amount by four. The adjustments don’t stop at the ingredients, however. Baking times and temperatures often need tweaking for smaller pans. Instead of baking at the standard 350 degrees F, I recommend reducing the oven temperature to 325 degrees F and baking for approximately 23 minutes. Always keep a close eye on your small batch, as ovens can vary, and smaller items tend to bake more quickly. This method ensures you get all the deliciousness of the full recipe in a perfectly manageable size, allowing you to enjoy fresh Tandy Cake Bars whenever the craving strikes.

Making these small batch Tandy Cake Bars is not just about convenience; it’s also a fantastic way to experiment with the recipe or simply enjoy a fresh batch more frequently. This scaled-down approach is perfect for smaller households, or for bakers who enjoy trying new recipes without ending up with an overwhelming amount of leftovers. The joy of pulling a perfectly baked, petite sheet of sponge cake from the oven, spreading that luscious peanut butter, and then topping it with a smooth chocolate layer, all in miniature form, is truly rewarding. It makes the entire baking process feel more intimate and less daunting, proving that big flavors can come in small packages.
- Homemade Cookie Mix and Boxes
- Peanut Butter Topped Chocolate Brownies
- Homemade Soft Pretzels with Beer
- Homemade Ice Cream Sandwiches With Mint Ice Cream
- Easy Homemade Fudge Sauce
The Ultimate Homemade Tandy Cake Bar Recipe

Homemade Tandy Cake Bars
Anna
Pin Recipe
Ingredients
- 2 cups all-purpose flour (250 grams)
- 1 teaspoon baking powder
- ¼ teaspoon salt
- 4 large eggs
- 2 cups granulated sugar (400 grams)
- 1 ½ teaspoon vanilla extract
- 1 cup whole milk
- 2 tablespoons unsalted butter (28 grams)
- 1 ¼ cups peanut butter
- 12 oz milk chocolate candy bar chopped**
Instructions
-
Preheat oven to 350 degrees F. Grease and flour a 10×15 inch pan. If halving the recipe, use a 9 inch square metal pan. You can also quarter the recipe and use a ⅛ sheet pan.
-
Whisk together the flour, baking powder and salt; set aside. Also, combine your milk and cut up pieces of butter in a microwave-safe cup so they’ll be ready to go!
-
In a mixing bowl, using an electric mixer, begin beating the eggs on medium speed. Gradually add the sugar, increasing speed of mixer a bit and beating until mixture is thick and lemon colored. Beat in the vanlila.
-
Add the flour mixture and stir by hand or using lowest speed of mixer until fully blended. Don’t over-beat.
-
Heat the milk and butter in the microwave just until it begins to boil. This won’t take long, so watch carefully! Pour the hot milk into the batter and stir by hand or beat on very low speed until blended and smooth.
-
Pour batter into the prepared pan and spread evenly.
-
Bake on center rack for 20 to 25 minutes (20 if halving), or until a toothpick inserted into the center of the cake comes out clean.
-
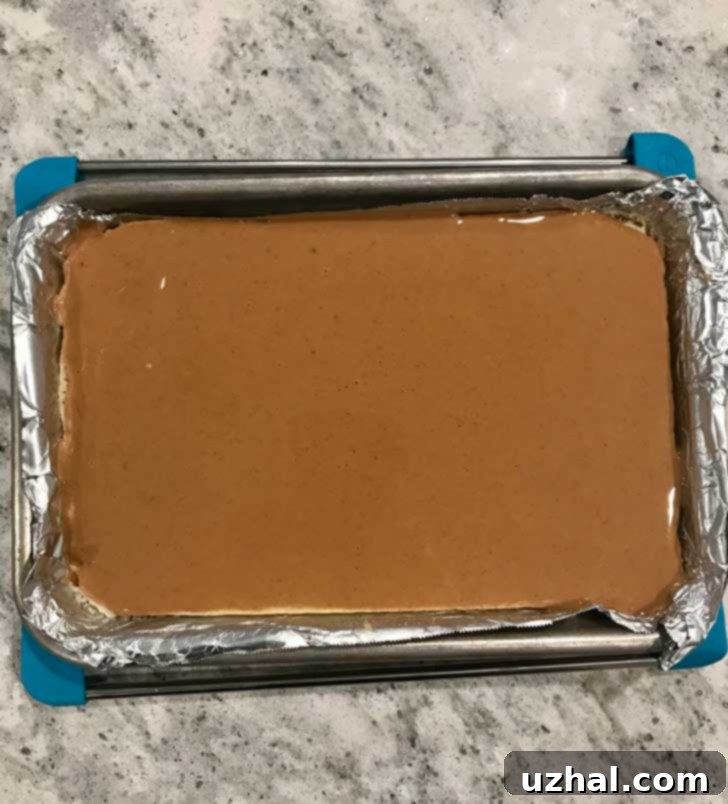
Drop dollops of peanut butter all over the still-warm cake and spread evenly to the edges. Let cool at room temperature for about 20 minutes, then refrigerate to set the peanut butter (about 1 hour).
-
In a microwave-safe dish, melt chocolate (for milk chocolate, I use a lower setting) and spread evenly over peanut butter layer. Refrigerate to allow chocolate to harden, but be careful because if the chocolate hardens too much it will crack when you slice the cake. Refrigerate it just until firm or you could even let it set at room temperature, which of course takes longer and which I very seldom do since I am so impatient!
-
Slice into bars.
Notes
**Bars of chocolate melt and spread more easily than chips, however you can use chips. If using chocolate chips, stir a few teaspoons of oil into the chips before melting them.
**If you are making a half version, you might want to line the pan with foil so you can lift the cake out and cut it neatly on a cutting board. I’m not a good cutter and always feel like I get better results when I don’t have to cut directly in the pan. This tip is especially useful for maintaining clean edges and ensuring each bar looks professionally made.
