Grandmother’s Four Day Coconut Cake: A Timeless Southern Recipe for Unforgettable Flavor and Moisture
There are some recipes that hold a special place in our hearts, yet sometimes get overshadowed. For me, that recipe is the incredible Four Day Coconut Cake. It’s a true classic, an heirloom passed down through generations, and while its name hints at a commitment, the unparalleled taste and texture make every moment of anticipation worthwhile. This isn’t just any coconut cake; it’s a culinary journey that rewards patience with a dessert that’s moist, rich, and deeply flavored in a way no quick cake ever could be.
I must admit, despite proclaiming it a favorite, I sometimes forget this gem due to its unique, four-day preparation time. As someone who appreciates instant gratification in baking, the waiting period can be a challenge. However, every single time I decide to embark on this delightful baking adventure, the first bite instantly reminds me why this recipe deserves all the love and recognition it can get. It’s super easy to assemble, but the magic truly happens during those four days of melding and maturing in the refrigerator.
The Heartwarming Origin of a Beloved Recipe
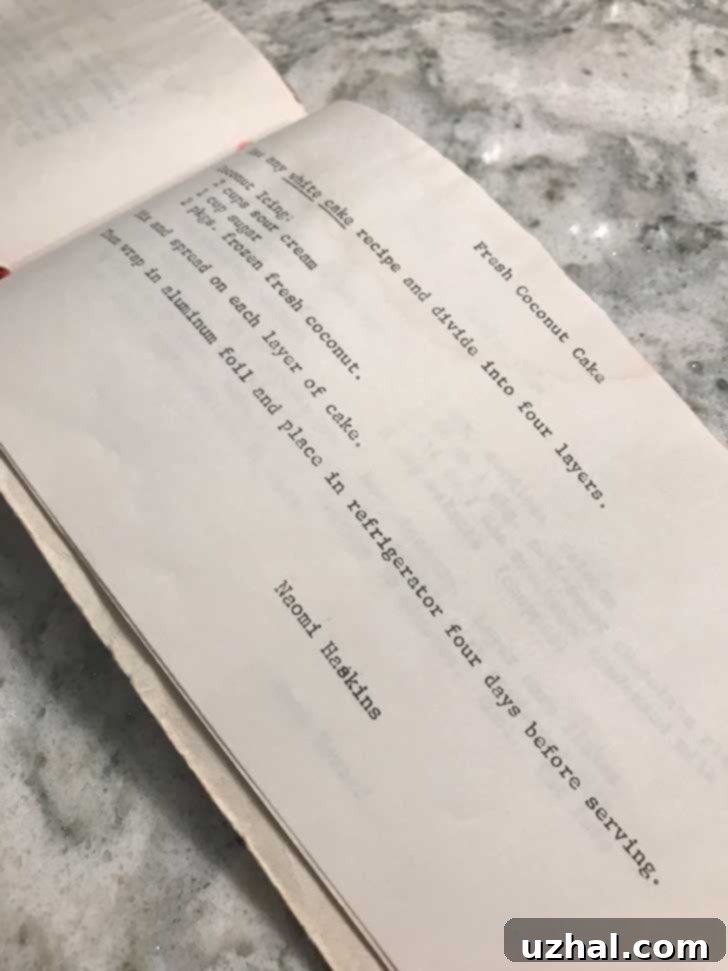
What makes this Four Day Coconut Cake even more special is its charming origin. This recipe hails from a small, handmade cookbook compiled by my grandmother and the wonderful ladies of Memorial Drive Baptist Church in Houston, TX, for State Missions Week back in 1980. This wasn’t some professionally printed book; it was a labor of love, crafted with ingenuity and community spirit.
My grandmother and her Sunday school classmates created these cookbooks by taking strips of wallpaper samples – a brilliant choice due to its inherent water resistance – folding them over, inserting typed recipe pages, and binding them together with yarn. It’s a tangible piece of history, a testament to simpler times and the enduring power of communal cooking. Flipping through its pages is like stepping back in time, offering a glimpse into the culinary traditions and favorite dishes that graced Southern tables decades ago.

The recipes contained within this unique cookbook are a delightful representation of the era, reflecting a blend of comfort food and innovative dishes. Alongside our beloved Four Day Coconut Cake, you’ll find classics like Watergate Salad, Strawberry Salad, Carrot and Pea Salad, Spinach Casserole, Broccoli Casserole, Hot Chicken Salad, Hodge Podge, Sesame Chicken, Green Chili Casserole, Lemon Bars, and Pumpkin Bread. Each recipe tells a story, and the Four Day Coconut Cake stands out as a true masterpiece of its time, designed for flavor development that few modern recipes attempt.
The Magic of Four Days: Why Patience Pays Off for This Coconut Cake
The “four-day” aspect of this coconut cake is not just a quirky name; it’s the secret to its extraordinary taste and texture. During these four days of refrigeration, a remarkable transformation occurs. The sour cream, sugar, and coconut mixture, which might seem simple initially, slowly but surely infuses every crumb of the cake layers with incredible moisture and a deep, complex coconut flavor. The cake doesn’t just get cold; it ages, tenderizes, and its flavors meld into a harmonious symphony.
This process is akin to marinating meat or allowing a good stew to simmer overnight – the ingredients have time to intermingle, soften, and develop richer nuances that simply cannot be achieved in a few hours. The cake becomes incredibly moist, almost pudding-like in consistency, and the coconut flavor permeates every bite, becoming more pronounced and luxurious. If you’re looking for the moistest, most flavorful coconut cake recipe, this extended waiting period is precisely what sets it apart and makes it an unforgettable Southern dessert.
Unlocking the Secrets: Detailed Directions for Your Four Day Coconut Cake
The original directions in the cookbook are indeed “pretty vague,” by design, allowing for a certain degree of baker’s intuition. However, having made this cake numerous times, I can offer some crucial tips to ensure your success and help you achieve the perfect Four Day Coconut Cake. The most important requirement, which I cannot stress enough, is ample refrigerator space. This entire cake needs to be securely wrapped or covered with a cake dome and stored in the refrigerator for the full four days so that all the flavors and textures can truly meld together. While other versions online might offer more intricate steps, these are the core principles.
Let’s break down the process day by day, transforming vague instructions into actionable steps:
Day One: The Coconut Infusion Begins
The first day is all about preparing the star of the show: the rich coconut filling. You’ll simply mix together the sour cream, granulated sugar, and thawed frozen coconut. This mixture needs time to sit and develop its flavors. The sour cream’s tang helps to balance the sweetness and contributes a beautiful moisture, while the sugar draws out the natural flavors of the coconut. Cover this mixture tightly and let it sit in the refrigerator overnight. This initial step is vital for the coconut to soften and for the flavors to begin their delicate dance.
Day Two: Building Your Moist Cake Foundation
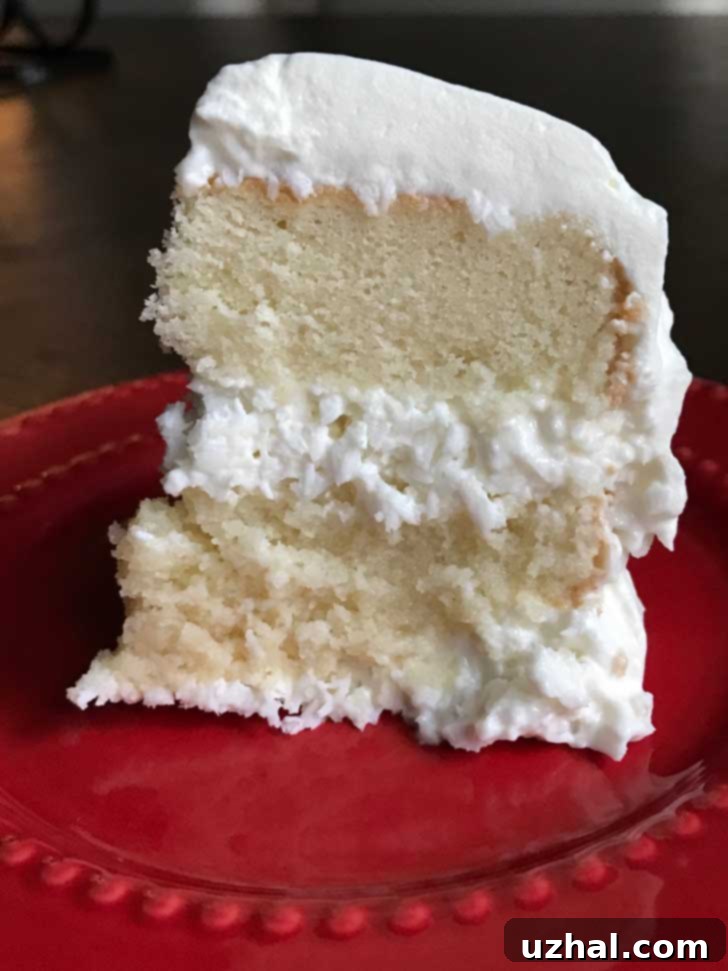
Day two is dedicated to baking your cake layers. For the best Four Day Coconut Cake, it’s crucial to start with a very moist yellow or white cake. You can use your favorite trusted scratch recipe – the “1234 Cake” mentioned in the original notes is an excellent choice for its moist crumb – or opt for a high-quality yellow or white cake mix. Bake the cake in two 9-inch round pans. Once baked, allow the cake layers to cool completely on a wire rack. Patience here is key; warm cake will absorb the mixture unevenly and could lead to a less desirable texture. Once cooled, carefully cut each cake layer horizontally to create four thinner layers in total. Then, generously spoon the coconut mixture over each layer, stacking them as you go. Once assembled, place your stacked cake in a suitable cake container or securely wrap it with plastic wrap. This is where your ample refrigerator space comes in handy, as the cake will now reside there for the next three or four days. You’ll notice the coconut mixture will become firmer and integrate beautifully into the cake as it chills.
Day Three: The Quiet Transformation
On day three, your primary instruction is simple: do nothing! This day is critical for the cake to continue its internal work. The moisture from the sour cream and coconut mixture steadily migrates into the cake layers, transforming them into an incredibly tender and flavorful base. The coconut’s essence deepens, and the overall texture becomes more unified. Resist the urge to peek or sample; trust the process. This resting period is what truly sets this coconut cake apart from any other.
Day Four: The Grand Reveal and Serving
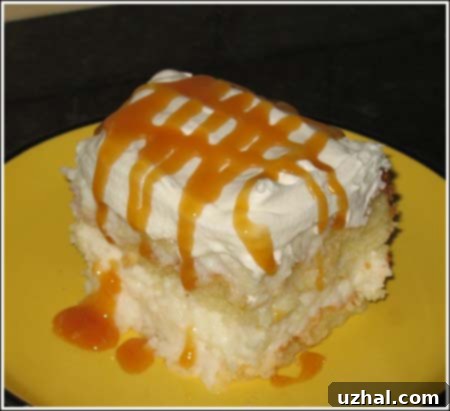
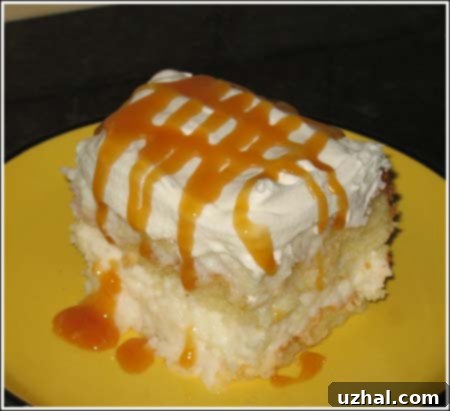
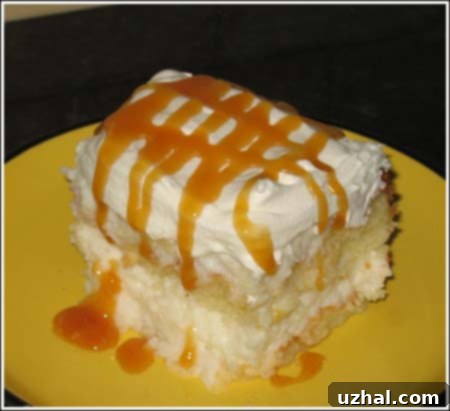
Finally, day four arrives, and your patience is about to be rewarded! Your Four Day Coconut Cake is ready to be served. You can present it as is, allowing the intensely moist, flavorful cake to speak for itself, or you can elevate it with a luxurious topping. I highly recommend covering it with sweetened whipped cream. To make homemade whipped cream, simply whip a cup of heavy cream with a couple of tablespoons of powdered sugar and a dash of vanilla extract until soft peaks form. Alternatively, a convenient 8-ounce tub of whipped topping works perfectly. Spread the whipped cream over the top or all over the cake for a more decadent finish. Garnish with something pretty and complementary, like fresh berries, toasted coconut flakes, or even a drizzle of caramel ice cream topping. Then, slice into squares and prepare for an unforgettable dessert experience that will have everyone asking for the recipe.
Adaptable Delights: Variations for Every Occasion
The beauty of this Four Day Coconut Cake recipe lies not only in its unique method but also in its versatility. While the traditional round layer cake is impressive, it’s easy to adapt for different needs and occasions.
For instance, one of my past successful variations involved baking the cake in a square pan. I then cut the square into just two layers, allowing for a simpler stacking process back within the same pan. This version proved to be ideal for a smaller family gathering and was considerably easier to store in the refrigerator than a full 9-inch round layer cake. The principles remain the same: layering the moist cake with the coconut mixture and allowing the flavors to meld over time.
Leftover Cupcake Version: Mini Four Day Coconut Cake
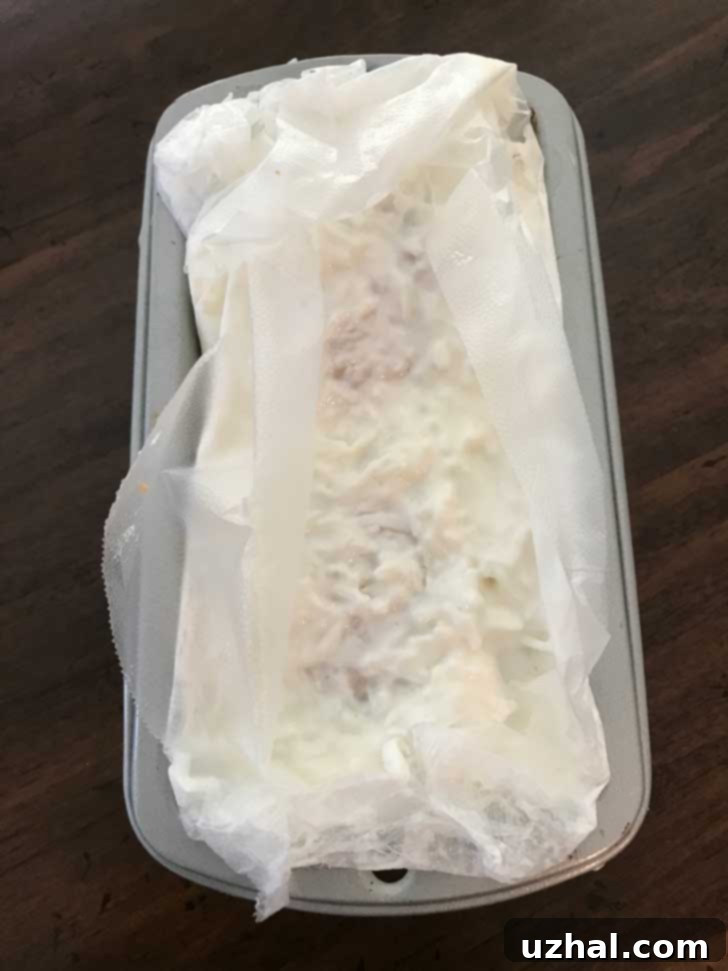
Another delightful and quicker variation I discovered is the “Mini Four Day Coconut Cake” using leftover cupcakes. This is perfect when you crave that unique flavor experience without committing to a full four-day wait. Here’s how to make it:
- Line a mini loaf pan with plastic wrap, ensuring enough overhang to wrap the cake tightly.
- Take two white cupcakes and split each horizontally to create four pieces in total.
- Lay two of these cupcake pieces in the bottom of the mini loaf pan.
- Generously top with some of the prepared coconut filling.
- Cap with the remaining two cupcake pieces.
- Spread additional coconut filling over and around the mini cake.
- Wrap tightly with the overhanging plastic wrap and refrigerate.
The good news is that this mini cake will be ready to enjoy in just 24 hours, giving you a taste of the Four Day Coconut Cake magic much sooner! When ready to serve, simply invert from the pan, peel off the plastic wrap, and cover with sweetened whipped cream for a delightful treat.
Essential Ingredients and Expert Tips for Your Four Day Coconut Cake
Success with this Four Day Coconut Cake recipe hinges on a few key ingredients and thoughtful preparation. Here are some detailed tips to guide you:
- Frozen Coconut: The Unsung Hero
Frozen coconut is not as widely used in recipes as dried or flaked varieties, but it is absolutely essential for this cake due to its superior moisture content and fresh flavor. It provides a more authentic and tender texture compared to its dried counterparts. You can typically find it in the freezer aisle of most mainstream grocery stores, often near the frozen fruits or international sections. Brands like Harris Teeter’s are commonly available in 6-oz packages. Ensure it is fully thawed before mixing. Using dried coconut might result in a less moist and flavorful cake, as it lacks the natural moisture that frozen coconut imparts. - Sugar: Sweetness to Your Liking
The amount of granulated sugar specified in the original recipe (1 cup) provides a balanced sweetness that allows the coconut flavor to shine. However, palates vary greatly! I highly recommend starting with 1 cup, but if you prefer a sweeter cake, feel free to add more to taste. I have personally increased the sugar to up to 2 cups in the past, depending on my mood and the occasion. Taste the sour cream and coconut mixture before it goes on the cake to gauge its sweetness level and adjust accordingly. - Sour Cream: Full-Fat for Full Flavor
Sour cream plays a dual role in this recipe: it adds a lovely tang that cuts through the sweetness and, more importantly, provides crucial moisture. I strongly advise against using light or fat-free sour cream. The extra water content in lighter versions can make your cake soggy and compromise the rich, creamy texture that defines this cake. Always opt for full-fat sour cream for the best results. The fat contributes to the cake’s tenderness and carries the flavors more effectively. - The Cake Base: Foundation of Flavor
The recipe calls for one whole yellow or white cake. The key is to use a very moist cake. A classic “1234 Cake” (a simple pound cake variant) is an excellent choice from scratch. Alternatively, a good quality yellow or white cake mix can be used for convenience, ensuring you prepare it to be as moist as possible. The cake acts as a sponge, soaking up the delicious coconut and sour cream mixture, so its initial moisture is paramount. - Sweetened Whipped Cream: An Optional Crown
Covering the cake with sweetened whipped cream or an equivalent whipped topping is an optional, but highly recommended, final flourish. It adds an extra layer of creamy texture and a fresh contrast to the rich, aged cake. You can make your own by whipping heavy cream with powdered sugar and vanilla, or use a store-bought whipped topping like Cool Whip for ease. This topping truly completes the dessert, adding an elegant touch and enhancing the overall experience.
By paying attention to these details, you’ll be well on your way to creating a Four Day Coconut Cake that lives up to its legendary status.
- Walnut Oat Triple Chocolate Chunk Cookies
- Lunch Lady Rolls
- Vanilla Cream Pie
- Green Bean Salad with Feta and Walnuts
- Easy King Cake
Recipe
Four Day Coconut Cake
Anna
Pin Recipe
Ingredients
- 2 cups sour cream
- 1 cup granulated sugar, but feel free to add a lot more to taste! I’ve added up to 2 cups in the past
- 12 oz frozen coconut (book says 2 packages) thawed
- 1 whole yellow or white cake 1234 Cake works well
- 2 cups sweetened whipped cream or 2 cups of Cool Whip Optional
Instructions
-
Day One: Mix together the sour cream, sugar and coconut. Cover and let sit in refrigerator over night.
-
Day Two: Bake a very moist yellow cake using your favorite scratch recipe or a good brand of yellow cake mix. Bake it in two round 9 inch pans, then let cool completely. Cut the cake layers horizontally to make 4 layers. Spoon coconut mixture over each layer and stack. Place stacked cake in some sort of cake container and refrigerate for 3 or even 4 days. The coconut mixture will become firmer as it sits.
-
Day Three: Do nothing! (today)
-
Day Four: Serve as is or cover with whipped cream. Whip up a cup of heavy cream and sweeten with a couple of tablespoons of powdered sugar and maybe some vanilla……or buy an 8 ounce tub of whipped topping. Spread over top of cake or all over cake. Garnish cake with something pretty like berries or caramel ice cream topping, then cut into squares and serve.
