Indulge in the Ultimate Fudgy KitchenAid Cream Cheese Brownies: A Swirl of Pure Bliss
There’s a reason some recipes become timeless classics, passed down through generations and cherished by home bakers everywhere. One such recipe that has garnered a devoted following on our site is the traditional KitchenAid Mixer Brownies. For years, this fudgy delight, originally sourced from an old KitchenAid cookbook, has satisfied countless cravings and become a go-to for many. But what if we told you there’s an even more decadent, more irresistible version? Prepare to elevate your baking game with these incredible KitchenAid Cream Cheese Brownies!
Imagine a brownie: rich, intensely chocolatey, and wonderfully fudgy. Now, envision that same brownie generously swirled with a tangy, sweet cream cheese filling, creating a beautiful marbled effect and an explosion of flavors in every bite. That’s precisely what these cream cheese brownies deliver. This updated recipe, also discovered in a vintage KitchenAid publication and slightly adapted for modern kitchens, takes everything you love about the classic brownie and adds a luxurious, creamy dimension.
This recipe is designed to produce a perfect 9×13 inch pan of unbelievably fudgy cream cheese brownies, ideal for sharing (or not!). What sets this particular version apart, and why we adore it so much, is its generous cream cheese filling. Unlike recipes that call for a partial block, this one utilizes a full 8-ounce package of cream cheese, ensuring a luscious, prominent swirl in every square. Combined with a single egg, ½ cup of sugar, and a touch of vanilla, this filling strikes the perfect balance of sweetness and tang, cutting through the richness of the chocolate for a truly unforgettable dessert experience.
Why Your KitchenAid Mixer is Essential for the Best Cream Cheese Brownies
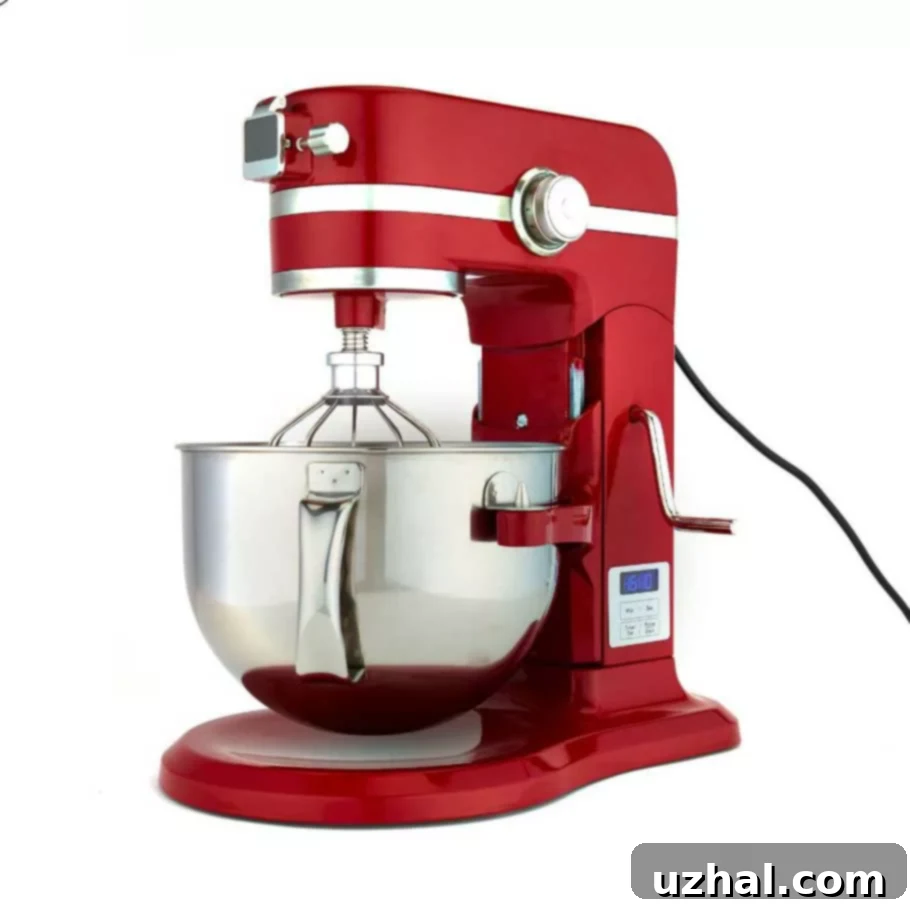
A stand mixer like the KitchenAid is more than just a convenience; it’s a game-changer for recipes like these cream cheese brownies. The consistent power and hands-free operation make light work of tasks that would be arduous by hand, ensuring your batter is perfectly aerated and blended. For this recipe, where you’re preparing two distinct batters – the rich chocolate and the creamy cheesecake swirl – your KitchenAid truly shines. It allows you to achieve the ideal texture for both, ensuring the brownies are fudgy and the cream cheese layer is smooth and lump-free.
Speaking of two batters, here’s a crucial tip for any serious baker who owns or plans to buy a stand mixer: invest in a second bowl! Trust us on this. For years, many bakers, including myself, struggled with the inconvenience of using just one bowl for recipes that require separate mixing steps, especially when dealing with different colored batters or ingredients like beaten egg whites. Having a second bowl readily available streamlines the process immensely. You won’t have to stop, wash, and dry your single bowl mid-recipe, which can save valuable time and prevent frustration. It’s a small investment that pays dividends in convenience and efficiency, making baking multi-component desserts like these cream cheese brownies an absolute breeze.
Mastering the Art of Cream Cheese Brownie Baking
Creating the perfect cream cheese brownie is a delightful journey that combines classic brownie techniques with the finesse of cheesecake. The beauty of this recipe lies in its straightforward steps, yet a few insider tips can help you achieve brownie perfection every time.
Ingredients Matter: Quality for Superior Flavor
Starting with quality ingredients is paramount. For the chocolate component, opt for the best unsweetened chocolate you can find. This forms the backbone of your brownie’s flavor, providing a deep, rich cocoa taste that isn’t overly sweet. If you use salted butter, remember the recipe accounts for this; if using unsalted, increase the salt slightly as indicated to balance the flavors. The full block of softened cream cheese ensures that delightful, generous swirl we talked about – don’t skimp!
The Two-Bowl Technique: Efficiency and Perfection
As mentioned, the KitchenAid mixer, especially with two bowls, makes this process seamless. You’ll first combine the melted butter and chocolate with a portion of the sugar and most of the eggs. The flat blade attachment is excellent for creaming and blending these ingredients, creating a smooth, glossy chocolate base. Once the chocolate batter is ready, set it aside. In your clean second bowl, the remaining sugar, egg, vanilla, and softened cream cheese are quickly beaten until light and fluffy. This two-step process is crucial for maintaining the distinct textures and flavors of each layer before they’re combined.
The Swirl: Your Artistic Touch
The swirling technique is where you add your personal flair. Alternating spoonfuls of chocolate and cream cheese batter into the prepared pan creates the potential for beautiful marbling. Once both batters are in the pan, a light swirl with a knife is all it takes. Be careful not to over-swirl, as you want distinct layers and ribbons, not a fully mixed batter. This gentle touch ensures that every bite offers both the intense chocolate and the creamy, tangy counterpoint.
Baking to Perfection: Fudgy vs. Cakey
Baking brownies can be a delicate balance. To achieve that coveted fudgy texture, it’s often better to slightly underbake than overbake. The recipe calls for 45 minutes at 350 degrees F, but it’s always wise to start checking earlier, perhaps around 35 minutes. Look for edges that are set and a center that might still appear slightly moist or jiggly. A toothpick inserted into the chocolate portion should come out with moist crumbs, not wet batter, and certainly not completely clean (which indicates a drier, more cake-like brownie). Remember, brownies continue to cook slightly as they cool.
Cooling is another vital step. Resist the urge to cut into your brownies while they’re warm. Allowing them to cool completely, preferably in the pan, helps them set properly, making for cleaner cuts and a truly fudgy texture. If you try to cut them too early, you risk a crumbly mess and a less satisfying experience. Patience, in this case, is definitely a virtue!
Recipe

KitchenAid Cream Cheese Brownies
Anna
Pin Recipe
Equipment
-
KitchenAid Mixer
Ingredients
- 8 oz salted butter or margarine, cut into chunks (228 grams)
- 4 oz unsweetened chocolate best quality, chopped (114 grams)
- 2 ½ cups sugar, divided use (380 grams and 100 grams)
- 4 large eggs, divided use
- 2 teaspoon vanilla
- 1 cup all-purpose flour (4.5 oz/126 grams)
- ½ teaspoon salt increase to 1 if using unsalted butter
- 1 cup chopped walnuts or pecans
- 8 oz softened cream cheese (228 grams)
Instructions
-
Preheat oven to 350 degrees F (175°C). Prepare a 9×13 inch baking pan by greasing and flouring it, or lining it with parchment paper or nonstick foil for easy removal.
-
In a small saucepan over low heat, or using a double boiler, or even in the microwave, melt together the butter (or margarine) and unsweetened chocolate. Stir until smooth and completely combined. Once melted, set the mixture aside to cool slightly while you prepare the other ingredients.
-
In the bowl of your KitchenAid stand mixer (using the first bowl), combine 2 cups of the granulated sugar and 3 of the large eggs.
-
Attach the flat beater to your mixer. Beat the sugar and egg mixture on speed 4 for approximately 90 seconds, allowing the mixture to become light and airy. Stop the mixer, scrape down the sides of the bowl to ensure everything is incorporated, then, still on speed 4, slowly add the slightly cooled chocolate mixture and 1 teaspoon of the vanilla extract.
-
Continue to beat until the chocolate mixture is thoroughly blended with the egg and sugar. Scrape the bowl once more, then add the all-purpose flour, salt, and chopped walnuts (or pecans). Mix on a low speed just until combined; be careful not to overmix, as this can lead to tough brownies.
-
Now, in a separate, clean mixer bowl (ideally your second KitchenAid bowl), combine the remaining ½ cup of sugar, the remaining 1 egg, the second 1 teaspoon of vanilla extract, and the softened cream cheese. Beat this mixture for 30 seconds on a medium speed until smooth. Then, increase the mixer speed to 6 and beat for a full minute to ensure a light and creamy consistency for your swirl.
-
Drop spoonfuls of the chocolate brownie batter and the cream cheese batter alternately into the prepared 9×13 inch pan. Use a knife or a skewer to gently swirl the two batters together, creating a beautiful marble pattern. Be mindful not to overmix the swirl. Bake in the preheated oven at 350°F (175°C) for approximately 45 minutes. You might want to check for doneness starting at 35 minutes. The edges should be set, and a toothpick inserted into the chocolate portion should come out with moist crumbs.
-
Once baked, remove the pan from the oven and place it on a wire rack. Allow the brownies to cool completely in the pan before attempting to remove and cut them into squares. This step is crucial for achieving that perfectly fudgy texture and clean slices.
Serving Suggestions and Storage
These fudgy KitchenAid Cream Cheese Brownies are delicious on their own, but a few additions can take them to the next level. Serve them slightly warm with a scoop of vanilla bean ice cream for a truly indulgent dessert. A dusting of cocoa powder or a drizzle of chocolate sauce can also add a touch of elegance. For an extra pop of flavor, consider adding a sprinkle of flaky sea salt before serving to enhance the chocolate notes.
If you’re looking for variations, feel free to experiment with different types of nuts in the brownie batter – pecans and walnuts are classic, but toasted almonds or hazelnuts would also be delightful. For an even more intense chocolate experience, you could fold in a handful of chocolate chips (dark, milk, or white) into the brownie batter.
Once cooled and cut, store your cream cheese brownies in an airtight container at room temperature for up to 3 days, or in the refrigerator for up to a week. The cream cheese layer actually benefits from being chilled, making the brownies even firmer and more satisfying. For longer storage, you can freeze individual brownies wrapped tightly in plastic wrap and then aluminum foil for up to 2-3 months. Thaw them at room temperature or gently warm them in the microwave for a quick treat.
Conclusion: Your New Favorite Brownie Recipe Awaits!
These KitchenAid Cream Cheese Brownies are more than just a dessert; they’re an experience. The perfect marriage of rich, fudgy chocolate and creamy, tangy cheesecake creates a harmony of flavors and textures that is truly irresistible. Thanks to your trusty KitchenAid stand mixer, achieving this culinary masterpiece is simpler than ever before. Whether you’re baking for a special occasion, a potluck, or just to treat yourself, this recipe is guaranteed to impress. So go ahead, preheat your oven, grab your KitchenAid, and get ready to bake some of the best cream cheese brownies you’ve ever tasted. Happy baking!
