Classic Chocolate Dream Pie: A Timeless Treasure from the 1960 Pillsbury Bake-Off
Step back in time to the vibrant culinary landscape of the 1960s, a decade that birthed many iconic American desserts. Among them is the beloved Dream Pie, a true testament to simple ingredients coming together to create something truly extraordinary. Originating from the prestigious 1960 Pillsbury Bake-Off, this recipe is a nostalgic journey for anyone who appreciates a rich, creamy chocolate pie. Often mistaken for the Dream Pie found on the back of Dream Whip boxes, this authentic version stands distinct with its use of fresh, luscious ingredients: freshly whipped cream, rich milk, granulated sugar, semi-sweet chocolate chips, delicate egg yolks, and smooth cream cheese. The result is a dessert that rivals the elegance of a French Silk Pie, yet possesses a uniquely light and airy character that sets it apart. While French Silk pies are known for their myriad variations, the Dream Pie offers a consistently delightful experience, a perfect blend of chocolate decadence and creamy texture that has charmed generations.
This vintage gem isn’t just a recipe; it’s a piece of American baking history, reflecting the ingenuity and spirit of home cooks. The Pillsbury Bake-Off was more than a competition; it was a platform that celebrated creativity in the kitchen, introducing innovative and accessible recipes to households across the nation. Dream Pie quickly became a favorite, celebrated for its luxurious taste and surprisingly straightforward preparation. It embodies the essence of comfort food, a dessert that feels both special and achievable, making it an ideal choice for family gatherings, holiday celebrations, or simply an indulgent treat on a quiet evening. The combination of its creamy chocolate filling, subtly tangy cream cheese, and a generous topping of whipped cream creates a symphony of flavors and textures that is truly unforgettable.

Choosing Your Perfect Pie Crust: Homemade vs. Store-Bought
As a genuine Pillsbury Bake-Off creation, the original Dream Pie recipe naturally suggested using a Pillsbury pie crust. This recommendation highlights the era’s focus on convenience combined with quality, making delicious desserts accessible to even the busiest home bakers. While a store-bought crust certainly offers a quick and easy solution, allowing the star of the show — the rich filling and cloud-like whipped cream — to shine without much effort, you also have the option to elevate this classic pie with a homemade touch.
For those who enjoy the art of baking from scratch, a flaky, all-butter pie crust can add an incredible depth of flavor and texture. The subtle buttery notes and crispness of a homemade crust provide a wonderful contrast to the creamy filling. While it might seem like extra work, the process of making a pie crust from scratch can be incredibly rewarding. Achieving that perfect golden-brown, flaky crust requires attention to detail, but the payoff in taste and texture is undeniable. Whether you opt for a tried-and-true family recipe or experiment with new techniques, a homemade crust transforms this Dream Pie into an even more artisanal creation.
However, if time is of the essence or you’re simply not in the mood for pastry making, don’t hesitate to use a quality store-bought crust. In this particular pie, the luscious chocolate filling and abundant whipped cream topping are so rich and prominent that the crust often takes a backseat. A pre-made, pre-baked crust works perfectly well, ensuring your Dream Pie is still a spectacular dessert without the added time commitment. The beauty of this recipe lies in its adaptability, allowing you to tailor it to your preferences and schedule without compromising on its delightful taste. Focus on the filling and topping, and your pie will still be a dream come true.
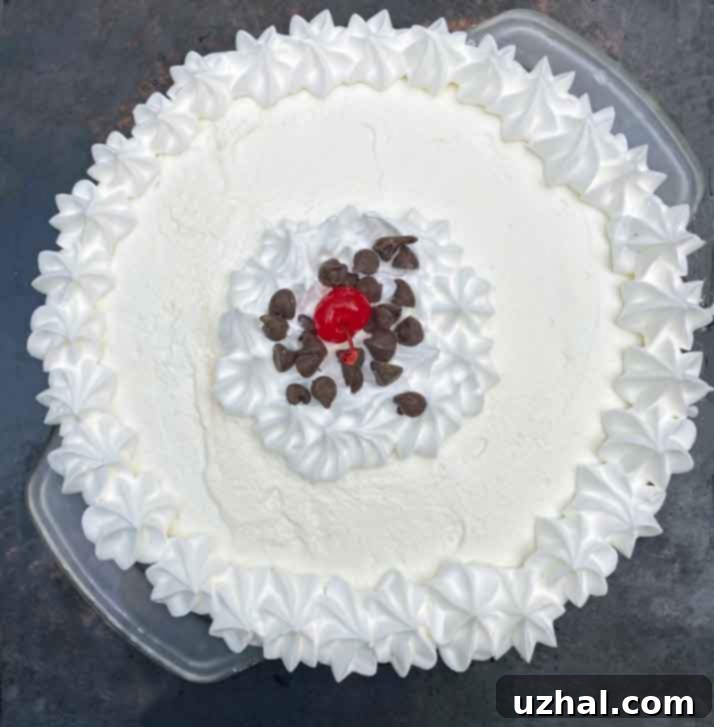
Crafting the Silky Homemade Dream Pie Filling
The heart of Dream Pie lies in its incredibly simple yet utterly delicious filling. What makes this recipe truly stand out is the ease with which you can achieve a rich, creamy, and perfectly smooth chocolate base. The process begins with combining dry ingredients like sugar, cornstarch, and a touch of salt, which collectively act as the thickening agents for our pudding-like filling. Gradually incorporating milk ensures a smooth mixture, preventing lumps before any heat is applied. This careful initial step is crucial for the final texture.
Once the base is smooth, the star ingredients are introduced: generous chocolate chips and slightly beaten egg yolks. The mixture is then placed over medium heat, and here’s where the magic truly happens. Constant stirring is key as the chocolate chips slowly melt, infusing the entire mixture with a deep, rich cocoa flavor. As you continue to stir, the mixture will begin to thicken, transforming into a glossy, pudding-like consistency. You’ll know it’s ready when it starts to bubble, and those bubbles break the surface, indicating that the cornstarch has fully activated and the mixture has reached its peak thickness. It’s important to maintain a steady stir during this stage to prevent scorching and ensure even cooking. And a word of caution from personal experience: while I jest about safety goggles, do be mindful of the bubbling chocolate mixture! It can sometimes splatter, and a rogue chocolate droplet in the eye is indeed an unpleasant surprise. So, exercise care as you stir, and soon you’ll have a wonderfully thick and smooth chocolate pudding ready for the next step.
After achieving that perfect, thick consistency, the saucepan is removed from the heat, and cubed, softened cream cheese is stirred in. The residual heat of the chocolate mixture quickly melts the cream cheese, which not only adds a delightful tang but also contributes to the filling’s incredibly smooth, velvety texture and richness. This addition is what truly sets Dream Pie apart, giving it a unique depth and a subtle creaminess that complements the chocolate beautifully. Once the cream cheese is fully incorporated and the filling is uniform, it’s transferred to a clean bowl, covered with plastic wrap (ensuring the wrap touches the surface to prevent a skin from forming), and allowed to cool. Refrigerating it until it’s just barely cool is crucial before folding in the whipped cream, as a hot filling would deflate the delicate cream. Patience during the cooling phase is a virtue that pays off in the final, flawless pie.
Mastering the Whipped Cream: The Cloud-Like Crown
The whipped cream component of Dream Pie is not merely a topping; it’s an integral part of the pie’s overall texture and flavor profile. The original recipe calls for 1 ½ cups of heavy whipping cream, which, when properly whipped, yields a generous volume—typically a little over 3 cups of light, airy cream. This quantity is thoughtfully divided to create both a luscious addition to the filling and a magnificent topping.
In this classic rendition, 1 cup of unsweetened whipped cream is carefully reserved to crown the pie, providing a beautiful contrast to the sweet chocolate filling. The remaining 2 cups of whipped cream are then gently folded into the slightly cooled chocolate mixture. This folding technique is essential to maintain the airiness of the whipped cream, ensuring the filling remains light and fluffy, rather than dense. The unsweetened cream in the topping allows the rich chocolate flavors to truly sing, offering a clean, refreshing balance to each bite. It’s a subtle but significant detail that showcases the pie’s masterful design.
For those who adore an extra-generous layer of whipped cream on top, or prefer a thicker, more dramatic presentation, I recommend increasing the initial amount of heavy cream. Whipping a total of 2 cups of heavy cream will yield approximately 4 cups of whipped cream. This provides the necessary 2 cups for folding into the filling, leaving you with a delightful surplus—a little over 2 cups—for an even more decadent topping. This flexibility allows you to customize the pie to your personal preference, ensuring every slice is perfectly tailored.
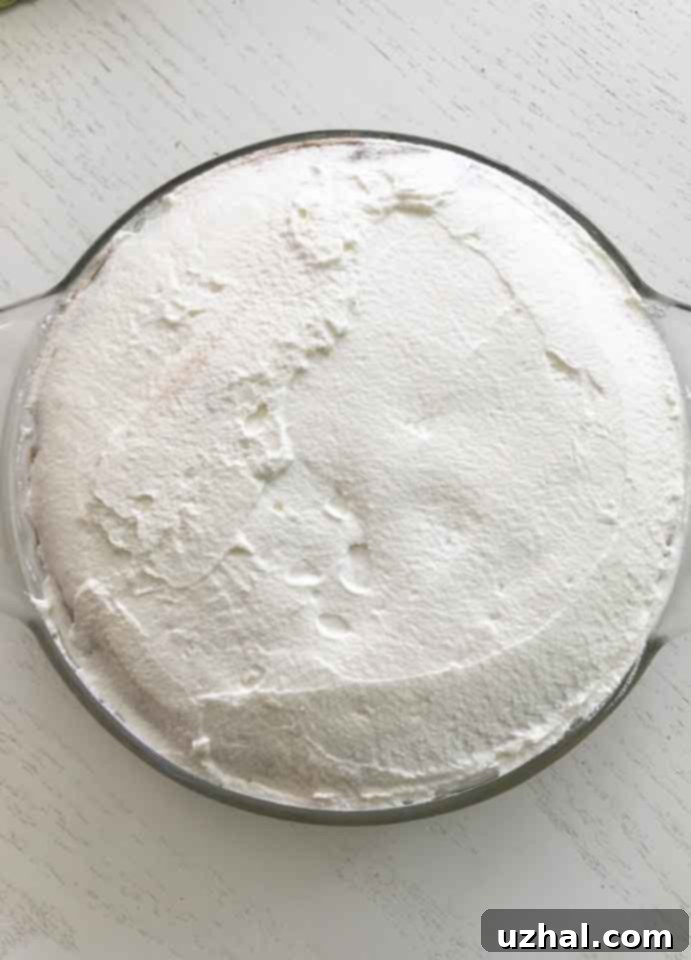
While the original recipe intentionally pairs the sweet filling with a delicate, unsweetened layer of cream, personal taste often dictates variations. If you are among those who appreciate the pure, unadorned flavor of unsweetened cream, then you’re all set! However, for many, a touch of sweetness elevates the experience. I wholeheartedly recommend sweetening the top layer of whipped cream to achieve a more harmonious flavor balance. A simple addition of about a tablespoon of powdered sugar, gently folded into the reserved whipped cream, makes a remarkable difference. This small adjustment transforms the topping into a subtly sweet, ethereal cloud that perfectly complements the rich chocolate, creating a truly irresistible dessert. It’s these thoughtful touches that can turn a great recipe into your absolute favorite.
Cool Whip vs. Homemade: Exploring Whipped Topping Options
When it comes to the whipped cream component of Dream Pie, the role of fresh whipping cream, particularly its unsweetened nature, is quite specific for the filling. The lightness and neutrality of unsweetened heavy cream are essential for integrating into the chocolate base without adding excessive sweetness or artificial flavors that might detract from the pie’s classic profile. Therefore, for the portion of cream folded into the filling, there’s truly no avoiding the fresh whipping cream. It’s crucial for achieving the desired texture and authentic taste of this vintage dessert.
However, the story changes slightly when considering the topping. If you’re a fan of Cool Whip and wish to streamline the process or simply prefer its unique texture and stability, it can be a viable option for the top layer. This is where you can introduce a convenient substitute without compromising the structural integrity or core flavor of the pie. Instead of whipping 1 ½ cups of heavy cream for both the filling and topping, you could whip 1 cup of heavy cream, ensuring it’s all folded into the chocolate filling. Then, you can use Cool Whip for the entire topping, spreading it generously over the pie. This method not only saves you the effort of whipping an additional batch of cream but also eliminates the need to sweeten the top layer yourself, as Cool Whip is already sweetened. It’s a practical shortcut that many home bakers appreciate.
Alternatively, for those who want the best of both worlds—the authenticity of homemade whipped cream within the pie and a touch of modern convenience—you can still make the pie as directed with fresh whipping cream for the filling. Then, use Cool Whip specifically for decorative piping around the edges of the pie, or even for creating intricate swirls on top. This allows you to combine the fresh, dairy flavor of homemade cream where it matters most, with the ease and decorative capabilities of a ready-made topping. Ultimately, the choice between fresh whipped cream and Cool Whip for the topping offers flexibility, allowing you to customize your Dream Pie to suit your taste, time constraints, and desired aesthetic, all while maintaining the delicious essence of this classic dessert.
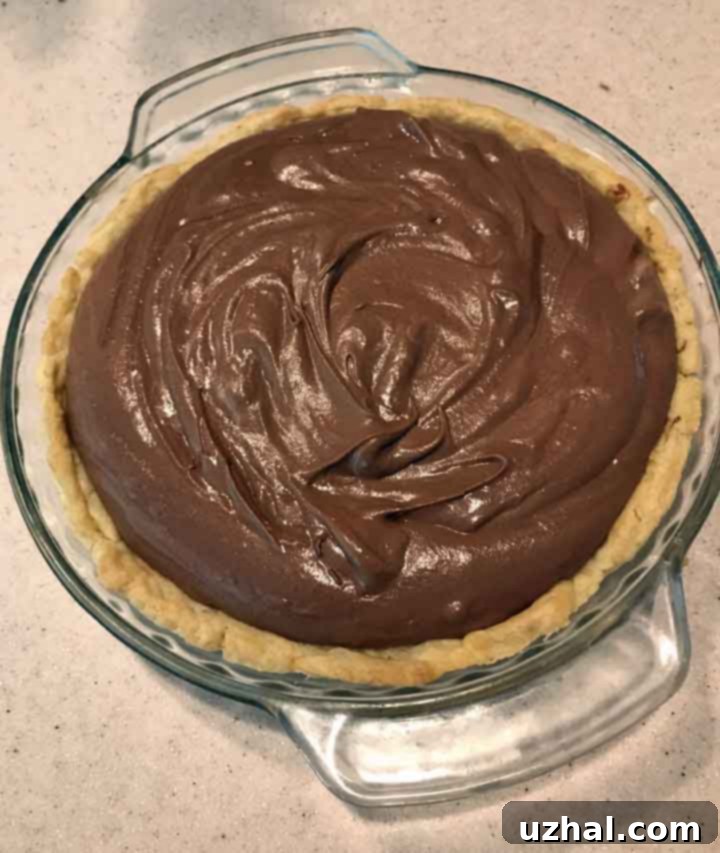
A Trip Down Memory Lane: Revisiting this Classic Recipe
It’s funny how some recipes have a way of reappearing in our lives, sometimes even surprising us with their familiarity! My memory, it seems, can sometimes play tricks, as I recently had a delightful realization: I had actually made this very Dream Pie about two years ago. It’s a testament to the timeless appeal of this dessert that it left such a positive impression, even if the details temporarily slipped my mind. Now, I’m taking the opportunity to consolidate my previous thoughts and experiences with this wonderful pie, bringing all the insights together in one comprehensive post.
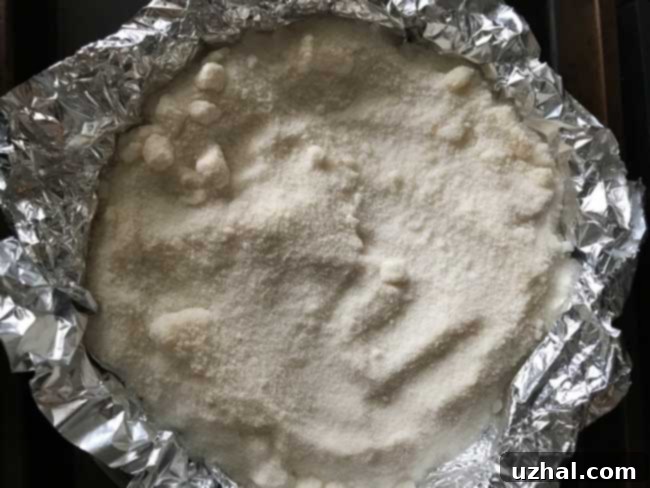
In that earlier endeavor, I recall experimenting with different pie crust techniques to achieve the ultimate flaky base. Specifically, I used a Flaky Baked Pie Crust recipe, which delivered an exceptional texture—crisp, tender, and beautifully golden. To enhance the crust’s flavor and ensure a perfectly even bake, I also utilized Stella Parks’ ingenious trick of using sugar as pie weights for blind baking. This method not only keeps the crust from shrinking or puffing up but also lightly toasts the sugar, infusing it with a subtle, caramelized sweetness that can then be repurposed. It’s a clever technique that elevates the humble pie crust to new heights, adding another layer of complexity to the overall pie experience.
My previous experience with Dream Pie reinforced just how delightful and versatile this vintage recipe truly is. It highlighted the importance of a well-made crust as the foundation for the rich filling, and the little tricks that can make a big difference in the final product. Reconnecting with this recipe has been a joy, reminding me of the simple pleasure of baking and the enduring charm of classic desserts. It’s a pie that invites personalization, whether through your choice of crust, the sweetness of your whipped topping, or your preferred garnishes. Each time I make it, it feels like a fresh discovery, yet it always delivers the comforting, familiar taste of a true classic.
Whether you’re new to the world of vintage baking or a seasoned pro, Dream Pie offers a rewarding experience. Its straightforward steps and satisfying results make it a perfect project for any baker. It’s more than just a dessert; it’s a connection to a bygone era of culinary innovation and home-baked goodness. So, gather your ingredients, prepare your crust—homemade or store-bought—and get ready to create a truly dreamy dessert that will earn rave reviews from everyone lucky enough to enjoy a slice.
- Dream Bars: A Chewy, Delightful Treat
- Double Chocolate Dream Cookies: An Indulgent Twist
- Cherry Dream Bars: Fruity, Sweet, and Dreamy
- Cream of Coconut Dream Bars: A Tropical Escape
- Sunshine Dream Bars: Bright and Zesty Flavor
Chocolate Dream Pie Recipe
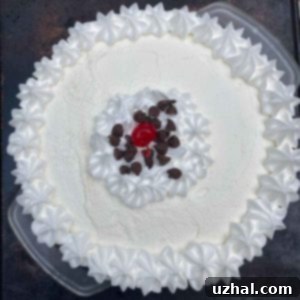
Chocolate Dream Pie
Pin Recipe
30 minutes
25 minutes
6 hours
6 hours
55 minutes
Dessert
American
8
Ingredients
- 1 9 inch baked pie shell
- ½ cup sugar
- ¼ cup cornstarch
- ⅛ teaspoon salt
- 1 cup milk
- 1 cup chocolate chips
- 2 egg yolks slightly beaten
- 3 oz cream cheese cubed and softened
- 1 ½ cups heavy whipping cream
- 1 teaspoon vanilla
- 1 tablespoon powdered sugar optional, for topping
Instructions
-
Bake a 9-inch pie crust according to package directions or your preferred method for a scratch pie crust. Allow it to cool completely.
-
In a 3-quart saucepan, whisk together the sugar, cornstarch, and salt until well combined. Gradually whisk in the milk to ensure no lumps. Then, stir in the chocolate chips and slightly beaten egg yolks.
-
Place the saucepan over medium heat. Cook, stirring constantly, until the chocolate chips have completely melted and the mixture is smooth. Continue stirring for another 1-2 minutes, or until large bubbles break the surface and the mixture has thickened to the consistency of pudding.
-
Remove the saucepan from the heat. Stir in the cubed and softened cream cheese until it is fully melted and incorporated, creating a perfectly smooth filling. Transfer the mixture to a clean bowl and cover the surface directly with plastic wrap to prevent a skin from forming. Let it cool slightly at room temperature, then refrigerate until just barely cool (check every hour or so). It should be cool but not firm.
-
In a large, chilled bowl, beat the 1 ½ cups of heavy whipping cream until soft peaks form. Beat in the vanilla extract. Reserve 1 heaping cup of this whipped cream for the topping. Gently fold the remaining whipped cream (approximately 2 cups) into the cooled chocolate mixture until it’s fully incorporated and the filling is light and airy.
-
Pour the chocolate-whipped cream filling into the baked and cooled pie shell, spreading it evenly. If desired, sweeten the reserved whipped cream with about 1 tablespoon of powdered sugar (or to taste), then spread or pipe it over the pie. Chill the pie in the refrigerator for at least 5 hours, or preferably overnight, to allow it to set completely. Garnish the top with chocolate sprinkles or chocolate shavings before serving.
Bake-Off, chocolate cream pie, vintage dessert, classic pie, homemade pie
Tried this recipe?
Let us know how it was!
