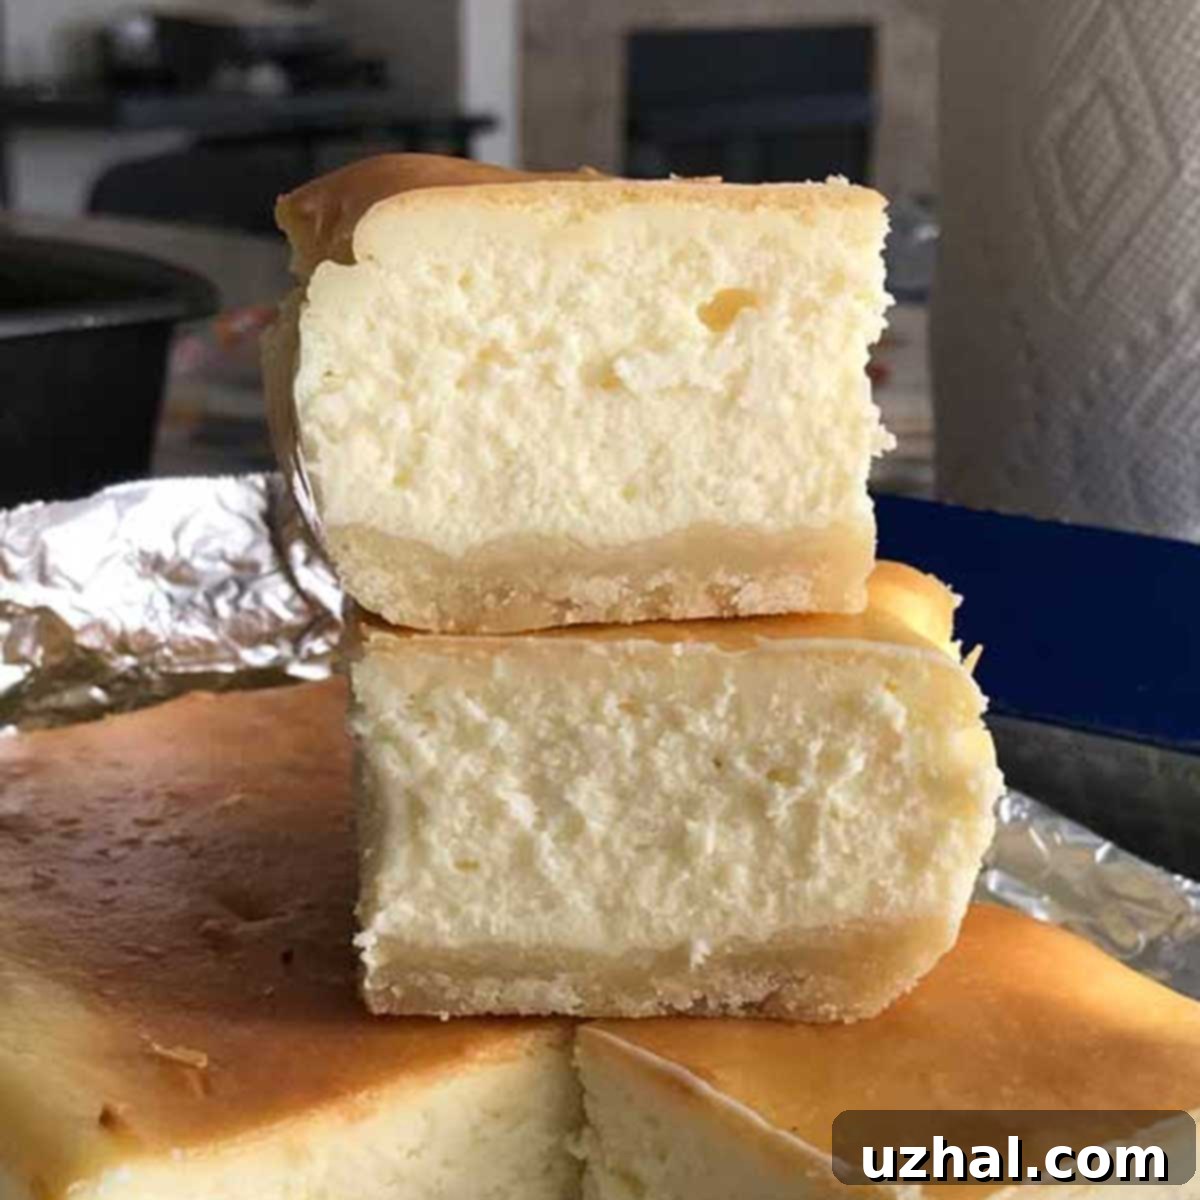
Perfect New York Style Loaf Pan Cheesecake: Half the Size, All the Flavor with Cherry Topping
Craving a rich, creamy cheesecake but don’t need a full 9-inch dessert? The loaf pan cheesecake is your ideal solution. This clever approach allows you to enjoy all the luxurious indulgence of a classic New York style cheesecake, perfectly portioned for a smaller gathering or when you simply don’t want a massive cake lingering in your fridge. A standard 9×5 inch (8-cup capacity) loaf pan is precisely the right size for a delectable half-batch cheesecake, often crowned with luscious Morello cherries or your favorite fruit topping.
Beyond portion control, baking in a loaf pan offers several distinct advantages. Loaf pans are inherently sturdy and watertight, eliminating the common anxiety associated with springform pans in a water bath. You won’t have to fuss with wrapping the bottom of a springform pan in multiple layers of foil to prevent leaks, making your cheesecake baking experience significantly less stressful and more enjoyable. This simple shift in bakeware transforms a potentially daunting dessert into an accessible, stress-free treat.
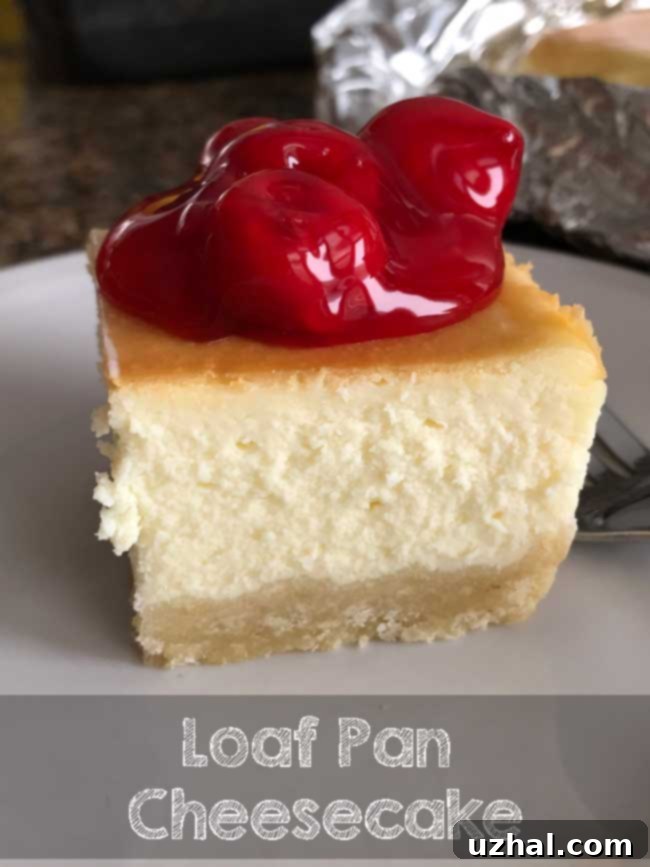
Furthermore, the rectangular shape of a loaf pan cheesecake makes it incredibly convenient for storage. Unlike round cheesecakes that can occupy awkward spaces, these slender desserts fit neatly into even the most packed refrigerators or freezers. This might seem like a minor detail, but for anyone who battles an “avalanche-prone” freezer every time the door opens, this benefit is a game-changer! Loaf pan cheesecakes can be easily wrapped and stacked, optimizing your storage space and preventing freezer chaos. It’s a practical choice that caters to both your culinary desires and your kitchen organization needs.
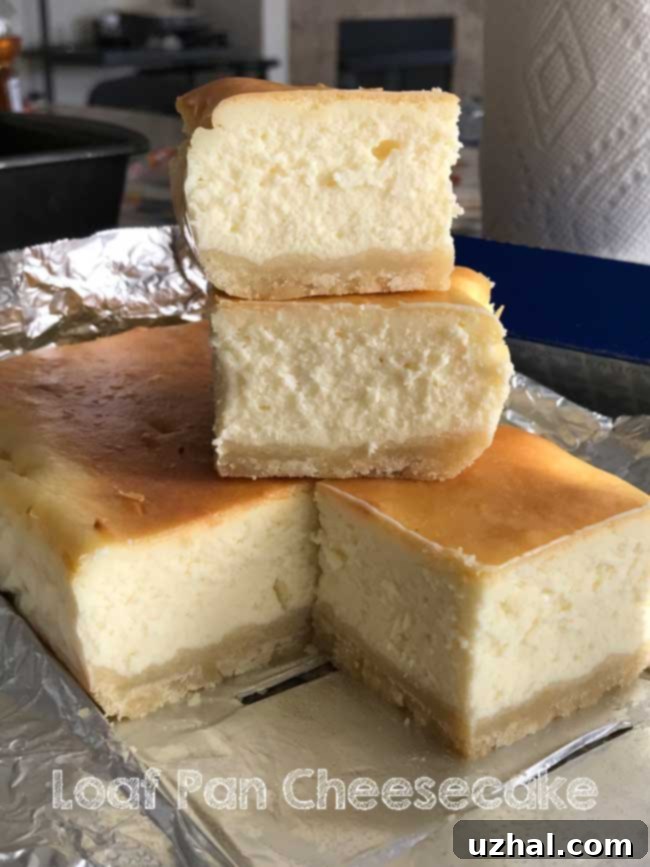
Crafting the Perfect New York Style Loaf Pan Cheesecake
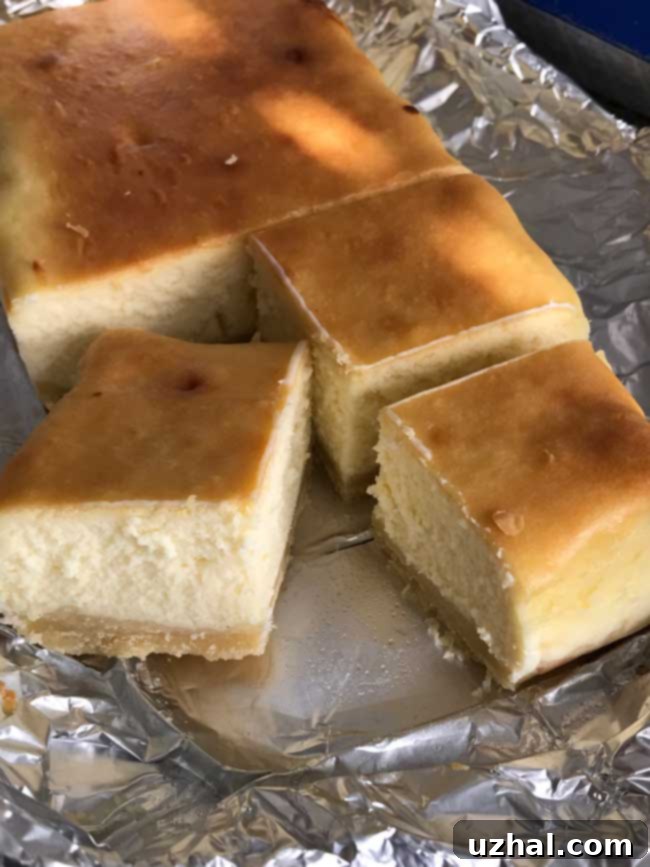
Over many years of baking, I’ve experimented with and adapted numerous cheesecake recipes to perfectly fit a large loaf pan, and this particular rendition, inspired by the renowned Junior’s recipe, has become an absolute favorite. What makes this recipe stand out is its ability to produce a consistently dense, incredibly creamy New York style cheesecake that boasts a buttery shortbread crust and a beautifully golden-brown top, all without the dreaded cracks. While cracks can always be camouflaged with a generous topping, achieving a flawlessly smooth surface right out of the oven provides a satisfying sense of accomplishment.
The essence of a true New York style cheesecake lies in its luxurious texture and rich flavor. It’s less airy than other cheesecakes, with a velvety smooth interior that truly melts in your mouth. This recipe captures that classic essence, offering a dessert that is both substantial and utterly indulgent. The dense consistency holds up beautifully when sliced, making it perfect for serving. I’ve refined this recipe and its variations countless times, and I’m always thrilled to hear about others’ experiences with it. If you decide to give it a try, please do share your feedback! Here are a few essential tips to ensure your cheesecake is nothing short of spectacular.
The Ideal Shortbread Crust for Your Loaf Pan Cheesecake
When it comes to the crust for your loaf pan cheesecake, you have two popular choices: graham cracker or shortbread. My personal preference leans strongly towards the shortbread crust. The primary reason is its convenience – I almost always have the necessary ingredients readily available in my pantry. Moreover, this recipe utilizes a delightfully simple melted butter version of shortbread, which comes together in mere minutes, making it a quick and easy start to your cheesecake journey.
Now, I must address the slightly unconventional “½ of an egg yolk” measurement. Please don’t let this deter you; it’s genuinely not a big deal! The easiest way to achieve this is to crack an egg into a small bowl, gently scoop out the yolk into a separate cup, and then carefully spoon out approximately half of it. The remaining half will be used in the cheesecake filling. Alternatively, you can crack the egg directly into one cup and use a spoon to carefully remove about half of the yolk. Precision isn’t paramount here; the small amount of egg yolk in the crust plays a crucial role in preventing it from becoming too hard and brittle after baking, ensuring a tender, buttery base that complements the creamy filling perfectly.
Achieving a Silky Smooth Cheesecake Filling
The secret to a lump-free, impeccably smooth cheesecake filling lies in the temperature of your ingredients. It is absolutely crucial that all dairy and egg components are at room temperature, or at least not too cool, before you begin mixing. Cold ingredients can lead to a lumpy batter, as they won’t emulsify properly with the other ingredients, resulting in a less desirable texture in your final cheesecake. To achieve the perfect consistency, plan ahead and leave your cream cheese, eggs, and heavy cream out on the counter for at least an hour before you start baking. If you’re short on time, a quick trick for cream cheese is to microwave it on a very low or defrost setting for short bursts, just until softened. For eggs, placing them in a bowl of very warm (not hot) water for a few minutes will bring them to room temperature quickly and effectively.
When mixing the filling, technique is key. Start by beating the softened cream cheese until it’s perfectly smooth, then gradually add the sugar, scraping down the bowl frequently to ensure everything is incorporated. Follow with the cornstarch, lemon zest, and vanilla. Introduce the eggs one at a time, beating on a low speed just until each egg is blended into the mixture. Overbeating the eggs can incorporate too much air, which can cause the cheesecake to puff up excessively in the oven and then crack as it cools. Finally, gently fold in the room temperature heavy cream. This methodical approach ensures a dense, creamy, and crack-free filling that is the hallmark of a truly great New York style cheesecake.
The Zesty Morello Cherry Topping and Other Alternatives
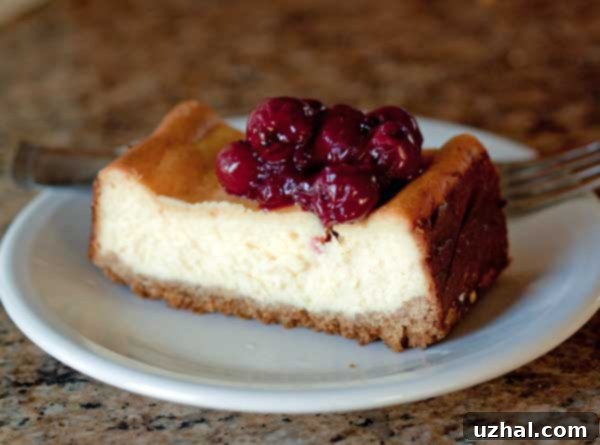
While the cheesecake itself is wonderfully simple, a vibrant topping can elevate it to new heights. Our recommended Morello cherry topping is straightforward to prepare and adds a delightful tang and beautiful color. Morello cherries, often found at stores like Trader Joe’s or Aldi, are known for their tartness, which provides a fantastic contrast to the rich, sweet cheesecake. If these specific cherries aren’t available, don’t worry! Any good quality sour cherry will work beautifully. You can also find canned or jarred sour cherries in the baking aisle of many supermarkets.
If cherries aren’t your preference, or if you simply want another option, a quick and elegant alternative is a simple sour cream topping. Just whisk together ¼ cup of sour cream with 2 teaspoons of sugar until smooth. This creamy, slightly tangy topping can be spread over the chilled cheesecake and then adorned with any fresh fruit you desire – think fresh berries like strawberries, blueberries, or raspberries for a burst of fresh flavor and color. The versatility of this cheesecake means you can customize it to suit any taste or occasion, making it a truly adaptable dessert.
Mastering the Graham Cracker Crust Alternative
While this recipe champions the shortbread crust, a classic graham cracker crust is always an excellent and popular alternative for your loaf pan cheesecake. It provides a distinct texture and flavor profile that many cheesecake enthusiasts adore. To prepare a graham cracker crust, begin by generously greasing the bottom of your loaf pan with butter. This ensures easy release and prevents the crust from sticking. For the crust mixture, you’ll need a heaping cup of finely crushed graham cracker crumbs. You can achieve this by pulsing graham crackers in a food processor or by placing them in a Ziploc bag and crushing them with a rolling pin. Combine these crumbs with 1 tablespoon of granulated sugar and 3 ½ tablespoons of melted butter. Both salted or unsalted butter can be used; if you opt for unsalted, a small pinch of salt will enhance the flavor. Unlike some graham cracker crust recipes, this particular one for the loaf pan cheesecake does not require pre-baking. Simply press the mixture firmly into the bottom of the prepared loaf pan and chill it while you prepare the filling. This makes the process even quicker and more convenient without compromising on taste or texture.
Baking and Cooling Your Loaf Pan Cheesecake to Perfection
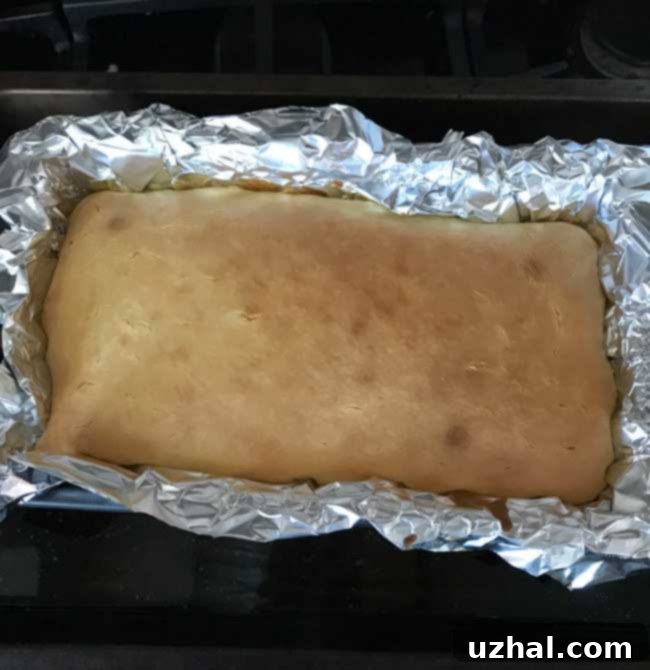
The baking process for this New York style cheesecake involves a crucial step: a water bath. This method helps to regulate the temperature around the cheesecake, ensuring it bakes gently and evenly. The steam created by the water bath also adds moisture to the oven, which prevents the cheesecake from drying out and significantly reduces the risk of cracks on the surface. To set up your water bath, place your foil or parchment-lined loaf pan into a larger baking pan, such as a 9×13 inch cake pan. Once in the oven, carefully fill the larger pan with hot water so it comes about halfway up the sides of the loaf pan. Bake for approximately 75 minutes. The cheesecake is ready when the edges are set and lightly browned, but the center still has a slight wobble. This “jiggle” indicates perfect doneness, as it will continue to set as it cools.
Proper cooling is just as important as proper baking. Once removed from the oven, allow the cheesecake to cool slowly at room temperature for about 2 hours. Resist the urge to rush this process! Rapid temperature changes can cause cracking. After the initial room temperature cooling, transfer the loaf pan cheesecake to the refrigerator and chill for a minimum of 6 hours, or ideally, overnight. This extended chilling period is essential for the cheesecake to fully set, develop its signature dense and creamy texture, and allow the flavors to meld beautifully. When you’re ready to serve, simply lift the cheesecake out of the pan using the foil or parchment lining, slice into elegant portions, and top with your chosen delicious accompaniment.
- Cherry Topped Brownie Cheesecake
- Cherry Cheesecake Pie
- New York Cheesecake — My Favorite Recipe
- Cheesecake Bars (Small Batch)
- Out of Flour Cake Mix Cheesecake
Recipe
Loaf Pan Cheesecake New York Style
Anna
Pin Recipe
Ingredients
Crust:
- 6 tablespoons unsalted butter (84 grams)
- ¾ cup flour (95 grams)
- 2 tablespoons sugar (25 grams)
- ¼ teaspoon salt
- ½ of an egg yolk approximate – doesn’t have to be precise!
- ½ teaspoon vanilla extract
Filling:
- 2 8 oz packages cream cheese, softened and room temperature (16 oz total)
- ¾ cup plus 1 tablespoon sugar (160 grams)
- 2 tablespoons cornstarch
- ½ teaspoon lemon zest
- 1 teaspoon vanilla extract
- 2 large eggs room temperature
- ½ of an egg yolk leftover from crust
- 6 tablespoons heavy cream, room temperature (84 grams)
Cherry Topping
- 1 jar Morello Cherries from Trader Joe’s or Aldi (or sour cherries)
- ⅓ cup granulated sugar (65 grams)
- 1 Pinch of salt
- 2 tablespoons cornstarch
- 1 teaspoon lemon juice
- ½ teaspoon almond extract optional
Instructions
-
Line the inside of a 9×5 inch (or just slightly larger) 8 cup capacity loaf pan with foil OR parchment. I originally used foil, but parchment is fine too.
-
Melt the butter in the microwave using 50% power so that it will melt gently and not be too hot. Partially melted is okay too. Allow it to cool a bit.
-
Meanwhile, combine the flour, sugar and salt in a mixing bowl.
-
Add the ½ egg yolk and vanilla to the melted butter and add to the flour mixture. Stir until blended, then press firmly into the bottom of the foil lined loaf pan. Chill for 30 minutes or until ready to bake.
-
Bake the crust at 400 degrees F for 8 to 10 minutes.
-
Reduce oven heat to 350. You will be baking the cheesecake at 350 degrees F.
-
Prepare Filling: In large bowl, with a handheld electric mixer at medium speed, beat half of the softened cream cheese just until smooth; beat in half of the sugar, scraping bowl often with rubber spatula. Stir in the cornstarch until blended.
-
Add remaining cheese and beat until blended, then beat in remaining sugar, lemon zest and vanilla extract. Add the eggs one at a time, beating on low just until blended (don’t overbeat the eggs), then beat in the ½ yolk, followed by the room temperature cream.
-
Set the loaf pan in a 9×13 inch cake pan and fill with hot water so that it comes about half way up the sides. Bake in water bath for about 75 minutes. Cake should appear brown and smooth.
-
Allow the cake to cool at room temperature for about 2 hours, then transfer to the refrigerator and chill for 6 hours or overnight.
-
When ready to serve, lift the foil from the pan and serve with your favorite topping.
-
To make the cherry topping, in a medium size saucepan combine the sugar, cornstarch and salt.
-
Drain cherries and reserve ¾ cup of cherry juice. Add the ¾ cup juice to the sugar mixture and stir until smooth. Place saucepan over medium heat and whisk or stir until mixture boils, thickens and becomes translucent.
-
Remove from the heat and stir in the drained cherries, lemon juice and almond extract.
